Table of Contents
Advertisement
Assembly Instructions for
Elite Storage Collection
CALL US FIRST
1-877-PREPAC1
1-877-773-7221
Mon - Fri
7am - 4pm PST
10am - 7pm EST
•
For help with assembly
•
If you have received a damaged or defective part or
are missing hardware.
We will process replacement parts
less. Parts are shipped via
Before you call please:
1) Record the following information from the shipping
label on the outside of the box. You will need it for
warranty purposes:
• Ship To Name
• Sales Order Number
2) Note the
product model number.
3) Review the contents of your shipment to determine
what you are missing.
Online Option:
Fill out the Replacement Parts Order form in the Product
Support section of our website: www.prepacmfg.com
Required Tools
Phillips Head Screwdriver
Hammer
in 2 business days or
UPS Ground or mail.
Drill
3/16" (5mm) drill bit
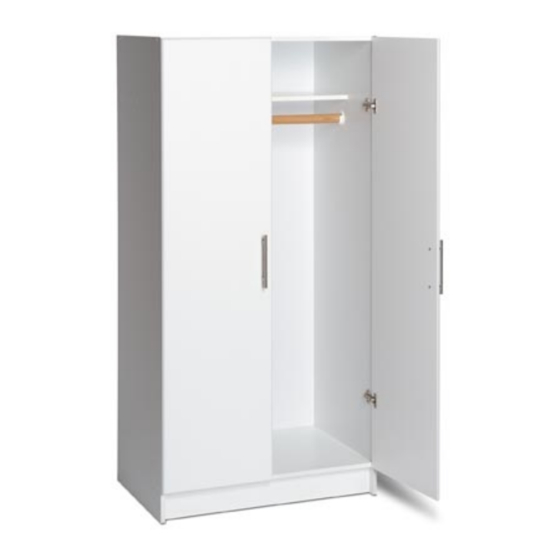
32" Wardrobe Cabinet
Model # WEW-3264
IMPORTANT
These instructions are made up of 2 parts:
A) Cabinet Assembly Instructions
B) Installation Instructions (back of this booklet)
Please read ALL instructions before you begin.
Using a power tool will speed
up assembly.
Caution
Do not over tighten any
screw.
The last few turns of each
screw should be done very
slowly or by hand.
Prepac Manufacturing Ltd.
6705 Dennett Place
Delta, BC V4G 1N4
LB-0616
2011-09-20
Advertisement
Table of Contents

Summary of Contents for Prepac Elite Storage WEW-3264
- Page 1 Using a power tool will speed up assembly. Caution Do not over tighten any screw. The last few turns of each Prepac Manufacturing Ltd. screw should be done very 6705 Dennett Place Delta, BC V4G 1N4 slowly or by hand. 3/16” (5mm) drill bit...
-
Page 2: Hardware Identification
Hardware Identification Brushed Nickel 2" Confirmat Screws Handle (2) (16) Euro Hinge with RM-0306 RM-0001 screws (4) Pole Socket (2) RM-0160 RM-0125 Machine Screw (4) RM-0471 White Screw #6 - 5/8" Screw (2) Cover Caps (16) RM-0004 RM-0008 Hinge Plate with ¾"... - Page 3 STEP 1 Estimated Time: 15 minutes Attach all parts shown with Confirmat Screws. Note the location of the hinge holes. Hinge Holes Hinge Holes FRONT STEP 2 Estimated Time: 5 minutes Attach a pole socket to each side #6 - 5/8" Screw Page 3 of 12...
- Page 4 STEP 3 Estimated Time: 5 minutes Turn cabinet over and nail backer as shown. Position nails in the center of the board FRONT Page 4 of 12...
- Page 5 STEP 4 Estimated Time: 10 minutes NOTE: Depending on your installation, you may want to attach the cabinet to the wall or other cabinets before you attach the doors. Refer to the ELITE STORAGE INSTALLATION GUIDE. Hinge edge should be Line up the hinges with the large parallel to door edge holes on the doors and secure...
- Page 6 STEP 6 Estimated Time: 3 minutes Insert wooden dowel into pole sockets. Attach handles with machine screws Machine Machine Screw Screw STEP 7 Estimated Time: 1 minute Insert screw cover caps into exposed screws. Note: If you are attaching multiple cabinets side-by side, wait until your installation is completed because you will only need to cover the exposed screws.
- Page 7 Hinge Adjustments Estimated Time: 5 minutes The hinges we include with our products are top quality and are 6-way adjustable, allowing you to make precise adjustments. Door Cabinet Side Hinge Plate Screw (center is the default factory position) To adjust the vertical alignment of the doors, loosen the top &...
- Page 8 Securing Free-Standing Storage Cabinets to the Wall Follow the step below to secure individual free standing cabinets to the wall. For full installation of multiple cabinets (for a garage, utility or laundry room application) please see the Installatin guide on pages 9-12 With the #6-¾”...
-
Page 9: Sample Configurations
Elite Storage Collection - Planning & Installation Guide Before you get started… Sample Configurations Read all installation instructions and assemble all cabinets as shown in the Cabinet Assembly portion of these instructions. If you are planning a multi-cabinet installation, leveling & pre-planning is an important step for a good quality installation and makes adjustments afterwards only minor. -
Page 10: Basic Installation
Available Cabinets 1 Door Topper & Wall 2 Door Topper & Wall 3 Door Wall Cabinet Cabinet Cabinet WEW-5424 WEW-1624 WEW-3224 54”w x 24”h x 12”d 16”w x 24”h x 16”d 32”w x 24”h x 16”d Base with Drawer & Door Base with 2 Doors Broom Cabinet Wardrobe Cabinet... - Page 11 Full Cabinet Installation Requirements: 1. Prepare the Floors Remove any moldings, baseboards and other obstructions where the Base Cabinets will be installed. Using your level, check for any high points in the floor. If there are any high points use this as your starting point to measure up the wall as described in step 2.
-
Page 12: Fastening Cabinets Together
4. Installing Wall Cabinets Fasten cabinets to the wall using the appropriate 3" screws (not supplied) through the hanging back rails and into studs. First drill a pilot hole in the cabinet hanging rails in line with the location of the wall studs. 5.


Need help?
Do you have a question about the Elite Storage WEW-3264 and is the answer not in the manual?
Questions and answers