Table of Contents
Advertisement
All operators must fully read and understand
this operator's manual before using the chipper.
Keep this manual for future reference.
HANSA NEW ZEALAND
HANSA NEW ZEALAND
+64 7 849 4749
+64 7 849 4749
www.hansachippers.com
www.hansaproducts.co.nz
HANSA C13
Operation, maintenance and safety manual
info@hansaproducts.co.nz
info@hansaproducts.co.nz
Register your Hansa chipper to qualify
www.hansaproducts.com/registration
HANSA AUSTRALIA
HANSA AUSTRALIA
1800 248 199
1800 426 722
www.hansachippers.com.au
www.hansaproducts.com.au
admin@hansachippers.com.au
info@hansaproducts.com.au
Advertisement
Table of Contents

Related Manuals for Hansa C13RT


Summary of Contents for Hansa C13RT
- Page 1 HANSA C13 Operation, maintenance and safety manual All operators must fully read and understand Register your Hansa chipper to qualify this operator’s manual before using the chipper. www.hansaproducts.com/registration Keep this manual for future reference. HANSA NEW ZEALAND HANSA AUSTRALIA HANSA NEW ZEALAND...
-
Page 2: Table Of Contents
............................................20 YRE PRESSURE ............................................. 21 OLT TORQUE SPECIFICATIONS ..................................21 DECALS ....................................... 22 HANSA GLOBAL INDUSTRIAL LIMITED WARRANTY ........................24 COMMISSIONING CHECKLIST AND REGISTRATION ........................26 Hansa C13 O&M Manual - OM-007 Revision L 28/06/2021 © Hansa Chippers 2020... -
Page 3: What Can My Hansa Chipper Process
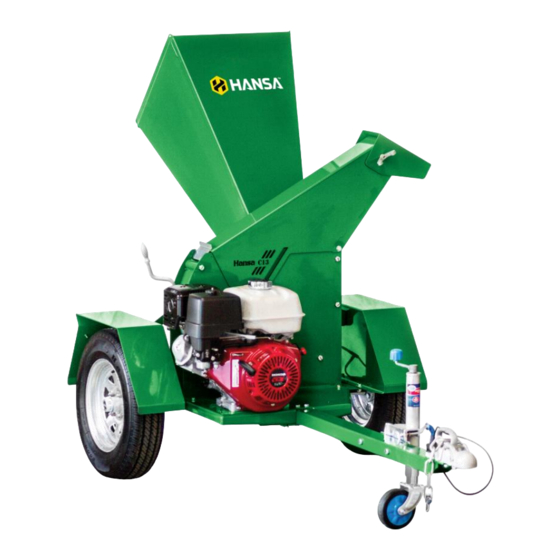
Intended uses of the chipper The Hansa C13 chipper is built to process organic material including wooden branches not exceeding 90 mm in diameter. It is designed to be used on a regular basis to maintain large gardens, lifestyle blocks, acreages, along with use by semi commercial garden maintenance contactors and hire / rental companies. -
Page 4: Assembling The Chipper
Assembling the chipper When you receive your Hansa brush chipper, the inlet and outlet chute may not be assembled on the chipper. All the fasteners (bolts, nuts and washers) will be attached to their respective components. Tools required for assembly (not supplied): •... -
Page 5: Fit The Fixed Outlet Chute
Lightly grease the flange on the chipper body. Slide the outlet chute onto the greased flange of the chipper body, ensuring that the locking hinge is open. Locking hinge Hansa C13 O&M Manual - OM-007 Revision L 28/06/2021 © Hansa Chippers 2020... -
Page 6: Fit The Inlet Chute
Ensure that the washer is touching the bolt head. Line up holes and insert the bolts, washers and nuts, ensuring the big washer is touching the bolt head. Hansa C13 O&M Manual - OM-007 Revision L 28/06/2021 © Hansa Chippers 2020... -
Page 7: Fit The Drawbar (Optional Part)
Fit the drawbar (optional part) Hansa C13 O&M Manual - OM-007 Revision L 28/06/2021 © Hansa Chippers 2020... -
Page 8: Safety
Ensure the jockey wheel is in the up position and locked away during travel Ensure that the machine is towed in accordance with local trailer transport regulations Hansa C13 O&M Manual - OM-007 Revision L 28/06/2021 © Hansa Chippers 2020... -
Page 9: Identifying Hazards And Risks
Take care when handling petrol, oil and grease harmful vapours Wash skin if contaminated with petrol, oil or grease Do NOT refuel the chipper in enclosed areas Hansa C13 O&M Manual - OM-007 Revision L 28/06/2021 © Hansa Chippers 2020... -
Page 10: Operation
That all screws, nuts, bolts, and other fasteners are properly secured That all chipper components are in place and in good condition If any parts are worn or damaged, contact Hansa for replacements That fuel and engine oil levels are above the minimum levels... - Page 11 Result in kickback of material through the feed opening Transport the chipper while the engine is running Tamper with the engine governor settings on the chipper Hansa C13 O&M Manual - OM-007 Revision L 28/06/2021 © Hansa Chippers 2020...
-
Page 12: Starting Procedure
Pull cord Once the engine is started and has warmed up (approx. 10 seconds), turn the choke lever to the “off” position (as shown in the picture). Hansa C13 O&M Manual - OM-007 Revision L 28/06/2021 © Hansa Chippers 2020... -
Page 13: Shutdown Procedure
Turn the engine switch to “off” position. WARNING! Do NOT disengage the belt drive with the chipper running at full revs, as this will cause friction and vibration on the belt drive. Hansa C13 O&M Manual - OM-007 Revision L 28/06/2021 © Hansa Chippers 2020... -
Page 14: Petrol
Inspect and sharpen or replace knives and/or anvil as required. Ensure correct clearances between knives and anvil The material is ejected in long strips • The knives and/or anvil might be blunt Hansa C13 O&M Manual - OM-007 Revision L 28/06/2021 © Hansa Chippers 2020... -
Page 15: Maintenance
✓ Check condition of guarding (belt guard and outlet chute) A damaged guard must be replaced by an identical or equivalent guard immediately It is recommended to contact Hansa for a replacement guard. Hansa C13 O&M Manual - OM-007 Revision L 28/06/2021... -
Page 16: Knife Re-Sharpening And Knife Replacement
Blunt knives result in damage to the chipper How to re-sharpen the knives: If you don’t have a surface grinder or are unsure how to re-sharpen the knives, contact a professional saw doctor or Hansa to arrange re-sharpening. WARNING! Be careful when working around the sharp knives. Be aware that even though engine is switched off, the cutting means can still move. - Page 17 Knife Side view: Cutting rotor Out of the pocket enough Not far enough out of pocket Hansa C13 O&M Manual - OM-007 Revision L 28/06/2021 © Hansa Chippers 2020...
- Page 18 50 Nm, then make further adjustments with the knives as described above. Turn the cutting rotor slowly by hand to check that it turns freely. Hansa C13 O&M Manual - OM-007 Revision L 28/06/2021 © Hansa Chippers 2020...
-
Page 19: Anvil Adjustment/Replacement
WARNING! Every time the knife clamping bolts are torqued up to 35 Nm and loosened off again, the life of the bolts is reduced. The knife clamping bolts must be replaced at most after every six sharpens. Contact Hansa for replacement bolts (m8x35 bolts of grade 10.9 or higher). -
Page 20: Belt Tension
From this position, turn the engagement handle one full revolution in the clockwise direction. This is the recommended tension for the belt drive when in the fully engaged position. Hansa C13 O&M Manual - OM-007 Revision L 28/06/2021 © Hansa Chippers 2020... -
Page 21: Belt Replacement
Note: Engine not shown in this view. Using two 17 mm spanners, unbolt and remove the engine (4 x M10 nuts). Note: Loosen the belt tensioner to allow room for removal. Hansa C13 O&M Manual - OM-007 Revision L 28/06/2021 © Hansa Chippers 2020... -
Page 22: Tyre Pressure
The maximum recommended tyre pressure for the larger wheels on the road towable model is 65 Psi. Do NOT over inflate the tyres. Over inflation may cause tyres to rupture. Hansa C13 O&M Manual - OM-007 Revision L 28/06/2021 © Hansa Chippers 2020... -
Page 23: Bolt Torque
Feed type Gravity fed, self-feeding Inlet chute opening 170 x 220 mm Discharge System Discharge height 1085 mm (1400 Swivel) Outlet chute type Fixed/Swivel outlet with deflector Hansa C13 O&M Manual - OM-007 Revision L 28/06/2021 © Hansa Chippers 2020... -
Page 24: Decals
Side of housing next to engagement arm Belt guard hazard Rotor housing front, next to the belt guard Rotor and housing safety Top face of outlet chute Hansa C13 O&M Manual - OM-007 Revision L 28/06/2021 © Hansa Chippers 2020... - Page 25 Outlet chute and deflector safety Outlet deflector Shaft guard safety Next to shaft guard Hansa C13 O&M Manual - OM-007 Revision L 28/06/2021 © Hansa Chippers 2020...
-
Page 26: Hansa Global Industrial Limited Warranty
HANSA offers a special extended warranty period (“Extended Warranty”) to new HANSA products purchased from an authorised HANSA dealer. The Extended Warranty period is set out below. In order to take advantage of the Extended Warranty you must: 1. Register your HANSA product through the HANSA warranty registration process and identify your HANSA product by its machine serial number. - Page 27 General 1. Your rights: a. HANSA will recognise any implied rights and remedies that are available to you at law in the applicable territory and that cannot be excluded by HANSA. b. In New Zealand, Hansa Products Ltd will recognise your statutory rights under the Consumers Guarantee Act 1993 (provided that you are a consumer for the purposes of that Act).
-
Page 28: Commissioning Checklist And Registration
Commissioning checklist and registration It is the retailers’ responsibility to ensure that this chipper is correctly commissioned for use, and that the purchase is registered with Hansa Chippers so as to provide the owner with the full benefit of the warranty policy.
Need help?
Do you have a question about the C13RT and is the answer not in the manual?
Questions and answers