Table of Contents
Advertisement
Quick Links
SHAR�
OPERATION MANUAL
Please read this operation manual carefully before using the camcorder.
Important
For assistance in rep orting the theft or loss of this pro duct, record
on the line provided the serial number which is located on the bottom
of the unit. Please retain this information.
Model No.:
VL-M6-SUGY
Serial No.:
TWIN CAM
Advertisement
Table of Contents

Related Manuals for Sharp TWINCAM VL-M6-SL


Summary of Contents for Sharp TWINCAM VL-M6-SL
- Page 1 SHAR� OPERATION MANUAL Please read this operation manual carefully before using the camcorder. Important For assistance in rep orting the theft or loss of this pro duct, record on the line provided the serial number which is located on the bottom of the unit.
- Page 2 WARNING: TO RED U C E THE RI SK OF FIRE O R ELECTRIC SHOCK, DO NOT EXPOSE THIS APPLIANCE TO RAIN OR MOISTURE. CAUTION TO R E D U CE THE RISK OF ELECTRIC SHOCK, DO NOT REMOVE COVER. NO USER-SERVICEABLE PARTS INSIDE. REFER SERVICING TO QUALIFIED SERVICE PERSONNEL.
-
Page 4: Supplied Accessories
FEATURES FAD E I N/OUT 1 . COM PACT AND LI GHTWEIGHT 10. EDIT SEARCH FUNCTION, CONVEN I ENT 2. TWIN LENS SYSTEM FOR ASSEMBLY AND I NSERT - SUPER WIDE ANGLE AND ZOOM RECORDINGS 3. P-I N-P (PICTURE I N PICTURE) FOR 1 1 . - Page 5 PRECAUTIONS & CARES •Avoid shocks and dropping. Do not drop or otherwise subject the camcorder •After operation, remove the battery pack from to hard shocks or strong vibrations. Bumping or the unit. striking the unit d uring recording will generate •...
- Page 6 Under such circumstances, contact the nearest SHARP service centre or your dealer for further advice. Be sure to tightly seal the plastic bag containing the camcorder.
- Page 7 . Set the switch to the "red mark" position when the battery is depleted. • Please use the SHARP BT-70 or BT-80 battery Temperature During Charging packs designed specifically for use with this • The battery pack can be charged at temperatures camcorder.
-
Page 8: Video Cassette Tapes
(Metal Powder) tapes, playing back ME (Metal Evaporate) tapes may result in "noisy" pictures. Therefore, we recommend that you use Sharp or other commercially available MP-type tapes whenever possible. • Do not store or place your video tapes in direct sunlight, near heaters, or in places with excessive moisture or dust. -
Page 9: Important Safeguards
IMPORTANT SAFEGUARDS Read Instructions - All the safety and operating instructions should be read before operating the camcorder. Retain Instructions - The safety and operating instructions should be retained for future refer ence. Heed Warnings - All warnings on the appliance and in toe operating instructions should be heed... - Page 10 13. Power-Cord Protection - Power-supply cords 18. Object and Liquid Entry - Never push objects of any kind into this video product through openings. should be routed in such a way that they are not likely to be walked on or pinched by items placed They may touch dangerous voltage points or short-out parts that could result in a fire or electric upon or against them.
-
Page 11: Top View
PART NA MES AND FUNCTIONS For details on the use of each contro l , refer to the TOP VIEW page number ind icated in the brackets. 0 FULL AUTO indicator Lights up in the Full Auto mode and blinks in emergency mode. -
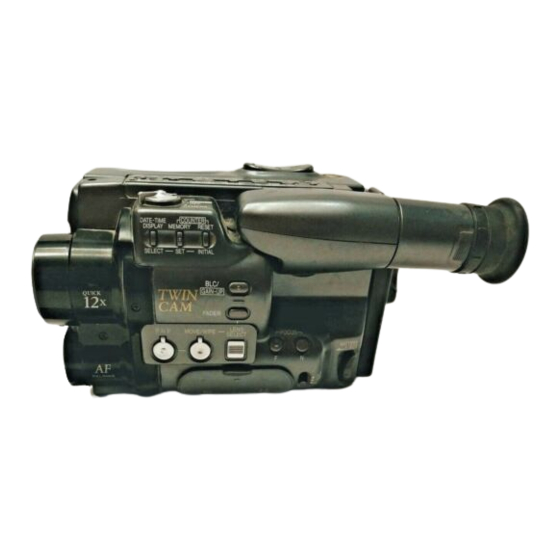
Page 12: Side View
Cf) DATE-TIME DISPLAY button [13] SIDE VIEW DATE-TIME SELECT button [13] 6) COUNTER MEMORY button [31] DATE-TIME SET button [13] 4D COUNTER RESET button [31] DATE-TIME INITIAL button [13] � Built-in microphone 4D Lens cap CD P IN P button * [40] G) MOVE/WIPE button * [39] [40] SELECT- SET - INITIAL CD LENS SELECT button * [38]... -
Page 14: Installing The Memory Backup Battery
. Replace the holder with the lithium battery into the camcorder. REPLACE BATIERY WITH SHARP TYPE CR2025 (PART NO. UBATL0006TAZZ) OR SONY ENERGYTEC TYPE CR2025 O N LY . USE OF A DIFFERENT BATIERY MAY PRESENT A RISK OF FIRE OR EXPLOSION. -
Page 16: Loading A Cassette
LOADING A CASSETTE Make sure that a power source is connected. While sliding the OPEN button in the direction ( O ), indicated by the arrow on the camcorder ( f) ). lift the lid up until it opens Press EJECT. The cassette com partment cover wil l automati... - Page 17 INSTALLING THE BATTERY PACK Rotate the viewfinder u pward . Align the right side of the battery pack with the line on the camcorder. ".&." Align the marks at the top and bot " " tom of the camcorder and the battery pack with each other.
-
Page 19: Power Supply
POWER SUPPLY POWER lamp (red) Lights to indicate that the AC USING THE AC ADAPTOR/ power cord is connected to a live power outlet. BATTERY CHARGER CHARGE lamp (orange) Lights when a battery pack is being charged. The lamp goes off when the battery pack is fully charged or removed. - Page 20 US ING THE CAR BATTERY A DAPTOR/BATTERY CHARGER (OPTI ONA L A CCESS ORY) Start the car engine and leave it idling while using the SHARP Car Battery Adaptor/Battery Charger VR-U40CH. Insert the plug into the cigarette-lighter socket. The POWER indicator will light.
-
Page 21: Alarm Indicators
E026 is displayed this - CASS ET TE · - ..-- / / I \ '- time, call the nearest SHARP Service Centre (see page 43). PROTECT TAB (b) If the error message is not The erasure protection hole on... - Page 22 OPER ATING INF O RM ATI ON INDICATO RS 1) Super Wide-Angle Indicator High Speed Shutter Recording When the view shown is through When the SHUTIER SPEED b ut- the wide-angle lens, "SUPER ton is pressed, the sh utter speed WIDE"...
-
Page 23: Camera Recording
CAM E RA R ECO R D I NG EASY CAM ERA R ECORDING WITH FULL AUTO Before record ing a special, one-time-only scene, p lease make a test recording to make sure that everything is set p roperly. For easy, "p oint-and-shoot" record i n g , slide the FULL AUTO switch to ON. - Page 24 Notes on Lens Cap Handling • While carryin g the camcorder aro u n d , keep the lens cap closed, and take care not to bump . the camcorder into objects or otherwise su bject it to shock, as such acci dents may cause damage.
-
Page 25: Edit Search
Viewfinder display USING THE AUTO DATE/TIME rcOUNfERt, DATE-TIME FUNCTION DISPlAY MEMORY RESET Follow the procedure to superimpose the date, or time and date, on a recording of scene. Make sure that a power source is connected, SELECT INITIAL turn the POWER switch to CAM ERA, and turn the STANDBY switch t o STANDBY. - Page 26 Playback Through the Viewfinder using EDIT SEARCH To check the recorded picture (for focus, white balance, iris, etc . ) Turn the POWER switch to CAMERA. Rotate the STAN DBY switch upward to STANDBY. Press and hold the EDIT SEARCH button STOP PAUSE/STILL...
-
Page 27: Auto Focus
AUTO FOCUS The Auto Focus system takes care of keeping the · �···· subject in focus so that you can concentrate on ' " . . , ! -1 creating great videos. Just keep the subject rough � � - ly in the center of the viewfinder, and the cam... - Page 28 LI G HTING Situation Brightness LIGHTING For clear, good-qual ity record i n g , 100,000 Blue sky lux is needed. Recording is also possible with less light, but the p icture q ual ity may suffer. Adequate 1 DD,DDD (Lux) Clear day at noon ( 1 DD,DDD lux) lighting is also essential for correct white balance.
-
Page 29: Conn Ections For Playback On A Tv
CONN ECTIONS FOR PLAYBACK ON A TV CONNECTION TO A WITH AUDIONIDEO JACKS Use the supplied audio/video cable to connect the camcorder to a TV's audio/video input jacks. Turn the POWER switch to VCR. Set the AN I N/OUT select switch to OUT. Select the TV to AN or VI DEO mode. - Page 30 CONNECTI ON TO A TV WITH OUT AU DI ONI DE O JACKS Use the supplied RF converter and VHF connecting All-channel antenna cable. Disconnect your antenna feed from the TV. • If the antenna feed is flat ribbon cable, con nect it to the 300-ohm/75-ohm ad aptor, then plug the adaptor to the RF converter 's IN FROM ANT terminal.
-
Page 31: Connection To Tv Via Vcr
CONNECTION TO TV VIA VCR WITH AN INPUT SELECTOR Connect the camcorder to the VCR's audio and video input jacks with the supplied audio/video cable. Set the A / V I N/OUT select switch to OUT. Set the input selector on the VCR to L I N E or A/V, and set the TV to the VI DEO or A/V mode. -
Page 32: Forward/Reverse Search
PLAYB A CK PLAYBACK Turn on the TV and select the correct channel for viewin g the played-back picture. Turn the POWER on the camcorder switch to VCR. Load a pre-recorded v ideo cassette. Press the PLAY button. To stop playback press the STOP button. -
Page 33: Using The Tape Counter
USING THE TAPE COUN TER The cou nter di gits show the actual tape position relative to the point on the tape where the counter was reset. To Index Scenes on a Tape Press the COUNTER M EMORY button to display the counter in the viewfinder. - Page 34 DU BBING/EDITING WITH A VCR You can play back recorded tapes on your cam corder for dubbing or editing on a connected VC R . Editing lets you add special effects, change the • OFF order of scenes, and cut unnecessary scenes to make your videos more enjoyable.
- Page 35 RECORDING FROM VCR OR REC button This camcorder can record from a VCR (or TV) that Recording has audio/video output jacks . Plug one end of the suppl ied AudioNideo cabl e into t h e camcorder a n d t h e other e n d into the VCR's or TV's audio and video output jacks.
-
Page 36: Useful Features For Camera Recording
USEFUL FEATURES FOR CAMERA RECORDING MANUAL FOCUS � REW There will be times when you want to focus the lens manual ly. To do so: FULL Slide the FULL AUTO switch to OFF. FOCUS Press the FOCUS button on the top of the camcorder. -
Page 37: White Balance Lock
WHITE BALANCE LOCK White balance ensures that colours are correctly reproduced. In the Full Auto mode, white balance is constantly adjusted automatically. Using the White Balance Lock Mode Colours may shift when your camcorder field is filled with a scene that has just one colour; e. g . , if you take a close-up of a solid orange sheet of paper. - Page 38 1 /60 sec ond shutter to produce sharp, blur-free recordings of high-speed motion. Cancel the Full Auto mode by sliding the FU LL AUTO switch to OFF. Press the SH UTIER SPEED button to record fast action.
-
Page 39: Fade In And Fade Out
FADE IN & FADE OUT Press the FADER button to smoothly fade i n or fade FADE I N <=== == == == == == == =- out a scene. FADE IN If the FADER button i s pressed during the Recording Pause mode, "FADER"... -
Page 40: Power Zoom
TWI N LENS SYSTEM POWER ZOOM This feature enables you to move the camcorder's apparent point of view closer to a subject or further away from it without actually moving the cam corder. Press the T side of the power zoom button for tele photo (subject appears closer) and the W side for wide-angle (subject appears farther away). - Page 41 LENS SELECT TWO-LENS FADES You can switch lenses d uring a fade to create more effective scene transitions. Press the FADER button. "FADER" appears in the viewfinder and the fade begins. Press the LENS SELECT button. The lens view changes during the fade. After that, the Fade mode is disengaged .
- Page 43 HINTS FOR BETTER SHOOTING Shooting Stable Pictures Holding the Camcorder It is i mportant to hold the camcorder properly dur ing hand-held shooting . • Tighten the grip strap unti l it fits snugly while your fingers are on the zoom button and our thumb is on the REC START/STOP button.
-
Page 44: Before Requesting Service
BEFORE REQU ESTI NG SERVICE Before calli ng for service, please ch eck this troubleshooting table. SYMPTOM POSSIBLE CAUSE SUGGESTED SOLUTION • No power. • Safety devices are functioning. • Disconnect the AC adaptor cord; then, • Power plug it into the wall outlet again. (Page 1 8. ) •... -
Page 45: Specifications
SERVICE I N FORMATION T o obtain the name and address of the nearest Sharp Factory Service Centre o r Authorized Service Centre, please contact: HEADQUARTERS: 335 Britannia Road East, Mississauga, Ontario L4Z 1 W9 Tel: (4 1 6) 890-21 00 WESTERN CENTRE: 1 00-1 3551 Commerce Parkway Richmond, B . - Page 46 SHARR Sharp Electronics of Canada Ltd. Britannia Road East, M ississauge, Ontario L4Z 1 W9 SHARP CORPORATION Osaka, Japan Printed i n Japan TINSZ1 33 7TAZZ T8 4 2 9 -A...
Need help?
Do you have a question about the TWINCAM VL-M6-SL and is the answer not in the manual?
Questions and answers