Table of Contents
Advertisement
Available languages
Available languages
Advertisement
Chapters
Table of Contents

Related Manuals for Alutech CU-TR230-868


Summary of Contents for Alutech CU-TR230-868
- Page 1 Installation and Operation Manual English Control units СU-TR230-868 / СU-TR400-868 Montage- und Betriebsanleitung Deutsch Steuergeräte СU-TR230-868 / СU-TR400-868 Manuel d’installation et d’utilisation Français Blocs de commande СU-TR230-868 / СU-TR400-868 07.2020 www.alutech-group.com...
-
Page 3: Table Of Contents
ENGLISH CONTENTS Safety rules and warnings ..........1.1. -
Page 4: Safety Rules And Warnings
Do not start installation and operation of the product if you have any questions or if you do not understand anything. If necessary, contact your nearest ALUTECH service or office. It is not allowed to make changes to any elements of the product design and use the product for other purposes. -
Page 5: During Operation
SafETy RULES aNd waRNINGS within the visibility of doors at a height of not less than 1.5 meters and at a safe distance from moving elements. Control devices should not be publicly available. In the case of using radio remote controls, make sure that the installation location of the control unit provides high-quality radio signal reception (there are no shielding and reflective surfaces, other sources of radio emission). -
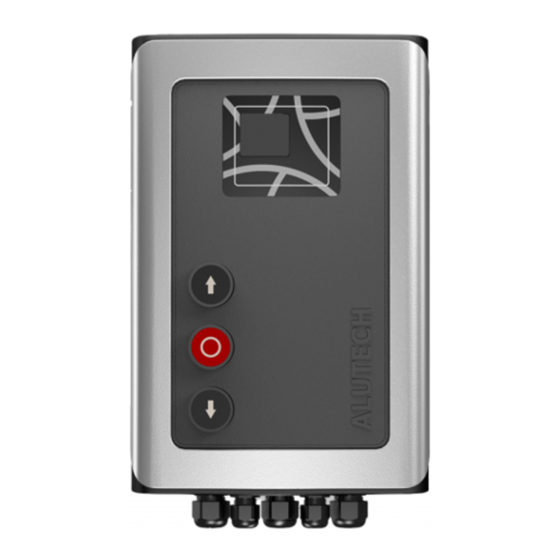
Page 6: Product Description
Control units CU-TR series are designed to control and manage the devices of the drive system of industrial sectional doors. Direct application is operation control of drives TR series CU-TR230-868: TR-3531-230, TR-5024-230, TR-3531-230E, TR-5020-230E, TR-5024-230E CU-TR400-868: TR-5024-400, TR-10024-400, TR-13018-400, TR-5013-400E, TR-5020-400E,... -
Page 7: Specifications
PREPaRaTION fOR INSTaLLaTION SPECIfICaTIONS Table 1 fEaTURE CU-TR230-868 CU-TR400-868 Supply voltage 230 V ± 10% ~ 400 V ± 10% 3 N~ Network frequency, Hz Maximum drive power, kW Maximum power consumption in standby mode (without additional devices), W 12 V DC / max. 150 mA Power supply for additional devices 24 V DC / max. 250 mA... -
Page 8: Installation
NETwORK aNd ELECTRIC dRIVE CONNECTIONS The network connection is performed to connector 1 of the unit (CU-TR230-868 — fig. 8, CU-TR400-868 — fig. 9). L is phase (phases), N is neutral. Protective earth is connected to connector 2. -
Page 9: Connection Of Switches / Drive Encoder
Incorrect connection may result in malfunction of the product. Use additional devices (accessories) offered by ALUTECH Company and with the required characteristics. ALUTECH Company is not responsible for the operation of the drive system when using additional devices produced by other manufacturers. - Page 10 ELECTRICaL CONNECTIONS CONNECTOR CONTaCT dESCRIPTION The input of the control devices ‘Stop’ (fig. 14, STOP) with a normally closed contact (NC). Actuation will immediately stop the door movement or block the start of the door movement +24 V Power output of additional devices. Supply voltage 24 V DC (DC) / max. 250 mA +12 V Power output of additional devices.
-
Page 11: Settings
SETTINGS SETTINGS The setting is performed using the buttons, the setting inscription is displayed on the control panel display 14 (fig. 8 / 9). button to enter the settings menu and exit the menu — button to enter the setting and confirm the selected value —... -
Page 12: Setting The End Position Of Doors
SETTINGS SETTING THE ENd POSITION Of dOORS aTTENTION! The end position setting is different for drive models with mechanical switches and encoder. aTTENTION! During the settings, control the door movement using the buttons of the unit is performed in manual mode (pressing and holding the button). When the control unit is supplied, the manual operation mode is set (P3–f1–on, tab. 13). - Page 13 SETTINGS When the inscription ‘- -’ appears on the bottom of display, using or if necessary set the doors in the position of full closing Press to confirm the installed position. The inscription ‘- -’ will appear with a dot When the inscription ‘- -’...
-
Page 14: Radio Control Setting
SETTINGS RadIO CONTROL SETTING Before programming the remote controls for the first time, clear the memory of the control unit from the previously recorded radio remote controls. If the remote control is lost, in order to prevent unauthorized access, it is necessary to delete the number of the lost remote control from the memory. - Page 15 SETTINGS SETTINGS f1–f5 dESCRIPTION Of RadIO CONTROL COMMaNdS CONTROL COMMaNd MEaNING LIGHTING (TURN ON) Performing either TURN ON or TURN OFF, or TURN ON / OFF when setting the outputs of connectors 7–9 (tab. 2) for lighting operation LIGHTING LIGHTING (TURN OFF) (settings P3–f4…f6, tab. 13).
- Page 16 SETTINGS 6.2.1. REMOTE CONTROL RECORdING If you record a previously recorded remote control, the remote control button or buttons will be rerecorded with new control commands! no — when recording remotes, the inscription means that the maximum number of remotes is recorded.
- Page 17 SETTINGS f3 — Record of four buttons of the remote control with any control command selected in the setting When entering the setting for all buttons of the remote control (b1–b4), the default value of the control command is 00. (tab. 4). Table 6 Enter the setting menu (tab. 3) and select menu P2.
- Page 18 SETTINGS 6.2.2. CHaNGING RECORdEd REMOTE CONTROL COMMaNdS f4 — Changing the control commands of all buttons on the remote control by the recording number of the remote It is necessary to know the remote record number in the control unit! No remote required.
- Page 19 SETTINGS f5 — Changing the control command of a recorded remote control button Recorded remote is required! Table 8 Enter the setting menu (tab. 3) and select the P2 menu. Select the f5 setting. After the desired setting appears, press The display will show rc, which means waiting for the remote control signal ×3 Press the remote control button 3 times, the command of which you want to change...
- Page 20 SETTINGS 6.2.4. dELETING THE REMOTE CONTROL aNd dEfINING THE REMOTE RECORd f7 — determining the number of the remote control record in memory f8 — deleting the remote control by code Recorded remote is required! Table 10 Enter the setting menu (tab. 3) and select the P2 menu. Select f7 or f8.
-
Page 21: Setting Operation Parameters
SETTINGS 6.2.5. dELETING aLL REMOTES f0 — dELETING aLL REMOTES Deleting all remotes recorded to the control unit is performed! Table 12 Enter the setting menu (tab. 3) and select the P2 menu. Select the f0 setting. After the desired setting appears, press After the inscription dL appears, press and hold it for ~ 5 s until a dot appears on the display, which will mean the deleting all remotes... - Page 22 SETTINGS faCTORy MENU SETTING dESCRIPTION VaLUES VaLUE Setting to disable the built-in obstacle detection system when opening (P5–f1). Designed to avoid false positives when using the built-in obstacle detection system (P5–f1) in the unit when opening the doors. The position of the beginning of contact of the damper (springs) of doors located at the end of opening is adjusted.
- Page 23 SETTINGS faCTORy MENU SETTING dESCRIPTION VaLUES VaLUE Operation of the SBS and OP inputs (tab. 2, 01 — SBS STEP BY STEP connector 20). When setting the outputs of OP OPEN connectors 7–9 for two-way control (values 05 02 — SBS STEP BY STEP and 06, tab. 14), the input SBS can be used for the direction of ENTRY, the input OP for the OP STEP BY STEP...
- Page 24 SETTINGS faCTORy MENU SETTING dESCRIPTION VaLUES VaLUE Operating time when opening 01, 02, 03…99: 01 — 1 s Operating time when closing 99 — 99 s In P5–f3 and P5–f4, the time for continuous movement of doors between the end positions is set.
- Page 25 SETTINGS faCTORy MENU SETTING dESCRIPTION VaLUES VaLUE PHOTOTEST function. When the setting is on, before starting the movement, an automatic verification of the operation of the photocells connected to the input PH1 is performed (tab. 2, no — disabled connector 20). on —...
- Page 26 SETTINGS faCTORy MENU SETTING dESCRIPTION VaLUES VaLUE Operating time LOAD № 1 after the command no — load does not of the remote control LOAD № 1 ENABLE. The turn off according operating time of the outputs of the connectors to time (it turns 7–9 (value 13, tab. 14) is configured in the case off only at the...
- Page 27 SETTINGS VaLUE dESCRIPTION No full closing. Activation will always accur, except for full closing in standby mode. Fig. 21 is an example of connecting a traffic light using the second connector (second relay) to turn off the traffic light (red light) when fully closing Traffic light on EXIT with two-way regulation.
-
Page 28: Reset To Factory Settings
SETTINGS RESET TO faCTORy SETTINGS Reset to the factory settings will restore the setting values that are set by default when the control unit has been delivered (tab. 13). aTTENTION! Door position settings will not be saved. To set the door position, follow the steps in section ‘6.1. -
Page 29: Cycle Counter Data
SETTINGS CyCLE COUNTER daTa The number of completed cycles in a six-digit form is displayed in the setting when changing the display inscription (maximum 999,999 cycles). The example shows the counter value 123 456 cycles: Table 16 Press and hold for ~5 s, until entering the setting menu After the inscription P1 appears, press After the inscription P0 appears, press After the inscription f0 appears, press... -
Page 30: Inscription
INSCRIPTION INSCRIPTION Table 17 — LEDs 19 (fig. 8, 9) INSCRIPTION PURPOSE LIGHT ON LIGHT Off Radio control command (the LED lights up in red if the remote control is not recorded or the control command is Is supplied Is not supplied not assigned to the control button / lights up in green if the control command is assigned to the control button) Command to open (input OP, connector 20) - Page 31 INSCRIPTION INSCRIPTION dESCRIPTION Opening command is activated Closing command is activated Stop of movement according to the STOP control command Control command is activated from input a (connector 20) Control command is activated from input P (connector 20) or PARTIALLY OPEN command of the radio remote control is activated Input a is activated (connector 20) Operation of control devices is blocked.
-
Page 32: Verification Of Operation And Commissioning
VERIfICaTION Of OPERaTION aNd COMMISSIONING VERIfICaTION Of OPERaTION aNd COMMISSIONING This is an important step in installing a drive system: • See section ‘1. Safety rules and warnings’ . All rules and requirements must be met. • Read the manuals of the drive system devices (electric drive, safety devices, controls, etc.). All rules and requirements specified in the manuals must be followed. -
Page 33: Maintenance Service
MaINTENaNCE SERVICE Commissioning of the drive system can only be carried out after a successful verification. Partial commissioning or temporary operation is not permissible. • Prepare and store the technical documentation for the automation kit. The documentation should contain: installation and operation instructions, maintenance schedule, diagram of the drive system and laying of electrical cables. -
Page 34: Malfunctions And Recommendations For Their Elimination
MaLfUNCTIONS aNd RECOMMENdaTIONS fOR THEIR ELIMINaTION 10. MaLfUNCTIONS aNd RECOMMENdaTIONS fOR THEIR ELIMINaTION aTTENTION! When looking for the cause of an incorrect operation or malfunction, refer to the description of the control unit inscription: LEDs (tab. 17) and display (tab. 18). aTTENTION! In the event of malfunction that cannot be resolved using the information in this manual, you must contact the service department. - Page 35 CU-TR400-868 Ø6.3×32 aTTENTION! Use fuses filled with quartz sand Т 0.8 A 250 V AC (FU1) Ø5×20 for CU-TR230-868 To access, unscrew the four screws 6, CU-TR230-868 / remove the connectors and cover 13 Ø6.3×32 CU-TR400-868 (fig. 8 / 9) for CU-TR400-868 Т 1 A 250 V AC (FU2) Ø5×20 CONTROL UNITS СU-TR230-868 / СU-TR400-868...
-
Page 36: Storage, Transportation, Disposal
− does not apply to a battery; − completed manual is not provided. Information about service is located at: http://www.alutech-group.com/feedback/service/ Documents on confirmation of conformity of the product (certificates / declarations) are located at: https://alutech-group.com/product/auto/automatics-promgate/DOCUMENTS/ CONTROL UNITS СU-TR230-868 / СU-TR400-868... -
Page 37: Commissioning Certificate
COMMISSIONING CERTIfICaTE 13. COMMISSIONING CERTIfICaTE Serial number and production date data from the product label Information on the organisation, authorised to perform mounting and maintenance name, address, phone Mounting date day, month, year L. S. Signature of the person, in charge of mounting signature full name The consumer (Client) has checked the content of the set, is informed on and agrees with the... -
Page 38: Information On The Performed Works
INfORMaTION ON THE PERfORMEd wORKS 14. INfORMaTION ON THE PERfORMEd wORKS The table contains works performed during installation and operation of the product: data of the drive, connected additional devices, safety devices, settings made (different from the factory values), verifications, maintenance, changes, etc. OwNER SPECIaLIST daTE... -
Page 39: Information On Repairs During Warranty Period
Importer to the EU / authorised representative of the Manufacturer: ALUTECH Systems s.r.o., 348 02, Czech Republic Bor u Tachova, CTPark Bor, Nova Hospoda 19, DS-EXIT 128 Phone / fax: + 420 374 6340 01, e-mail: info@cz.alutech-group.com CONTROL UNITS СU-TR230-868 / СU-TR400-868... - Page 41 INfORMaTION ON THE PERfORMEd wORKS dEUTSCH INHaLT Sicherheits- und Warnhinweise ......... . . 1.1.
-
Page 42: Sicherheits- Und Warnhinweise
Beginnen Sie nicht die Montage und Inbetriebnahme der Anlage, wenn Sie Fragen haben oder etwas nicht verstunden woderden ist. Gegebenfalls setzen Sie sich mit der nächsten Servicestelle oder einem ALUTECH Büro in Verbindung. Veränderungen an den Konstruktionselementen und nichtbestimmungsgemäße Verwendung der Anlage sind nicht zulässig. -
Page 43: Beim Betrieb
SICHERHEITS- UNd waRNHINwEISE Stellen Sie sicher, dass die Antriebseinrichtungen gegen unbeabsichtigte Stöße durch voder- beifahrenden Fahrzeuge geschützt sind. Undernfalls ist eine Schutzausrüstung (Umzäunung) voderzusehen. Die Oberflächen des Aufstellungsodertes der Geräte müssen robust sein und als zuverlässige, vibrationsfreie und steife Stütze dienen. Undernfalls sind Maßnahmen zur Stärkung der Mon- tagestelle zu ergreifen. -
Page 44: Produktbeschreibung
PROdUKTBESCHREIBUNG Bevoder Sie die Todere in Gang setzen, stellen Sie sicher, dass sich keine Personen, Tiere, Fahr- zeuge oder Gegenstände im Gefahrenbereich befinden. Kontrollieren Sie die Bewegung der Todere, bis sie vollständig öffnen oder schließen. Im Falle der geöffneten, vollständig gestoppten und stehenden Todere ist die Bewegung zulässig. Fahren Sie nicht, wenn sich die Todere bewegen. -
Page 45: Technische Daten
MONTaGEVOdERBEREITUNG TECHNISCHE daTEN Tabelle 1 PaRaMETER CU-TR230–868 CU-TR400–868 Netzspannung 230 V ± 10% ~ 400 V ± 10% 3 N~ Netzfrequenz, Hz Maximale Antriebsleistung, kW Maximale Leistungsaufnahme im Stundby-Betrieb (ohne Zusatzgeräte), W 12 V DC / max. 150 mA Stromversodergung von Zusatzgeräten 24 V DC / max. 250 mA Querschnitt der an die Steckverbinder max. 2,5 mm2 anzuschließenden Leitungen... -
Page 46: Montage
MONTaGE MONTaGE Montieren Sie das Steuergerät auf einer vertikalen Fläche innerhalb der Sichtbarkeit des Toderes (neben dem Toder) in einer Höhe von mindestens 1,5 m (Abb. 4) in einem sicheren Abstund zu beweglichen Teilen des Toderes auf. Es wird empfohlen, das Steuergerät an der Seite der An- triebsmontage zu installieren. -
Page 47: Anschluss Der Schalter Und Des Antriebsencoder
Bei der Verwendung, Montage und dem Anschluss von zusätzlichen elektrischen Geräten (Zube- hör) beachten Sie bitte die mit diesen Geräten mitgelieferten Anleitungen. Ein falscher Anschluss kann zu einer Fehlfunktion des Produktes führen. Verwenden Sie die von ALUTECH angebotenen Zusatzgeräte (Zubehör) mit den erfoderderlichen Eigenschaften. ALUTECH haftet für den Betrieb des Antriebssystems bei Verwendung von Zusatzgeräten underer Hersteller nicht. - Page 48 ELEKTROaNSCHLÜSSE STECKaN- KONTaKT BESCHREIBUNG SCHLUSS Eingang der Steuereinrichtungen „ÖFFNEN TEILWEISE“ (Abb. 14, PEdESTRIaN) mit nodermal geöffnetem Kontakt (NO). Wenn die Todere vollständig geschlossen sind (in der Endlage „Toder-Zu“), führt die Auslösung zum Öffnen innerhalb der in der Einstellung (Tab. 13, P1–f9) eingestellten Zeit Eingang von Sicherheitseinrichtungen (Abb.
-
Page 49: Einstellungen
EINSTELLUNGEN EINSTELLUNGEN Die Einstellung erfolgt mit den Tasten, die Einstellungsanzeige wird auf dem Bedienfeld-Dis- play 14 angezeigt (Abb. 8 / 9). Taste zum Aufrufen und Verlassen des Einstellungsmenüs – Taste zum Zugriff auf die Einstellung und zur Bestätigung des ausgewählten Wertes –... -
Page 50: Einstellung Der Endlagen
EINSTELLUNGEN EINSTELLUNG dER ENdLaGEN aCHTUNG! Bei Antriebsmodellen mit mechanischen Schaltern und Encoder ist die Endlagen- einstellung unterschiedlich. aCHTUNG! Während der Einstellungen wird die Torbewegung mit den Tasten oder im Hundbetrieb (Drücken und Halten der Taste) gesteuert. Bei der Auslieferung des Steuergerätes wird der Hundbetrieb eingestellt (P3–f1–on Tab. 13). Der Zugang zum Einstellungsmenü... - Page 51 EINSTELLUNGEN Wenn „- -“ unten auf dem Display angezeigt wird, verwenden Sie die Taste oder, falls erforderlich, die Taste um das Tor vollständig zu schließen Die Taste drücken, um die eingestellte Position zu bestätigen. Die Anzeige „- -“ wird mit einem Punkt versehen Wenn „- -“...
-
Page 52: Einstellung Der Funksteuerung
EINSTELLUNGEN EINSTELLUNG dER fUNKSTEUERUNG Vor der ersten Programmierung der Handsender löschen Sie den Speicher des Steuergerätes der zuvor gespeicherten Funkhandsender. Wenn der Handsender verloren geht, muss die Num- mer des verlorenen Handsenders aus dem Speicher gelöscht werden, um unbefugten Zugriff zu vermeiden. - Page 53 EINSTELLUNGEN MENÜ P2 EINSTELLUNGEN f1–f5 BESCHREIBUNG dER fUNKBEfEHLE STEUERBEfEHL wERT BELEUCHTUNG Ausführung von Befehlen EINSCHaLTEN (EINSCHALTEN) oder aUSSCHaLTEN oder EIN-/aUSSCHaLTEN bei der Einstellung der Ausgänge der Anschlüsse 7–9 BELEUCHTUNG BELEUCHTUNG (Tab. 2) für den Beleuchtungsbetrieb (AUSSCHALTEN) (Einstellungen P3–f4...f6, Tab. 13). Die automatische Ausschaltung (Betriebszeit) der Beleuchtung wird durch BELEUCHTUNG P8–f4 eingestellt...
- Page 54 EINSTELLUNGEN 6.2.1. SPEICHERN dES fUNKHaNdSENdERS Wenn ein zuvor aufgezeichneter Handsender wird gespeichert, werden die Tasten auf dem Handsender erneut gespeichert und neue Steuerbefehle zugewiesen! no – beim Speichern von Handsendern bedeutet die Anzeige, dass die maximale Anzahl der Handsender gespeichert wurde. f1 –...
- Page 55 EINSTELLUNGEN f3 – Speichern von vier Handsendertasten mit einem beliebigen in der Einstellung ausgewählten Steuerbefehl Beim Zugriff auf die Einstellung werden alle Tasten des Handsenders (b1–b4) auf den Standardwert des Steuerbefehls 00 gesetzt (Tab. 4). Tabelle 6 Öffnen Sie das Einstellungsmenü (Tab. 3) und wählen Sie P2. Dann wählen Sie f3.
- Page 56 EINSTELLUNGEN 6.2.2. ÄNdERUNG dER BEfEHLE VOM GESPEICHERTEN HaNdSENdER f4 – Änderung der Steuerbefehle aller Handsendertasten gemäß der Speichernummer Die nummer vom Handsenderspeichern im Steuergerät ist zu kennen! Keine Hadsender erforderlich. Tabelle 7 Öffnen Sie das Einstellungsmenü (Tab. 3) und wählen Sie das Menü P2 Dann wählen Sie die Einstellung f4.
- Page 57 EINSTELLUNGEN f5 – Änderung des Steuerbefehls der Taste auf dem gespeicherten Handsender Ein gespeicherter Handsender ist erforderlich! Tabelle 8 Öffnen Sie das Einstellungsmenü (Tab. 3) und wählen Sie das Menü P2 Dann wählen Sie die Einstellung f4. Wenn die erforderliche Einstellung angezeigt wird, drücken Sie die Taste Auf der Anzeige erscheint rc, d.h.
- Page 58 EINSTELLUNGEN 6.2.4. LÖSCHEN dES HaNdSENdERS UNd BESTIMMUNG dER SPEICHERNUMMER dES HaNdSENdERS f7 – Bestimmung der Speichernummer des Handsenders f8 – Löschen des Handsenders durch eine Kode Ein gespeicherter Handsender ist erforderlich! Tabelle 10 Öffnen Sie das Einstellungsmenü (Tab. 3) und wählen das Menü P2. Dann wählen Sie die Einstellung f7 oder f8. Wenn die gewünschte Einstellung angezeigt wird, drücken Sie die Taste Auf der Anzeige erscheint rc, d.h.
-
Page 59: Einstellung Der Betriebsparameter
EINSTELLUNGEN 6.2.5. daS LÖSCHEN aLLER HaNdSENdER f0 – Löschen aller Handsender Alle im Steuergerät gespeicherten Handsender werden gelöscht! Tabelle 12 Öffnen Sie das Einstellungsmenü (Тabelle 3) und wählen das Menü P2. Wählen Sie die Einstellung f0. Wenn die gewünschte Einstellung angezeigt wird, drücken Sie die Taste 5 Sek. - Page 60 EINSTELLUNGEN EINSTEL- wERKSEIN- MENÜ BESCHREIBUNG wERTE LUNG STELLUNG Die Einstellung des integrierten Hinderniserkennungssystems beim Öffnen (P5–f1). Das System dient zur Vermeidung von Fehlauslösungen bei Verwendung des integrierten Hinderniserkennungssystems (P5–f1) beim Öffnen des Tores. Die Position des Kontaktbeginns des Dämpfers (der Federn), die sich am Ende der Öffnungsstellung des Tores befindet, wird eingestellt.
- Page 61 EINSTELLUNGEN EINSTEL- wERKSEIN- MENÜ BESCHREIBUNG wERTE LUNG STELLUNG Betrieb der Ausgänge des Anschlusses 7 (Tab. 2) no – abgeschaltet Betrieb der Ausgänge des Anschlusses 8 (Tab. 2) 01…16 – in der Tab. 14 beschrieben Betrieb der Ausgänge des Anschlusses 9 (Tab. 2) Eingänge SBS und OP (Tab. 2, Steckanschluss 20). 01 –...
- Page 62 EINSTELLUNGEN EINSTEL- wERKSEIN- MENÜ BESCHREIBUNG wERTE LUNG STELLUNG Empfindlichkeit der Hinderniserkennung beim no – abgeschaltet Schließen. Kontakt des Torblattes mit einem 01, 02, 03…99: Hindernis beim Schließenverursacht den Stopp des 01 – maximaler Wert Torlaufes und ein nachträgliches Öffnen (Werte für 99 –...
- Page 63 EINSTELLUNGEN EINSTEL- wERKSEIN- MENÜ BESCHREIBUNG wERTE LUNG STELLUNG no – abgeschaltet 01, 02…05: Langsame Geschwindigkeit am Beginn des Schließvorgangs 01 – 1 Sek. 05 – 5 Sek. Langsame Geschwindigkeit in der Nähe vom Fußboden. When the setting is eingeschaltet the position of slow speed starting is set in the same no –...
- Page 64 EINSTELLUNGEN EINSTEL- wERKSEIN- MENÜ BESCHREIBUNG wERTE LUNG STELLUNG Arbeitszeit nach dem Befehl des Funkhandsenders no – load does LAST №1 EINSCHALTEN. Die Arbeitszeit der Ausgän- not turn off ge der Anschlüsse 7–9 (Wert 13, Tab. 14) wird ein- accoderding to gestellt, wenn der Handsender für die Laststeuerung time (it turns bestimmt wird (Befehl LaST №1, Tab. 4) off only at the...
- Page 65 EINSTELLUNGEN VaLUE dESCRIPTION Einseitige Ampel (Anzeige für ein vollständiges Öffnen). Die Schaltung erfolgt nach dem vollständigen Öffnen. Abb. 20 – Beispiel für den Anschluss der Ampel Kein vollständiges Schließen. Es wird immer betätigt, mit Ausnahme des vollständigen Schließens bei der Wartephase. Auf der Abb. 21 ist ein Beispiel für den Anschluss der Ampel mithilfe des zweiten Anschlusses (zweiten Relais) dargestellt, um die Ampel (Rotampel) beim vollständigen Schließen auszuschalten Ampel AUSFAHRT bei der zweiseitigen...
-
Page 66: Zurücksetzen Auf Werkseinstellung
EINSTELLUNGEN ZURÜCKSETZEN aUf wERKSEINSTELLUNG Das Zurücksetzen auf die Werkseinstellungen ermöglicht die Wiederherstellung der Standard- einstellungen, die bei der Auslieferung des Steuergerätes (Tab. 13) vorbestimmt wurden. aCHTUNG! Die Einstellungen der Torpositionen werden nicht gespeichert. Zur Einstellung der Torpositionen folgen Sie den Schritten im Abschnitt „6.1. Einstellung der Endlagen des Tores“. Die bereits gespeicherten Funkhandsender und Werte des Zyklenzählers (Tab. 16) werden gespeichert. -
Page 67: Werte Des Zyklenzählers
EINSTELLUNGEN wERTE dES ZyKLENZÄHLERS Die Anzahl der ausgeführten Zyklen im sechsstelligen Format wird in der Einstellung beim Wechsel der Displayanzeige angezeigt (maximal 999 999 Zyklen). Das Beispiel zeigt den Zählerwert von 123 456 Zyklen: Tabelle 16 5 Sek. Die Taste drücken und binnen ~5 Sek. bis zum Aufruf des Einstellungsmenüs gedrückt halten Nach Erscheinen P1 auf der Anzeige die Taste drücken... -
Page 68: Indikation
INdIKaTION INdIKaTION Tabelle 17 – Leuchtdioden 19 (Abb. 8–9) INSCRIPTION PURPOSE LIGHT ON LIGHT Off Befehl vom Funkhandsender (LED leuchtet rot, wenn der Handsender nicht gespeichert ist oder der Taste des Handsenders kein Steuerbefehl zugewiesen ist / Wird erteilt Wird nicht erteilt leuchtet grün, wenn der Taste des Handsenders ein Steuerbefehl zugewiesen ist) Befehl zum Öffnen (Eingang OP, Anschluss 20) - Page 69 INdIKaTION INSCRIPTION dESCRIPTION Endlage TOR-ZU (für Antriebe mit Schaltern hat der Eingang CL.L ausgelöst, Steckanschluss 20) Teilöffnungsstellung (durch den Befehl P des Steckanschlusses 20 oder den Befehl „ÖFFNEN TEILWEISE“ des Funkhandsenders) Befehl zum Öffnen wurde geleitet Befehl zum Schließen wurde geleitet Bewegungsstopp durch den Steuerbefehl STOPP Steuerbefehl wurde vom Eingang a (Steckanschluss 20 ) gegeben Steuerbefehl wurde vom Eingang P (Steckanschluss 20) oder der Befehl ÖFFNEN...
-
Page 70: Betriebsüberprüfung Und Inbetriebnahme
BETRIEBSÜBERPRÜfUNG UNd INBETRIEBNaHME BETRIEBSÜBERPRÜfUNG UNd INBETRIEBNaHME Das ist ein wichtiger Schritt beim Einbau des Antriebssystems: • Lesen Sie die Einweisungen des Kapitels „1. Sicherheits- und Warnhinweise“. Alle Anforde- rungen der Anleitung sind im vollen Umfang zu erfüllen. • Lesen Sie die Anleitungen zum Antriebssystem (Antrieb, Sicherheitsvorrichtungen, Steuer- einrichtungen, etc.). -
Page 71: Wartung
waRTUNG Inbetriebnahme des Antriebssystems kann erst nach einem erfolgreichen Ablauf der Testfahrt erfolgen. Eine halbe Inbetriebnahme oder ein vorübergehender Betrieb sind nicht zulässig. • Technische Unterlagen zum Steuerset vorbereiten und aufbewahren. Unterlagen sollen folgende Informationen beinhalten: generelle Zeichnung, elektrisches Schema, Montage und Betriebsanleitung sowie Wartungsplan. -
Page 72: Störungen Und Störungsbehebung
STÖRUNGEN UNd STÖRUNGSBEHEBUNG 10. STÖRUNGEN UNd STÖRUNGSBEHEBUNG aCHTUNG! Um die Ursache für Fehlfunktion zu bestimmen, beachten Sie die Beschreibung der Anzeige des Steuergerätes: Leuchtdiode (Tab. 17) und Display (Tab. 18). aCHTUNG! Im Störungsfall, der mithilfe der Informationen aus dieser Anleitung nicht beheben werden kann, wird es empfohlen, ein Serviceunternehmen zu kontaktieren. - Page 73 STÖRUNGEN UNd STÖRUNGSBEHEBUNG STÖRUNG EVENTUELLE URSaCHE EMPfEHLUNGEN Bei häufiger Betätigung stoppt Die Temperatursiche- Legen Sie eine Pause in der Arbeit des Motors an, die für die Kühlung das Tor bei Bewegung, die rung des Motors hat ausreichend ist Steuerbefehle führen zur angesprochen nachfolgenden Torbewegung nicht.
-
Page 74: Lagerung, Transport Und Entsorgung
− bei Fehlern und Störungen, die durch ausfallende optische Prüfung und Wartung bedingt sind; − beim Fehlen der ausgefüllten Anleitung. Informationen über Servicedienste finden Sie unter: http://www.alutech-group.com/feedback/service/ Die Kopien der Konformitätserklärungen (Zertifikate / Erklärungen) finden Sie auf der folgenden Internetseite: https://alutech-group.com/product/auto/automatics-promgate/DOCUMENTS/... -
Page 75: Inbetriebnahmebescheinigung
INBETRIEBNaHMEBESCHEINIGUNG 13. INBETRIEBNaHMEBESCHEINIGUNG Fabrikationsnummer und Herstellungsdatum Daten vom Etikett Daten über die Organisation, die für die Montage und Wartung bevollmächtigt ist Bezeichnung, Adresse und Telefonnummer der Organisation Montagedatum Tag, Monat, Jahr Stempel Unterschrift des Verantwortlichen für die Montage Unterschrift Name des Unterzeichners Der Bertreiber (Auftraggeber) hat den Lieferumfang überprüft, ist mit den Garantiebedingungen und -Fristen einverstanden, hat keine Beanstandungen am äußeren Erscheinungsbild. -
Page 76: Angaben Über Durchgeführten Arbeiten
aNGaBEN ÜBER dURCHGEfÜHRTEN aRBEITEN 14. aNGaBEN ÜBER dURCHGEfÜHRTEN aRBEITEN Die Tabelle enthält die während der Installation und des Betriebs des Produktes durchgeführten Arbeiten: Eigenschaften des Antriebes, angeschlossene Zusatzgeräte, Sicherheitseinrichtungen, vorgenommene Einstellungen (abweichend von den Werkseinstellungen), Prüfung, Wartung, Änderungen, etc. UNTERSCHRIfT UNTERSCHRIfT daTUM aRBEITSaRT dES faCHMaNNES... -
Page 77: Angaben Über Reparaturen Während Der Garantiefrist
Importeur in der EU / Bevollmächtigter Vertreter des Herstellers: ALUTECH Systems s.r.o., 348 02, Tschechische Republik Bor u Tachova, CTPark Bor, Nova Hospoda 19, DS-EXIT 128 Telefon / Fax: + 420 374 6340 01, e-mail: info@cz.alutech-group.com STEUERGERÄTE СU-TR230-868 / СU-TR400-868... - Page 79 aNGaBEN ÜBER dURCHGEfÜHRTEN aRBEITEN fRaNÇaIS TaBLE dES MaTIÈRES Mises en garde et consignes de sécurité ........1.1.
-
Page 80: Mises En Garde Et Consignes De Sécurité
à l'installation et à l'utilisation du produit. Le cas échéant, veuillez contacter le service après — vente ou le bureau ALUTECH le plus proche. Toute modification de certains éléments de la configuration du produit et leur utilisation inap- propriée sont interdites. -
Page 81: Lors De L'utilisation
MISES EN GaRdE ET CONSIGNES dE SéCURITé Les surfaces des endroits d'installation des blocs doivent être robustes et utilisées en tant que support fiable et rigide, éliminant les vibrations. Sinon, il vous faudra prendre des mesures pour renforcer les endroits d'installation. Le bloc de commande et les autres dispositifs de commande fixes doivent être situés à... -
Page 82: Description Du Produit
dESCRIPTION dU PROdUIT Il est défendu de se situer (s’arrêter) dans la zone de mouvement de la porte. Les portes auto- matiques peuvent se déclencher à un moment inattendu ! Vérifiez le système d’entraînement et la porte régulièrement, en particulier, les câbles, les ressorts, le matériel de montage pour vous assurer qu'ils ne sont ni usés, ni déséquilibrés. -
Page 83: Spécifications Techniques
PRéPaRaTION à L’INSTaLLaTION SPéCIfICaTIONS TECHNIQUES Tableau 1 PaRaMÈTRES CU-TR230-868 CU-TR400-868 Tension d’alimentation 230 V ± 10% ~ 400 V ± 10% 3 N~ Fréquence du réseau, Hz Puissance motrice max, kW Puissance consommée max en mode veille (sans dispositifs accessoires), W 12 V courant continu / max. 150 mA Alimentation des dispositifs accessoires 24 V courant continu / max. 250 mA... -
Page 84: Installation
RaCCORdEMENTS aU RESEaU ET aU MOTEUR ELECTRIQUE dE La COMMaNdE Le réseau est raccordé au connecteur 1 du bloc de commande (CU-TR230-868 — fig. 8, CU-TR400-868 — fig. 9). L — phase (s), N — neutre. La mise à terre de protection est raccordée au connecteur 2. -
Page 85: Raccordement Des Interrupteurs / De L'encodeur De La Commande
Un raccordement incorrect peut entraîner un dysfonctionnement du produit. Utilisez des dispositifs supplémentaires (accessoires) proposés par la société ALUTECH et сeux possédant les caractéristiques requises. La société ALUTECH décline toute responsabilité pour le fonction- nement du système d’entraînement lors de l’utilisation d’appareils supplémentaires fabriqués par d’autres fabricants. - Page 86 RaCCORdEMENT éLECTRIQUE CONNECTEUR CONTaCT dESCRIPTION Affichage général Entrée pour les dispositifs de commande FERMER (fig. 14, CLOSE) avec contact normalement ouvert (NO). Lors de son déclenchement, l’instruction de com- mande FERMER sera exécutée Entrée pour les dispositifs de commande STEP-BY-STEP (fig. 14, STEP-By-STEP) avec contact normalement ouvert (NO).
- Page 87 RaCCORdEMENT éLECTRIQUE CONNECTEUR CONTaCT dESCRIPTION L (L1) Sorties 230 V / 50 Hz pour alimenter les dispositifs supplémentaires. Charge maximale pas plud de 3 А Entrée de connexion du conducteur de protection d'antenne RG58 Entrée de connexion du conducteur de signal d'antenne Connecteur du raccordement d'un interrupteur avec clé (option). L’ interrupteur est installé...
-
Page 88: Réglages
RéGLaGES RéGLaGES Les réglages de la commande s’effectuent à l’aide les boutons, l’indication de réglages s’affiche sur l’écran de l’afficheur 14 (fig. 8 / 9). bouton d’entrée dans le menu de réglages et de sortie de menu — bouton de réglage et de confirmation de la valeur sélectionnée —... -
Page 89: Réglage Des Positions Finales
RéGLaGES RéGLaGE dES POSITIONS fINaLES aTTENTION ! Le réglage des positions finales diffère pour les modèles de commande à inter- rupteurs mécaniques et ceux à encodeur. aTTENTION ! Lors du réglage, l’actionnement du mouvement de la porte s’effectue à l' aide des boutons du bloc en mode manuel (appuyez et maintenez le bouton). - Page 90 RéGLaGES • Menu P1, réglage f3 pour les commandes à encodeur : aTTENTION ! L'emplacement de la commande au niveau de la porte doit se conformer au manuel d'utilisation de commande afin que, lors de l'ouverture de la porte, le sens de rotation de l'arbre sortant soit assuré. Le sens d'ouver- ture doit être réglé...
-
Page 91: Réglage De La Radiotélécommande
RéGLaGES RéGLaGE dE La RadIOTéLéCOMMaNdE Avant toute première programmation de télécommandes, effacez la mémoire du bloc de com- mande des télécommandes radio enregistrées précédemment. Si la télécommande est perdue, le numéro de la télécommande perdue doit être supprimé de la mémoire pour éviter l'accès non autorisé. - Page 92 RéGLaGES MENU P2 RÈGLaGES f1–f5 dESCRIPTION dES INSTRUCTIONS dE RadIOCOMMaNdE INSTRUCTIONS dE COMMaNdE VaLEUR éCLaIRaGE Exéсution ou aCTIVER, ou déSaCTIVER, (ACTIVER) ou aCTIVER/déSaCTIVER lors du réglage des sorties des connecteurs 7–9 (tab. 2) pour éCLaIRaGE éCLaIRaGE l'éclairage (réglages P3–f4…f6, tab. 13). (DÉSACTIVER) La désactivation automatique (durée de fonctionnement) de l' éclairage est définie par éCLaIRaGE...
- Page 93 RéGLaGES 6.2.1. MéMORISaTION dE La RadIOTéLéCOMMaNdE Si vous avez une télécommande radion précédemment enregistrée, la nouvelle mémorisation du bouton ou des boutons de la télécommande se fera par l’affectation de nouvelles instructions de commande ! no — lors de la mémorisation des télécommandes, cette indication signifie que le nombre maximal de télécommandes a été...
- Page 94 RéGLaGES f3 — La mémorisation de quatre boutons de la télécommande (b1–b4) avec n’importe quelle instruction de commande Lorsque vous accédez au réglage de tous les boutons de la télécommande (b1–b4), la valeur de l’instruction de commande par défaut sera 00. Tableau 6 Accédez au menu de réglage (tab. 3) et sélectionnez le menu P2.
- Page 95 RéGLaGES 6.2.2. MOdIfICaTION dES INSTRUCTIONS dE La TéLéCOMMaNdE RadIO MéMORISéE f4 — Modification des instructions de commande de tous les boutons de la télécommande (b1–b4) depuis le numéro enregistré de la télécommande Il est indispensable de connaître le numéro enregistré de la télécommande dans le bloc de commande ! Aucune télécommande requise.
- Page 96 RéGLaGES f5 — Modification de l’instruction de commande du bouton de la télécommande enregistrée Il est indispensable d’avoir la télécommande enregistrée ! Tableau 8 Accédez au menu de réglages (tab. 3) et sélectionnez le menu P2. Sélectionnez le réglage f5. Dès l’affichage de l’indication du réglage souhaité, appuyez sur le bouton L’indication rc s’affiche sur l'écran, ce qui signifie l’attente du signal de la télécommande...
- Page 97 RéGLaGES 6.2.4. EffaCEMENT d’UNE TéLéCOMMaNdE ET IdENTIfICaTION dU NUMéRO d’ENREGISTREMENT dE La TéLéCOMMaNdE f7 — Identification du numéro d’enregistrement de la télécommande dans la mémoire f8 — Effacement de la télécommande avec le codage Il est indispensable d’avoir la télécommande enregistrée ! Tableau 10 Accédez au menu de réglages (tab. 3) et sélectionnez le menu P2.
-
Page 98: Réglage Des Paramètres De Fonctionnement
RéGLaGES 6.2.5. EffaCEMENT dE TOUTES LES TéLéCOMMaNdES f0 — Effacement de toutes les télécommandes Toutes les télécommandes enregistrées dans le bloc de commande seront effacées ! Tableau 12 Accédez au menu de réglage (tab. 3) et choisissez le menu P2. Sélectionnez le réglage f0. Dès que l’indication du réglage souhaité s’affiche, appuyez sur le bouton Après l’affichage de l’indication dL appuyez le bouton et maintenez... - Page 99 RéGLaGES VaLEUR MENU RéGLaGE dESCRIPTION VaLEUR d’USINE Réglage de la fonction désactivation du système intégré de détection d'obstacle à l'ouverture (P5–f1). Il a pour affectation de supprimer les faux déсlenchements provoqués par le système de détection d'obstacle (P5–f1) intégré dans le bloc du système lors de l'ouverture de la porte.
- Page 100 RéGLaGES VaLEUR MENU RéGLaGE dESCRIPTION VaLEUR d’USINE Fonctionnement de sorties du connecteur 7 (tab. 2) no — désactivé Fonctionnement de sorties du connecteur 8 01…16 — décrit dans le (tab. 2) tab. 14 Fonctionnement de sorties du connecteur 9 (tab. 2) Fonctionnement de sorties SBS et OP ( tab. 2, 01 —...
- Page 101 RéGLaGES VaLEUR MENU RéGLaGE dESCRIPTION VaLEUR d’USINE Sensibilité de détection des obstacles à la no — désactivé fermeture. Lors de la fermeture, la détection 01, 02, 03,99 : d’un obstacle entraînera un arrêt et une 01 — max. ouverture ultérieure (la valeur d’ouverture est 99 —...
- Page 102 RéGLaGES VaLEUR MENU RéGLaGE dESCRIPTION VaLEUR d’USINE La hauteur à partir du sol, après laquelle le fonctionnement de l'entrée SE est déconnecté, doit être inférieure à 50 mm. Après le réglage de la fermeture de la barre palpeuse, et toute la modification (réglage) en position finale de la porte fermée, une vérification est nécessaire pour confirmer la conformité...
- Page 103 RéGLaGES VaLEUR MENU RéGLaGE dESCRIPTION VaLEUR d’USINE Temps de fonctionnement de l’éclairage no — lampe d’éclairage après l’instruction de la télécommande radio ne s'éteint pas en LIGHT Off (ALLUMER ÉCLAIRAGE. The opera- fonction du temps ting time of the lighting lamp is set in the case (ne s'éteint que sur of recording a remote control for lighting control l’instruction de la...
- Page 104 RéGLaGES Tableau 14 VaLUE dESCRIPTION Lampe de signalisation. Elle se déclenche lors du mouvement et pendant le temps différé du mouvement (P8–f2, tab. 13). La fig. 19 est un exemple de connexion de la lampe de signalisation Lampe d’éclairage. Elle se déclenche lors du mouvement et pendant le temps après l’arrêt du mouvement (P8–f3, tab. 13).
-
Page 105: Réinitialisation Aux Réglages D'usine
RéGLaGES VaLUE dESCRIPTION Position OUVERT PARTIELLEMENT (piéton) . Déclenchement en position de l’ouverture partielle après l’instruction de la commande OUVRIR PARTIELLEMENT (piéton) PHOTOTEST. Le déclenchement avant que la porte ne commence à se déplacer après n’importe quelle instruction de commande FERMER, lors du contrôle du fonctionnement du dispositif de sécurité... -
Page 106: Relevés Du Compteur De Cycles
RéGLaGES RELEVéS dU COMPTEUR dE CyCLES Le nombre à six chiffres de cycles accomplis est affiché dans le réglage lors du changement d'indication d'affichage (maximum 999 999 cycles). L'exemple montre la valeur du compteur 123 456 cycles : Tableau 16 Appuyez et maintenez le bouton pendant ~5 s, avant l’accès au menu de réglage Après l’affichage de l’indication P1 appuyez le bouton... -
Page 107: Affichage
affICHaGE affICHaGE Tableau 17 — LEDs 19 (fig. 8, 9) INSCRIPTION PURPOSE LIGHT ON LIGHT Off Instruction de la télécommande radio (diode LED s’allume en rouge, si la télécom- mande n’est pas enregistrée ou aucune instruction de commande n’a pas été attribuée Donné Is not supplied au bouton de télécommande /s’allume en vert si une instruction de commande a été... - Page 108 affICHaGE Tableau 18 — Affichage sur l’écran du panneau de configuration (fig. 8, 9) INSCRIPTION dESCRIPTION Mode de veille (un point est allumé sur l’écran) Ouverture Fermeture Position finale OUVERT (pour la commande à interrupteurs, l’entrée OP.L s’est déclenchée, connecteur 20) Position finale FERMÉ (pour la commande à interrupteurs l’entrée CL.L, connecteur 20 s’est déclenché) Position de l’ouverture partielle (piéton) (à...
-
Page 109: Vérification Et Mises En Service
VéRIfICaTION ET MISES EN SERVICE INSCRIPTION dESCRIPTION Sens incorrect de rotation de la commande (chapitre « 6.1. Réglage de la position finale de la porte » étape 2 et étape 3) Il n'y a pas de signal de l’encodeur : connexion de l’encodeur incorrecte ou cassée, dysfonctionnement. -
Page 110: Maintenance
MaINTENaNCE • Utilisant des échantillons de contrôle spéciaux, vérifiez le bon fonctionnement des photocellules (entrée PH1, tab. 2, connecteur 20) en fonction de leur conformité aux normes (EN 12453, EN 12445) et de l'absence d'interaction avec d'autres dispositifs (exigences reglémentaires doivent se conformer aux normes EN 12445). Les échantillons doivent être détectés par des photocellules sur toute la largeur de la porte. -
Page 111: Anomalies De Fonctionnement Et Recommandations De Leur Réparation
aNOMaLIES dE fONCTIONNEMENT ET RECOMMaNdaTIONS dE LEUR RéPaRaTION • Assurez-vous que les raccords filetés (boulons, vis, écrous fixant la commande, ancrage du bloc de commande, ancrage du système d’entraînement , etc.) soient correctement serrés. • Effectuez le contrôle conformément aux instructions du chapitre « 8. Vérification et la mise en service». - Page 112 aNOMaLIES dE fONCTIONNEMENT ET RECOMMaNdaTIONS dE LEUR RéPaRaTION aNOMaLIE CaUSE POTENTIELLE RECOMMaNdaTIONS La commande ne fonctionne La sélection incorrecte du Vérifiez dans le réglage P1–f0 si le pas (affichage du bloc de type de commande dans les type de commande est correcte commande Е0 ou Е5) réglages (à interrupteurs) (tab. 13)
-
Page 113: Stockage, Тransport, Recyclage
CU-TR400-868 (fig. 9). Ø6,3×32 aTTENTION ! Utilisez des fusibles remplis de sable de quartz Т 0,8 A 250 V AC (FU1) Ø5×20 pour CU-TR230-868 Pour y accéder, vous devez dévisser les deux vis 6, retirer les CU-TR230-868 / Ø6,3×32 pour CU-TR400-868 connecteurs et le couvercle 13 CU-TR400-868 (fig. 8, 9) -
Page 114: Obligations De Garantie
− n’est pas valable pour la pile d’alimentation (batterie) ; − absence du Carnet d’entretien dûment rempli. Les informations sur les services sont à l’adresse suivante : http://www.alutech-group.com/feedback/service/ Les copies des déclarations de conformité sont disponibles à l`adresse suivante : https://alutech-group.com/product/auto/automatics-promgate/DOCUMENTS/ BLOCS DE COMMANDE СU-TR230-868 / СU-TR400-868... -
Page 115: Сertificat De Mise En Service
СERTIfICaT dE MISE EN SERVICE 13. СERTIfICaT dE MISE EN SERVICE Numéro de série et date de fabrication Données de l'étiquette du produit Renseignements sur l’entreprise agrée pour l’installation et la maintenance Nom, adresse et téléphone Date d’installation Day, month, year L. S. -
Page 116: Renseignements Des Travaux Accomplis
RENSEIGNEMENTS dES TRaVaUX aCCOMPLIS 14. RENSEIGNEMENTS dES TRaVaUX aCCOMPLIS Le tab. inclut les travaux accomplis pendant l’installation et l' utilisation du produit : références de la commande, des dispositifs accessoires connectés, des dispositifs de sécurité, des réglages réa- lisés (différents des valeurs d' usine), des vérifications, de la maintenance, des modifications, etc. SIGNaTURE dU SIGNaTURE dU daTE... -
Page 117: Renseignements Sur Les Réparations Effectuées Pendant La Période De Garantie
Importateur dans IUE / Représentant autorisé du fabricant : ALUTECH Systems s.r.o., 348 02, République tchéque Bor u Tachova, CTPark Bor, Nova Hospoda 19, DS-EXIT 128 Tél. / Fax : + 420 374 6340 01, e-mail : info@cz.alutech-group.com BLOCS DE COMMANDE СU-TR230-868 / СU-TR400-868... - Page 118 aTTENTION! Dimensions in manual drawings are in millimeters. aCHTUNG! Die Abmessungen auf den Abbildungen in der Anleitung sind in Millimetern angegeben. M 1:1 aTTENTION ! Les dimensions des figures dans le présent manuel sont en millimètres. M 1:1 M 1:1 M 1:1 M 1:1 M 1:1 Control unit (1 pc.)
- Page 119 90°...
- Page 120 Electric Elektromechanischer Antrieb Commande mécanique drive Control unit Steuergerät Bloc de commande Wicket sensor Schlupftürkontakt (bei der Capteurs de portillon (when installing the wicket) Installation der Schlupftür) (lors d’installation du portillon) Weakening sensors Sensoren für Seilabspannung Capteurs d’affaiblissement (breakage) of the cable (Seilbruch) (rupture) câble Spring breakage sensors...
- Page 121 display window Displayfenster écran de l’afficheur OPEN button Taste ÖffNEN bouton OUVRIR STOP button Taste STOPP bouton STOP CLOSE button Taste SCHLIESSEN bouton FERMER black schwarz noir blue blau bleu rouge yellow gelb jaune...
- Page 124 230 V~ 230 V / 50 Hz (1N + PE) 400 V 400 V / 50 Hz (3N + PE) MENU: P1-F0-01 <50mm (NC) Spring (NC) MENU: Open (NC) P1-F0-01 OP.L <50mm (NC) Close (NC) CL.L IN_S Spring (NC) Open (NC) ENCODER OP.L Close (NC)
- Page 125 MENU: P1-F0-02 ENCODER OP.L CL.L IN_S MENU: P7-F4-02 Green Grün Vert Brown Braun Brun White Weiß Blanc...
- Page 126 – + – + MENU: P7-F3-on – – + – MENU: P3-F4-16 P7-F3-on – + – TEST NC COM TEST...
- Page 127 230 V MENU: MENU: P3-F4-01 P3-F5-02 J1.3 J2.3 J1.2 J2.2 J1.1 J2.1 Signal lamp Signalleuchte Lampe de signalisation Lighting lamp Beleuchtungslampe Lampe d’éclairage 230 V MENU: P3-F4-03 J1.3 Feu de J1.2 Traffic light Ampel signalisation J1.1 Green Grünes Licht Feu vert Rotes Licht Feu rouge MENU:...
- Page 128 230 V TL 2 TL 1 MENU: MENU: P3-F4-05 P3-F5-06 J2.3 J1.3 J1.2 J2.2 J1.1 J2.1 Feu de Traffic light Ampel signalisation Green Grünes Licht Feu vert Rotes Licht Feu rouge MENU: P3-F6-07 J3.3 230 V J3.2 J3.1 TL 1 TL 2 MENU: MENU:...
- Page 130 10, Selitskogo str. 220075, Minsk, Republic of Belarus Tel. +375 (17) 330 11 00 Fax +375 (17) 330 11 01 www.alutech-group.com Selitskogo Straße 10 220075, Minsk, Republik of Belarus Tel. +375 (17) 330 11 00 Fax +375 (17) 330 11 01 www.alutech-group.com...
Need help?
Do you have a question about the CU-TR230-868 and is the answer not in the manual?
Questions and answers