
Related Manuals for INVENTOR RG57


Summary of Contents for INVENTOR RG57
- Page 1 AIR CONDITIONING SYSTEMS HOTEL MENU • USER’S MANUAL • ΕΓΧΕΙΡΙΔΙΟ ΧΡΗΣΗΣ • MANUAL UTILIZATORULUI • BENUTZERHANDBUCH ENGLISH | ΕΛΛΗΝΙΚΑ | ROMANA | DEUTSCH...
- Page 3 CONTENTS Handling the remote controller ..................4 Remote controller specification ..................4 Features of remote controller buttons ................5 How to set up the funcitons ....................6 All the pictures in the manual are for explanatory purposes only. The actual shape of the unit you purchased may be slightly different, but the operations and functions are the same.
-
Page 4: Handling The Remote Controller
2 or 3 months. Do not dispose batteries as unsorted municipal waste. • Collection of such waste separately for special treatment is necessary. Remote controller specification RG57 / RG66 / RG10 Model 3.0V (Dry batteries R03/LR03X2) Rated Voltage Signal Receiving Range -5°C~60°C... -
Page 5: Features Of Remote Controller Buttons
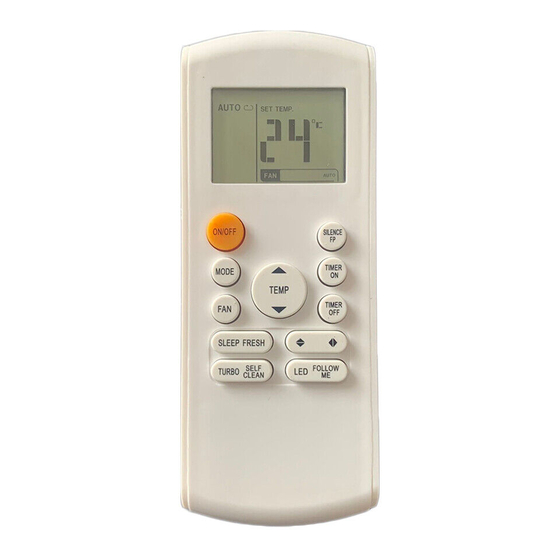
After installing the batteries and during the first 30 seconds period, press and hold the remote controller’s corresponding buttons for 5 seconds to enter the Hotel Menu settings. The LCD window will display F1. for RG57 controller: MODE, FAN and TIMER ON/OFF SHORT TIMER MODE... -
Page 6: How To Set Up The Funcitons
How to set up the functions NOTE: The indoor unit will beep for 2 seconds indicating the function being set up successfully. › Auto-start function 2. Press MODE button. Then press 1. Press ” ” & ” ” ” ” & ” ”... - Page 7 › Anti-cold air function Intelligent anti-cold air function setting: NOTE: The parameter of intelligent anti-cold air is changed with the room temperature. After the room temperature raised, the temperature of anti-cold air would raise too, which can make you feel more comfortable. After the room temperature decreased, the anti-cold air temperature would decrease too, which can improve the fan speed and bring fast heating operation.
- Page 8 2. Press MODE button. Press FAN button to to choose parameter . Then press ” ” & ” ” button to select 2 . MODE TEMP Flashing 3. Press TIMER OFF button to adjust the parameter. The parameter keeps flashing. Then press ”...
- Page 9 › Louver angle memory function 1. Press ” ” & ” ” button to choose “F5” . TEMP 2. Press MODE button. Then press ” ” & ” ” button to select “1”, “2” or “3”. MODE TEMP Indicates cancelling memory function. Indicates the louver angle memory function is enabled under switching off or power failure.
- Page 10 › Cooling temperature compensation 1. Press ” ” & ” ” button to choose “F7” . TEMP 2. Press MODE button. Then press ” ” & ” ” button to choose the parameter in a range of -2ºC~2ºC. 3. Press TIMER ON or FAN button to confirm. ›...
- Page 11 › High temperature setting 1. Press ” ” & ” ” button to choose “E3”. TEMP 2. Press MODE button. Then press ” ” & ” ” button to set the temperature in a range of 25ºC to 30ºC. 3. Press TIMER ON or FAN button to confirm. ›...
- Page 12 Point check function Press the “LED DISPLAY” button (“Mute” button for some remote controllers) of remote controller three times and then press “AIR DIRECTION” button (“Swing” button for some remote controllers) three times within 10 seconds, the buzzer ring last 2 seconds,the air conditioner will enter the information enquiry status.
- Page 13 When the air condtioner enter the information enquiry status, it will display the code value in the next 25s after display name is displayed, the details are as follows, Display Remark Enquiry Meaning information value T1,T2,T3, -1F,-1E, -25,-24,-23,-22, All the displaying temperature is actual T4,T2B,TP, TH, -1d,-1c, -21,-20...
- Page 14 ΠΕΡΙΕΧΟΜΕΝΑ Χρήση τηλεχειριστηρίου ....................15 Χαρακτηριστικά τηλεχειριστηρίου ................15 Λειτουργίες και Πλήκτρα Τηλεχειριστηρίου ..............16 Πως να ενεργοποιήσετε τις λειτουργίες ............... 17 Όλες οι εικόνες στο παρόν εγχειρίδιο εξυπηρετούν επεξηγηματικούς σκοπούς. Το προϊόν που προμηθευτήκατε μπορεί να εμφανίζει ορισμένες διαφορές ως προς το σχήμα, ωστόσο...
- Page 15 να το χρησιμοποιήσετε πάνω από 2 με 3 μήνες. • Μην απορρίπτετε τις μπαταρίες μαζί με τα οικιακά απορρίμματα. Χρίζουν ειδικής περισυλλογής. Χαρακτηριστικά Τηλεχειριστηρίου Μοντέλο RG57 / RG66 / RG10 3.0 V (Ξηρού Τύπου Μπαταρίες R03/LR03 2) Volt Εύρος Λήψης Σήματος Θερμοκρασία Περιβάλλοντος...
- Page 16 παρατεταμένα τα παρακάτω πλήκτρα* για 5 δευτερόλεπτα για να εισέλθετε στις ρυθμίσεις του Hotel Menu. Η ένδειξη στην οθόνη του χειριστηρίου θα δείξει F1. ON/OFF SHORT για χειριστήρια RG57: MODE, FAN και TIMER MODE TEMP TIMER ON TIMER για χειριστήρια RG66: MODE και FAN SLEEP για...
- Page 17 Πως να ρυθμίσετε τις λειτουργίες Σημείωση: Θα ακουστεί χαρακτηριστικός ήχος για 2 δευτερόλεπτα έως ότου η λειτουργία ενεργοποιηθεί. › Αυτόματη επανεκκίνηση 2. Πιέστε το MODE πλήκτρο και στη συνέχεια 1. Πιέστε τα πλήκτρα ” ” μέσω των πλήκτρων ” ” & ” ”...
- Page 18 › Λειτουργία Έξυπνης Προθέρμανσης Ρύθμιση λειτουργίας έξυπνης προθέρμανσης: Σημείωση: Η λειτουργία αυτή επιτρέπει την προσαρμογή της ταχύτητας του ανεμιστήρα ανάλογα με τη θερμοκρασία που έχει ο χώρος, έτσι ώστε στη λειτουργία της θέρμανσης, όταν η θερμοκρασία αρχίσει να πέφτει, αλλά δεν έχει φτάσει κάτω από την επιθυμητή, να αποτρέπει...
- Page 19 2. Πιέστε το πλήκτρο MODE και στη συνέχεια πιέστε το πλήκτρο FAN ώστε να επιλέξετε τη παράμετρο. Πιέστε τα πλήκτρα ” ” & ” ” ταυτόχρονα για να διαλέξτε το «2». MODE TEMP Flashing 3. Πιέστε το πλήκτρο TIMER OFF για να προσαρμόσετε τη παράμετρο η οποία θα αρχίσει να...
- Page 20 › Απομνημόνευση Θέσης Περσίδας 1. Πιέστε τα πλήκτρα ” ” & ” ” ταυτόχρονα για να επιλέξτε τη λειτουργία F5. TEMP 2.Πιέστε το πλήκτρο MODE και στη συνέχεια πιέστε τα πλήκτρα ” ” & ” ” ταυτόχρονα ώστε να διαλέξτε μεταξύ των «1» , «2» , «3». MODE TEMP Δηλώνει...
- Page 21 › Ρύθμιση της Διαφοράς Θερμοκρασίας Μεταξύ του Αισθητηρίου της μονάδας & της πραγματικής θερμοκρασίας του Χώρου κατά τη Ψύξη 1. Πιέστε τα πλήκτρα ” ” & ” ” ταυτόχρονα για να επιλέξτε τη λειτουργία F7. TEMP 2. Πιέστε το πλήκτρο MODE και στη συνέχεια πιέστε τα πλήκτρα ” ”...
- Page 22 › Ρύθμιση Ορίου Υψηλότερης Θερμοκρασίας 1. Πιέστε τα πλήκτρα ” ” & ” ” ταυτόχρονα για να επιλέξτε τη λειτουργία Ε3. TEMP 2. Πιέστε το πλήκτρο MODE και στη συνέχεια πιέστε τα πλήκτρα ” ” & ” ” ταυτόχρονα ώστε να διαλέξτε μεταξύ του εύρους 25°C – 30°c. 3.
- Page 23 Λειτουργία Point Check Πιέστε το “LED DISPLAY’’ πλήκτρο (“MUTE’’ πλήκτρο για μερικά τηλεχειριστήρια) του τηλεχειριστηρίου 3 φορές και έπειτα πιέστε το “AIR DIRECTION’’ πλήκτρο (‘’SWING’’ πλήκτρο για μερικά τηλεχειριστήρια) 3 φορές μέσα σε 10 δευτερόλεπτα, ο χαρακτηριστικός ήχος διαρκεί 2 δευτερόλεπτα, το κλιματιστικό θα εισάγει τη πληροφορία στο...
- Page 24 Όταν το κλιματικό εισάγει τη ΄΄ζητούμενη πληροφορία΄΄, θα εμφανίσει ο κωδικός στα επόμενα 25 δευτερόλεπτα αφότου έχει εμφανιστεί η κατάσταση λειτουργίας και οι λεπτομέρειες εμφανίζονται παρακάτω: Ζητούμενη Πληροφορία Τιμή Ερμηνεία Παρατηρήσεις Τ1,Τ2,Τ3,Τ4,Τ2Β,ΤP,TH, -1F, -1E, -1d,- -25, -24, -23,-22,-21,-20 Επιθυμητή Συχνότητα, 1c,-1b,-1A 1.
- Page 25 CUPRINS Prezentarea telecomenzii ....................26 Specificatii ........................... 26 Caracteristicile si butoanele telecomenzii ..............27 Selectarea functiilor ......................28 Toate imaginile din acest manual, au scop pur informativ. Forma reala a produsului pe care l-ati cumparat poate fi usor diferita insa functiile si operatiile sunt aceleasi. Compania nu isi asuma nici o responsabilitate pentru greselile de tipar.
-
Page 26: Prezentarea Telecomenzii
• In cazul incare nu veti folosi aparatul pentru o perioada de 2-3 luni, scoatei bateriile din telecomanda. • Nu aruncati bateriile impreuna cu deseurile menajere. Aceste produse se vor colecta separat. Specificatii RG57 / RG66 / RG10 Model 3.0V (Acumulatori uscati R03/LR03X2) Tensiune nominala Distanta maxima transmitere semnal -5°C~60°C... -
Page 27: Caracteristicile Si Butoanele Telecomenzii
Dupa instalarea bateriilor si in primele 30 de secunde, tineti apasate butoanele corespunzatoare ale telecomenzii* timp de 5 secunde pentru a intra in setarile Hotel Menu. Afisajul LCD va afisa codul F1. pentru controlerul RG57: MOD, FAN și ON/OFF SHORT TIMER ON TIMER MODE pentru controlerul RG66: MODE și FAN... -
Page 28: Selectarea Functiilor
Selectarea functiilor NOTA: Pentru a confirma setarea aleasa, unitatea interioara va emite un semnal sonor de 2 secunde. › Auto-start function 2. Apasati butonul MODE. Apoi apasati 1. Apasati butoanele ” ” & ” ” pentru a alege “On” sau “Off”. ”... - Page 29 › Functia anti-aer rece Setarea functiei inteligente anti-aer rece: NOTA: Parametrii functiei inteligente anti-aer rece, se vor schimba in functie de temperatura incaperii. Dupa ce temperatura incaperii a crescut, temperatura nominala a functiei va creste, pentru sporirea confortului. Atunci cand temperatura incaperii va scadea, temperatura nominala va scadea de asmenea, pentru cresterea turatiei ventilatorului si pentru o incalzire rapida.
- Page 30 2. Apasati butonul MODE si butonul FAN pentru a alege parametrul. Apoi apasati ” ” & ” ” pentru a alege intre 2. MODE TEMP Intermitent 3. Apasati butonul TIMER OFF pentru modificarea parametrului, acesta va fi afisat intermitent. Apoi apasati ” ”...
- Page 31 › Functia de memorare a unghiului flapsului 1. Apasati butonul ” ” & ” ” si selectati “F5” . TEMP 2. Apasati butonul MODE. Apoi apasati ” ” & ” ” si selectati “1”, “2” sau “3”. MODE TEMP Indica anularea functiei de memorare. Indica faptul ca functia de memorare a pozitiei flapsului a fost activata, in cazul opririi aparatului sau in cazul unei pene de curent.
- Page 32 › Compensare temperatura racire. 1. Apasati butonul ” ” & ” ” si selectati “F7” . TEMP 2. Apasati butonul MODE. Apoi apasati ” ” & ” ” si selectati parametrul intre valorile urmatoare: -2ºC~2ºC. 3. Apasati TIMER ON sau FAN pentru confirmare. ›...
- Page 33 › Setare pentru temperatura ridicata 1. Apasati butonul ” ” & ” ” si selectati “E3”. TEMP 2. Apasati butonul MODE. Apoi apasati ” ” & ” ” si selectati temperatura intre 25ºC si 30ºC. 3. Apasati TIMER ON sau FAN pentru confirmare. ›...
- Page 34 Functia de verificare punctuala Apasati butonul “LED DISPLAY” (sau butonul “MUTE” in functie de telecomanda), de 3 ori si dupa aceea apasati butonul “AIR DIRECTION” (sau butonul “SWING” in functie de telecomanda). Dupa 10 secunde, veti auzi o notificare sonora si aparatul de aer conditionat va intra in starea in starea de verificare.
- Page 35 Cand aparatul intra in starea “Verificare”, acesta va afisa valoarea fiecarui cod in urmatoarele 25s. Mai multe informatii veti gasi in tabelul de mai jos: Semnificatie Informatia Valoare Note verificata afisata T1,T2,T3, -1F,-1E, -25,-24,-23,-22, 1. Temperatura absouluta afisata T4,T2B,TP, TH, -1d,-1c, -21,-20 reprezinta valoarea efectiva.
- Page 36 INHALT Handhabung der Fernbedienung ..................37 Technische Daten der Fernbedienung ................37 Eigenschaften der Tasten der Fernbedienung ............... 38 Einrichten der Funktionen ....................39 Die Abbildungen in diesem Handbuch dienen lediglich zur Erläuterung der Funktionen. Die tatsächliche Form der Einheit, die Sie gekauft haben, kann etwas abweichen, aber die Bedienung und Funktionen sind gleich.
-
Page 37: Handhabung Der Fernbedienung
3 Monate lang nicht benutzt werden sollen. Entsorgen Sie Batterien nicht als unsortierten Siedlungsabfall. • Derartige Abfälle müssen getrennt gesammelt und einer speziellen Behandlung zugeführt werden. Spezifikation der Fernbedienung RG57 / RG66 / RG10 Modell Spannung 3.0V (Trockenbatterien R03/LR03X2) Signalempfangsbereich 8m -5°C~60°C... -
Page 38: Eigenschaften Der Tasten Der Fernbedienung
Fernbedienung und halten Sie sie 5 Sekunden lang gedrückt, um die Einstellungen des Hotelmenüs aufzurufen. Im LCD-Fenster wird F1 angezeigt. ON/OFF SHORT TIMER MODE für RG57-Steuerung: MODE, FAN und TIMER TEMP TIMER für RG66-Steuerung: MODUS und LÜFTER SLEEP für RG10-Steuergerät: POWER und SWING TURBO Vane... -
Page 39: Einrichten Der Funktionen
Einrichtung der Funktionen HINWEIS: Das Innengerät piept 2 Sekunden lang, um anzuzeigen, dass die Funktion erfolgreich eingerichtet wurde. › Auto-Start-Funktion 2. Drücken Sie die MODE-Taste. Drücken Sie dann die Tasten 1. Drücken Sie die Tasten ” ” & ” ” , um “Ein” oder “Aus” zu wählen. ”... - Page 40 › Anti-Kaltluft-Funktion Intelligente Einstellung der Anti-Kaltluft-Funktion: HINWEIS: Der Parameter der intelligenten Anti-Kaltluft-Funktion wird mit der Raumtemperatur geändert. Nach die Raumtemperatur gestiegen ist, steigt auch die Temperatur der Anti-Kälte-Luft, was Sie sich wohler fühlen. Wenn die Raumtemperatur sinkt, sinkt auch die Temperatur des Kälteschutzes. die Temperatur des Kälteschutzes ab, was die Ventilatorgeschwindigkeit erhöht und einen schnellen Betrieb.
- Page 41 2. Drücken Sie die Taste MODE. Drücken Sie die FAN-Taste, um den Parameter auszuwählen. Drücken Sie dann die Tasten ” ” & ” ”Taste, um 2 zu wählen. MODE TEMP Flashing 3. Drücken Sie die Taste TIMER OFF, um den Parameter einzustellen. Der Parameter blinkt weiter.
- Page 42 › Lamellenwinkelspeicherfunktion 1. Drücken Sie die Tasten ” ” & ” ” , um “F5” auszuwählen. TEMP 2. Drücken Sie die MODE-Taste. Drücken Sie dann die Tasten ” ” & ” ” , um “1”, “2” oder “3” zu wählen. MODE TEMP Zeigt an, dass die Speicherfunktion deaktiviert ist.
- Page 43 › Kühltemperaturkompensation 1. Drücken Sie die Tasten ” ” & ” ” , um “F7” zu wählen. TEMP 2. Drücken Sie die MODE-Taste. Drücken Sie dann die Tasten ” ” & ” ” , um den Parameter in einem Bereich von -2ºC~2ºC auszuwählen. 3.
- Page 44 › Einstellung der hohen Temperatur 1. Drücken Sie die Tasten ” ” & ” ”, um “E3” zu wählen. TEMP 2. Drücken Sie die MODE-Taste. Drücken Sie dann die Tasten ” ” & ” ”, um die Temperatur in einem Bereich von 25ºC bis 30ºC einzustellen 3.
- Page 45 Punktprüfungsfunktion Drücken Sie die Taste “LED DISPLAY” (bei einigen Fernbedienungen die Taste “Mute”) der Fernbedienung dreimal und dann die Taste “AIR DIRECTION” (bei einigen Fernbedienungen die Taste “Swing”) dreimal innerhalb von 10 Sekunden, der Summer ertönt 2 Sekunden lang. Das Klimagerät wechselt in den Status der Informationsabfrage. Danach drücken Sie die “LED DISPLAY”...
- Page 46 Wenn das Klimagerät den Status der Informationsabfrage aufruft, wird der Codewert in den nächsten 25 Sekunden nach der Anzeige des Namens angezeigt, die Details sind wie folgt, Display Bedeutung Anmerkung Informationen zur Umfrage Bedeutung T1,T2,T3, -1F,-1E, -25,-24,-23,-22, Die angezeigte Temperatur ist der T4,T2B,TP, TH, -1d,-1c, -21,-20...
- Page 48 AIR CONDITIONING SYSTEMS HOTEL MENU V:1.0.092021 INVENTOR A.G. S.A. Manufacturer: 24th km National Road Athens - Lamia & 2 Thoukididou Str., Ag.Stefanos, 14565 Tel.: +30 211 300 3300, Fax: +30 211 300 3333 - www.inventor.ac...
Need help?
Do you have a question about the RG57 and is the answer not in the manual?
Questions and answers