Advertisement
Table of Contents
Advertisement
Table of Contents

Related Manuals for Mastervolt CHARGEMASTER 12/25-3


Summary of Contents for Mastervolt CHARGEMASTER 12/25-3
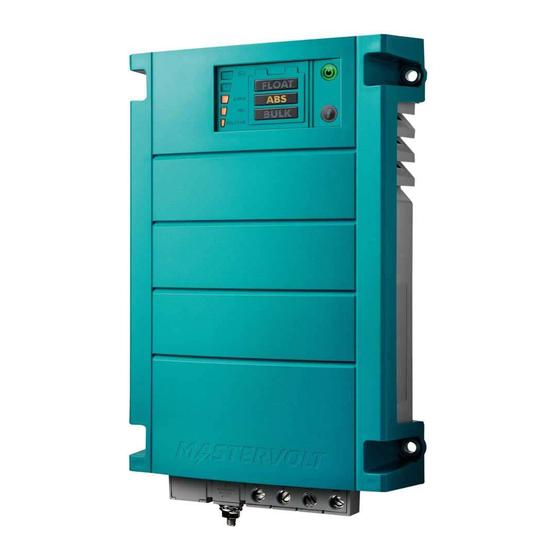
- Page 1 USERS MANUAL CHARGEMASTER 12/25-3, 24/12-3 FULL AUTOMATIC BATTERY CHARGER...
- Page 2 TABLE OF CONTENTS TABLE OF CONTENTS: 10000001811/01 - August 2015 GENERAL INFORMATION .............................. 3 Use of this manual .............................. 3 Validity of this manual ............................3 Use of pictograms .............................. 3 Identification label ...............................
-
Page 3: General Information
Important Safety Instructions. Copyright © 2015 Mastervolt. All rights reserved. Reproduction, transfer, distribution or storage of part or all of the contents in this document in any form without the IP 23 prior written permission of Mastervolt is prohibited. -
Page 4: Operation
OPERATION 2 OPERATION FEATURES POWER LED The Mastervolt Chargemaster is a fully automatic battery (NO BUTTON) Green = on, charger. This means that under normal circumstances it Red = standby. may stay switched on with the AC power and batteries Blinking red = failure connected. -
Page 5: Three Step Charge Algorithm
The Chargemaster is compatible with the MasterBus automatic stages: BULK, ABSORPTION and FLOAT. network: fully decentralized data network communication between the different Mastervolt system devices such as the inverter, battery charger, generator, BATTERY VOLTAGE batteries and many more. See APPENDIX for details. MAINTENANCE ABSORPTION BULK FLOAT No specific maintenance to the ChargeMaster is required. -
Page 6: Installation
If such interference appears, it is recommended to increase The fuse with the fuse-holder is available from your local the separation between the Chargemaster and the Mastervolt distributor or Customer Service Representative. equipment, to relocate the receiving antenna or to... -
Page 7: Batteries
Tools to fix the screws / bolts (Ø 4.5mm) with plugs to mount the enclosure to a surface BATTERIES Always follow the instructions published by battery manufacturer. The minimum required battery capacity for Mastervolt gel batteries (MVG series) is as follows: Model Minimum required battery Chargemaster capacity (MVG series) -
Page 8: Connection
INSTALLATION CONNECTION CAUTION! Too-thin cables and/or loose connections can cause dangerous overheating of the cables WARNING and/or terminals. Therefore tighten Let installation work be done by a licensed connections well, in order to limit transition electrician. resistance as far as possible. Use cables of All electrical systems (AC and DC) must be the correct size. -
Page 9: Installation Step By Step
INSTALLATION INSTALLATION STEP BY STEP Attach the battery temperature sensor to the casing of battery bank 1. Mark the position of the four mounting spots. Plug the temperature sensor cable into the Then fix the charger to the wall. “temp.sensor” jack. Fit boot lace ferrules to the DC-cables. -
Page 10: Commissioning After Installation
Always use the original packing for transportation. Contact Chargemaster. your local Mastervolt Service Centre for further details if you want to return the apparatus for repair. WARNING When placing this fuse, a spark can occur, 3.12 RE-INSTALLATION... -
Page 11: Settings
Press the SET button (Figure 2) shortly for 5 times; the the actual setting for the Energy saving mode is Setting Charge program: shown: On = Mastervolt MLi battery (Li-ion) 2-step On: Constant voltage charging Setting Yellow LED’s (13.8/27.6V) -
Page 12: Equalize Mode
SETTINGS Minimum battery capacity to meet the requirements of the mode should only be executed by trained technical CEC regulations: engineers. The equalizing mode can only be started when the Model Chargemaster Battery capacity Chargemaster is in operation and in Float mode. The 12/25-3 >200Ah equalize mode can only be started by means of MasterBus... - Page 13 SETTINGS 4.3.1 Monitoring Value Meaning Default Adjustable range General State Shows charger state (Charging / Stand by / Alarm) (read only) On/Stand-by Button to toggle the charger state On / Stand-by Input current Option to set the maximum AC input current to prevent a 8.0A 0.0 –...
- Page 14 SETTINGS 4.3.4 Configuration Below parameters can be changed via the MasterBus network by means of a remote control panel or by means of an interface connected to a PC with MasterAdjust software. See applicable user’s manuals for details. Value Meaning Factory setting Adjustable.
- Page 15 SETTINGS Value Meaning Factory setting Adjustable. range Equalize mode Shows whether the Equalize mode is active (“On”) or not (read only) (“Off”) Equalize Button to start the equalize mode manually See section Button 4.2. The equalize mode can only be started when the charger is in the Float stage.
- Page 16 SETTINGS Value Meaning Factory setting Adjustable. range Events Event x source Disabled (See List of event Event-based command Event by the ChargeMaster that should result in an sources, section action by another device on the MasterBus network. 4.3.6) Event x target (See Device list) Event-based command Selection of device on the MasterBus network that...
-
Page 17: Trouble Shooting
Centre. Firmware version; double click on ChargeMaster icon Make sure you have the following information present in MasterView System software Configuration. if you have to contact your local Mastervolt Service Center to solve a problem: Malfunction Possible cause What to do... -
Page 18: Technical Data
TECHNICAL DATA 6 TECHNICAL DATA SPECIFICATIONS Model 12/25-3 24/12-3 Article no. 44010250 44020120 Nominal input voltage**: 120/230V 120/230V Nominal input frequency: 50/60Hz 50/60Hz Full load consumption: 450VA 435VA Efficiency at full load (@ 230V AC): ≥81% (V =13.25V, I =25A) ≥84% (V =26.5V, I =12A) -
Page 19: Dimensions
TECHNICAL DATA DIMENSIONS Figure 13: Dimensions in mm [inch] Chargemaster models 12/25-3 and 24/12-3 CORRECT DISPOSAL OF THIS PRODUCT (WASTE ELECTRICAL & ELECTRONIC EQUIPMENT) This product is designed and manufactured with high quality materials and components, which can be recycled and reused. When this crossed-out wheeled bin symbol is attached to a product, it means the product is covered by the European Directive 2012/19/EU. -
Page 20: Ordering Information
77040000 MasterBus Terminator Mastervolt offers a wide range of products for your electrical installation, AGM, Gel and MLi (Li-ion) batteries, shore power connections, DC distribution kits and many more. Shop the largest selection of reliable marine electronics and navigation in our online store.
Need help?
Do you have a question about the CHARGEMASTER 12/25-3 and is the answer not in the manual?
Questions and answers
How to set for lithium battery charging