Table of Contents
Advertisement
Quick Links
Advertisement
Table of Contents

Related Manuals for Tiger TIGERFLEX ZORA


Summary of Contents for Tiger TIGERFLEX ZORA
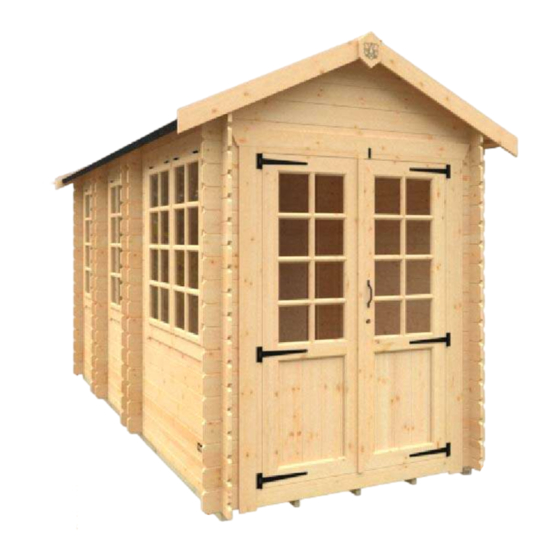
- Page 1 TIGERFLEX® ZORA LOG CABIN 14’x6’ GENERAL ASSEMBLY INSTRUCTIONS...
-
Page 2: Before You Get Started
BEFORE YOU GET STARTED PLEASE READ INSTRUCTIONS CAREFULLY • Check the pack and make sure you have all the parts listed. • When you are ready to start, make sure you have the right tools at hand (not supplied). • Ensure there is plenty of space and a clean dry area for assembly. TIMBER As with all natural materials, timber can be affected during various weather conditions. - Page 3 We understand how busy life can be: our Pro-Installation service can take the stress and strain out of assembling your quality Tiger building for you. We recommend using professional and dedicated installers to erect your building. With their knowledge and experience, they will ensure that your cabin is put properly in place ready for you to enjoy your space for years to come.
-
Page 4: Tools Required
BEFORE YOU GET STARTED TOOLS REQUIRED We recommend using the following tools (not supplied): HAMMER RUBBER MALLET DRILL LADDER TAPE MEASURE SHARP KNIFE SPIRIT LEVEL SCREWDRIVER + WOOD SAW FIXING PACK CONTENTS: 13mm Galvanised Clout Nails 25mm Black Screws 40mm Screws (C13) x80 (S25) x16 (S40) x24... - Page 5 Please retain instructions for future reference BUILDING PACK CONTENTS: For full details of what should be included please see the Module Pack List that is supplied with the delivery. They are also available on request in pdf form from our helpful Customer Support team – please call 0113 2054189 for Customer Support or use the Items Delivered Query form at tigersheds.com/contact.
- Page 6 BEFORE YOU GET STARTED - PRE ASSEMBLY Flexible Format: DOOR & WINDOW POSITIONING (MODULE PACKS: A, B, C, D, E & Q) • Lay out the module packs supplied in the position you would like them to be constructed. See following examples for some inspiration. •...
- Page 7 Please retain instructions for future reference...
- Page 8 BEFORE YOU GET STARTED - PRE ASSEMBLY tigersheds.com 0113 205 4189 sales@tigersheds.com...
- Page 9 Please retain instructions for future reference...
- Page 10 14’x6’ TIGERFLEX ZORA LOG CABIN INSTRUCTIONS ® Step 1: FLOOR BEARER ASSEMBLY (MODULE PACKS: H, J & Q) • Layout floor bearers as shown. (Pic A) • Assemble inner bearers & floor joists (S35) using 4x 35mm screws (3 Required). •...
- Page 11 Please retain instructions for future reference Step 2: FLOOR ASSEMBLY (MODULE PACKS: H & J) • Place half logs as shown - 2x 1750mm & 4x 1150mm Required. • Secure to tanalised floor bearer through notch at end using 1x 50mm (S50) screws per notch.
- Page 12 14’x6’ TIGERFLEX ZORA LOG CABIN INSTRUCTIONS ® Step 3: FLOOR ASSEMBLY (MODULE PACK: B) • Take 4 full logs from Module Pack B and slot them into place as shown. Do not secure with screws. • Decide at this point where you would like your door to be positioned. If you plan on having it on one of the gable ends, place your first floorboard at the door end chosen.
- Page 13 Please retain instructions for future reference Step 5: FLOOR ASSEMBLY • Measure corner to corner diagonally to make sure cabin floor is square. If both values are equal, your frame is square. Make any adjustments if required until values are equal. Step 6: FLOOR ASSEMBLY (MODULE PACKS: H, J &...
- Page 14 14’x6’ TIGERFLEX ZORA LOG CABIN INSTRUCTIONS ® Step 7: WALL ASSEMBLY STAGE 1 (MODULE PACKS: A, B, C, D, E, F, Q & T) • For central sections, use notched logs from Module Pack Q. Cut Log x 2 • Secure through notch into log below using 1x 50mm (S50) screw per notch, then secure into floorboards.
- Page 15 Please retain instructions for future reference Step 8: WALL ASSEMBLY STAGE 2 (MODULE PACKS: A, B, C, D, E, F, Q & T) • Once 6 logs high, use 274mm cut logs to start building window frame. • Secure through notch into log below using 1x 50mm (S50) screw.
- Page 16 14’x6’ TIGERFLEX ZORA LOG CABIN INSTRUCTIONS ® Step 9: WALL ASSEMBLY STAGE 3 (MODULE PACKS: A, B, C, D, E, F, Q & T) • Continue log fitting process to build remaining walls. Continue to tie the side walls together using 190mm spacers every 3rd log fitted using 2x 35mm (S35) screws.
-
Page 17: Roof Panel Installation
Please retain instructions for future reference Step 10: Use a spirit level to draw a guide line for drilling through into walls. ROOF PANEL INSTALLATION (MODULE PACK: K & L) • “Hook” roof panels into notches at apex of gable tops. •... - Page 18 14’x6’ TIGERFLEX ZORA LOG CABIN INSTRUCTIONS ® Step 11: WINDOW & DOOR FASCIA ASSEMBLY (MODULE PACKS: Window - FXCW3 & W, FXCW4 & V | Door - FXCD2 & U) • Take window frame and attach the front fascia only. On a door, the front side fascia’s are the longer of the two. •...
-
Page 19: Window Installation
Please retain instructions for future reference Step 12: WINDOW INSTALLATION • Offer window up to the opening as shown. • Make sure window is positioned centrally, resting on the last full log within the opening. Note: There will be a gap either side to allow for settling. (S35) •... - Page 20 14’x6’ TIGERFLEX ZORA LOG CABIN INSTRUCTIONS ® Step 14: INTERNAL FIXINGS (MODULE PACKS: H, J, X & Y) • Secure corner battens in place as shown. (Pic N) Battens are in 2 pieces so need to be butted together. Secure to gable walls using 4x 50mm (S50) screws per corner (2 per batten) Secure to side walls using 4x 35mm...
- Page 21 Please retain instructions for future reference Step 15: JOINTING FASCIA BOARDS (MODULE PACKS: N) • Secure cover fascia’s internally & externally as shown between the side module joins. • Butt top fascia flush with roof and secure in place using 4x 35mm (S35) screws Note: Angle edge must be as shown to stop water ingress.
- Page 22 14’x6’ TIGERFLEX ZORA LOG CABIN INSTRUCTIONS ® Step 16: FELTING THE ROOF • Roll out felt along lower part of roof, leaving sufficient overhang to fold down onto roof edge. Note: Do not fold underneath roof. (C13) • Use clout nails to tack top of felt section 1 to the roof panels.
-
Page 23: Maintenance
NEED HELP? If you need any help with parts of the build please see the handy HELP section on the Tiger website which has articles, guides and videos that may help you. If you have other questions, please call 0113 2054189 for Customer Support or use the Items Delivered Query form at tigersheds.com/contact. - Page 24 Local Display Agent Woodlands DIY Store Station Yard, Horsforth, Leeds, LS18 5NZ Telephone: 0113 205 4189 Website: tigersheds.com Email: customersupport@tigersheds.com...
Need help?
Do you have a question about the TIGERFLEX ZORA and is the answer not in the manual?
Questions and answers