Advertisement
Advertisement
Table of Contents

Related Manuals for Tiger TIGERFLEX SHIPLAP APEX SHED


Summary of Contents for Tiger TIGERFLEX SHIPLAP APEX SHED
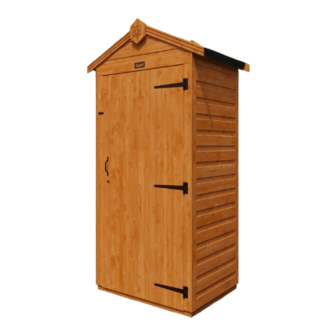
- Page 1 TIG/INS02 TIGERFLEX® SHIPLAP APEX SHED GENERAL ASSEMBLY INSTRUCTIONS...
-
Page 2: Before You Get Started
BEFORE YOU GET STARTED PLEASE READ INSTRUCTIONS CAREFULLY • Check the pack and make sure you have all the parts listed. • When you are ready to start, make sure you have the right tools at hand (not supplied). • Ensure there is plenty of space and a clean dry area for assembly. TIMBER As with all natural materials, timber can be affected during various weather conditions. - Page 3 Please retain instructions for future reference CAUTION: CAUTION: All buildings should be erected It is advisable to wear gloves by two competent adults. during building installation. MADE IN THE UK SINCE 1913. We have been making our high quality, great value garden buildings here in Britain for decades.
-
Page 4: Tools Required
BEFORE YOU GET STARTED - PRE ASSEMBLY TOOLS REQUIRED: We recommend using the following tools (not supplied): HAMMER RUBBER MALLET DRILL LADDER TAPE MEASURE SHARP KNIFE SPIRIT LEVEL SCREWDRIVER + WOOD SAW HACKSAW SPANNER FIXING KIT GUIDES: FX01 - NAIL KIT TIGERFLEX ®... - Page 5 Please retain instructions for future reference ALL WINDOWS MUST BE SEALED INSIDE AND OUT WITH SILICONE, PUTTY, OR ANY OTHER WATER-TIGHT SOLUTION. (NOT SUPPLIED). CONTACT OUR FRIENDLY CUSTOMER SERVICE TEAM TO ORDER YOUR SEALANT KIT. BUILDING PACK CONTENTS: For full details of what should be included please see the itemised packing list that is supplied with the delivery. They are also available on request in pdf form from our helpful Customer Support team –...
- Page 6 BEFORE YOU GET STARTED - PRE ASSEMBLY TIGERFLEX APEX PRODUCT RANGE ® GUIDANCE: This guide provides assembly information for the TigerFlex Apex Building range of products. Images are for ® reference only and may vary from the product you have ordered. If you have any issues, please contact our customer service team.
- Page 7 Please retain instructions for future reference What Is TigerFlex ® The original modular shed range, TigerFlex sheds let you choose where you want to place the door and the ® windows, giving you the flexibility to decide how you want your shed to look and feel for your garden, for storage, for work or for leisure.
- Page 8 TIGERFLEX SHIPLAP APEX GENERAL ASSEMBLY GUIDE ® ELEVATED VIEW FLOOR PLAN VIEW ELEVATED VIEW WINDOW PANEL DOOR PANEL FLOOR PLAN VIEW 600mm BLANK PANEL 1150mm BLANK PANEL tigersheds.com 0113 205 4189 sales@tigersheds.com...
-
Page 9: Floor Panel Installation
Please retain instructions for future reference Step 1: FLOOR PANEL INSTALLATION • Lay out floor panels supplied as shown below. NOTE: SINGLE FLOOR MODEL SHOWN FOR REFERENCE. NOTE: CHECK YOUR PRODUCT FLOOR SIZE FOR THE CORRECT DIAGRAM. • Please ensure floors in multiple panels are butted up tightly with no gaps. •... - Page 10 TIGERFLEX SHIPLAP APEX GENERAL ASSEMBLY GUIDE ® SINGLE FLOOR 2x3, 3x3, 4x3, 4x4, 4x6 FLOOR PANEL DOUBLE FLOOR 5x3, 6x3, 7x3, 8x3, 8x4, 8x6 FLOOR PANEL FLOOR PANEL MULTI FLOOR 12x4 & 12x6 FLOOR PANEL FLOOR PANEL FLOOR PANEL tigersheds.com 0113 205 4189 sales@tigersheds.com...
- Page 11 Please retain instructions for future reference Step 2: REMOVE TRANSPORT BLOCKS • Make sure transport blocks have been removed from side panels before assembly. (Detail B) NOTE: HAMMER OFF SIDEWAYS. DO NOT PRISE OFF.
-
Page 12: Side Panel Assembly
TIGERFLEX SHIPLAP APEX GENERAL ASSEMBLY GUIDE ® Step 3: SIDE PANEL ASSEMBLY • Secure side panels to each other in corners using 3x S50 evenly spaced per join. (Detail C1) • Secure side panels to each other using 3x S50 evenly spaced per join. (Detail C2) •... -
Page 13: Door Installation
Please retain instructions for future reference Step 4a: DOOR INSTALLATION SINGLE DOOR INSTALLATION • Place door in desired position. NOTE: DOOR SHOWN IN RIGHT HAND HINGE POSITION. • Leave Approx 2mm gap at side between door and door panel. • Leave Approx 6mm gap at top between door and door panel. - Page 14 TIGERFLEX SHIPLAP APEX GENERAL ASSEMBLY GUIDE ® Step 4b: DOUBLE DOOR INSTALLATION • Double Doors pre-fitted to frame in factory. • Cut 1x extra corner strip (Plain profile) to size of door height. Secure to RH door using 4x BS25. (Detail E) •...
- Page 15 Please retain instructions for future reference Step 4d: SINGLE SECURITY DOOR INSTALLATION • Fix Door Panel in place, See Single Door Installation. (See Step 4a) • Check you have all components before starting. • Fix wooden blocks (105mm x 44mm x 27mm) before drilling & fixing screws and bolts. (Detail F1) •...
- Page 16 TIGERFLEX SHIPLAP APEX GENERAL ASSEMBLY GUIDE ® Step 4e: DOUBLE SECURITY DOOR INSTALLATION • Check you have all components before starting. • Choose where you want the padlock to be positioned. • Mark the position of the holes required for the hinge plate. Line up plate with edge of door. Secure in place with 4x screws.
- Page 17 Please retain instructions for future reference Step 5: INSTALL GABLE TOPS • Fix gable tops to the existing built structure. Secure through side panels using 2x S50 per Gable top. (Detail H)
- Page 18 TIGERFLEX SHIPLAP APEX GENERAL ASSEMBLY GUIDE ® Step 6: INSTALL APEX TRUSS • Fix apex truss to the existing built structure. • For single apex truss models, position truss as shown. (Detail I1) NOTE: MODEL SIZES 8X4W & 8X6W • For double apex truss models, position each truss as shown.
- Page 19 Please retain instructions for future reference Step 8: FIT ROOF PANELS • Attach roof panels as shown. There will be a slight gap between the roof panels at the apex of shed. (Detail K1) • Secure apex purlins by pushing panels together and fixing with 4x N65 evenly spaced along length per panel. (Detail K2) TOP TIP You may need someone to hold roof panels together while you secure roof panels at the apex.
- Page 20 16ft plus overhangs at each end. This is to be cut into two lengths, see table above, by the customer to provide the correct coverage. Tiger sheds provide the 0.5m wide felt cut to length. (see table above) tigersheds.com 0113 205 4189 sales@tigersheds.com...
- Page 21 Please retain instructions for future reference Step 10: FIT BARGEBOARDS & FINIAL • Fit bargeboards to the roof panels, trapping overhanging end of the felt in between the roof panel and bargeboard. Secure using 2x N40 per bargeboard through roof panel. •...
- Page 22 TIGERFLEX SHIPLAP APEX GENERAL ASSEMBLY GUIDE ® Step 11: FIT COVER LATS • Install cover lats as shown. • Secure to side panel over joins using 4x N40 evenly spaced per cover lat. (Detail M) NOTE: THESE ARE GROOVED BOTH SIDES. NOT TO BE CONFUSED WITH BARGEBOARDS •...
- Page 23 Please retain instructions for future reference Step 12: INSTALLING DOOR PULL • Find comfortable height for supplied pull door handle. • Secure handle to door using 4x 25mm (BS25) screws in the holes provided. • If door is made from interlocking boards and your chosen handle position does not match with existing door bracing, use supplied 150mm framing to fix handle screws into.
- Page 24 TIG/INS02 Head Office TO VIEW GENERAL ASSEMBLY GUIDE FOR TIGERFLEX APEX ROOF SHED Calverley Lane, ® Rodley, Leeds, West Yorkshire, LS13 1NP Telephone: 0113 205 4189 Website: tigersheds.com Email: customersupport@tigersheds.com TO SEE GENERAL ACCESSORY & INSTALLATION VIDEO LIBRARY...
Need help?
Do you have a question about the TIGERFLEX SHIPLAP APEX SHED and is the answer not in the manual?
Questions and answers