
Related Manuals for H3C WA5320X


Summary of Contents for H3C WA5320X
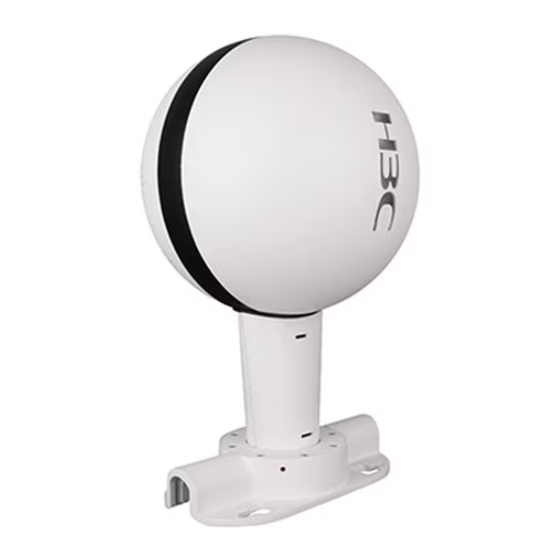
- Page 1 H3C WA5320X Access Point Installation Guide New H3C Technologies Co., Ltd. http://www.h3c.com Document version: 6W100-20200707...
- Page 2 The information in this document is subject to change without notice. All contents in this document, including statements, information, and recommendations, are believed to be accurate, but they are presented without warranty of any kind, express or implied. H3C shall not be liable for technical or editorial errors or omissions contained herein.
- Page 3 Preface This installation guide describes the installation procedure for the H3C WA5320X access point. This preface includes the following topics about the documentation: • Audience. • Conventions. • Documentation feedback. Audience This documentation is intended for: • Network planners. •...
- Page 4 Symbols Convention Description An alert that calls attention to important information that if not understood or followed WARNING! can result in personal injury. An alert that calls attention to important information that if not understood or followed CAUTION: can result in data loss, data corruption, or damage to hardware or software. An alert that calls attention to essential information.
- Page 5 Documentation feedback You can e-mail your comments about product documentation to info@h3c.com. We appreciate your comments.
-
Page 6: Table Of Contents
Contents 1 Preparing for installation ·········································································· 1-1 Examining the installation site ························································································································· 1-1 Installation site selection ························································································································· 1-1 Temperature and humidity requirements ································································································ 1-1 Power supply ··········································································································································· 1-1 Grounding and lightning protection ········································································································· 1-2 Installation accessories ··································································································································· 1-3 Installation tools ·············································································································································· 1-3 2 Installing the AP ·······················································································... -
Page 7: Preparing For Installation
0% RH to 100% RH, noncondensing Power supply You can power the AP by using a power injector. No power injector is provided with the AP. You can use an H3C power injector. See "Connecting the AP to a power injector" for the connection method. -
Page 8: Grounding And Lightning Protection
Grounding and lightning protection The AP must be reliably grounded. Make sure the grounding points of the grounding conductor of the AP, lightning arresters, PE wire of the power cord, and antenna support are separate from each other, make good contact, and are securely connected and treated with corrosion protection. Ground resistance The ground resistance is typically required to be smaller than 5 ohms, and smaller than 10 ohms in an area with fewer than 20 thunderstorm days a year. -
Page 9: Installation Accessories
Installation accessories Figure1-1 lists the installation accessories provided with the AP. Figure1-2 lists the installation accessories to be prepared by users. Figure1-1 Installation accessories provided with the AP Figure1-2 Installation accessories to be prepared by users Installation tools When installing the AP, you might need the following tools. Prepare the installation tools yourself as required. - Page 10 Figure1-3 Installation tools...
-
Page 11: Installing The Ap
Installing the AP IMPORTANT: • To ensure radio coverage, have the AP installed by technical personnel as a best practice. • You can mount the AP on a pole or wall and route the cables in the pole or wall. The figures in the following installation procedures are for illustration only. -
Page 12: Installation Flowchart
Installation flowchart Figure2-1 Installation flowchart Start Attach the cable to the AP Connect the grounding cable Install the protection cover Connect Ethernet cables Install the AP Pole-mount the AP Pole-mount the AP Pole-mount the AP by using the by using the Mount the AP on a Mount the AP on a by using band... -
Page 13: Connecting The Grounding Cable
Figure2-2 Attaching the cable to the AP Fasten the sealing nut, and then use a cable clip to secure the cable to the base of the AP. Figure2-3 Securing the cable to the AP Connecting the grounding cable CAUTION: • Correctly connecting the grounding cable is crucial to lightning protection and EMI protection. •... -
Page 14: Installing The Protection Cover
Attach the ring terminal to the grounding cable. Figure2-4 Attaching the ring terminal to the grounding cable 5 mm Grounding cable Ring terminal Heat shrink tube (0.20 in) Feed the ring terminal-end of the grounding cable through the base and then use the grounding screw to attach the ring terminal to grounding point on the AP. -
Page 15: Connecting Ethernet Cables
Connecting Ethernet cables IMPORTANT: • Use Category-5e or above Ethernet cables only. As a best practice, use shielded twisted pair (STP) cables. • The all-in-one cable provides the following ports in ascending order of the cable length, with one port on each cable: GE1/PoE++ port, GE2/PoE++ port, GE3/IoT port, and console port. Each port has a label for identification. -
Page 16: Pole-Mounting The Ap By Using The Provided Pole-Mounting Kit
Pole-mounting the AP by using the provided pole-mounting IMPORTANT: To pole-mount the AP by using the pole-mounting kit provided with the AP, make sure the pole diameter is not larger than 75 mm (2.95 in). Mounting the AP on a vertical pole Secure the base of the pole to the rooftop or a concrete pier block by using expansion bolts. - Page 17 Figure2-9 Securing the AP to the vertical pole As shown by callout 1 in Figure2-10, use a T8 Torx screwdriver to loosen the two screws on the base so that the AP can rotate. Rotate and adjust the AP until the bubble in the level is in the middle. Fasten the two screws on the base to fix the rotating shaft of the AP.
-
Page 18: Pole-Mounting The Ap By Using The Optional Pole-Mounting Kit
Figure2-11 Securing the AP to the horizontal pole As shown by callout 1 in Figure2-12, use a T8 Torx screwdriver to loosen the two screws on the base so that the AP can rotate. Rotate and adjust the AP until the bubble in the level is in the middle. Fasten the two screws on the base to fix the rotating shaft of the AP. - Page 19 Figure2-13 Securing the pole-mounting brackets to the pole Insert two hex screws into the installation holes at the top of the pole bracket. Do not drive the screws all the way in, leaving a certain space for hanging the AP. Figure2-14 Inserting hex screws to the pole-mounting brackets Hang the AP on the pole-mounting brackets by aligning the keyhole slots with the hex screws, and then fasten the screws.
- Page 20 Figure2-15 Hanging the AP on the pole-mounting brackets Insert the other two hex screws into the installation holes at the bottom of the AP base and then fasten the screws to secure the AP to the pole-mounting brackets. As shown by callout 1 in Figure2-16, use a T8 Torx screwdriver to loosen the two screws on the base so that the AP can rotate.
- Page 21 Figure2-17 Securing the pole-mounting brackets to the pole Insert two hex screws into the installation holes at the right of the bracket. Do not drive the screws all the way in, leaving a certain space for hanging the AP. Figure2-18 Inserting hex screws to the pole-mounting brackets Hang the AP on the pole-mounting brackets by aligning the keyhole slots with the hex screws, and then fasten the screws.
-
Page 22: Pole-Mounting The Ap By Using Band Clamps
As shown by callout 1 in Figure2-20, use a T8 Torx screwdriver to loosen the two screws on the base so that the AP can rotate. Rotate and adjust the AP until the bubble in the level is in the middle. Fasten the two screws on the base to fix the rotating shaft of the AP. - Page 23 Figure2-21 Installing band clamps Fasten the screw on each band clamp to secure the AP to the pole. As shown by callout 1 in Figure2-22, use a T8 Torx screwdriver to loosen the two screws on the base so that the AP can rotate. Rotate and adjust the AP until the bubble in the level is in the middle.
-
Page 24: Mounting The Ap On A Custom Pole
Figure2-23 Installing band clamps Fasten the screws on each band clamp to secure the AP to the pole. As shown by callout 1 in Figure2-24, use a T8 Torx screwdriver to loosen the two screws on the base so that the AP can rotate. Rotate and adjust the AP until the bubble in the level is in the middle. - Page 25 Figure2-25 Custom pole To install the AP on a custom pole: Connect the cables of the AP to the Ethernet cables from the pole and put the cables into the pole. Figure2-26 Connecting cables Drive two hex screws into the installation hole at the top of the pole-mounting brackets. Do not fasten the screws all the way in, leaving a certain space for hanging the AP.
-
Page 26: Mounting The Ap On A Wall
Figure2-27 Securing the AP As shown by callout 1 in Figure2-28, use a T8 Torx screwdriver to loosen the two screws on the base so that the AP can rotate. Rotate and adjust the AP until the bubble in the level is in the middle. Fasten the two screws on the base to fix the rotating shaft of the AP. - Page 27 Figure2-29 Marking the installation holes on the wall Drill four holes with a diameter of 8 mm (0.32 in) at the marked locations. Tap an expansion bolt with a rubber hammer into each hole and then remove the nut and washers, as shown in Figure2-30.
- Page 28 Figure2-31 Installing the AP on the wall As shown by callout 1 in Figure2-32, use a T8 Torx screwdriver to loosen the two screws on the base so that the AP can rotate. Rotate and adjust the AP until the bubble in the level is in the middle. Fasten the two screws on the base to fix the rotating shaft of the AP.
-
Page 29: Connecting The Ap To A Power Injector
Connecting the AP to a power injector with two copper uplink ports The PoE1 port on the dual-port H3C power injector must be connected to the uplink network through the LAN1 port, and PoE2 through LAN2. The following procedures use the PoE1 port as an example to connect the AP. -
Page 30: Labeling Cables
Figure2-34 Connecting the AP to a power injector with a fiber uplink port Labeling cables After cable connection, attach labels to each cable as a best practice for future maintenance. • Attach a label to both ends of a cable and at every certain distance. •... -
Page 31: Powering On The Ap
DC = DataCheck, R = Run M = Master, B = Backup AP name APID State Model Serial ID WA5320X 219801A17C8171E00012 Verifying network connectivity when the AP operates as a cloud-managed AP When the AP operates in fat AP mode, use the command to ping an uplink device. -
Page 32: Logging In To The Fat Ap
Logging in to the fat AP Typically, the AP is installed at a high position. As a best practice, log in to the AP and configure settings before installing the AP. You can log in to the fat AP through the console port, Telnet, or Web interface. Logging in to the fat AP through the console port Logging in through the console port requires the following items: •... -
Page 33: Setting Terminal Parameters
Setting terminal parameters To configure and manage the AP through the console port, you must run a terminal emulator program, Super Terminal or PuTTY, on your PC. You can use the emulator program to connect a network device, a Telnet site, or an SSH site. For more information about the terminal emulator programs, see the user guides for these programs. -
Page 34: Appendix A Technical Specifications
Appendix A Technical specifications Table4-1 Technical specifications Item Specification 374 × 240 × 240 mm (14.72 × 9.45 × 9.45 in) Dimensions (H × W × D) Weight 3.7 kg (8.16 lb) System power consumption 30 W IEEE standards IEEE802.11a/b/g/n/ac wave2... -
Page 35: Appendix B Leds And Ports
Appendix B LEDs and Ports LEDs Table5-1 LED descriptions (fit AP mode) Status Description No power is present. Yellow Steady on The AP is initializing. The AP has started up but has not registered to any Flashing at 0.5 Hz Green Flashing at 1 Hz Only the 2.4G radio has associated clients. -
Page 36: Ports
Ports The AP provides only one port. You can connect the all-in-one cable provided with the AP to it. The all-in-one cable provides the following ports, with one port on each cable, in ascending order of the cable length: • GE1/PoE++ port •...
Need help?
Do you have a question about the WA5320X and is the answer not in the manual?
Questions and answers