Table of Contents
Advertisement
Available languages
Available languages
Quick Links
No: 24877 – 1/19 rev. 1
Catalog Numbers • Les Numéros de Catalogue • Números de Catálogo: UT-300-1, UT-300-2, UT-300-3
Country of Origin: Made in China • Pays d'origine: Fabriqué en Chine • País de origen: Hecho en China
Models ending in -U are BAA and TAA compliant (Product produced in the U.S.)
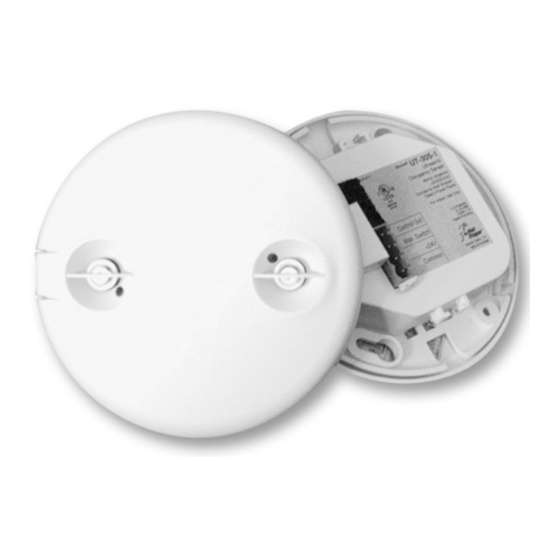
DESCRIPTION AND OPERATION
The Wattstopper UT-300 sensors turn lighting systems on and off
based on occupancy and ambient light levels. The light level feature
keeps lights from turning on if the ambient light level is sufficient.
The UT-300 can be configured to turn lighting on, and hold it on as
long as it detects cccupancy. After no movement is detected for a user
specified time (5 to 30 minutes) the lights are switched off. A "walk-
through" mode can turn lights off after only 3 minutes, if no activity is
detected after 30 seconds of an occupancy detection.
The UT-300 operates on 24V supplied by Wattstopper Power Packs.
The sensors can operate on 24VDC, 24VAC, or half wave rectified AC.
COVERAGE PATTERN
The UT-300 is available in 3 models. Each model has a different size
coverage pattern. The coverage shown represents walking motion at a
mounting height of 8 to 10 feet. For building spaces with lower levels of
activity or with obstacles and barriers, coverage size may decrease.
PLACEMENT GUIDELINES
Depending upon obstacles such as furniture or partitions, the area
of coverage may be less or more than the sensing distances shown
in the coverage pattern. This must be considered when planning the
number of sensors and their placement. It is also recommended to
place the sensor 4 to 6 feet away from air supply ducts.
Mount the sensor to the ceiling. The UT-300 is designed for a
ceiling height of about 8-10 feet. Mounting above or below this range
will significantly affect the coverage patterns. As a general rule, each
occupant should be able to clearly view the sensor.
Open Office Area Coverage: To get complete coverage in an open
office area, install multiple sensors so that there is approximately
20% overlap with each adjacent sensor's ultrasonic coverage area.
Wattstopper
Ultrasonic Low Voltage Occupancy Sensor with Manual On Feature,
Light Level and Isolated Relay (version 3)
Détecteur de présence à ultrasons basse tension avec marche en mode manuel,
contrôle du niveau de luminosité et relais isolé (v3)
Sensor de ocupación ultrasónico de bajo voltaje con función de encendido manual,
nivel de luz y relé aislado (v3)
Installation Instructions • Instructions d'Installation • Instrucciones de Instalación
Voltage ................................18-28VDC/VAC, half wave rectified AC
Current Consumption ...............................................................25mA
Power Supply ...........................................Wattstopper Power Packs
Operating Temperature ............................. 32° to 131°F (0° to 55°C)
Time Delay Adjustment ............................30 seconds to 30 minutes
Ultrasonic Coverage
UL & CUL Listed for use with Wattstopper Power Packs
U.S. Patents: 7,277,012
23'
16'
12'
5'
0
5'
12'
16'
23'
®
SPECIFICATIONS
Walk-Through Mode ..........3 minutes if no activity after 30 sec.
Test Mode .................................... 5 sec. upon DIP switch reset
Model UT-300-1 ..................................................... up to 500 ft
Model UT-300-2 ................................................... up to 1000 ft
Model UT-300-3 ................................................... up to 2000 ft
Sensitivity Adjustment ............. Minimum to Maximum (trimpot)
Frequency .......................................................................40kHz
33'
23'
16'
12'
0
UT-300/305-3
UT-300/305-2
UT-300/305-1
2
2
2
12' 16'
23'
33'
UT-300/305-3
HALLWAY
APPLICATION
Advertisement
Table of Contents

Subscribe to Our Youtube Channel
Related Manuals for LEGRAND Wattstopper UT-300-1


Summary of Contents for LEGRAND Wattstopper UT-300-1
- Page 1 Wattstopper ® Ultrasonic Low Voltage Occupancy Sensor with Manual On Feature, Light Level and Isolated Relay (version 3) Détecteur de présence à ultrasons basse tension avec marche en mode manuel, contrôle du niveau de luminosité et relais isolé (v3) No: 24877 – 1/19 rev. 1 Sensor de ocupación ultrasónico de bajo voltaje con función de encendido manual, nivel de luz y relé...
-
Page 2: Wiring Directions
WIRING DIRECTIONS Each Wattstopper BZ series power pack can supply power for 5 UT-300 WARNING: TURN THE POWER OFF AT THE sensors. When using more sensors than this, multiple power packs are CIRCUIT BREAKER BEFORE WIRING. required. Refer to the wiring diagram for the following procedures: Connect the low voltage: •... -
Page 3: Sensor Adjustment
Using an Octagonal J-Box 4" Octagonal J-Box (at least 1.5" deep) 1. Pull the low voltage wires from the power pack into the J-Box through the conduit Ceiling knockout. 2. Connect the low voltage wires to the appropriate terminals on the sensor. Depluggable 3. -
Page 4: Dip Switch Setting
DIP SWITCH SETTING Time Delay: Switches 1, 2, 3 Switch# Time Delay 1 2 3 The sensor will hold the lights ON as long as occupancy is detected. The time delay countdown starts when no motion is detected. After no motion is detected for the length of the time delay, the sensor will turn the lights OFF. Test Mode/20 min 30 seconds Walk-Through Switch 4... -
Page 5: Ordering Information
Unwanted Sensor Activations (LED flashes): Possible causes 1. The ultrasonic sensitivity may be too high causing detection outside of desired coverage area. 2. Sensor located too close to HVAC or VAV vents with heavy air flow. 3. If LED is flashing rapidly (~10Hz), an overload condition exists. When this is corrected, the sensor will return to normal operation. Possible solutions 1. -
Page 6: Instructions De Câblage
INSTRUCTIONS DE CÂBLAGE Chaque bloc d'alimentation de la série BZ deWattstopper peut fournir du AVERTISSEMENT : COUPER LE courant à 5 détecteurs UT-300. Lorsque vous utilisez plus de 8 détecteurs, COURANT AU DISJONCTEUR PRINCIPAL plusieurs blocs d'alimentation seront nécessaires. AVANT D’INSTALLER LE CÂBLAGE. Reportez-vous au schéma de câblage pour les procédures suivantes : Raccordez la basse tension : •... -
Page 7: Montage Du Détecteur
MONTAGE DU DÉTECTEUR Directement sur le plafond 1. Fixez les clips à ressort en plastique sur les bords du détecteur dans les fentes prévues à cet effet. 2. Découpez un orifice rond de 8,9 à 10,2 cm (3,5 à 4 po.) dans la dalle du plafond acoustique au niveau de l’emplacement de montage. - Page 8 Pour tester les détecteurs de présence 1. Assurez-vous que la temporisation est réglée sur le Mode test* en utilisant le réglage « Mode test/20 minutes ». (Interrupteurs DIP 1, 2 et 3 sur ARRÊT). 2. Assurez-vous que le potentiomètre d’ajustement de la sensibilité aux ultrasons est placé à environ 70 % dans le sens horaire. 3.
-
Page 9: Protection Contre La Surcharge
RÉGLAGE DE L’INTERRUPTEUR DIP Temporisation : Interrupteurs 1, 2, 3 N° d'interrupteur 1 2 3 Temporisation Le détecteur maintient les lumières ALLUMÉES tant qu’une présence est détectée. Le compte à rebours Mode Test/20 min de temporisation démarre lorsqu’aucun mouvement n’est détecté. En l’absence de mouvement pendant 30 secondes toute la durée de la temporisation, le détecteur ÉTEINT les lumières. -
Page 10: Informations Pour Commander
Les lumières ne s’éteignent pas automatiquement : 1. Le détecteur peut être activé de l’extérieur de la zone de portée ou par le biais d’interférences (consulter « Activations intempestives du détecteur » ci-dessous). 2. Vérifiez tous les branchements des fils du détecteur. 3. -
Page 11: Especificaciones
INSTRUCCIONES EN ESPAÑOL DESCRIPCIÓN Y FUNCIONAMIENTO ESPECIFICACIONES Los sensores Wattstopper UT-300 encienden y apagan los Voltaje ....de 18-28 VCC/VCA o CA rectificada de media onda sistemas de iluminación en base a la ocupación del ambiente. Consumo de corriente ..............25mA Los sensores UT-300 pueden configurarse para encender la Fuente de alimentación .... -
Page 12: Instrucciones De Cableado
INSTRUCCIONES DE CABLEADO Cada fuente de alimentación de la serie BZ de Wattstopper puede suministrar energía a 5 sensores UT-300. ADVERTENCIA: DESCONECTE LA Cuando se utilicen más sensores, se necesitarán varias fuentes de alimentación. ALIMENTACIÓN EN EL DISYUNTOR ANTES DEL CABLEADO. Consulte el diagrama de cableado para los siguientes procedimientos: Conecte el voltaje bajo: •... -
Page 13: Montaje Del Sensor
MONTAJE DEL SENSOR Directamente en cielo raso 1. Coloque las abrazaderas de resorte plásticas en el borde del sensor en las ranuras correspondientes. 2. Perfore un orificio redondo de 3,5 in a 4 in en la losa del cielo raso acústica en la ubicación del montaje. -
Page 14: Configuración Del Interruptor Dip
FUNCIÓN DE NIVEL DE LUZ La función de nivel de luz mantiene las luces apagadas durante la presencia inicial si hay una luz ambiente adecuada. No apagará las luces si están encendidas. La configuración predeterminada está ajustada al máximo, lo que significa que aun con la luz ambiente más clara no se mantendrá... -
Page 15: Protección Contra Sobrecarga
1. La carga puede encenderse con la activación del interruptor manual y permanece encendida según la configuración de lógica de presencia. El retardo de tiempo del sensor funciona según lo programado. Cuando la carga se apaga a causa de la falta de detección de presencia, la carga puede volver a encenderse mediante la detección de presencia o mediante la activación del interruptor. -
Page 16: Información Para Pedidos
No. 24877 – 1/19 rev. 1 © Copyright 2019 Legrand All Rights Reserved. 800.879.8585 © Copyright 2019 Tous droits réservés Legrand. www.legrand.us/wattstopper © Copyright 2019 Legrand Todos los derechos reservados.
Need help?
Do you have a question about the Wattstopper UT-300-1 and is the answer not in the manual?
Questions and answers