Table of Contents
Advertisement
Quick Links
Advertisement
Table of Contents

Related Manuals for Euromaid EMFS60SODFSS


Summary of Contents for Euromaid EMFS60SODFSS
- Page 1 Free Standing Cooker / User Manual EMFS60SODFSS...
- Page 2 Thank you for choosing this product. This User Manual contains important safety information and instructions on the operation and maintenance of your appliance. Please take the time to read this User Manual before using your appliance and keep this book for future reference. Icon Type Meaning...
-
Page 3: Table Of Contents
CONTENTS 1.SAFETY INSTRUCTIONS ....................4 1.1 General Safety Warnings ....................4 1.2 Installation Warnings ......................7 1.3 During Use ........................8 1.4 During Cleaning and Maintenance ................10 2.INSTALLATION AND PREPARATION FOR USE ............12 2.1 Instructions for the Installer ..................12 2.2 Installation of the Cooker ....................13 2.3 Gas Connection ......................13 2.4 Gas Conversion (if available) ..................14 2.5 Electrical Connection and Safety (if available) ............15... -
Page 4: Safety Instructions
1. SAFETY INSTRUCTIONS • Carefully read all instructions before using your appliance and keep them in a convenient place for reference when necessary. • This manual has been prepared for more than one model therefore your appliance may not have some of the features described within. - Page 5 WARNING: Danger of fire: Do not store items on the cooking surfaces. WARNING: If the surface is cracked, switch off the appliance to avoid the possibility of electric shock. • For models which incorporate a hob lid, clean any spillages off the lid before use and allow the cooker to cool before closing the lid.
- Page 6 applicable local and international standards and regulations. • Maintenance and repair work should only be carried out by authorised service technicians. Installation and repair work that is carried out by unauthorised technicians may be dangerous. Do not alter or modify the specifications of the appliance in any way.
-
Page 7: Installation Warnings
the technical instructions which describe how to modify the appliance to match the conditions of use of the country. • All possible measures have been taken to ensure your safety. Since the glass may break, care should be taken while cleaning to avoid scratching. Avoid hitting or knocking the glass with accessories. -
Page 8: During Use
In the case of a defect do not use the appliance and contact a qualified service agent immediately. The materials used for packaging (nylon, staplers, styrofoam, etc.) may be harmful to children and they should be collected and removed immediately. •... - Page 9 very hot and damage may be caused to the product. Do not leave the cooker unattended when cooking with solid or liquid oils. They may catch fire under extreme heating conditions. Never pour water on to flames that are caused by oil, instead switch the cooker off and cover the pan with its lid or a fire blanket.
-
Page 10: During Cleaning And Maintenance
with the oven door closed. CAUTION: Glass lids may shatter when heated. Turn off all the burners and allow the hob surface to cool before closing the lid. • Do not place anything on the oven door when it is open. This could unbalance the oven or damage the door. - Page 11 electronic equipment. By ensuring this product is disposed of correctly, you will help prevent potential negative consequences for the environment and human health, which could otherwise be caused by inappropriate waste handling of this product. For more detailed information about recycling of this product, please contact your local city office, your household waste disposal service or the retailer who you purchased this product from.
-
Page 12: Installation And Preparation For Use
2. INSTALLATION AND PREPARATION FOR USE Air inlet section WARNING : This appliance must be min. 100 cm installed by an authorised service person or qualified technician, according to the instructions in this guide and in compliance with the current local regulations. -
Page 13: Installation Of The Cooker
• The appliance should not be installed • There should be a minimum 2cm blank directly above a dishwasher, fridge, space around the appliance for air freezer, washing machine or clothes circulation. dryer. • If a cooker hood or cupboard is to be •... -
Page 14: Gas Conversion (If Available)
• The device should be connected in line with the relevant local gas standards. • The hose must be kept clear of areas Gas pipe that may heat up to temperatures of more than 90°C. Seal • The hose must not be cracked, torn, Hose bent or folded. -
Page 15: Electrical Connection And Safety (If Available)
• Cut off the main gas supply and unplug the appliance from the mains electrical Valve with flame failure Valve with flame failure device device supply. • Remove the burner caps and the adapters. • Use a 7 mm spanner to unscrew the injectors. -
Page 16: Safety Chain
• During installation, please ensure that isolated cables are used. An Use a wall plug to fasten the hook (1) to the incorrect connection could damage kitchen wall and connect the safety chain your appliance. If the mains cable is (3) to the hook with the help of the locking damaged and needs to be replaced mechanism. -
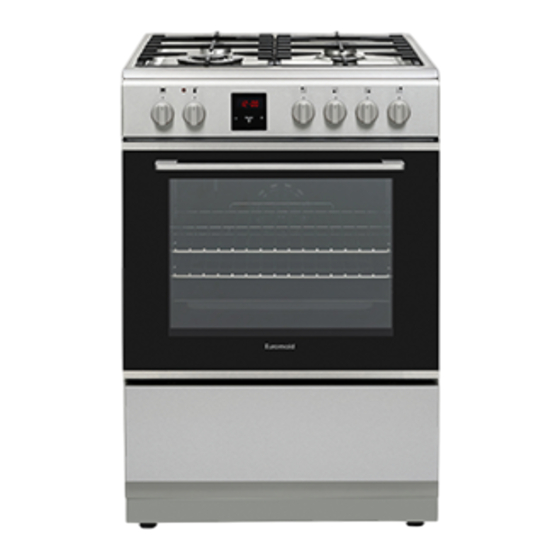
Page 17: Product Features
3. PRODUCT FEATURES Important: Specifications for the product vary and the appearance of your appliance may differ from that shown in the figures below. List of Components 1. Cooktop 2. Control Panel 3. Oven Door Handle 4. Oven Door 5. Adjustable Feet Control Panel 6. -
Page 18: Use Of Product
4. USE OF PRODUCT 4.1 Use of gas burners Ignition of the burners The position symbol above each control knob indicates the burner that the knob controls. Manual Ignition of the Gas Burners OFF position MAX position If your appliance is not equipped with an ignition aid, or in case there is a failure in the electric network, follow the procedures listed below. -
Page 19: Oven Controls
4.2 Oven Controls Rapid / Wok Burner 22-26 cm Oven function control knob Semi-rapid Burner 14-22 cm Turn the knob to the corresponding symbol Auxiliary Burner 12-18 cm of the desired cooking function. For the details of different functions see ´Oven Make sure that the tips of the flames do not Functions`. -
Page 20: Cooking Table
Fan Function: The Puff Pastry 1 - 2 170-190 35-45 oven’s thermostat and Cake 1 - 2 170-190 30-40 warning lights will switch on, and the Cookie 1 - 2 170-190 30-40 upper and lower Stew 175-200 40-50 heating elements and fan will start operating. - Page 21 press and hold the “MODE” button for 2 seconds. The desired operation can then be Function Description carried out. Audible warning time adjustment Auto cooking The audible warning time can be set to any time between “00:00” and “23:59” hours. Manual cooking The audible warning time is for warning purposes only.
- Page 22 When the timer reaches zero, the oven 3. Select the desired will switch off and an audible warning will sound. The symbol “A” will flash. Turn cooking time period both control knobs to the “0” position and using the “+” and “-” press any key on the timer to stop the keys.
-
Page 23: Accessories
accessories out of the oven. Hot meals 6. The current time or accessories can cause burns. will reappear on the screen, and the • The accessories may deform with heat. symbols “A”, and will Once they have cooled down, they will remain illuminated. -
Page 24: Cleaning And Maintenance
The Flap Drawer Your appliance includes a drawer for storing accessories such as trays, shelves, grids, or small pots and pans. WARNING: The inner surface of the drawer may become hot during use. Do not store any food, plastic or flammable materials in the drawer. - Page 25 screws holding each catalytic panel to the Do not use steam cleaners for cleaning oven. any part of the appliance. Cleaning the Inside of the Oven • The inside of enamelled ovens are best cleaned while the oven is warm. •...
- Page 26 appliance on a regular basis. • Wipe the enamelled parts with a soft cloth soaked in soapy water. Then, wipe them over again with a wet cloth and dry them. Do not clean the enamelled parts while they are still hot from cooking. Do not leave vinegar, coffee, milk, salt, To replace the inner glass: water, lemon or tomato juice on the enamel...
-
Page 27: Maintenance
The lamp is designed specifically for use in household cooking appliances. It is not suitable for household room illumination. 5.3 Maintenance WARNING: The maintenance of this appliance should be carried out by an authorised service person or qualified technician only. 3. -
Page 28: Troubleshooting&Transport
6. TROUBLESHOOTING&TRANSPORT 6.1 Troubleshooting If you still have a problem with your appliance after checking these basic troubleshooting steps, please contact an authorised service person or qualified technician. Problem Possible Cause Solution The burners may be in the ´off` position. Check the position of the control knob. -
Page 29: Transport
Check that the recommended temperatures and shelf positions are being used. Do not frequently open the door unless you are Cooking is uneven Oven shelves are incorrectly cooking things that need to be turned. If you within the oven. positioned. open the door often, the interior temperature will be lower and this may affect the results of your cooking. -
Page 30: Technical Specifications
7. TECHNICAL SPECIFICATIONS 7.1 Injector Table EN - 30... - Page 31 52202020...
Need help?
Do you have a question about the EMFS60SODFSS and is the answer not in the manual?
Questions and answers