Table of Contents
Advertisement
Quick Links
User's Manual
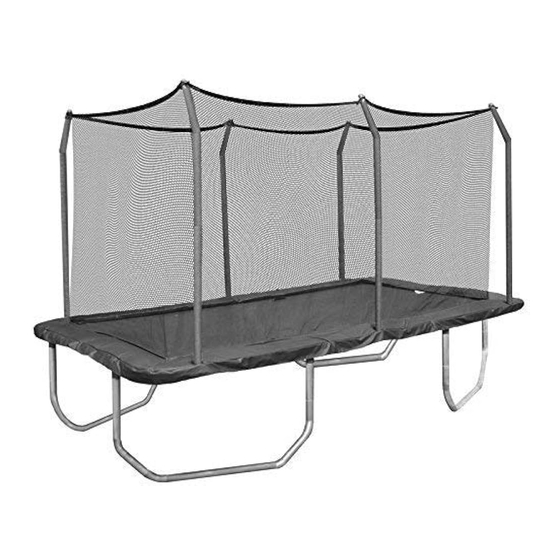
8'x14' Rectangular Trampoline Combo
STRC149G09
Model _________________
WARNING
!
Read all precautions and
instructions in this manual before
using this equipment. Save this
manual for future reference.
Maximum user weight 200 lbs.
IMPORTANT
!
Trampoline/Enclosure's are
susceptible to winds. Be sure to
secure your
Trampoline/Enclosure. Wind
Damage is not covered in the
TM
warranty of your trampoline.
Advertisement
Table of Contents

Subscribe to Our Youtube Channel
Related Manuals for Skywalker STRC149G09


Summary of Contents for Skywalker STRC149G09
- Page 1 User’s Manual 8’x14’ Rectangular Trampoline Combo STRC149G09 Model _________________ WARNING Read all precautions and instructions in this manual before using this equipment. Save this manual for future reference. Maximum user weight 200 lbs. IMPORTANT Trampoline/Enclosure's are susceptible to winds. Be sure to secure your Trampoline/Enclosure.
-
Page 2: Table Of Contents
STRC149G09 Model _________________ A model decal is found on one of the trampoline legs. Write the model number and serial number in the space above. CONTENTS Trampoline Important Precautions ....................Enclosure Important Precautions ....................Warning Label Placement ......................... Before You Begin .......................... -
Page 3: Trampoline Important Precautions
TRAMPOLINE IMPORTANT PRECAUTIONS 11. If you do not use the trampoline correctly someone can be seriously hurt. ! WARNING: To reduce the risk of serious injury, read and follow all of the warnings, precau- 12. The trampoline should only be used with a proper tions, and instructions in this manual before you understanding of the safety precautions, and under assemble (put together) and use the trampoline. -
Page 4: Enclosure Important Precautions
ENCLOSURE IMPORTANT PRECAUTIONS 12. This trampoline enclosure is made for users who do not ! WARNING: To reduce the risk of serious injury, read weigh more than 250 pounds and children less than 6 years and follow all of the warnings, precautions, and instructions old should not use it. -
Page 5: Warning Label Placement
Note: The labels and placard are not shown actual size. BEFORE YOU BEGIN Thank you for choosing a SKYWALKER TRAMPOLINES Brand Trampoline. The SKYWALKER TRAMPOLINES Rectangular Trampolines are designed and crafted to provide many years of fun and fitness. This trampolines comes equipped with warnings and instructions for the assembly, care, maintenance, and use of the trampoline. -
Page 6: Trampoline Safety Information
TRAMPOLINE SAFETY INFORMATION In trampoline use, as in all active recreational sports, participants can be injured. However, there are steps that can be taken to reduce the risk of injury. In this section, primary accident patterns are identified and the responsibilities of supervisors and jumpers in accident prevention are described. -
Page 7: Enclosure Safety Information
ENCLOSURE SAFETY INFORMATION NEED FOR TRAMPOLINE ENCLOSURE SAFETY A trampoline enclosure is a recreational product. The information on this page and on pages 8-9 identify important safety precautions. The precautions are not all- inclusive, because an enclosure can be used in ways that this manual cannot cover completely. To prevent pinches and cuts during enclosure use, a frame pad must be installed on the trampoline. - Page 8 Hazards Associated with High Winds A trampoline with an enclosure can be moved or blown over by high winds. Anyone in its path, or inside of the enclosure, may be injured if this happens. Please see Care and Maintenance section under Special Considerations, High Wind Storing the Trampoline Enclosure Safely Specific steps for storing the trampoline enclosure are given later in this manual.
- Page 9 Wear clothing that does not have drawstrings, hooks, loops or anything else that could get caught in the netting. Do not attach anything to the netting that is not a Skywalker Holdings, LLC approved accessory or part of the of the trampoline enclosure.
-
Page 10: Methods Of Accident Prevention
METHODS OF ACCIDENT PREVENTION The Supervisor’s Role in Preventing Accidents It is the responsibility of the owners of trampoline users to provide knowledgeable and mature supervision. They need to know and enforce all of the rules and warnings printed in this manual to minimize the likelihood of accidents and injuries. -
Page 11: Use And Instructional Material
Climb onto and off of the trampoline. Do not jump onto or off of it. Do not use the trampoline as a springboard to jump to other objects or places. For additional information regarding equipment, contact Skywalker Holdings,LLC. For additional information regarding skill training, contact a trainer certification organization. -
Page 12: Instructional Program And Model Lessons
INSTRUCTIONAL PROGRAM AND MODEL LESSONS The following lessons are examples of an instructional program. They should follow a complete discussion and demonstration of body mechanics between the supervisor and the student(s). See pages 13 and 14 for descriptions of basic trampoline skills. Lesson 1 1. -
Page 13: Basic Trampoline Skills
BASIC TRAMPOLINE SKILLS Fundamental Bounce Knee Drop 1. Start from a standing position with your head erect and 1. Start bouncing from a standing position, keeping your your eyes on the frame pad. eyes on the frame pad. 2. Swing your arms forward and up in a circular motion. 2. - Page 14 Seat Drop Front Drop 1. Land in a sitting position with your legs parallel to the 1. Start from a low bounce and land on the mat in a prone mat. position. 2. Place your hands on the mat beside your hips. 2.
-
Page 15: Trampoline Assembly
TRAMPOLINE ASSEMBLY IMPORTANT ASSEMBLY INFORMATION • Need phillips screw driver and 2 adjustable wrenches (putting the trampoline together). A rubber mallet may make assembly easier, however. • Assembly requires two persons. • Wear gloves to protect your hands from pinch points during assembly. TRAMPOLINE PLACEMENT 1. - Page 16 3. Identify one Right Frame Tube(3) which has a sticker “R”. Connect the Right Frame Tube(3) to the Straight Frame Tube(11) in the same manner as step 1 and step 2 on page 15 shown. Do not tighten the Locknuts yet. 16 14 16 14 4.
- Page 17 5. Identify one Curved Leg with Male Ends(8) and Curved Leg with Female & Male End(9). Connect two Male End Leg Extensions(7) to the Curved Leg with Male Ends and Curved Leg with Female & Male End with three M4.8x16mm Screws(15). Connect the other Leg Extensions(7), Curved Leg with Male Ends(8) and Curved Leg with Female &...
- Page 18 8. Connect the two assemblies you finished on step 7 on page 17 with two Frame Tube with slight Bend(10), four Inner U-Joints(25), four Outer U-Joints(24). Secure with eight M10x98mm Bolts(13), eight M10x90mm Bolts(12), twenty-four M10 Washers(16), sixteen M10 Locknuts(14), eight M10x20mm Bolts(21) and eight M10 Spring Washers(28).
- Page 19 10. Lay the Jump mat(2) on the ground with Warning labels facing up. Put the Enclosure Net(5) on the Jump Mat. Make sure the opening of the enclosure net is between the seventh and eighth V-ring on long side of the Jump- mat.
- Page 20 Start attaching the springs by attaching every other one Inset drawing V-ring until you have worked the complete distance around the frame. Then attach the remaining springs to fully complete the spring step. Frame 12. Lay the Spring Pad(1) on outer edge so that the Springs are covered completely.
-
Page 21: Enclosure Assembly
ENCLOSURE ASSEMBLY 1. Orient one Lower Enclosure Tube(17) as shown. Attach one Upper Enclosure Tube(18) to the Lower Enclosure Tube with an M4.8x16 Screw(15). Repeat this procedure with all remaining poles. Note: The short end of the bend on the Upper Enclo- sure Tube(18) is at the top. - Page 22 4. In this step you will secure the enclosure poles to the frame of the trampoline. Enclosure Door Start from the enclosure door, lift one of the poles assembled in step , see the inset drawing. Insert the Lower Enclosure Tube(17) through the frame pad into the top hole of the round socket on the trampoline frame as shown.
-
Page 23: Care And Maintenance
CARE AND MAINTENANCE CARE Do not allow pets on the trampoline, as their claws may snag and pull the mat material or damage the frame pad. The trampoline is intended to be used by one person at a time who weighs not more than 250 pounds. The user should be either barefoot, wearing socks, or wearing gymnastic shoes. -
Page 24: Part List
PARTS LIST Key No. Descrption Qty. Key No. Descrption Qty. Spring Pad M10 Washer Jumping Mat Lower Enclosure Tube Right Frame Tube Upper Enclosure Tube Left Frame Tube Foam Tube Enclosure Net Pole retaining pin Spring M10x20mm Bolt Leg Extension Tools 1Set Curved Leg with Male Ends 4... - Page 25 PARTS LIST M10x90mm Bolt (16) Long Frame Tube (2) M10x98mm Bolt (16) Straight Frame Tube(2) Lower Enclosure Tube(6) M10 Locknut (32) M4.8x16 Screw (18) Springs (82) Upper Enclosure Tube(6) M10 Washer (48) FoamTubes (12) M10x20mm Bolt (16) Pole retaining pin (6) M5x50mm Bolt (6) Outer U-Joint(8) tools...
-
Page 26: Ordering Replacement Parts
ORDERING REPLACEMENT PARTS To order replacement parts, visit our web site at www.skywalkertrampolines.com or call our toll-free Customer Care Hot Line at 1-866-603-Jump (5867), Monday through Friday, 8 a.m. until 5 p.m. Mountain Time (excluding holi- days). To help us assist you, please provide the following information when calling: •... -
Page 27: Limited Warranty
(90) days after the date of purchase. All warranty coverage extends only to the original retail purchaser from the date of purchase. Skywalker Holdings, LLC obigation under this Warranty is limited to replacing or repairing, at Skywalker Holdings, LLC option, the product at one of this authorized service centers.
Need help?
Do you have a question about the STRC149G09 and is the answer not in the manual?
Questions and answers