Table of Contents
Advertisement
Quick Links
Advertisement
Table of Contents

Related Manuals for Skywalker STEC12X.2


Summary of Contents for Skywalker STEC12X.2
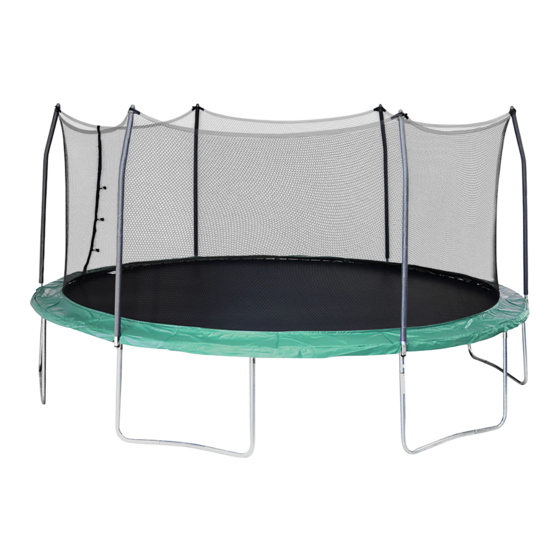
- Page 1 ASSEMBLY, MAINTENANCE, & USER MANUAL MODEL #STEC12X.2./OWTC12.2 WARNING Read all precautions and instructions in this manual before using this equipment. Skywalker Holdings LLC Save this manual for future reference. P.O. Box 574, Brigham City, UT 84302 Maximum user weight 200 lbs.
-
Page 2: Table Of Contents
HEY WE'VE GOT SOMETHING REALLY IMPORTANT TO SAY Skywalker Trampolines belongs to a family of brands focused on providing active products. Check us out online! We've got assembly videos (for those of you who prefer movies over books), FAQs (so you know you're not the only one who had a question), additional products (including fitness, sports and playground equipment), and most importantly, find us on social media! Because we want to be your friend. -
Page 3: Part List
BEFORE YOU BEGIN Thanks for choosing Skywalker Trampolines! We’re just as excited as you are to help your family live an active (but most importantly FUN) lifestyle. This model is one of our favorites, and we’re confident you’ll love it too. To make things easier for you, we’ve listed important information that you (and your little outdoor adventurers) need to know. -
Page 4: Part Identification
PART IDENTIFICATION Before you begin, take a look at the drawings below to make sure you have all the parts! The numbers in the squares to the left (key numbers) will help you identify the parts during assembly. T-joint (may be pre- Socket (may be Leg Extension (x12) installed) (x6) - Page 5 ST4.8x16mm Self- End Cap (x6) M5x44mm Bolt (x6) tapping Screw (x33) Spring Tool (x1) Screw Driver (x1) Top Tube (x12)
-
Page 6: Exploded Drawing
EXPLODED DRAWING (14) (12) (12) (14) (14) (12) (11) (10) (10) (15) (12) (15) (14) (11) (14) (12) (10) (11) (10) (11) (14) (12) (11) (15) (15) (10) (11) (10) (11) (11) (11) (15) (15) (11) (11) (18) (18) (18) (18) (15) (15) -
Page 7: Assembly
ASSEMBLY READ THIS BEFORE YOU BEGIN • You’ll probably need at least 2 adults and 2 hours to assemble your trampoline (of course, that depends on what model you have, and whether or not you’re secretly a superhero). • We’ve provided a Phillip’s screw driver and two adjustable wrenches to help with assembly, but you’re more than welcome to use your own tools. - Page 8 ASSEMBLY STEP 3 Insert a leg brace (4) into 2 leg extensions (3) and tighten with 2 self-tapping screws (15). Insert both leg extensions into the T-joint and socket at the same time, and tighten with two self-tapping screws. Repeat this step until you have 6 frame Leg Extension Leg Brace Self-tapping...
- Page 9 To assemble the enclosure net to the jump mat first, place the jump mat on the ground. The warning label should be on the top, and the ID label should be on the back. Jump Mat (x1) Model: STEC12X.2 Part #: 7027 Description: 12 Foot Mat...
- Page 10 ASSEMBLY STEP 7 Place the jump mat (5) with attached enclosure net on clear ground inside the frame. Make sure the 2 warning decals align with 2 T-joints! T-joint Warning label Enclosure door T-joint Warning label STEP 8 You may want to use gloves for this step! Before you begin, make sure each V-ring has been threaded through the holes on the enclosure net.
- Page 11 STEP 9 Now, repeat step 8 on the other side of the trampoline placing the hook of the smaller end of a spring into the V-ring just left of the warning label then stretch the free end of the spring until it reaches the frame hole just left of the T-joint.
- Page 12 ASSEMBLY STEP 11 Next, place 6 springs into the V-rings just left of the sockets, and stretch the springs until they reach the frame holes just left of the sockets. Remember to count v-rings and frame holes so everything lines up! You now have attached 12 V-rings to the frame holes using 12 springs.
- Page 13 STEP 13 Place the frame pad (6) on top of the springs. Adjust the frame pad so that the slits are directly above the T-sockets. Important: Don’t use the trampoline without the frame pad. It’s designed to protect your little jumpers! Trust us on this one. Frame Pad (x1) Socket Slit of Pad...
- Page 14 ASSEMBLY STEP 15 If you want, take a snack break because you’re MORE THAN HALFWAY DONE, and you deserve it. This next step is easy. Just slide all the straight tubes (9) and curved tubes (10) into foam (11). If you’re having trouble getting the foam over the tubes, try adding a small amount of water inside the Straight Curved...
- Page 15 STEP 17 Important: The pole cap (12) has two sides; one with a hexagon hole, and one with a regular hole. Insert the pole cap into one strap ring found on the top of the enclosure net. Make sure the hexagon hole is facing the net, and the regular hole is Pole Cap (x6) facing you.
- Page 16 ASSEMBLY STEP 19 Starting from the enclosure door, lift one of the assembled poles and insert the straight tube (9) into the socket. Repeat this process to assemble the 5 remaining poles. Helpful tip: When inserting the enclosure poles, pull back on the middle of the poles! Pull back Socket Socket...
- Page 17 STEP 21 LAST STEP YOU’RE IN THE FINAL HOME STRETCH. Using the included plastic tie, attach the safety placard to the trampoline frame close to the enclosure door. Frame Safety Placard STEP 22 Congratulations on completing your new trampoline! (See... we knew you could do it!) So here comes the real question...
-
Page 18: Maintenance And Care Information
MAINTENANCE & CARE INFORMATION Congratulations and high five on successfully assembling your new Skywalker Trampolines 12' Round Trampoline with Enclosure! Now, the best way to keep your new trampoline in tip top shape, is to periodically check for: • Missing, improperly positioned, or insecurely attached frame padding, netting, enclosure tubes, or foam sleeves •... -
Page 19: Instructions For Use
INSTRUCTIONS FOR USE To reduce the risk of serious injury, read and follow all of the warnings, precautions, and instructions in this manual before you use the trampoline enclosure. Warnings and instructions for care, maintenance, and use of this trampoline and enclosure are included to promote safe enjoyable use of this equipment. -
Page 20: Warning Label Placement
Climb on to and off the trampoline. Do not jump on or off. Do not use the trampoline as a springboard to other objects. Inspect before using and replace any worn, defective or missing parts. For further equipment information contact Skywalker. For skill training information, contact a trainer certification organization. ATTACH TO TRAMPOLINE WARNING Do not land on head or neck. -
Page 21: Methods Of Accident Prevention
METHODS OF ACCIDENT PREVENTION THE SUPERVISOR’S ROLE IN PREVENTING ACCIDENTS It is the responsibility of the supervisors of trampoline users to provide knowledgeable and mature supervision. They need to know and enforce all of the rules and warnings printed in this manual to minimize the likelihood of accidents and injuries. -
Page 22: Instructions And Model Lessons
INSTRUCTIONS & MODEL LESSONS The following lessons are examples of an instructional program. They should follow a complete discussion and demonstration of body mechanics between the supervision and the student(s). 1. Fundamental bounce: Demonstration and practice. 2. Knee Drop: Demonstration and practice. 3. - Page 23 Lesson 5: Seat Drop Lesson 6: Front Drop 1. Land in a sitting position with your legs parallel to the 1. Start from a low bounce and land on the mat in a mat. prone position. 2. Place your hands on the mat beside your hips. 2.
- Page 24 Lesson 9: Mounting and Dismounting Lesson 10: Breaking 1. Users should climb onto the trampoline by placing 1. Starting from a standing position, jump into the their hands on the frame and stepping or rolling up air. onto the frame, across the springs and onto the mat. 2.
-
Page 25: Trampoline Safety Information
TRAMPOLINE SAFETY INFORMATION In trampoline use, as in all active recreational sports, participants can be injured. However, there are steps that can be taken to reduce risk of injury. In this section, primary accident patterns are identified and the responsibilities of supervisors and jumpers in accident prevention are described. -
Page 26: Enclosure Safety Information
ENCLOSURE SAFETY INFORMATION NEED FOR TRAMPOLINE ENCLOSURE SAFETY A trampoline enclosure is a recreational product. The information on this page identifies important safety precautions. The precautions are not all-inclusive, because an enclosure can be used in ways that this manual cannot cover completely. -
Page 27: Limited Warranty
LIMITED WARRANTY Skywalker Holdings, LLC warrants its products to be free from defects in material and workmanship under normal use and service conditions. The steel frame is warranted for three (3) years after the date of purchase. All other parts are warranted for one (1) year after the date of purchase. Warranty coverage extends only to the original retail purchaser from the date of original purchase. - Page 28 NOTE: SKYWALKER HOLDINGS, LLC IS NOT RESPONSIBLE OR LIABLE FOR INDIRECT, SPECIAL OR CONSEQUENTIAL DAMAGES ARISING OUT OF OR IN CONNECTION WITH THE USE OR PERFORMANCE OF THE PRODUCT OR OTHER DAMAGES WITH RESPECT TO ANY ECONOMIC LOSS, LOSS OF PROPERTY, LOSS OF REVENUE OR PROFITS, LOSS OF ENJOYMENT OR USE, COST OF REMOVAL, INSTALLATION OR OTHER CONSEQUENTIAL DAMAGES.
- Page 29 MONTAJE, MANTENIMIENTO Y MANUAL PARA EL USUARIO MODELO N.º STEC12X.2 ADVERTENCIA Lea todas las precauciones e instrucciones de este manual antes de utilizar este producto. Skywalker Holdings LLC Guarde este manual para consultarlo en el P.O. Box 574, Brigham City, UT 84302...
- Page 30 ÍNDICE Lista de las piezas .......................................3 Identificación de piezas ..................................4-5 Dibujo de despiece .....................................6 Montaje ..........................................7-17 Información de mantenimiento y cuidado ..........................18 Instrucciones de uso ....................................19 Posición de la etiqueta de advertencia ............................20 Métodos para evitar accidentes ..............................21 Instrucciones y lecciones modelo ..............................22-23 Información de seguridad del trampolín ............................24 Información de seguridad del cerramiento ..........................25 Garantía limitada ......................................26...
-
Page 31: Lista De Las Piezas
ANTES DE COMENZAR ¡Gracias por elegir Skywalker Trampolines! Estamos tan emocionados como usted por ayudar a que su familia tenga un estilo de vida activo (pero lo más importante: DIVERTIDO). Este modelo es uno de nuestros favoritos, y estamos seguros de que a usted también le encantará. -
Page 32: Identificación De Piezas
IDENTIFICACIÓN DE PIEZAS Antes de comenzar, observe los dibujos de abajo para asegurarse de que posee todas las piezas. Los números que se encuentran en los recuadros ubicados a la izquierda (números de referencia) lo ayudarán a identificar las piezas durante el montaje. - Page 33 Tornillo Tapa del extremo (x6) Perno M5x44 mm (x6) autorroscante (x33) Herramienta para el Destornillador (x1) Tubo superior (x12) resorte (x1)
-
Page 34: Dibujo De Despiece
DIBUJO DE DESPIECE (14) (12) (12) (14) (14) (12) (11) (10) (10) (15) (12) (15) (14) (11) (14) (12) (10) (11) (10) (11) (14) (12) (11) (15) (15) (10) (11) (10) (11) (11) (11) (15) (15) (11) (11) (18) (18) (18) (18) (15) -
Page 35: Montaje
MONTAJE LEA LO SIGUIENTE ANTES DE COMENZAR • Es probable que se necesiten, al menos, dos adultos y 2 horas para montar su trampolín (esto dependerá del modelo que tenga y de si usted es o no un superhéroe encubierto). •... - Page 36 MONTAJE PASO 3 Coloque un refuerzo de la pata (4) en dos extensiones de la pata (3) y ajústelo con dos tornillos autorroscantes (15). Coloque ambas extensiones de la pata en la articulación en T y el manguito al mismo tiempo, y ajústelas con dos tornillos autorroscantes.
- Page 37 Lona de salto (x1) Model: STEC12 Part #: 7027 Description: 12 Foot Mat Made in China Skywalker Holdings, LLC PO Box 547, Brigham City, UT, 84302 USA www.skywalkertrampolines.com Factory address: Wei Jia Tun Village Ligezhuang town Jiaozhou city Qingdao China WARNING Trampoline and enclosures are susceptible to winds, secure your trampoline and enclosure.
- Page 38 MONTAJE PASO 7 Apoye la lona de salto (5) en el suelo dentro del armazón. Asegúrese de que las dos etiquetas de advertencia estén alineadas con las dos articulaciones en T Articulación en T Etiqueta de advertencia Puerta del cerramiento Etiqueta de Articulación advertencia...
- Page 39 PASO 9 Ahora, repita el paso 8 del otro lado del trampolín. Asegúrese de contar la cantidad exacta de anillos en V y agujeros del armazón para que se correspondan entre sí. Ya ha unido dos anillos en V con los agujeros del armazón utilizando dos resortes. Resortes (x1) Puerta del cerramiento...
- Page 40 MONTAJE PASO 11 A continuación, coloque seis resortes en el anillo en V, a la izquierda de los manguitos, y estire los resortes hasta que alcancen los agujeros del armazón, a la izquierda de los manguitos. Ya ha unido doce anillos en V con los agujeros del armazón utilizando doce resortes. Debe haber cinco anillos en V y cinco agujeros del armazón entre cada uno de los Resortes (x6) resortes.
- Page 41 PASO 13 Coloque la almohadilla del armazón (6) sobre los resortes. Ajuste la almohadilla del armazón para que las ranuras queden justo sobre los manguitos en T. Importante: No utilice el trampolín sin la almohadilla del armazón. ¡Está diseñado para proteger a los pequeños saltarines! Confíe en nuestro consejo Almohadilla del armazón (x1) Manguito Ranura de la...
- Page 42 MONTAJE PASO 15 Si lo desea, tómese un descanso porque YA REALIZÓ MÁS DE LA MITAD DEL TRABAJO, y se lo merece. El siguiente paso es sencillo. Deslice todos los tubos rectos (9) y curvos (10) dentro de las gomaespumas (11). Si encuentra dificultades a la hora de deslizar los tubos en las gomaespumas, intente echar un poco de agua Tubo dentro de las gomaespumas.
- Page 43 PASO 17 Importante: La tapa del poste (12) tiene dos lados; uno con un agujero hexagonal y otro con un agujero normal. Inserte la tapa del poste en un anillo con correa en la parte superior de la red. Asegúrese de que el agujero hexagonal se encuentre orientado hacia la redy de que el agujero normal se encuentre orientado hacia usted.
- Page 44 MONTAJE PASO 19 Comience con la puerta del cerramiento, levante uno de los postes montados e inserte el tubo recto (9) en el manguito. Repita este proceso para montar los 5 postes restantes. Consejo útil: Cuando inserte los postes del cerramiento, tire de la parte central de los postes hacia atrás. Tire hacia atrás Manguito...
- Page 45 PASO 21 ÚLTIMO PASO: ¡LLEGÓ A LA RECTA FINAL! Usando el amarre de plástico incluido, coloque el letrero de seguridad en el armazón del trampolín, cerca de la puerta del cerramiento. Armazón Letrero de seguridad PASO 22 ¡Felicidades! Terminó de armar su nuevo trampolín. (¿Vio?... ¡Sabíamos que podía lograrlo!) Es momento de responder la pregunta más importante...
-
Page 46: Información De Mantenimiento Y Cuidado
INFORMACIÓN DE MANTENIMIENTO Y CUIDADO ¡Felicitaciones!, ¡choque los cinco! Ha montado exitosamente su nuevo trampolín circular de 12” con cerramiento de Skywalker Trampolines. La mejor manera de conservar el estado de su trampolín, es controlando lo siguiente de forma periódica: •... -
Page 47: Instrucciones De Uso
INSTRUCCIONES DE USO Para reducir el riesgo de lesiones graves, lea y respete todas las advertencias, precauciones e instrucciones de este manual antes de usar el cerramiento del trampolín. Se incluyen advertencias e instrucciones de cuidado, mantenimiento y uso de este trampolín y cerramiento para promover el uso seguro y agradable de este equipo. -
Page 48: Posición De La Etiqueta De Advertencia
Lea todas las instrucciones antes de usar este trampolín. Para obtener más información acerca del equipo, comuníquese con Skywalker. Para obtener información acerca de la formación de habilidades, comuníquese con una organización de instrucción certificada. Inspeccione antes de usar y reemplace las piezas desgastadas, defectuosas o faltantes. -
Page 49: Métodos Para Evitar Accidentes
MÉTODOS PARA EVITAR ACCIDENTES LA FUNCIÓN DEL SUPERVISOR EN LA PREVENCIÓN DE ACCIDENTES Los supervisores de los usuarios del trampolín tienen la responsabilidad de proporcionar supervisión informada y madura. Deben conocer y hacer cumplir todas las reglas y advertencias impresas en este manual para minimizar la probabilidad de accidentes y lesiones. -
Page 50: Instrucciones Y Lecciones Modelo
INSTRUCCIONES Y LECCIONES MODELO Las siguientes lecciones son ejemplos de un programa instructivo. Deberían seguir un debate y una demostración completos de la mecánica del cuerpo entre la/s persona/s que supervisa/n y el/los estudiante/s. 1. Montaje y desmontaje: Demostración y práctica de técnicas correctas. 2. - Page 51 Lección 5: caída sentado Lección 6: caída de frente 1. Aterrice sentado con las piernas paralelas a la lona. 1. Comience con un rebote bajo y aterrice en la lona 2. Coloque las manos sobre la lona al lado de su cadera. boca abajo.
-
Page 52: Información De Seguridad Del Trampolín
INFORMACIÓN SOBRE EL TRAMPOLÍN Con el uso del trampolín, como en todos los deportes recreativos activos, los participantes pueden lesionarse. Sin embargo, pueden tomarse medidas para reducir el riesgo de lesión. En esta sección, se identifican los principales patrones de accidentes y se detallan las responsabilidades de los supervisores y de los usuarios relativas a la prevención de accidentes. -
Page 53: Información De Seguridad Del Cerramiento
INFORMACIÓN SOBRE EL CERRAMIENTO NECESIDADES DE SEGURIDAD PARA EL CERRAMIENTO DEL TRAMPOLÍN El cerramiento de un trampolín es un producto de recreación. La información de esta página identifica las precauciones de seguridad importantes. Las precauciones no incluyen todas las posibilidades, dado que un cerramiento puede utilizarse de maneras que este manual podría no cubrir en su totalidad. -
Page 54: Garantía Limitada
óxido o la corrosión. Es posible que algunas regiones tengan mayor contenido salino, mayor humedad, o lluvias y nieve más fuertes. Skywalker no ofrece garantía por la decoloración. Les aconsejamos a los clientes que utilicen un protector de rayos UV en la almohadilla del armazón para extender la duración del producto. - Page 55 NOTA: SKYWALKER HOLDINGS, LLC NO ES RESPONSABLE DE LOS DAÑOS INDIRECTOS, ESPECIALES O CONSECUENTES QUE SURJAN DE O EN RELACIÓN CON EL USO O DESEMPEÑO DEL PRODUCTO O DE OTROS DAÑOS RELATIVOS A CUALQUIER PÉRDIDA ECONÓMICA, PÉRDIDA DE PROPIEDAD, PÉRDIDA DE INGRESOS O GANANCIAS, PÉRDIDA DEL DISFRUTE O DEL USO, COSTO DE EXTRACCIÓN, INSTALACIÓN U OTROS DAÑOS CONSECUENTES.
- Page 56 ASSEMBLAGE, ENTRETIEN ET MANUEL DE L’UTILISATEUR DE MODÈLE STEC12X.2 AVERTISSEMENT Veuillez lire toutes les précautions et les instructions de ce manuel avant d’utiliser cet équipement. Skywalker Holdings LLC Conservez ce manuel pour référence ultérieure. Poids P.O. Box 574, Brigham City, UT 84302...
-
Page 57: Liste Des Pièces
Twitter : twitter.com/swtrampolines AVANT DE COMMENCER YouTube : youtube.com/c/SkywalkerTrampolines Instagram : instagram.com/skywalker_trampolines Merci d’avoir choisi Skywalker Trampolines! Nous sommes très heureux de vous aider à procurer un style de vie actif AVERTISSEMENT IMPORTANT AVERTISSEMENT à votre famille (mais surtout un style de vie AMUSANT). Ce modèle est l’un de nos préférés et nous sommes certains que vous allez l’adorer. -
Page 58: Identification Des Pièces
IDENTIFICATION DES PIÈCES Avant de commencer, regardez les dessins ci-dessous afin de vous assurer que vous avez toutes les pièces! Les numéros dans les carrés à gauche (numéros de code) vous aideront à identifier les pièces pendant l’assemblage. Joint en T (peut Connecteur (peut Vis autotaraudeuse Capuchon... -
Page 59: Dessin Éclaté
DESSIN ÉCLATÉ ASSEMBLAGE LISEZ CECI AVANT DE COMMENCER • Vous devrez être au moins 2 adultes et disposer de 2 heures de disponible pour assembler votre trampoline (14) (12) (12) (14) (bien sûr, cela dépend du modèle que vous possédez et si vous possédez des pouvoirs de super héros). •... -
Page 60: Assemblage
Vis autotarau- que les 6 pièces de l’armature soient assemblées. patte (x12) patte (x6) trampoline (x1) deuses (x24) Model: STEC12X.2 Part #: 7027 Description: 12 Foot Mat Made in China Skywalker Holdings, LLC PO Box 574, Brigham City, UT, 84302 USA www.skywalkertrampolines.com... - Page 61 ASSEMBLAGE ÉTAPE 7 ÉTAPE 9 Répétez maintenant l’étape 8 de l’autre côté de la trampoline en plaçant le crochet de la plus petite extrémité d’un ressort dans l’anneau en V à la Déposez la toile de la trampoline (5) avec le filet de l’enceinte attaché sur le sol à l’intérieur de l’armature. gauche de l’étiquette d’avertissement, puis étirez l’extrémité...
- Page 62 ASSEMBLAGE ÉTAPE 11 ÉTAPE 13 Placez ensuite 6 ressorts dans les anneaux en V à gauche des connecteurs, Déposez le coussin de protection (6) sur le dessus des ressorts. Positionnez et étirez les ressorts jusqu’à ce que vous atteigniez les trous de l’armature à le coussin de protection de manière à...
- Page 63 ASSEMBLAGE ÉTAPE 15 ÉTAPE 17 Si vous le voulez, prenez une pause collation, nous avons Important : Le capuchon de poteau (12) possède deux côtés; un avec un PLUS DE LA MOITIÉ du travail d’effectué, vous le méritez bien. trou hexagonal et l’autre avec un trou régulier. La prochaine étape est facile.
- Page 64 ASSEMBLAGE ÉTAPE 19 ÉTAPE 21 En partant de la porte de l’enceinte, soulevez l’un des poteaux assemblés, puis insérez le tube droit (9) dans le LA DERNIÈRE ÉTAPE, VOUS ÊTES PRÈS DE LA LIGNE D’ARRIVÉE. En utilisant l’attache en plastique incluse, fixez connecteur.
-
Page 65: Information Sur L'entretien Et La Maintenance
Afin de réduire le risque de blessures graves, lisez et respectez tous les avertissements, précautions et instructions indiqués dans ce manuel Félicitations et bravo! Vous avez assemblé avec succès votre nouvelle trampoline Skywalker de 3,7 m (12 pi) avec avant d’utiliser l’enceinte de la trampoline. Les avertissements et les instructions pour l’entretien, la maintenance et l’utilisation de cette enceinte! Maintenant, la meilleure façon de garder votre nouvelle trampoline en bon état, il est important de vérifier... -
Page 66: Emplacement De L'étiquette D'avertissement
6 ans. pas la trampoline comme tremplin pour d’autres objets. Pour obtenir plus d’information sur l’équipement, communiquez avec Skywalker. Pour obtenir de l’information sur la Lisez tous les instructions avant d’utiliser d’assemblage). Pour obtenir de plus amples informations ou d’autres renseignements concernant la formation, formation, communiquez avec une organisation de formation certifiée. - Page 67 INSTRUCTION ET MODÈLE DE LEÇONS Leçon 5 : Chute sur le postérieur Leçon 6 : Chute avant 1. Atterrissez dans une position assise en ayant vos 1. Commencez par un saut léger et retombez sur votre Les leçons suivantes sont des exemples d’un programme d’instruction. Ils doivent être précédés d’une discussion jambes parallèles à...
-
Page 68: Information De Sécurité Pour La Trampoline
INFORMATION DE SÉCURITÉ POUR LA TRAMPOLINE INFORMATION DE SÉCURITÉ POUR L’ENCEINTE IL EST NÉCESSAIRE D’ASSURER LA SÉCURITÉ DE L’ENCEINTE DE LA TRAMPOLINE EN UTILISANT CELLE-CI DE FAÇON SÉCURITAIRE Les participants peuvent se blesser lors de l’utilisation de la trampoline, comme c’est le cas pour tous les sports récréatifs. -
Page 69: Garantie Limitée
GARANTIE LIMITÉE Skywalker Holdings, LLC garantit que ses produits sont libres de défauts de fabrication ou de main-d’œuvre dans REMARQUE : SKYWALKER HOLDINGS, LLC N’EST PAS RESPONSABLE DES DOMMAGES INDIRECTS, PARTICULIERS OU le cadre d’une utilisation normale et selon les conditions de service. Le cadre en acier est garanti pendant trois CONSÉCUTIFS PROVENANT OU LIÉS À...
Need help?
Do you have a question about the STEC12X.2 and is the answer not in the manual?
Questions and answers