Table of Contents
Advertisement
Quick Links
- 1 Step 1 - Charging Headsets
- 2 Step 3 - Locating Base Stations
- 3 Step 6 - Installing Base Stations and Registration Point
- 4 Step 7 - Connecting Base Stations and Registration Point
- 5 Step 10 - Registering Headsets
- 6 Appendix A - Headset Battery Fitting
- 7 Appendix B - Headset Functionality & System Troubleshooting
- 8 Appendix C - Pro10 Products and Codes
- Download this manual
Advertisement
Table of Contents

Related Manuals for Quail Digital QP10HS


Summary of Contents for Quail Digital QP10HS
- Page 1 Pro10 Headset System Installation Manual...
-
Page 2: Table Of Contents
This guide specifies how the Pro10 headset system should be installed and commissioned. The LEDs on the base, registration point and headset use a sequence of colours and pulses to indicate the status of the system and the item, which are explained in this guide. Contents Pre-Installation Procedure Tools required to install Pro10 system... -
Page 3: Pre-Installation Procedure
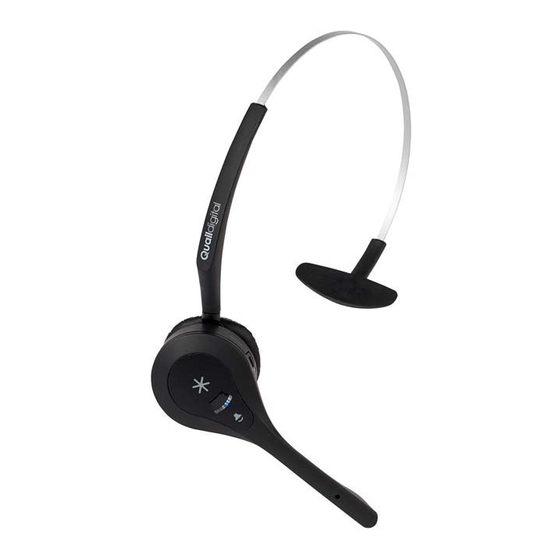
Pre-Installation Procedure Tools required to install Pro10 system: • • Phillips screwdriver Category 5/6/7 network cable • • drill with 1/8” masonry bit RJ45 crimp tool • • pencil cable stripper • • tape measure network cable tester • 1m patch cable Pro10 system components: Q-P10HS - headset(s) including battery and headband or neckband Q-P10BS - base station(s) with 48v power supply... - Page 4 • Always locate your base stations so that they have, as much as possible, clear line of sight in the area you want to cover. Any solid wall, doorway, fridge, plant room area or mezzanine floor in immediate proximity in front of the base station will reduce range. •...
-
Page 5: Step 4 - Conducting Your Range Test
Step 4 - Conducting your range test To conduct your range test, you should temporarily locate your first base station in the optimal position you think is correct for delivering maximum range. Then, temporarily connect the registration point to the base station with a Cat 5 patch cable from the base to the registration point. -
Page 6: Installation Procedure
Installation Procedure Step 6 - Installing base stations and registration point Once you’re confident that the bases are well sited, you should start your installation. Use the cardboard templates provided in the base & the registration point boxes to mark the wall with the correct fixing position. -
Page 7: Step 7 - Connecting Base Stations And Registration Point
Step 7 - Connecting base stations and registration point Daisy chain base stations together with Cat5 network cables (figure 3). The initial base station will have a network cable connected to the ‘network out’ RJ45 socket and the last in line will only have a connection on its ‘network in’... -
Page 8: Step 9 - Setting Up The Charger
Step 9 - Setting up the charger The Q-P10CH charger(s) are likely to be located in the staff room, manager’s office or other back- office area always ensuring that the headsets remain in good range of a base station. The charger(s) can be wall mounted on a shelf (Q-P10SHELF). -
Page 9: Step 11 - Testing The Installation
Note: 1. If you present a headset but the registration point doesn’t start to fast-flash GREEN it means that the headset is already registered to that system, so no further action needed on that headset. 2. If the registration point LED fast-flashes GREEN and then turns solid RED, it means that there’s a problem initialising the headset, put it aside and try again. -
Page 10: Appendix A - Headset Battery Fitting
Appendix A - Headset battery fitting Headsets should always be placed in the charger when not in use. The battery should not be removed from the headset except when being replaced. Battery fitting and removal 1. The headset will ship without the battery inserted. -
Page 11: Appendix B - Headset Functionality & System Troubleshooting
Appendix B – Headset functionality and system troubleshooting Headset audio Status Next steps Bloop-bleep Call drop Either you’ve moved out of range of base (move towards it). Or base has no power, check LEDs on front of base. If LEDs out or AMBER, call Tech support. -
Page 12: Appendix C - Pro10 Products And Codes
Appendix C - Pro10 products and codes Pro10 Headset Pro10 Base Station Pro10 Registration Point Q-P10HS Q-P10BS Q-P10RP Pro10 Charger Pro10 Charger Shelf Pro10 Headband Q-P10CH Q-P10SHELF Q-P10HB Pro10 Neckband Pro10 Battery Q-P10NB Q-P10BAT page 12... -
Page 13: Regulatory Notices
- Connect the equipment into an outlet on a circuit different from that to which the receiver is connected. - Consult the dealer or an experienced radio/TV technician for help. ISED ID: 6402A-QP10HS This device complies with Industry Canada licence-exempt RSS standard(s). Operation is subject to the following two conditions: (1) this device may not cause interference, and (2) this device must accept any interference, including interference that may cause undesired operation of the device. - Page 14 Quail Digital 92 Lots Road London SW10 0QD United Kingdom www.quaildigital.com 31 Mar 2020...
Need help?
Do you have a question about the QP10HS and is the answer not in the manual?
Questions and answers