Sign In
Upload
Download
Table of Contents
Contents
Add to my manuals
Delete from my manuals
Share
URL of this page:
HTML Link:
Bookmark this page
Add
Manual will be automatically added to "My Manuals"
Print this page
×
Bookmark added
×
Added to my manuals
Manuals
Brands
Raymarine Manuals
Monitor
E70141
Installation and operation instruction manual
Raymarine E70141 Installation And Operation Instruction Manual
Hide thumbs
1
2
3
4
Table Of Contents
5
6
7
8
9
10
11
12
13
14
15
16
17
18
19
20
21
22
23
24
25
26
27
28
29
30
31
32
33
34
35
36
37
38
39
40
41
42
43
44
45
46
47
48
49
50
51
52
53
54
55
56
57
58
59
60
61
62
63
64
65
66
67
68
69
70
page
of
70
Go
/
70
Contents
Table of Contents
Troubleshooting
Bookmarks
Table of Contents
Table of Contents
Chapter 1 Important Information
Safety Notices
Water Ingress
Disclaimer
EMC Installation Guidelines
Suppression Ferrites
Connections to Other Equipment
Declaration of Conformity
Product Disposal
Warranty Registration
IMO and SOLAS
Technical Accuracy
Chapter 2 Handbook Information
Handbook Information
Chapter 3 Planning the Installation
Installation Checklist
System Integration
Typical Systems
Parts Supplied
Tools Required
Chapter 4 Cables and Connections
General Cabling Guidance
Connections Overview
Power Connection
Seatalk Ng Connection
Chapter 5 Location and Mounting
Selecting a Display Location
Mounting
Bracket Mounting
Selecting a Transducer Location
Front Bezel
Chapter 6 Getting Started
Controls
Power
Data Master
Adjusting the Backlight
Adjusting the Contrast
Calibration
Chapter 7 Using Your Display
Pages
I40 Bidata Operation
I40 Depth Operation
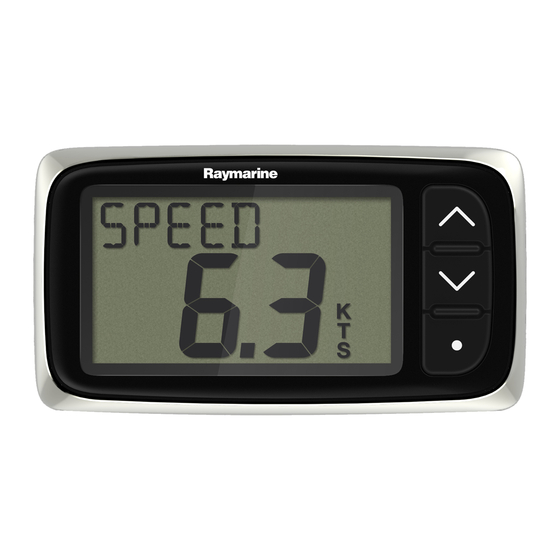
I40 Speed Operation
I40 Wind Operation
Chapter 8 Using Alarms
Alarms
Chapter 9 Maintaining Your Display
Service and Maintenance
Condensation
Routine Equipment Checks
Cleaning
Cleaning the Display Case
Cleaning the Display Screen
Chapter 10 Troubleshooting
Troubleshooting
Instrument Troubleshooting
Power up Troubleshooting
Miscellaneous Troubleshooting
Self-Test
Chapter 11 Technical Support
Raymarine Customer Support
Chapter 12 Technical Specification
Technical Specification
Operating Ranges
Chapter 13 Spares and Accessories
Accessories
I40 Transducers
Spares
Seatalk Accessories
Seatalk Power Cables
Converters
Advertisement
Quick Links
Download this manual
Table of
Contents
Previous
Page
Next
Page
1
2
3
4
5
Advertisement
Table of Contents
Troubleshooting
Chapter 10 Troubleshooting
51
Troubleshooting
52
Instrument troubleshooting
53
Power up troubleshooting
55
Miscellaneous troubleshooting
56
Need help?
Do you have a question about the E70141 and is the answer not in the manual?
Ask a question
Questions and answers
Related Manuals for Raymarine E70141
Marine Equipment Raymarine i40 Installation And Operation Instructions Manual
(86 pages)
Monitor Raymarine i40 Installation And Operation Instructions Manual
(68 pages)
Monitor Raymarine E140 Quick Reference Manual
E-series widescreen multifunction display (12 pages)
Monitor Raymarine E Series User Reference Handbook
Widescreen multifunction display (260 pages)
Monitor Raymarine E-Series Installation Manual
E-series networked display (54 pages)
Monitor Raymarine E-Series Operating Manual
(19 pages)
Monitor Raymarine E Series Reference Manual
Networked display (360 pages)
Monitor Raymarine e7 User Reference
Multifunctional display (320 pages)
Monitor Raymarine a65 Operation Instructions Manual
Multifunction display lighthouse ii (390 pages)
Monitor Raymarine e7D Installation And Operation Handbook
Multifunction displays (270 pages)
Monitor Raymarine eS Series Installation Instructions Manual
(148 pages)
Monitor Raymarine AXIOM+ Series Installation Instructions Manual
(84 pages)
Monitor Raymarine AXIOM Series Installation Instructions Manual
Multifunction displays (84 pages)
Monitor Raymarine a9 Series Mounting And Getting Started
Multifunction displays (21 pages)
Monitor Raymarine i70 Operation Instructions Manual
(104 pages)
Monitor Raymarine E70064 Installation And Operation Instruction Manual
(70 pages)
This manual is also suitable for:
I40
E70066
E70064
E70063
E70065
Table of Contents
Print
Rename the bookmark
Delete bookmark?
Delete from my manuals?
Login
Sign In
OR
Sign in with Facebook
Sign in with Google
Upload manual
Upload from disk
Upload from URL


Need help?
Do you have a question about the E70141 and is the answer not in the manual?
Questions and answers