Advertisement
Quick Links
Advertisement

Subscribe to Our Youtube Channel
Related Manuals for Hanwha Techwin Wisenet HCZ-6321


Summary of Contents for Hanwha Techwin Wisenet HCZ-6321
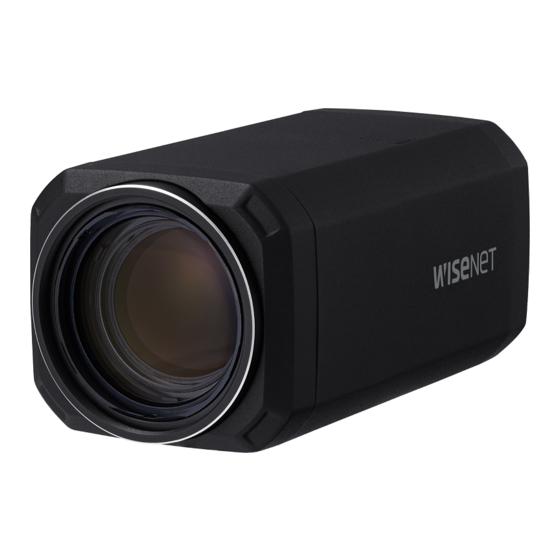
- Page 1 High Resolution 32X Zoom Color Camera User Manual HCZ-6321...
- Page 2 High Resolution 32X Zoom Color Camera User Manual Copyright ©2020 Co., Ltd. All rights reserved. Hanwha Techwin Trademark Each of trademarks herein is registered. The name of this product and other trademarks mentioned in this manual are the registered trademark of their respective company. Restriction Copyright of this document is reserved.
- Page 3 safety information CAUTION RISK OF ELECTRIC SHOCK. DO NOT OPEN CAUTION: TO REDUCE THE RISK OF ELECTRIC SHOCK, DO NOT REMOVE COVER (OR BACK) NO USER SERVICEABLE PARTS INSIDE. REFER SERVICING TO QUALIFIED SERVICE PERSONNEL. This symbol indicates that dangerous voltage consisting a risk of electric shock is present within this unit.
- Page 4 9. If this product fails to operate normally, contact the nearest service center. never disassemble or modify this product in any way. (Hanwha Techwin is not liable for problems caused by unauthorized modifications or attempted repair.) 10.
- Page 5 FCC STATEMENT This device complies with part 15 of the FCC Rules. Operation is subject to the following two conditions : 1) This device may not cause harmful interference, and 2) This device must accept any interference received including interference that may cause undesired operation.
- Page 6 important safety instructions 1. Read these instructions. 2. Keep these instructions. 3. Heed all warnings. 4. Follow all instructions. 5. Do not use this apparatus near water. 6. Clean the contaminated area on the product surface with a soft, dry cloth or a damp cloth.
- Page 7 “Installation & connection” in the user manual. 20. Installing or using the product in water can cause serious damage to the product. Hanwha Techwin cares for the environment at all product manufacturing stages to preserve the environment, and is taking a number of steps to provide customers with more environment-friendly products.The Eco mark represents Hanwha Techwin’s will to create...
- Page 8 contents INTRODUCTION Features What’s included Component names and functions CONNECTION Connecting to Monitor Connecting to Power CONTROL VIA RS-485 INTERFACE Using Coaxial Communications Connecting to 8P Control Terminal CAMERA OPERATION Menu Configuration Menu Setup TROUBLESHOOTING Troubleshooting SPECIFICATIONS Specifications Dimensions SAMSUNG-T PROTOCOL SAMSUNG-T Protocol Command Description COMMAND DESCRIPTION...
- Page 9 introduction FEATURES y 32x Optical Zoom The built-in HCZ-6321(32x) optical zoom lens is a highly durable component. It features auto focus, auto iris, and zoom functions. y High Resolution Use of a 2.38 mega pixel CMOS device provides clear pictures with a horizontal resolution of 1000TV lines.
- Page 10 introduction WHAT’S INCLUDED High Resolution 32X Zoom Color Camera User Manual HCZ-6321 Main Body Quick Manual 8-PIN CABLE ASSY Cable for the testing monitor 10_ introduction...
- Page 11 COMPONENT NAMES AND FUNCTIONS FRONT SIDE Mounting Bracket Screw Hole Used to fix the camera on a mounting bracket. The screw size : It is the specification for the screws used to fasten the camera to the support. 1/4" -20 UNC L: 4.5mm±0.2mm (ISO Standard), or 0.197"...
- Page 12 introduction REAR SIDE CVBS 1 : RS-485- 2 : RS-485+ POWER 3 : EX-DN 4 : GND 5 : MD 6 : COM DC 12V 7 : FOCUS 8 : ZOOM 1 2 3 4 5 6 7 8 AHD Jack Sends video signal and connects to the Video IN port of a AHD DVR.
- Page 13 connection CONNECTING TO MONITOR Refer to the following figure to connect monitors through DVR. ALARM NETWORK BACKUP POWER AHD DVR CVBS 1 : RS-485- 2 : RS-485+ POWER 3 : EX-DN 4 : GND 5 : MD 6 : COM DC 12V 7 : FOCUS 8 : ZOOM...
- Page 14 connection When the resistance value of copper wire is at [20°C(68°F)] Copper wire size (AWG) #24 (0.22mm #22 (0.33mm #20 (0.52mm #18 (0.83mm Resistance value(Ω/m) 0.078 0.050 0.030 0.018 Voltage Drop (V/m) 0.028 0.018 0.011 0.006 y As shown in the table above, voltage decreases as the wire gets longer. Therefore use of an excessively long adaptor output line for connection to the cam- era may affect the performance of the camera.
- Page 15 USING COAXIAL COMMUNICATIONS • Coaxial Communications System • OSD Control method CAMERA CONTROLLER MENU/ENTER OSD KEY UP KEY JOYSTICK UP DOWN DOWN KEY JOYSTICK DOWN LEFT LEFT KEY JOYSTICK LEFT RIGHT RIGHT KEY JOYSTICK RIGHT <DVR> ALARM NETWORK BACKUP POWER : BNC •...
- Page 16 connection CONNECTING TO 8P CONTROL TERMINAL The camera can be controlled by using external controllers like a Remote controller. (RS-485 Communication) CVBS 1 : RS-485- 2 : RS-485+ POWER 3 : EX-DN 4 : GND 5 : MD 6 : COM 7 : FOCUS DC 12V 8 : ZOOM...
- Page 17 Connector Function Signal Level +6V ~ +12V Tele ZOOM Wide -6V ~ -12V +6V ~ +12V FOCUS Near -6V ~ -12V 3±0.5sec USER Vcc ← → There is no motion There is motion DAY mode : D&N terminals must be OPEN to external signals. EX DN (Do not input voltage) NIGHT mode : D&N terminal must be connected to the ground...
- Page 18 camera operation MENU CONFIGURATION MAIN SETUP MENU SSDR ● ON ● OFF ● AWC→SET ● ATW ● MANUAL WHITE BAL ● OUTDOOR ● INDOOR ● MERCURY ● SODIUM ● BLC ● HLC ● OFF BACKLIGHT ● WDR INTELLIGENCE ● OFF ●...
- Page 19 MENU SETUP Use Function Setup switch on back of the camera. CVBS Function Setup switch 1 : RS-485- 2 : RS-485+ POWER 3 : EX-DN 4 : GND 5 : MD 6 : COM DC 12V 7 : FOCUS 8 : ZOOM 1 2 3 4 5 6 7 8 1.
- Page 20 camera operation SSDR (SUPER DYNAMIC RANGE) SSDR illuminates darker spots of an image while retaining the same light level for brighter spots to even out the overall brightness of images with high contrast between bright and dark spots MAIN SETUP SSDR ...
- Page 21 ❖ Select one of the following 7 modes, as appropriate for your purpose. y ATW : Select this when the color temperature is between 1,800˚K and 10,500˚K. y MANUAL : Select this to fine-tune White Balance manually. Set White Balance first by using the ATW or AWC mode. After that switch to MANUAL mode, fine-tune the White Balance and then press the Function Setup switch.
- Page 22 camera operation BACKLIGHT Unlike conventional cameras, the HCZ-6321 is designed to deliver a distinctive subject and background at the same time, even when the subject is backlight, by using the features of the proprietary WN2 chip. 1. When the SETUP menu screen is MAIN SETUP displayed, select ‘Backlight’...
- Page 23 When dark, the HLC is only activated when a bright light exceeding a specific size. (In NIGHT ONLY mode.) y WDR When there are both bright and dark areas at the same time, this mode makes both areas distinctive. - LEVEL : Select one from low, middle, WDR SETUP MODE high to adjust the brightness of the WDR setup.
- Page 24 camera operation INTELLIGENCE Commands the camera to motion-detect and trace an object 1. When the SETUP menu screen is displayed, select ‘INTELLIGENCE’ by using the Functiion Setup Switch so that the arrow indicates ‘INTELLIGENCE’ . 2. Select a desired mode using the Function Setup switch. y DETECTION : Since the camera detects INTELLIGENCE motion without any additional external...
- Page 25 - DIRECTION • IN : Detects objects entering the fenced area. • OUT : Detects objects exiting the fenced area • IN/OUT : Detects all objects entering and exiting the fenced area. TRACKING TRACKING SEL POS POS1 SEL POS POS1 ...
- Page 26 camera operation - DWELL TIME : Use the left or right button in the ‘DWELL TIME’ item to select a time between 5 and 60 seconds for the dwell time before the zoom is returned to the ‘START ZOOM’ position. (5,7,10,15,20,30,40,60 sec) y SETUP CONFIG - DETECT AREA : Defines the Motion...
- Page 27 Tips on Using the Motion Detection Feature • The feature may not function properly under flickering light conditions. • The camera interprets sudden changes in lighting and subsequent change in brightness of an object as motion. • With the feature enabled, other algorithms may require additional time to operate. •...
- Page 28 camera operation - MANUAL : Select 'MANUAL' and press the ZOOM/FOCUS POS SETUP FUNCTION SETUP SWITCH to confirm. Increase or decrease optical zoom (ZOOM) or digital zoom (D-ZOOM) positions moving directional buttons while ← : NEAR → : FAR verifying the changes on screen. Press the ↑...
- Page 29 y ZOOM POS INIT : FOCUS SETUP Moves to the controlled ZOOM position when MODE ONE-PUSH the power is truned on and the initial ZOOM ZOOM TRACK AUTO TRACK position has been set. ZOOM SPEED FAST D-ZOOM - AUTO : If you turn the power off and on, ZOOM POS INIT AUTO ...
- Page 30 camera operation EXPOSURE From the Main Setup menu, select EXPOSURE and press Function Setup Switch. You can now change the exposure setting. 1. Press the Function Setup Switch to MAIN SETUP access the main setup menu and then SSDR position the indicator over EXPOSURE. WHITE BAL BACKLIGHT 2.
- Page 31 Press the FUNCTION SETUP SWITCH to complete. ❷ Image may become unstable if the camera is set to 'ESC' mode and faces a strong fluorescent light. In case the shutter is set to Low Speed in a bright environment, saturation may occur.
- Page 32 camera operation SPECIAL 1. Press the Function Setup Switch to MAIN SETUP access the main setup menu and then SSDR position the indicator over 'SPECIAL'. WHITE BAL BACKLIGHT 2. Press the Function Setup Switch to con- INTELLIGENCE firm. FOCUS EXPOSURE y PRIVACY : Hide the area that you want not SPECIAL ...
- Page 33 - AUTO : The mode is switched DAY/NIGHT AUTO SETUP to 'Color' in a normal environment, but switches to DWELL TIME 5 SEC 'B/W' mode when ambient DURATION SLOW illumination is low. To set up RETURN the switching time or speed for AUTO mode, press the Function Setup Switch.
- Page 34 camera operation y DIS: The DIS mode can compensate for SPECIAL SETUP vibration of the camera. PRIVACY When DIS is operating, D-ZOOM does not DAY/NIGHT AUTO operate. DEFOG y DEFOG: You can use the defog mode to allow the camera to automatically detect the fog density of the screen and display a clear image despite smog, fog or general poor visibility.
- Page 35 - COAX : You can select whether to use COAX communication. Coaxial communication is not available in CVBS mode. y IMAGE ADJ: Includes image quality or special function factors. When the SETUP menu screen is SPECIAL SETUP displayed, select ‘IMAGE ADJ.’ using PRIVACY the Function Setup Switch so that the DAY/NIGHT...
- Page 36 camera operation y DISPLAY: Use this feature to designate a name for the camera, which will display on the monitor screen. - CAM TITLE Press the Function Setup Switch to DISPLAY SETUP display the main setup menu and CAM TITLE ...
- Page 37 - LANGUAGE : You can select the menu language according to your requirements. - RETURN : Select this to save the SPECIAL menu settings and return to the SPECIAL menu. RESET Resets the camera settings to the factory defaults. Communication, Language and Monitor settings are not initialized.
- Page 38 troubleshooting TROUBLESHOOTING If you have trouble operating your camera, refer to the following table. If the guidelines do not enable you to solve the problem, contact an authorized technician. PROBLEM SOLUTION ▶ Ensure that your camera is supplied with rated power as appropriate.
- Page 39 specifications SPECIFICATIONS HCZ-6321 VIDEO Imaging Device 1/2.8" 2.38M CMOS Total Pixels 1952(H) x 1116(V), 2.18M Effective Pixels 1944(H) x 1104(V), 2.14M Scanning System Progressive Color : 0.2 Lux (1/30sec, F1.6, 30IRE), 0.003 Lux(2sec, F1.6, 30IRE) Min. Illumination B/W : 0.01 Lux (1/30sec, F1.6, 30IRE), 0.0001 Lux(2sec, F1.6, 30IRE) S / N Ratio 50dB Video Output...
- Page 40 specifications HCZ-6321 Electronic Shutter Speed Minimum / Maximum / Anti flicker (2 ~ 1/33,000sec) Digital Zoom Flip / Mirror Off / On Intelligent Video Analytics Detection / Tracking / Fixed Moved / Tampering Remote Control I/F RS-485, Coaxial Protocol RS-485: Samsung-T/E, Pelco-D/P, Panasonic, Bosch, AD, Vicon, Honeywell Coaxial : ACP (AHD Coax Protocol) Video Transmission Distance 500m(5C2V Coaxial Cable)
- Page 41 DIMENSIONS Unit : mm [Inches] 71.8 [2.83] 131.7 [5.18] 137.25 [5.40] English_41...
- Page 42 SAMSUNG-T Protocol Command Descri p ti o n SAMSUNG-T PROTOCOL COMMAND DESCRIPTION Byte1 Byte2 Byte3 Command Packet CAM ID HOST ADDR Return Packet CAM ID HOST ADDR Command Name Checksum CHECKSUM CALCULATION : UNARY OPERATION OF SUMMATION F EX) CHECKSUM = ~(BYTE2+BYTE3+... +BYTE8+ BYTE9); Function Reset all data to factory default value.
- Page 43 Byte4 ll Byte5 Byte 6 Byte7 Byte8 Byte9 Byte10 Byte11 CAMMAND DATA3 DATA4 DATA5 DATA6 CHECKSUM CAMMAND DATA3 DATA4 DATA5 DATA6 CHECKSUM FROM BYTE2 TO BYTE9. 000Fh CHECK SUM 000Fh CHECK SUM 0100h CHECK SUM 0100h CHECK SUM 0200h CHECK SUM 0200h CHECK SUM 0040h...
- Page 44 SAMSUNG-T Protocol Command Descri p ti o n Function Save current user preset configuration information. Command Packet CAM ID HOST ADDR User Preset Save Return Packet CAM ID HOST ADDR Parameter P1:00h(USER PRESET 1) ~ 80h(USER PRESET 128) Function Execute selected user preset. Command Packet CAM ID HOST ADDR...
- Page 45 0003h CHECK SUM 0003h CHECK SUM 0007h CHECK SUM 0007h CHECK SUM 0005h CHECK SUM 0005h CHECK SUM 00B1h CHECK SUM 00B1h CHECK SUM 0008h CHECK SUM 0008h CHECK SUM 0010h CHECK SUM 0010h CHECK SUM 0004h CHECK SUM 0004h CHECK SUM 0002h CHECK SUM...
- Page 46 Heriot House, Heriot Road, Chertsey, Surrey, KT16 9DT, United Kingdom Tel +44.1372.235663 Fax +44.1932.57.8101 www.hanwha-security.eu Hanwha Techwin Vietnam Hanoi Office 28th Floor, Handico Building, Pham Hung Street, Me Tri ward, Nam Tu Liem District, Hanoi City, Vietnam Tel : +84.91.982.40.88...
Need help?
Do you have a question about the Wisenet HCZ-6321 and is the answer not in the manual?
Questions and answers