Table of Contents
Advertisement
Quick Links
Advertisement
Table of Contents

Subscribe to Our Youtube Channel
Related Manuals for Hanwha Techwin Wisenet HCD-7070RA


Summary of Contents for Hanwha Techwin Wisenet HCD-7070RA
- Page 1 High Resolution Camera User Manual HCD-7070RA HCV-7070RA HCO-7070RA...
- Page 2 High Resolution Camera User Manual Copyright ©2017 Hanwha Techwin Co., Ltd. All rights reserved. Trademark Each of trademarks herein is registered. The name of this product and other trademarks mentioned in this manual are the registered trademark of their respective company.
- Page 3 Before operating the camera, confirm the camera model and correct input power voltage. To help you understand this manual thoroughly, we'll introduce our model description. ■ HCD-7070RA/HCV-7070RA/HCO-7070RA SERIES • NTSC MODEL • PAL MODEL HCD-7070RAN HCD-7070RAP HCV-7070RAN HCV-7070RAP HCO-7070RAN HCO-7070RAP ■...
- Page 4 safety information CAUTION RISK OF ELECTRIC SHOCK. DO NOT OPEN CAUTION: TO REDUCE THE RISK OF ELECTRIC SHOCK, DO NOT REMOVE COVER (OR BACK) NO USER SERVICEABLE PARTS INSIDE. REFER SERVICING TO QUALIFIED SERVICE PERSONNEL. This symbol indicates that dangerous voltage consisting a risk of electric shock is present within this unit.
- Page 5 9. If this product fails to operate normally, contact the nearest service center. never disassemble or modify this product in any way. (Hanwha Techwin is not liable for problems caused by unauthorized modifications or attempted repair.) 10.
- Page 6 safety information FCC Statement This device complies with part 15 of the FCC Rules. Operation is subject to the following two conditions : 1) This device may not cause harmful interference, and 2) This device must accept any interference received including interference that may cause undesired operation.
- Page 7 important safety instructions Read these instructions. Keep these instructions. Heed all warnings. Follow all instructions. Do not use this apparatus near water. Clean only with dry cloth. Do not block any ventilation openings. Install in accordance with the manufacturer’s instructions. Do not install near any heat sources such as radiators, heat registers, or other apparatus (including amplifiers) that produce heat.
- Page 8 WARNING IR emitted from this product. Do not stare at operating lamp. Product tested against IEC 62471 Hanwha Techwin cares for the environment at all product manufacturing stages, and is taking measures to provide customers with more environmentally friendly products.
-
Page 9: Table Of Contents
contents INTRODUCTION Features Components and Accessories Component names and functions INSTALLATION Before Installation Installation Adjusting the monitoring direction for the camera CONNECTION Connecting to Monitor Connecting to Power To connect the Motion Detection Output Using Coaxial Communications CAMERA OPERATION Menu Configuration Menu Setup TROUBLESHOOTING Troubleshooting... -
Page 10: Introduction
introduction FEATURES y High Resolution Use of a 4.1 mega pixel CMOS device provides clear pictures with a resolution of 2560x1440. y Excellent Sensitivity - Color : 0.16Lux (F1.6, 1/30sec) B/W : 0Lux(IR LED on) y D-WDR If an object has a large variance between bright and dark areas, it will keep bright areas bright and make selected dark areas bright, so that the overall brightness can be maintained. -
Page 11: Components And Accessories
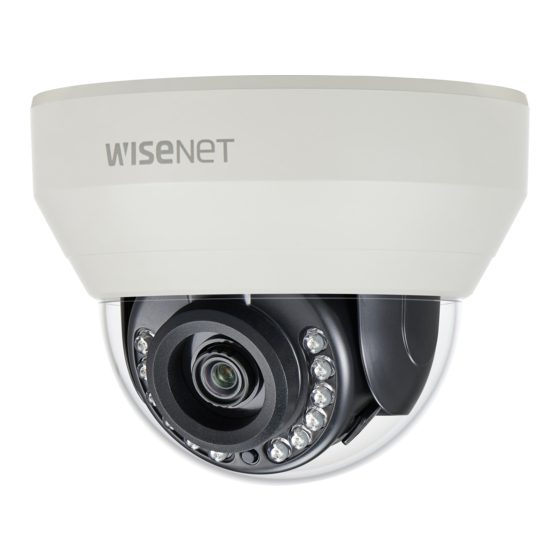
COMPONENTS AND ACCESSORIES Check if the following items are included in the product package. <HCD-7070RA> Camera Quick Manual Screws Template Video Output Cable English_11... - Page 12 introduction <HCV-7070RA> Camera Quick Manual Template Tapping Screw Machine Screws L Wrench Card-type moisture Video Output Cable absorbent 12_ introduction...
- Page 13 <HCO-7070RA> Camera Quick Manual Screws Card-type moisture Template Wrench absorbent Video Output Cable English_13...
-
Page 14: Component Names And Functions
introduction COMPONENT NAMES AND FUNCTIONS HCD-7070RA ⓭ ⓬ ⓫ ❿ Dome Cover Shield Case Rotate base : control rotating angle of camera. Vari-focal Lens Module : 3.2 ~ 10mm (F1.6). Function Setup switch : Display the menu on the screen and move the cursor to four directions to confirm status or after changing a selected item. - Page 15 HCV-7070RA ⓬ ⓫ ❿ Dome Cover Rotate base : control rotating angle of camera. Vari-focal Lens Module : 3.2 ~ 10mm (F1.6). Function Setup switch : Display the menu on the screen and move the cursor to four directions to confirm status or after changing a selected item. ...
- Page 16 introduction HCO-7070RA Camera Sunshield Knob Sunshield : Fixing the sunshield onto the camera. Focus lever : Set focus of lens by turn the focus lever. Zoom lever : Set zoom magnification of lens by turn the zoom lever. Front cover Function Setup Switch : Display the menu on the screen and move the cursor to four directions to confirm status or after changing a selected item.
- Page 17 Back (HCO-7070RA) ❿ Function jack (ALARM OUT, GND) VIDEO OUTPUT jack : Video signals are output through this port. Connect this port to the Video IN port of a AHD DVR. Power input terminal : Connect the power as specified for each model here. ❿...
-
Page 18: Installation
Installation BEFORE INSTALLATION Ensure you read out the following instructions before installing the camera: y You have to check whether the location (ceiling or wall) can bear five times the weight of your camera. y Don’t let the cable to be caught in improper place or the electric line cover to be damaged. Otherwise it may cause a breakdown or fire. - Page 19 Disassembling(HCV-7070RA) Using the L-wrench provided, loosen 3 screws by turning them counterclockwise and separate the dome cover. L Wrench Dome Cover English_19...
-
Page 20: Installation
Installation Installation(HCD-7070RA) 1. Attach the installation template to the selected area and punch 2 holes as shown in the fi gure. 케이블 구멍 2. Use the 2 supplied screws to fi x the camera to the 2 punched holes. y Set the <TOP FRONT> mark imprinted on the camera to face the direction of camera monitoring. - Page 21 Installing the camera on a ceiling or wall(HCV-7070RA) 1. Drill holes on the ceiling by matching to the holes on the case bed, and insert plastic anchors (HUD 5) (not included) fully into the holes. Fix the case bed on the ceiling by using screws .
- Page 22 3. Adjust the lens in a desired direction by referring to the “Adjusting the monitoring direction for the camera”section. 4. Close the dome cover. To ensure waterproofing, tight up the fixing bolts using the L-wrench. Dome Cover L Wrench The installation should be done by qualified service personnel or system installers. If the ceiling material is not strong enough to hold the installation screws, the camera may fall off.
-
Page 23: Adjusting The Monitoring Direction For The Camera
ADJUSTING THE MONITORING DIRECTION FOR THE CAMERA <HCD-7070RA> Tilt Lens rotation <HCV-7070RA> Tilt Lens rotation English_23... - Page 24 Installation ` Adjusting the monitoring direction You can adjust the camera direction only when the camera is fixed on the ceiling. Where, rotating the camera unit to the left or right is called Pan, adjusting the tilt is called Tilt, and turning the lens on its axis is called Rotation. - The effective range of pan is a total of 350 degrees.
- Page 25 Adjust the lens’s zoom and focus (HCO-7070RA) 1. Remove the sunshield from the camera. 2. Remove the front cover from the camera by turning it counterclockwise. 3. Unlock the Zoom or Focus lever before adjusting the lens. 4. Adjust the zoom & focus by moving the lever counterclockwise for (NEAR & WIDE) and clockwise for (TELE &...
-
Page 26: Connection
connection CONNECTING TO MONITOR Connect the Video OUT port on the rear panel of the camera to a AHD DVR. ALARM NETWORK BACKUP POWER AHD DVR HCD-7070RA Monitor ALARM NETWORK BACKUP POWER AHD DVR HCV-7070RA Monitor 26_ connection... -
Page 27: Connecting To Power
HCO-7070RA ALARM NETWORK BACKUP POWER AHD DVR Monitor y As the connecting method varies with the instruments, refer to the manual supplied with the instrument. y Only connect the cable when the power is turned off. This product supports 2 video output formats of AHD, CVBS. The default is AHD. Select the video output appropriate for your DVR. - Page 28 connection Power Input Terminal HCV-7070RA HCO-7070RA Power Input Terminal When the resistance value of copper wire is at [20°C(68°F)] Copper wire size (AWG) #24 (0.22mm #22 (0.33mm #20 (0.52mm #18 (0.83mm Resistance value(Ω/m) 0.078 0.050 0.030 0.018 Voltage Drop (V/m) 0.028 0.018 0.011...
-
Page 29: To Connect The Motion Detection Output
TO CONNECT THE MOTION DETECTION OUTPUT If devices (e.g., flashing light and siren) that exceed the voltage and current specifications are connected by using the open collector method, it may cause malfunction. Refer to the connection diagram below when connecting devices that exceed the voltage and current specifications. -
Page 30: Using Coaxial Communications
connection USING COAXIAL COMMUNICATIONS y Coaxial Communications System y OSD Control method CAMERA MENU/ENTER UP KEY DOWN DOWN KEY LEFT LEFT KEY RIGHT RIGHT KEY HCD-7070RA : BNC ● HCV-7070RA HCO-7070RA 30_ connection... - Page 31 - Video Cable The camera's video output port is connected to the DVR with a BNC coaxial cable, shown below. Recommended Cable Distance Specification 500m 5C2V It is recommended that pure copper coax cable is used and not copper coated steel, as this will cause issues with the communication over the coaxial cable.
-
Page 32: Camera Operation
camera operation MENU CONFIGURATION MAIN SETUP VIDEO FORMAT ◦ ◦ CVBS D-WDR ◦ ◦ ◦ ◦ ◦ INDOOR OUTDOOR WHITE BAL ◦ ◦ AWC → SET MANUAL ◦ ◦ ◦ BRIGHTNESS LENS SHUTTER EXPOSURE ◦ ◦ ◦ RETURN BACKLIGHT ◦ ◦... - Page 33 MAIN SETUP 1. VIDEO FORMAT Select the Change the status function using 2. D-WDR using the Function the Function Setup switch. 3. WHITE BAL Setup switch. 4. EXPOSURE 5. BACKLIGHT 6. SPECIAL 7. EXIT SAVE 1. Press the Function Setup switch. y Main SETUP menu is displayed on the monitor screen.
- Page 34 camera operation D-WDR If an object has a large variance between bright and dark areas, it will keep bright areas bright and make selected dark areas bright, so that the overall brightness can be maintained. 1. When the SETUP menu screen is MAIN SETUP displayed, select ‘D-WDR’...
- Page 35 y INDOOR : Select this when the color temperature is between 4,500K and 8,500K. Automatically adjusts the camera color for optimization to the indoor environment. y MANUAL : Select this to fine-tune White WB MANUAL Balance manually. Set White 1. RED GAIN IIIIIIIIII IIIIIIIIII Balance first by using the ATW...
- Page 36 camera operation - Manual : The shutter does not automatically move but is fixed to the maximal degree in this mode. Some lenses may not work properly, depending on the setting of the BRIGHTNESS LEVEL. y SHUTTER : You can select the shutter. - MIN : 1/30 ~ 1/12000 - MAX : 1/60 ~ 1/12000(NTSC) , 1/50 ~ 1/12000(PAL) - A.FLK : Select this when you experience picture flicker, this happen when there is...
- Page 37 y USER BLC : Enables a user to select a desired area on a picture and BLC SETUP view that area more clearly. ▶ LEVEL M I D D L E - LEVEL : Adjusts the brightness level of a IIII IIIIIIIIIIIIIIII monitoring area.
- Page 38 camera operation SPECIAL 1. When the SETUP menu screen is MAIN SETUP displayed, select ‘SPECIAL’ by using 1. VIDEO FORMAT the Function Setup switch so that the 2. D-WDR arrow indicates ‘SPECIAL’ . 3. WHITE BAL 2. Select a desired mode using the 4.
- Page 39 - SHARPNESS : Select a mode to adjust the thickness of an image’s sharpness. Increase or decrease the level of each mode to adjust the level of sharpness. y OFF : Released state y ON : The setting range is 1 ~ 32. - RETURN : Return to the SPECIAL menu.
- Page 40 camera operation - COLOR : The picture is always displayed in color. - B/W : The picture is always displayed in black and white. You can turn on or off the burst signal on B/W mode. If the lens mounted in the camera is different from the one set in <LENS> of the <EXPOSURE>...
- Page 41 ` MASK : Under Motion Detection, If you don’t want to see mosaic image on the screen, you may turn MASK OFF. If you wants to see mosaic image, please turn it on. ` TRANSPARENCY: Adds or removes transparency from the masking area. ` TOP/BOTTOM/LEFT/RIGHT : Area location can be adjusted.
- Page 42 camera operation - If the size is greater than the max size or smaller than the min size, motion is not detected. To avoid false detection caused by noises, set the max/min detection size suitable for the installation environment. But the same movement in the same location can cause a different detection size. So, include margins when you set the min/max detection size.
-
Page 43: Troubleshooting
troubleshooting TROUBLESHOOTING If you have trouble operating your camera, refer to the following table. If the guidelines do not enable you to solve the problem, contact an authorized technician. Problems Troubleshooting Nothing appears on the screen. y Check that the power cord and line connection between the camera and monitor are properly connected. -
Page 44: Specifications
specifications SPECIFICATIONS HCD-7070RAN/ HCV-7070RAN/ HCO-7070RAN/ HCD-7070RAP HCV-7070RAP HCO-7070RAP Video Imaging Device 1/3” 4M CMOS Total Pixels 2720(H) x 1536(V) Effective Pixels 2688(H) x 1520(V) Scanning System Progressive Scan Color : 0.16Lux (F1.6, 1/30sec) Min. Illumination B/W : 0Lux(IR LED on) S / N Ratio 52dB (AGC off, Weight on) Video Output... - Page 45 HCD-7070RAN/ HCV-7070RAN/ HCO-7070RAN/ HCD-7070RAP HCV-7070RAP HCO-7070RAP White Balance ATW / Outdoor / Indoor(4,500K° ~ 8,500K°) / Manual / AWC (1,800K° ~ 10,500K°) Electronic Shutter Speed 1/30 sec ~ 1/12,000 sec(N), 1/25sec~ 1/12,000sec(P) Reverse Off / H-Rev / V-Rev Alarm MD output 1 Remote control interface Coaxial Protocol...
-
Page 46: Dimension
DIMENSION Unit: mm (inch) <HCD-7070RA> 46_ specifications... - Page 47 Unit: mm (inch) <HCV-7070RA> English_47...
- Page 48 Unit: mm (inch) <HCO-7070RA> 48_ specifications...
- Page 49 Head Office 6, Pangyo-ro 319 beon-gil, Bundang-gu, Seongnam-si, Gyeonggi-do, 463-400 Rep. of KOREA Tel : +82.70.7147.8753 Fax : +82.31.8018.3740 www.hanwha-security.com Hanwha Techwin America 500 Frank W. Burr Blvd. Suite 43 Teaneck, NJ 07666 Toll Free +1.877.213.1222 Direct +1.201.325.6920 Fax +1.201.373.0124 www.hanwha-security.com...
Need help?
Do you have a question about the Wisenet HCD-7070RA and is the answer not in the manual?
Questions and answers