Table of Contents
Advertisement
Quick Links
Advertisement
Table of Contents

Subscribe to Our Youtube Channel
Related Manuals for Makita DUR369LPT2


Summary of Contents for Makita DUR369LPT2
- Page 1 INSTRUCTION MANUAL Cordless Grass Trimmer DUR369A DUR369L Read before use.
-
Page 2: Specifications
SPECIFICATIONS Model: DUR369A DUR369L Handle type Bike handle Loop handle No load speed 3: 0-7,000 min (at each rotation speed level) 2: 0-5,500 min 1: 0-4,600 min Overall length 1,846 mm (without cutting tool) Nylon cord diameter 2.4 mm Applicable cutting tool and 2-tooth blade 255 mm cutting diameter... -
Page 3: General Power Tool Safety Warnings
Power tools can produce electromagnetic fields Only for EU countries Ni-MH (EMF) that are not harmful to the user. However, Do not dispose of electric equipment or battery Li-ion users of pacemakers and other similar medical pack together with household waste material! In observance of the European Directives, devices should contact the maker of their device and/ on Waste Electric and Electronic Equipment... -
Page 4: Intended Use
Power tool use and care Do not use a battery pack or tool that is dam- aged or modified. Damaged or modified batteries Do not force the power tool. Use the correct may exhibit unpredictable behaviour resulting in power tool for your application. The correct fire, explosion or risk of injury. -
Page 5: Personal Protective Equipment
Personal protective equipment Electrical and battery safety Do not expose the tool to rain or wet condi- tions. Water entering the tool will increase the risk of electric shock. Do not use the tool if the switch does not turn it on and off. Any tool that cannot be con- trolled with the switch is dangerous and must be repaired. -
Page 6: Cutting Tools
Operation 19. When using a cutting blade, swing the tool evenly in half-circle from right to left, like In the event of an emergency, switch off the using a scythe. tool immediately. 20. Hold the tool by insulated gripping surfaces If you feel any unusual condition (e.g. -
Page 7: First Aid
When transporting the tool in a vehicle, prop- erly secure it to avoid turnover. Otherwise damage to the tool and other baggage may result. Maintenance Have your tool serviced by our authorized service center, always using only genuine replacement parts. Incorrect repair and poor maintenance can shorten the life of the tool and increase the risk of accidents. - Page 8 Before using battery cartridge, read all instruc- causing fires, personal injury and damage. It will tions and cautionary markings on (1) battery also void the Makita warranty for the Makita tool and charger, (2) battery, and (3) product using charger. battery.
-
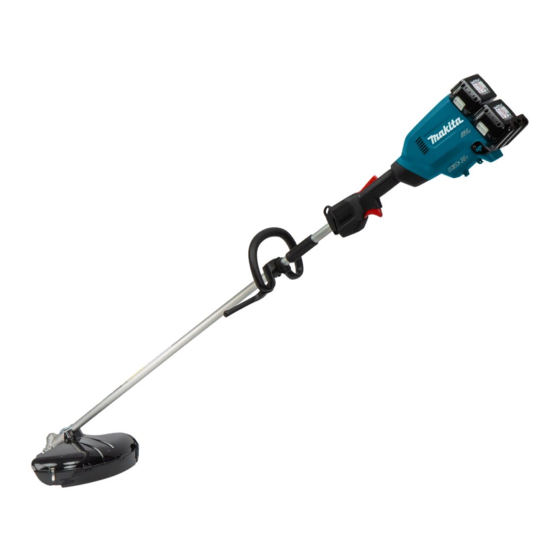
Page 9: Parts Description
PARTS DESCRIPTION DUR369L DUR369A Speed indicator ADT indicator Caution lamp Main power button (ADT = Automatic Torque Drive Technology) Reverse button Battery cartridge Lock-off lever Switch trigger Hanger Handle Barrier (country specific) Protector Protector extension (for Shoulder harness nylon cutting head / plastic blade) 9 ENGLISH... -
Page 10: Functional Description
FUNCTIONAL Caution lamp Status Color Blinking DESCRIPTION Green Overload Overheat (tool) / (battery) WARNING: Always be sure that the tool is switched off and the battery cartridge is removed Over discharge before adjusting or checking function on the tool. Failure to switch off and remove the battery cartridge Overload protection may result in serious personal injury from accidental start-up. -
Page 11: Main Power Switch
Press the check button on the battery cartridge to indi- CAUTION: Before installing the battery car- cate the remaining battery capacity. The indicator lamps tridge into the tool, always check to see that the light up for a few seconds. switch trigger actuates properly and returns to the "OFF"... - Page 12 Speed adjusting You can select the tool speed by tapping the main power button. Each time you tap the main power button, the level of speed will change. ► 1 . marking 2. marking 3. ADT indicator 4. Main power button 5. Reverse button Indicator Mode Cutting tool...
-
Page 13: Electric Brake
NOTE: During the reverse rotation, the tool operates only NOTICE: Note the direction of the grip. The for a short period of time and then automatically stops. screw holes will not be aligned if the grip is not inserted in the correct direction. NOTE: Once the tool is stopped, the rotation returns to regular direction when you start the tool again. - Page 14 For the loop handle model, the hex wrench can also be Attaching the barrier stored on the handle as illustrated. For the loop handle model only (country specific) If the barrier is included in your model, attach it to the handle using the screw on the barrier.
-
Page 15: Cutter Blade
For cutter blade Installing the cutting tool Attach the protector to the clamp using bolts. CAUTION: Always use the supplied wrenches to remove or to install the cutting tool. CAUTION: Be sure to remove the hex wrench inserted into the tool head after installing the cutting tool. -
Page 16: Nylon Cutting Head
NOTICE: pointing in the same direction. Be sure to use genuine Makita nylon cutting head. There are two types of nylon cutting head; the bump & feed type and the manual feed type. -
Page 17: Operation
To remove the nylon cutting head, follow the installation procedures in reverse. Plastic blade NOTICE: Be sure to use genuine Makita plastic blade. Clasp the hook on the shoulder harness to tool's hanger. ► 1 . Plastic blade 2. Spindle 3. Hex wrench 4. Loosen 5. - Page 18 The shoulder harness features a means of quick Adjust the shoulder harness to a comfortable release. working position. Simply squeeze the sides of the buckle to release the shoulder harness. The shoulder harness features a means of quick release. ► 1 . Buckle Pull the strip as illustrated to release the tool from the shoulder harness.
- Page 19 Adjust the hanger position as shown in the figure DUR369A and then tighten the hex socket head bolt. 750 mm 100-300 mm 750 mm DUR369L The hanger position from the ground The cutting tool position from the ground The horizontal distance between the hanger and the unguarded part of the cutting tool Correct handling of the tool WARNING: Always position the tool on your...
-
Page 20: Maintenance
Discoloration, deformation or cracks may result. To maintain product SAFETY and RELIABILITY, repairs, any other maintenance or adjustment should be performed by Makita Authorized or Factory Service Centers, always using Makita replacement parts. Cleaning the tool Clean the tool by wiping off dust, dirt, or cut off grass with a dry cloth or one dipped in soapy water and wrung out. - Page 21 95-M10L 100 mm 80 mm 21 ENGLISH...
- Page 22 B&F ECO 4L 100 mm 80 mm 22 ENGLISH...
- Page 23 UN-74L, UN-72L 4.5 m 100 mm 23 ENGLISH...
- Page 24 Manual feed type Replacing the plastic blade When the nylon cord gets short, pull it out from the Replace the plastic blade if it is worn out or broken. eyelet and feed it from the another eyelet. 0.75 m When installing the plastic blade, align the direction of the arrow on the blade with that of the protector.
-
Page 25: Troubleshooting
TROUBLESHOOTING Before asking for repairs, conduct your own inspection first. If you find a problem that is not explained in the manual, do not attempt to dismantle the tool. Instead, ask Makita Authorized Service Centers, always using Makita replace- ment parts for repairs. State of abnormality Probable cause (malfunction) Remedy Motor does not run. Battery cartridge is not installed. Install the battery cartridge. - Page 28 Makita Corporation 3-11-8, Sumiyoshi-cho, Anjo, Aichi 446-8502 Japan 885742A928 www.makita.com 20191004...
Need help?
Do you have a question about the DUR369LPT2 and is the answer not in the manual?
Questions and answers