
Related Manuals for Eneo ISM-52F0023W0A


Summary of Contents for Eneo ISM-52F0023W0A
- Page 1 Quick Installation Guide Network Board Camera, Day&Night, WDR, H.265, PoE, 12VDC ISM-52F0023W0A ISM-54F0023W0A ISM-52F0021W0A ISM-52F0006W0A...
-
Page 2: Table Of Contents
Content Components ........................5 Installation ........................6 Extension Cable .................................6 Connection ..................................6 Micro SD memory slot ..............................6 RJ-45 port ..................................7 Connecting Alarms ..............................7 Connecting the Power ..............................7 Connecting Audio ................................8 Connecting Test Monitor Out (CVBS) ........................8 Network Connection & IP assignment ........................9 Operation ........................10 Access from a browser .............................. - Page 3 Safety instructions General safety instructions • Before switching on and operating the system, first read this safety advice and the operating instructions. • Keep the operating instructions in a safe place for later use. • Installation, commissioning and maintenance of the system may only be carried out by authorised individuals and in accordance with the installation instructions - ensuring that all applicable standards and guidelines are followed.
- Page 4 Class A device note This is a Class A device. This device can cause malfunctions in the living area; in such an event, the operator may need to take appropriate measures to compensate for these. WEEE (Waste Electronical & Electronic Equipment) Correct Disposal of This Product (Applicable in the European Union and other European countries with separate collection systems).
-
Page 5: Components
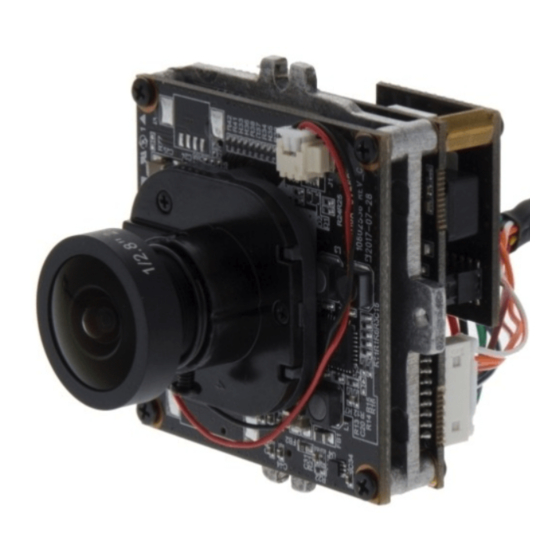
Components This system comes with the following components; • Network Camera • Accessory Kit Notice: Check your package to make sure that you received the complete system, including all components listed above. Notice: Adapter for DC 12V is not supplied. -
Page 6: Installation
Installation For the operation of the Network Camera, it is necessary to connect a network cable for data transmission, power connection from power adapter. Depending on operation methods, it is possible to connect an alarm cable additionally. For its fixation on different locations, please consult with an installer. -
Page 7: Rj-45 Port
RJ-45 port Connect a standard RJ-45 cable to the network port of the network camera. Generally a cross-over cable is used for directly connection to PC, while a direct cable is used for con- nection to a hub. You can also use a router featuring PoE (Power over Ethernet) to supply power to the camera. -
Page 8: Connecting Audio
• If PoE and 12 VDC are both applied, the camera will be supplied with power from PoE. Connecting Audio Connect Speaker to Audio line output and external Mic to Audio input line. Connecting Test Monitor Out (CVBS) Connect 5pin micro USB test video cable (optional) to check test video. -
Page 9: Network Connection & Ip Assignment
If necessary, uncheck “DHCP”. Make the necessary settings and confirm with “OK”. The camera settings are updated. Now you can also perform a factory reset of the camera inside the eneo Site Manager. For further information, please refer to the eneo Site Manager Quick Start Guide. -
Page 10: Operation
Operation The network camera can be used with Windows operating system and browsers. The recommended browsers are Internet Explorer, Safari, Firefox, Opera and Google Chrome with Windows. Notice: To view streaming video in Microsoft Internet Explorer, set your browser to allow ActiveX controls. -
Page 11: Access From The Internet
Access from the internet Once connected, the network camera is accessible on your local network (LAN). To access the network camera from the Internet you must configure your broadband router to allow incoming data traffic to the network camera. To do this, enable the NAT traversal feature, which will attempt to automatically configure the router to allow access to the network camera. -
Page 12: Live View Page
Live View Page The Live View page comes in several screen modes. Users are allowed to select the most suitable one out of those modes. Adjust the mode in accordance with your PC specifica- tions and monitoring purposes. General controls Live View Page Playback Page Setup Page... - Page 13 The Snapshot button takes a snapshot of the current image. The location where the image is saved can be specified. The Digital Zoom button activates a zoom-in or zoom-out function for video image on the live screen. The Full Screen button causes the video image to fill the entire screen area. No other windows will be visible.
-
Page 14: Video Streams
Video Streams The network camera provides several images and video stream formats. Your require- ments and the properties of your network will determine the type you use. The Live View page in the network camera provides access to H.264 and Motion JPEG vid- eo streams, and to the list of available video streams. - Page 15 You can see the video screen when playing the video clip in the Micro SD memory. ② Playback Buttons: To view a recording data in the SD local storage, select it from the list and click the Play- back buttons. Go to the first: go to the beginning of the video clip.
-
Page 16: Network Camera Setup
displayed. If you select a particular date in the calendar, a yellow square on the date will be displayed. ⑥ Play Time: Displays time of the video playing. ⑦ Event Search Window: Select a search option in the drop-down list and click GO button. You can also enter the time period for searching. -
Page 17: Resetting To The Factory Default Settings
Notice: If the password is lost, the network camera must be reset to the factory default settings. Please see ”Resetting to the Factory Default Setting”. Resetting to the factory default settings To reset the network camera to the original factory settings, go to the Setup > System > Maintenance web page (described in “System >... -
Page 18: Further Information
• the product detail pages on the eneo website (www.eneo-security.com), • the eneo download portal (https://datacloud.videor.com/s/eneodownloadportal). In case that previous link is broken, the latest link to the eneo download portal can be found on the respective eneo product page at www.eneo-security.com. - Page 19 Inhalt Komponenten ......................22 Installation ........................23 Verlängerungskabel ..............................23 Verbindung ..................................23 Schlitz für MicroSD-Speicherkarte ........................23 RJ45-Port ..................................24 Anschließen von Alarmen ............................24 Anschluss der Stromversorgung ......................... 24 Audio anschließen ..............................25 Anschließen eines Testmonitors (CVBS) ......................25 Netzwerkverbindung und IP-Zuweisung ......................26 Bedienung ........................27 Zugriff über einen Browser ............................
- Page 20 Sicherheitsanweisungen Sicherheitshinweise allgemein • Bevor Sie das System anschließen und in Betrieb nehmen, lesen Sie zuerst diese Sicherheitshinweise und die Betriebsanleitung. • Bewahren Sie die Betriebsanleitung sorgfältig zur späteren Verwendung auf. • Montage, Inbetriebnahme und Wartung des Systems darf nur durch dafür autorisierte Personen vorgenom- men und entsprechend den Installationsanweisungen - unter Beachtung aller mitgeltenden Normen und Richtlinien - durchgeführt werden.
- Page 21 • Bei abgedunkelter Umgebung und direktem Blick in den IR-Scheinwerfer ist ein Sicherheitsabstand von > 1 m zum Scheinwerfer einzuhalten. • Unsichtbare LED Strahlung nicht direkt mit optischen Instrumenten (z.B. Lupe, Vergrößerungsglas oder Mikroskop) betrachten, da dies Augen gefährden kann, LED Klasse 1M. •...
-
Page 22: Komponenten
Komponenten Das System wird mit den folgenden Komponenten geliefert: • Netzwerkkamera • Montageset Hinweis: Prüfen Sie den Packungsinhalt, um sicherzustellen, dass Sie das vollständi- ge System mit allen oben genannten Komponenten erhalten haben. Hinweis: Adapter für 12V DC ist nicht im Lieferumfang enthalten. -
Page 23: Installation
Installation Zum Betrieb der Netzwerkkamera müssen ein Netzwerkkabel zur Datenübertragung und die Stromversorgung durch ein Netzteil angeschlossen werden. Je nach Betriebsmethode kann ein zusätzliches Alarmkabel angeschlossen werden. Zur Befestigung an verschiede- nen Standorten wenden Sie sich bitte an einen Installateur. Verlängerungskabel Element Beschreibung... -
Page 24: Rj45-Port
RJ45-Port Schließen Sie ein Standard-RJ-45-Kabel an den Netzwerkanschluss der Netzwerkkamera an. Zum Anschluss an einen PC wird im Allgemeinen ein Crossover-Kabel verwendet, während zum Anschluss an einen Hub ein direktes Kabel (Patch-Kabel) verwendet wird. Zur Versorgung der Kamera mit Strom kann auch ein Router mit der PoE-Funktion (Power over Ethernet) verwendet werden. -
Page 25: Audio Anschließen
• Zur Versorgung der Kamera mit Strom kann auch ein Router mit der PoE-Funktion (Power over Ethernet) verwendet werden. • Weitere Informationen zum Stromanschluss finden Sie im Anhang, Produkteigenschaften. • Wenn sowohl PoE als auch 12 V DC angewendet werden, wird die Kamera durch den PoE-Anschluss versorgt. -
Page 26: Netzwerkverbindung Und Ip-Zuweisung
Netzwerkverbindung und IP-Zuweisung Mit dem eneo Site Manager können alle eneo Netzwerk Kameras im lokalen Netzwerk erkannt werden (laden Sie die Software von www.eneo-security.com herunter). Laden Sie die Software von www.eneo-security.com herunter und installieren Sie es. Starten Sie das Programm. Sie erhalten eine Liste der im lokalen Netzwerk verfügbaren Kameras. -
Page 27: Bedienung
Bedienung Die Netzwerkkamera kann mit einem Windows-Betriebssystem und Browsern verwen- det werden. Die empfohlenen Browser sind Internet Explorer, Safari, Firefox, Opera und Google Chrome in Windows. Hinweis: Um das Video-Streaming mit dem Microsoft Internet Explorer zu ermögli- chen, müssen Sie Ihren Browser so einstellen, dass ActiveX Controls erlaubt werden. Zugriff über einen Browser 1. -
Page 28: Zugriff Über Internet
Zugriff über Internet Nach dem Anschluss ist die Netzwerkkamera in Ihrem lokalen Netzwerk (LAN) verfügbar. Um vom Internet aus auf die Netzwerkkamera zugreifen zu können, müssen Sie Ihren Breitband-Router so konfigurieren, dass eingehende Verbindungen zur Netzwerkkamera zugelassen werden. Schalten Sie dazu die Funktion „NAT-Traversal“ ein, um den Router au- tomatisch so zu konfigurieren, dass der Zugriff auf die Netzwerkkamera möglich ist. -
Page 29: Live View-Seite
HINWEIS: Der Standardname und das Standardkennwort des Administrators lauten "admin". Wenn das Kennwort verloren gegangen ist, muss die Netzwerkka- mera auf die Werkseinstellungen zurückgesetzt werden. Siehe „Rücksetzen auf die Werkseinstellungen“. Um beim Einstellen des Admin-Kennworts das Abhören der Netzwerkverbindung zu verhindern, kann dies über eine verschlüsselte HTTPS-Verbindung geschehen, wozu ein HTTPS-Zertifikat erforderlich ist (siehe unten den Hinweis). -
Page 30: Allgemeine Steuerelemente
Allgemeine Steuerelemente Live View-Seite Wiedergabe-Seite Konfigurationsseite Hilfeseite Mit der Video-Dropdown-Liste können Sie einen konfigurierten oder einen vorprogrammierten Video-Stream auf der Live View-Seite anzeigen. Die Stream-Profile werden unter Setup (Konfiguration) > Basic Configuration (Grundkonfiguration) > Video und Bild konfiguriert. Weitere Informationen finden Sie unter "Grundkonfiguration > Video und Bild"... -
Page 31: Video-Streams
Fokus: Klicken Sie auf für fernen Fokus und für nahen Fokus. Zoom: Klicken Sie auf die Taste zum Hinauszoomen und auf die Taste zum Heranzoomen. Fokus verschiebt sich leicht nach der Einstellung des Zooms; stellen Sie den Fokus bei Bedarf erneut ein. Smart Focus: Benutzer können hier den automatischen Fokus einstellen. - Page 32 Aufzeichnung verwendete Ereignistyp angegeben. Der Kalender und Zeitstrahl zeigt an, ob eine Aufzeichnung existiert oder nicht. Beschreibung des Wiedergabe-Fensters: ① Video-Bildschirm: Sie können den im microSD-Speicher abgelegten Video-Clip auf dem Video-Bildschirm wiedergeben. ② Wiedergabe-Tasten: Zur Wiedergabe von auf der lokalen SD-Karte abgelegten Aufzeichnungen wählen Sie diese aus der Liste aus und klicken Sie dann auf die Wiedergabe-Tasten.
- Page 33 Schrittweise Rückwärtswiedergabe: Bildweise im Video-Clip zurückspulen. Pause: Wiedergabe des Video-Clips pausieren. Schrittweise Vorwärtswiedergabe: Bildweise im Video-Clip vorwärtsspulen. Vorwärtswiedergabe: Vorwärtswiedergabe des Video-Clips. Schnelle Vorwärtswiedergabe: Schnelle Vorwärtswiedergabe des Video-Clips. Zum Ende springen: Zum Ende des Video-Clips springen. Clip kopieren: Kopieren des Video-Clips. Heranzoomen: Vergrößerte Darstellung des Video-Clips.
-
Page 34: Netzwerkkamera-Konfiguration
⑧ Ereignislistenfenster: Die Ereignisliste zeigt die Ereignisse, die auf dem lokalen SD-Speicher aufgezeichnet wurden. Treffen Sie Ihre Auswahl und klicken Sie dann auf die Wiedergabe-Schaltfläche. Der Video-Clip wird abgespielt. Netzwerkkamera-Konfiguration In diesem Abschnitt wird die Konfiguration der Netzwerkkamera beschrieben. Administratoren haben uneingeschränkten Zugriff auf alle Konfigurationswerkzeuge, während Benutzer nur Zugriff auf die Grundkonfiguration haben, nämlich auf die Seiten Live View, Video und Bild, Audio, Ereignis, Dome-Konfiguration und System. -
Page 35: Rücksetzen Auf Die Werkseinstellungen
Hinweis: Wenn das Kennwort verloren gegangen ist, muss die Netzwerkka- mera auf die Werkseinstellungen zurückgesetzt werden. Siehe „Rücksetzen auf die Werkseinstellungen“. Rücksetzen auf die Werkseinstellungen Um die Netzwerkkamera auf die Werkseinstellungen zurückzusetzen, rufen Sie die Web- seite Konfiguration > System > Wartung auf (beschrieben in der Betriebsanleitung unter "System >... -
Page 36: Weitere Informationen
Bitte halten Sie die Firmware stets aktuell, damit Sie die neuesten Funktionen des Geräts nutzen können. Die aktuellsten Firmware-Versionen finden Sie auf unserer Website unter www.eneo-security.com. Das Benutzerhandbuch und weitere Software-Tools sind auf der eneo Website unter www.eneo-security.com verfügbar. Informationen zu kompatiblen Video Management Software-Lösungen finden Sie in der Kategorie Software unter www.eneo-security.com. - Page 37 Contenu Composants .........................40 Installation ........................41 Câble d’extension ................................41 Connexion ..................................41 Logement Carte microSD ............................41 Port RJ-45 ..................................42 Connexion des alarmes ............................42 Connexion de l´alimentation ..........................42 Connexion audio ............................... 43 Connexion de test Monitor Out (CVBS) ......................43 Connexion au réseau et attribution d’une adresse IP ..................
- Page 38 Instructions de sécurité Consignes de sécurité générales • Avant de brancher et de mettre en service le système, veuillez lire d'abord ces consignes de sécurité ainsi que la notice d'instructions. • Conservez soigneusement la notice d'instructions en vue d'une utilisation ultérieure. •...
- Page 39 • Une distance de sécurité > 1 m doit être respectée par rapport au projecteur dans un environnement sombre, quand on regarde directement dans le projecteur IR. • Les rayons invisibles des LED ne doivent pas être observés directement avec des instruments optiques (par ex.
-
Page 40: Composants
Composants Le système est fourni avec les composants suivants : • Caméra de réseau • Kit d'accessoires Remarque : veuillez contrôler votre package afin de vous assurer que vous avez reçu le système intégral, y compris tous les composants répertoriés plus haut. Remarque: l'adaptateur 12 VCC n'est pas fourni. -
Page 41: Installation
Installation Pour utiliser la caméra réseau, il est nécessaire de brancher un câble réseau pour la transmission de données ainsi que la prise de courant sur le bloc d'alimentation secteur. En fonction des méthodes de fonctionnement, il est également possible de connec- ter un câble d’alarme. -
Page 42: Port Rj-45
Port RJ-45 Branchez un câble RJ-45 standard au port réseau de la caméra réseau. En général, un câble croisé est utilisé pour une connexion directe à un PC alors qu’un câble direct est employé pour se connecter à un concentrateur. Vous pouvez également utiliser un rou- teur avec fonction PoE (Power over Ethernet) pour alimenter la caméra. -
Page 43: Connexion Audio
• Pour les spécifications relatives à l'alimentation électrique, veuillez consulter l'an- nexe, Spécifications des produits. • Si le PoE et une tension 12 VCC sont appliqués, la caméra est alimentée par le PoE. Connexion audio Connecter le haut-parleur à la ligne de sortie audio et le microphone externe à la ligne d'entrée audio. -
Page 44: Connexion Au Réseau Et Attribution D'une Adresse Ip
Le gestionnaire de site eneo (téléchargeable à partir de www.eneo-security.com) est utilisé pour localiser toutes les caméras réseau eneo dans un réseau local. Vous obtiendrez une liste des camé- ras connectées au réseau local. -
Page 45: Fonctionnement
Fonctionnement La caméra de réseau peut être utilisée avec un système d'exploitation Windows et la plupart des navigateurs standards. Les navigateurs recommandés sont Internet Explorer, Safari, Firefox, Opera et Google Chrome sous Windows. Remarque : pour consulter la vidéo en streaming dans Microsoft Internet Explorer, configurez votre navigateur de manière à... -
Page 46: Accès À Partir De L'internet
Accès à partir de l’internet Une fois connectée, la caméra réseau est accessible au sein de votre réseau local (LAN). Pour accéder à la caméra réseau depuis l'Internet, vous devez configurer votre routeur à large bande afin d’autoriser le trafic de données entrantes vers la caméra réseau. À cette fin, activez la fonction NAT-traversal, laquelle essaiera de configurer automatiquement le routeur pour permettre un accès à... -
Page 47: Page Live View (Affichage En Direct)
Remarque : le nom et le mot de passe d'administrateur par défaut sont « admin ». En cas de perte du mot de passe, la caméra réseau doit être réinitialisée aux paramètres d'usine. Veuillez consulter « Réinitialisation des réglages d'usine. » Pour éviter les écoutes électroniques lors de la configuration du mot de passe admin, vous pouvez utiliser une connexion HTTPS cryptée nécessitant un certificat HTTPS (voir la remarque ci-dessous). -
Page 48: Barre D'outils
La liste déroulante de la résolution vous permet de sélectionner la résolu- tion vidéo la plus adéquate à afficher sur la page d'affichage en direct. Barre d’outils La barre d’outils Live Viewer apparaît uniquement sur la page du navigateur web. Elle affiche les boutons suivants : Le bouton Stop arrête le flux vidéo en cours de lecture. -
Page 49: Streaming Vidéo
Calibrer: Calibrez la mise au point et le zoom. Le bouton Smart Focus active la fonction « smart focus » qui règle la mise au point à la position optimale. (Cet icône s'affiche uniquement pour le modèle d'objectif motorisé.) Le bouton Relay Output (sortie de relais) permet de déclencher manuellement le relais à... - Page 50 La description de la fenêtre Lecture suivra. ① Écran vidéo : Vous pouvez voir l'écran vidéo lors de la lecture de la séquence vidéo dans la mémoire microSD. ② Boutons Playback (lecture) : Pour visualiser des données d'enregistrement dans le stockage local SD, sélectionnez-les dans la liste et cliquez sur les boutons «...
- Page 51 Pause : pause de la lecture de la séquence vidéo. Avancer d'un pas : la séquence vidéo avance d'une trame. Lecture normale : la séquence vidéo est lue normalement. Avance rapide : la séquence vidéo est avancée rapidement. Aller à la fin : aller à la fin de la séquence vidéo. Copier séquence : copier la séquence vidéo.
-
Page 52: Configuration De La Caméra Réseau
⑦ Fenêtre de recherche par évènement : Sélectionnez une option de recherche dans la liste déroulante et cliquez sur le bouton GO. Vous pouvez également saisir la période pour la recherche. Si vous cliquez sur une des zones Date de début ou Date de fin, le calendrier de la recherche s'affiche. ⑧... -
Page 53: Réinitialisation Aux Paramètres Par Défaut D'usine
Remarque : En cas de perte du mot de passe, la caméra réseau doit être réinitialisée aux paramètres d'usine. Voir « Réinitialisation aux paramètres par défaut d'usine ». Réinitialisation aux paramètres par défaut d'usine Pour réinitialiser la caméra réseau aux paramètres d'usine, suivez la page Internet Setup >... -
Page 54: Complément D'information
• the product detail pages on the eneo website (www.eneo-security.com), • the eneo download portal (https://datacloud.videor.com/s/eneodownloadportal). In case that previous link is broken, the latest link to the eneo download portal can be found on the respective eneo product page at www.eneo-security.com. - Page 55 Indice Componenti .........................58 Installazione .........................59 Cavo di prolunga ................................59 Collegamento .................................. 59 Alloggiamento memoria Micro SD ........................59 Porta RJ-45 .................................. 60 Collegamento degli allarmi ........................... 60 Collegamento dell'alimentazione ........................60 Collegamento dell'audio ............................61 Collegamento di Test Monitor Out (CVBS) ....................... 61 Connessione alla rete e assegnazione dell'IP .......................
- Page 56 Istruzioni per la sicurezza Istruzioni generali per la sicurezza • Prima di collegare e mettere in funzione il sistema, leggete le istruzioni per la sicurezza e le istruzioni per l'uso. • Conservate con cura le istruzioni per l'uso per un eventuale utilizzo futuro. •...
- Page 57 • Deve essere mantenuto un margine di sicurezza di > 1 m dal proiettore se si guarda direttamente nel proiettore IR in un ambiente buio. • Non guardare direttamente le radiazioni LED invisibili utilizzando strumenti ottici (ad es. lente, lente di ingrandimento o microscopio) per prevenire danni agli occhi ( LED classe 1M).
-
Page 58: Componenti
Componenti Il sistema viene fornito con i componenti seguenti: • Telecamera di rete • Kit di accessori Avviso: controllare la confezione per verificare di aver ricevuto il sistema completo, con tutti i componenti indicati sopra. Avviso: l'adattatore per 12 VCC non è fornito. -
Page 59: Installazione
Installazione Per l'utilizzo della telecamera di rete è necessario collegare un cavo di rete per la tra- smissione dei dati e collegare l'alimentazione dall'adattatore di corrente. A seconda del metodo d'uso, è possibile collegare anche un cavo di allarme. Per il fissaggio in luoghi diversi, consultare l'installatore. -
Page 60: Porta Rj-45
Porta RJ-45 Collegare un cavo RJ-45 standard alla porta di rete della telecamera di rete. Generalmente si utilizza un cavo incrociato per il collegamento diretto al PC, mentre si usa un cavo di- retto per il collegamento a un hub. È anche possibile utilizzare un router con PoE (Power over Ethernet) per fornire alimentazione alla telecamera. -
Page 61: Collegamento Dell'audio
• Se PoE e 12 VCC sono entrambi applicati, la telecamera riceve l'alimentazione da PoE. Collegamento dell'audio Collegare l'altoparlante alla linea di uscita audio e il microfono esterno alla linea di ingres- so audio. Collegamento di Test Monitor Out (CVBS) Collegare il cavo video di prova micro USB a 5 pin (opzionale) per verificare il video di prova. -
Page 62: Connessione Alla Rete E Assegnazione Dell'ip
Connessione alla rete e assegnazione dell'IP Lo strumento eneo Site Manager (scaricabile da www.eneo-security.com) viene utilizzato per individuare tutte le telecamere di rete eneo in una rete locale. Viene visualizzato un elenco di telecamere collegate alla rete locale. Selezionare la telecamera dall’elenco e, facendo clic con il tasto destro del mouse, aprire il menu di scelta rapida. -
Page 63: Funzionamento
Funzionamento La telecamera di rete può essere utilizzata con il sistema operativo e i browser Windows. I browser consigliati con Windows sono Internet Explorer, Safari, Firefox, Opera e Google Chrome. Avviso: per visualizzare un video in streaming in Microsoft Internet Explorer, attivare i controlli ActiveX nel browser. -
Page 64: Accesso Da Internet
Accesso da Internet Una volta collegata, la telecamera di rete è accessibile nella propria rete locale (LAN). Per accedere alla telecamera di rete da Internet occorre configurare il router a banda larga affinché consenta il traffico dati in entrata alla telecamera di rete. Per far ciò, attivare la funzione di attraversamento del NAT, che tenterà... -
Page 65: Pagina Live View
Pagina Live View La pagina Live View è disponibile in diverse modalità dello schermo. Gli utenti possono selezionare la modalità più adatta tra queste. Regolare la modalità in base alle specifiche del PC e alle finalità di monitoraggio. Comandi generali Pagina Live View Pagina di riproduzione Pagina di impostazione... - Page 66 Il pulsante Pausa mette in pausa la riproduzione dello stream video. Il pulsante Istantanea scatta un'istantanea dell'immagine corrente. È possibile sceglie- re il percorso in cui salvare l'immagine. Lo zoom digitale attiva la funzione di zoom avanti o indietro sull'immagine video visualizzata sulla schermata live.
-
Page 67: Stream Video
Il pulsante Mic attiva/disattiva l'ingresso del microfono. Utilizzare questo regolatore per controllare il volume degli altoparlanti e dei microfoni. Stream video La telecamera di rete offre diversi formati di stream video e immagini. Il tipo utilizzato dipende dalle esigenze dell'utente e dalle proprietà della rete. La pagina Live View della telecamera di rete fornisce accesso a stream video H.264 e Motion JPEG, nonché... - Page 68 Di seguito vi è una descrizione della finestra di riproduzione. ① Schermata video: è possibile vedere la schermata video durante la riproduzione di videoclip dalla memoria Micro SD. ② Pulsanti di riproduzione: per visualizzare i dati di registrazione dalla memoria locale SD, selezionarla dall'elenco e fare clic sui pulsanti di riproduzione.
-
Page 69: Configurazione Della Telecamera Di Rete
⑤ Calendario di ricerca: i risultati della ricerca nella memoria locale SD della telecamera di rete collegata sono visualizzati mese per mese. In presenza di una registrazione in una data, la data viene indicata con un quadratino blu. Selezionando una data nel diagramma, la data viene visualizzata con un quadratino giallo. -
Page 70: Ripristino Delle Impostazioni Predefinite
È possibile configurare la telecamera di rete facendo clic su Setup (Impostazione) nella prima pagina di connessione oppure nel secondo pulsante in alto a destra della pagina Live View (Vista in tempo reale). Quando si accede alla telecamera di rete da un computer per la prima volta si apre la finestra di dialogo Admin Password (Password amministrato- re). -
Page 71: Altre Informazioni
• the product detail pages on the eneo website (www.eneo-security.com), • the eneo download portal (https://datacloud.videor.com/s/eneodownloadportal). In case that previous link is broken, the latest link to the eneo download portal can be found on the respective eneo product page at www.eneo-security.com. - Page 72 VIDEOR E. Hartig GmbH Exclusive distribution through specialised trade channels only. VIDEOR E. Hartig GmbH Carl-Zeiss-Straße 8 63322 Rödermark/Germany Tel. +49 (0) 6074 / 888-0 Technical changes reserved Fax +49 (0) 6074 / 888-100 www.videor.com...
Need help?
Do you have a question about the ISM-52F0023W0A and is the answer not in the manual?
Questions and answers