
Related Manuals for SIMAG SDN25


Summary of Contents for SIMAG SDN25
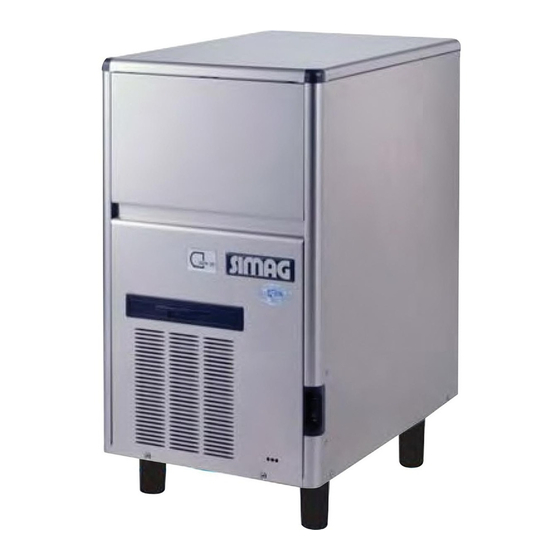
- Page 1 SDN 25 SDN 30 SDN 35 SDN 45 SDN 65 SD 80 SD 125 SD 210 Automatic cubers Automatic Kegeleisbereiter 090091.05 - REV. 03/2008...
-
Page 2: Table Of Contents
TABLE OF CONTENTS PAGE INHALTSVERZEICHNIS SEITE GENERAL INFORMATION AND INSTALLATION ALLGEMEINES UND INSTALLATION Introduction Einführung Unpacking and inspection Auspacken und Inspektion Location and levelling Maschinenplatz und lotgerechte Austellung Electrical connection Elektrische Anschlüße Water supply and drain connection Wasserversorgung und Abflußleitungen Final check list Schlußkontrollen Installation practice... - Page 3 Ice making capacity - Eisproduktionskapazität SDN 30 SDN 25 AIR COOLED MODELS - LUFTKÜHLUNG WATER COOLED MODELS - WASSERKÜHLUNG AIR COOLED MODELS - LUFTKÜHLUNG WATER COOLED MODELS - WASSERKÜHLUNG °C °C °C °C 10 °C 10 °C 10 °C 10 °C WATER TEMPERATURE - WASSERTEMPERATUR WATER TEMPERATURE - WASSERTEMPERATUR WATER TEMPERATURE - WASSERTEMPERATUR...
- Page 4 SDN 25 - 30 SDN 35 - 45 - 65 CORD SET - ELEK. KABEL Ø 20 WATER OUTLET - WASSERABFLUSS G3/4" WATER INLET - WASSEREINLAUF SDN 25 (mm) SDN 30 (mm) SDN 35 (mm) SDN 45 (mm) SDN 65 (mm)
- Page 5 SD 80 SD 125 - 210 CORD SET - ELEK. KABEL Ø 20 WATER OUTLET - WASSERABFLUSS G3/4" WATER INLET - WASSEREINLAUF G3/4" WATER OUTLET - WASSERABFLUSS * G3/4" WATER INLET - WASSEREINLAUF * * Water cooled only - Nur wassergekuhlt SD 80 (mm) SD 125 (mm) SD 210 (mm)
- Page 6 TECHNICAL SPECIFICATIONS - TECHNISCHE ANGABEN SDN25 SDN25W SDN30 SDN30W SDN35 SDN35W SDN45 SDN45W SDN65 SDN65W SD80 SD80W SD125 SD125W SD210 SD 210 W Electric voltage 230/50/1 230/50/1 230/50/1 230/50/1 230/50/1 230/50/1 230/50/1 230/50/1 -10 ÷ +10% -10 ÷ +10% -10 ÷ +10% -10 ÷...
- Page 7 WIRING DIAGRAM - SCHALTUNGSSCHEMA 230/50/1 AIR & WATER COOLED - LUFT UND WASSERGEKÜHLT SDN 25 - 30 - 35 - 45...
- Page 8 WIRING DIAGRAM - SCHALTUNGSSCHEMA 230/50/1 AIR COOLED - LUFTGEKÜHLT SDN 65...
- Page 9 WIRING DIAGRAM - SCHALTUNGSSCHEMA 230/50/1 WATER COOLED - WASSERGEKÜHLT SDN 65...
- Page 10 WIRING DIAGRAM - SCHALTUNGSSCHEMA 230/50/1 AIR & WATER COOLED - LUFT UND WASSERGEKÜHLT SD 80...
- Page 11 WIRING DIAGRAM - SCHALTUNGSSCHEMA 230/50/1 AIR & WATER COOLED - LUFT UND WASSERGEKÜHLT SD 125 - SD 210...
- Page 12 FiG. 2 FiG. 1 FiG. 1 FREEZING CYCLE - TIMING PHASE FREEZING CYCLE FiG. 4 FiG. 3 DEFROST CYCLE DEFROST CYCLE - BIN FULL FiG. 5 FiG. 6 FREEZING CYCLE - BIN FULL RINSING CYCLE MASTER SWITCH - HAUPTSSCHALTER 9. OPERATING LIGHT - CONDENSER THERMOSTAT - KONDENSATORTHERMOSTAT 10.
-
Page 13: General Information And Installation
Notify carrier of your claim for the concealed To keep your SIMAG CUBER at peak perfor- damage as stated in step 2 above. mance levels, periodic maintenance checks... -
Page 14: Water Supply And Drain Connection
(SD 80-125-210) NOTE. All external wiring should conform to national, state and local standards and The water cooled versions of SIMAG Ice Makers regulations. require two separate inlet water supplies, one for the water making the ice and the other for the Check voltage on the line and the ice maker’s... -
Page 15: Final Check List
6. Has the water supply pressure been checked 12. Has the owner been given the name and the to ensure a water pressure of at least 1 bar phone number of the authorized SIMAG Service (14 psi)? Open the shut-off valve and verify the Agency serving him? absence of water losses from the connections. -
Page 16: Operating Instruction
Page 4 CONTACTOR COIL (SD 80-125-210) OPERATING WATER PUMP INSTRUCTIONS FAN MOTOR (in air cooled version) Check to see through the ice discharge START UP opening that the spray system is correctly seated and that the water jets uniformely reach the After having correctly installed the ice maker and interior of the inverted mold cups or the exterior completed the plumbing and electrical... - Page 17 Page 5 By rotating the control setting screw clockwise NOTE. In case this test is performed during the ice cube thickness can be increased; on the the freezing cycle, the unit will shut OFF only contrary the thickness can be reduced by turning at the end of the freeezing cycle and exactly the setting screw counterclockwise.
-
Page 18: Operating Principles
FAN MOTOR. As soon as the discharged refrigerant pressure In the SIMAG cube ice makers the water used to drops, the pressure control opens its contacts to make the ice is kept constantly in circulation by temporarely de-energize the fan motor. -
Page 19: Control Sequence
Conctats COM-NC timer microswitch • onto a slanted grid chute, then through a curtained Pressure control (SDN25÷65W) (SDN65÷SD210A) opening they fall into the storage bin. At the end of the defrost cycle, both the hot gas and the water inlet valves close and the machine TIMED FREEZE starts again a new freezing cycle. -
Page 20: Components Description
It goes without saying that an extension of the the discharge pressure is kept between 8÷10 defrost period will directly reduce the timed portion bars (110÷140 psig) SDN25÷SD80, 15,5÷20 bars of the freezing cycle and viceversa. (215÷280 psig) SD 125-210. - Page 21 Page 9 FAN MOTOR (Air cooled version) SAFETY THERMOSTAT/PRESSURE SWITCH (BY HAND RESET) The fan motor, in the SDN60-SD-80-125-210 models is electrically connected in series with the Fastened directly onto the refrigerant liquid line and electrically connected upstream all other pressure control operates during the freezing controls, this safety device shut-off the icemakers cycle to draw cooling air through the condenser...
-
Page 22: Service Diagnosis
Page 10 SERVICE DIAGNOSIS SYMPTOM POSSIBLE CAUSE SUGGESTED CORRECTION Unit will not run Main switch in OFF position Turn switch to ON position Safety device intervention Eliminate the stop motivation and (thermostat - pressure switch) push the reset button or replace. Loose electrical connections Check wiring Inoperative bin thermostat... - Page 23 Page 11 SERVICE DIAGNOSIS SYMPTOM POSSIBLE CAUSE SUGGESTED CORRECTION Irregular cubes Some jets plugged Remove jet cover and clean size & some cloudy Shortage of water See shortage of water Unit not level Level as required Cubes too large Freezing cycle too long Adjust evap.
-
Page 24: Maintenance And Cleaning Instructions
The following maintenance should be scheduled at least two times per year on these icemakers, by using the SIMAG technical service. Check and clean the water line strainer. Check that the icemaker is levelled in side to side and in front to rear directions. - Page 25 Page 13 Wait till the end of defrost cycle then, shut Let the unit to remain in the CLEANING the unit OFF by means of its master switch. mode for about 20 minutes then switch OFF the machine. Scoop out all the ice cubes stored into the bin in order to prevent them from being Flush out the cleaning solution from the contaminated with the cleaning solution then...
-
Page 26: Allgemeines Und Installation
SIMAG Seriennummer des Gerätes angeben, die Sie EISBEREITER der Serie SD - SDN. Die SIMAG Eiswürfelbereiter sind für eine hohe dem Schild auf dem Rahmen entnehmen können Qualität geplant und produziert. Sie werden bei uns für mehrere Stunden getestet und können daher eine maximale Leistung für jede... -
Page 27: Elektrische Anschlüße
Beachten Sie das Schild des Gerätes, um dann geliefert wird und der an ein getrenntes Sperrventil den Querschnitt und das Kabel entsprechend angeschlossen wird. der angegeben Spannung zu wählen. Alle Geräte SIMAG besitzen ein elektrisches Kabel für die Stromversorgung, das an ein Wasserabfluß Stromnetz einem... -
Page 28: Installation
Seite 16 Wurden die Muttern, die den Kompressor die periodische Wartung des Gerätes gegeben? verankern, kontrolliert? Erlauben diese eine Schwingung auf den eigenen Halterungen? 11. Wurde die Garantiekarte ausgefüllt? Seriennummer und das Modell auf dem Schild Wurden die Innenwände des Eisbehälters des Gerätes kontrollieren und dann an den und die Außenwände des Gerätes gesäubert? Hersteller senden. -
Page 29: Betriebsanleitung
Seite 17 BEDIENUNGSANLEITUNG Durch die Öffnung der Würfelabgabe kontrollieren, daß der Spritzbalken richtig positioniert ist und daß das Wasser gleichmäßig auf die umgedrehten Formen des Verdampfers INBETRIEBNAHME gespritzt wird. Wenn das Gerät richtig installiert und an das Kontrollieren, daß der kleine Plastikvorhang Strom- und Wassernetz angeschlossen ist, korrekt positioniert wurde und den Wasserauslauf folgendermaßen vorgehen:... - Page 30 Seite 18 Gefrierzyklus hin, oder darauf, daß das Wasser, ANMERKUNG. Wenn dies Kontrolle das für die Produktion benutzt wurde, von während des Gefrierzyklus ausgeführt wird, schlechter Qualität ist und angemessene Filter arbeitet das Gerät bis zum Ende des Zyklus zur Reinigung oder ein Wasserkonditionierer weiter, bis der Mikroschalter des Timers in einzusetzen sind.
-
Page 31: Funktionssysteme
Luft gekühlt werden (SDN 25 ÷ 45), funktioniert der Ventilator ständig und hält den Druck zwischen 8÷ 10 bar. In den Eiswürfelbereitern SIMAG wird das zur Bei den Versionen von SDN 25 bis SDN 65, die Produktion benutzte Wasser ständig von einer mit Wasser gekühlt werden, ist der Druckwächter... -
Page 32: Steuersequenzen
Dauer, beendet ist, geht das Gerät direkt in die Versorgte elektrische Bauteile... ON OFF Abtauphase über. Nachdem die Abtauphase Kompressor ........• beendet ist, beginnt die Maschine automatisch Ventilatormotor (SDN25÷65 ON) .. • mit einem neuen kompletten Zyklus. Heissgasventil ....... • Wassereingangsventil .... -
Page 33: Komponentenbeschrieb
• einwirkt und so die Nocken verlängert oder Kontakte COM-NC Mikrotimer ..• verkürzt, so wie man es benötigt. Druckwächter (SDN25÷65W) (SDN65÷SD210A) • ACTUNG. Um Schäden am Kompressor zu vermeiden, darf der Abtauzyklus auf FUNKTIONSEIGENSCHAFTEN keinen Fall eine Maximaldauer von 4 Minuten überschreiten. - Page 34 Seite 22 Heißgas, das vom Kompressor direkt durch die (SDN 25÷65W) Versionen benutzt und hält den Serpentine des Verdampfers fließt, um die Eingangsdruck des Kühlkreislaufes zwischen den beiden eingestellten Werten (8 ÷10 Bar für Eiswürfel von den Formen zu lösen, den Weg. SDN 25 ÷...
-
Page 35: Fonktionsfehler
Seite 23 FEHLERSUCHE Problem Möglicher Fehler Lösung Das Gerät funktioniert nicht Hauptschalter aus Hauptschalter anschalten Sicherheitsvorrichtung aktiviert Grund suchen und eliminieren oder ersetzen Elektrische Leitungen nicht Leitungen kontrollieren angeschlossen Kontakte Thermostat Behälter Thermostat ersetzen offen Der Kompressor führt die Niedrige Spannung Stromkreis auf Überlastung Zyklen intermittierend aus kontrollieren... - Page 36 Seite 24 FEHLERSUCHE Problem Möglicher Fehler Lösung Unregelmäßige und matte Spritzdüsen zum Teil verstopft Die Deckel abnehmen und Eiswürfel säubern Wassermangel Siehe Wassermangel Maschine nicht gut ausgeglichen Maschine gut ausgleichen Zu große Eiswürfel Gefrierzyklus zu lang Das Thermostat des Verdampfers im Gegenuhrzeigersinn drehen Das Thermostat des Verdampfers Thermostat ersetzen...
-
Page 37: Wartung Und Reinigungsanleitung
REINIGUNG DES Gegenuhrzeigersinn vermindert man es. EISWÜRFELBEREITERS Kontrollieren, daß nirgends Kühlmittelverlust Die folgenden Wartungsarbeiten müssen vorliegt mindestens zwei Mal im Jahr von einer lokalen SIMAG-Niederlassung ausgeführt werden: C. REINIGUNG - AUSTAUSCH DES Filternetz Innern LUFTKONDENSATORFILTERS Wassereingangsventils kontrollieren und säubern. 1. Den Luftfilter vorne aus der Öffnung der Frontplatte herausziehen. -
Page 38: Wartungs Und Reinigungsanleitungen
Seite 26 ANWEISUNGEN FÜR DIE REINIGUNG ANMERKUNG. Während des Reinigungs- DES WASSERKREISLAUFES vorganges, arbeitet nur die Pumpe, damit das Enthärtungsmittel in die Wasserleitungen Die vordere und obere Wandtafel gepumpt werden kann abnehmen, um Zugriff zum Schaltkasten und zum Verdampfer zu haben. Das Gerät etwa 20 Minuten laufen lassen Das Ende des Abtauzyklus abwarten und und dann durch den Hauptschalter abschalten... - Page 39 SIMAG Singapore Office via Risorgimento, 4 SIMAG FAR EAST 20017 Mazzo di Rho (MI) - Italy 627A Aljunied Road Tel. +39 02 93900215 (Commerciale - Sales Dept.) 04-04 Biztech Centre Tel. +39 02 93960357 (Assistenza - Service Dept.) Singapore 389842 Fax +39 02 93900226 (Commerciale - Sales Dept.)
- Page 40 SD SERIES AUTOMATIC CUBERS CLEANING AND SANITIZING PROCEDURES TOOLS REQUIRED Medium Phillips Screwdriver Medium Flat Screwdriver Pair of Protective Gloves Bucket/Container Different types of brush Clean Cloth Ice Machine Cleaner Antialgae Cleaner FREQUENCE WARNING. When using any chemical, protection of hands and eyes should be worn.
- Page 41 PROCEDURE 4. Wait until the end of defrost cycle then Switch OFF 1. Remove the Front Panel and…. the machine at unit master switch. 5. Scoop out all the ice cubes stored into the bin in 2. ….Top Panel to again access either to the control order to prevent them from being contaminated with box and the evaporator.
- Page 42 7. Preparing the cleaning solution by diluting in a 9. ….slowly pour onto the evaporator platen plastic container 2 or 3 liters of warm water ( 45°- cleaning solution. 60° C) with a 0,2-0,3 liters of Ice Machine Cleaner Part Number 00100901. 10.
- Page 43 12. ….give power to the unit by master switch.( item 4) 14. Flush out the cleaning solution from the sump reservoir then….. 15. ….pour onto the evaporator cavity one or two liters of clean potable water with cc 2 antibacteria NOTA - With the system in CLEANING MODE the solution (part number 264000 02) to rinse and...
- Page 44 16. If necessary remove the spray bar and nozzles to 19. …..fush out the rising water from the sump reservoir. clean them separately then refit them. 20. Rotate the Timer so that the microswitches reach 17. Set back the master switch to ON. The water pump the beginning of the defrost cycle (low part of the is again in operation to circulate the water and the cam) then give power to the unit at master switch.
- Page 45 21. When the water tank is filled up (water flowing out 24. Wipe clean and rinse the inner surfaces of the from the drain) put the compressor switch on I ON storage bin. position to restart the machine in the automatic mode.
Need help?
Do you have a question about the SDN25 and is the answer not in the manual?
Questions and answers