Kärcher B60/10CB Operating Instructions Manual
Hide thumbs
Also See for B60/10CB:
- Operating instructions manual (55 pages) ,
- Operating instructions manual (55 pages)
Table of Contents
Advertisement
Quick Links
WARNING:
This product and accessories may contain a chemical
State of California to cause cancer and birth defects or other
reproductive harm.
For more information about this regulation:
86390990-L
08/07/15
known
to the
www.P65Warnings.ca.gov
Read these instructions before using the machine.
Operating instructions (ENG)
MODELS:
B60/10CB
1.006-701.0
B60/10CP
1.006-707.0
B60/10CD
1.006-708.0
Advertisement
Table of Contents

Related Manuals for Kärcher B60/10CB


Summary of Contents for Kärcher B60/10CB
- Page 1 Operating instructions (ENG) MODELS: B60/10CB 1.006-701.0 B60/10CP 1.006-707.0 B60/10CD 1.006-708.0 WARNING: This product and accessories may contain a chemical known to the State of California to cause cancer and birth defects or other reproductive harm. For more information about this regulation: www.P65Warnings.ca.gov...
-
Page 2: Machine Data Label
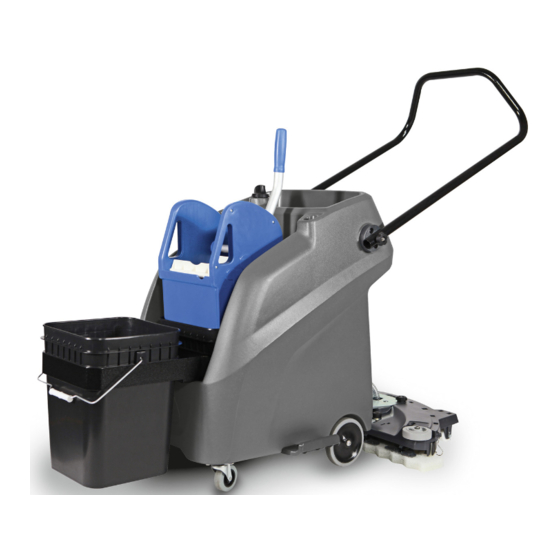
Machine Data Label Overview The B60/10C is a hard floor cleaning machine intended for commercial use. This appliance applies a cleaning solution to the floor and then pumps the soiled water back into the recovery bucket. Warranty Registration Thank you for purchasing a Kärcher product. Warranty registration is quick and easy. Your registration will allow us to serve you better over the lifetime of the product. -
Page 3: Table Of Contents
Table of Contents Machine Data Label ......2 Overview........2 Table of Contents . -
Page 4: How To Use This Manual
How To Use This Manual This manual contains the following sections: The SAFETY section contains important information regarding hazardous or unsafe practices of the • How to Use This Manual machine. Levels of hazards are identified that could • Safety result in product damage, personal injury, or severe •... -
Page 5: Safety
Safety IMPORTANT SAFETY INSTRUCTIONS When using this machine, basic precaution must always be followed, including the following: READ ALL INSTRUCTIONS BEFORE USING THIS MACHINE. To reduce the risk of injury: During operation, attention shall be paid to other persons, especially children. Use only as described in this manual. - Page 6 Safety IMPORTANTES MESURES DE SÉCURITÉ L'utilisation d'un appareil électrique demande certaines précautions: LIRE TOUTES LES INSTRUCTIONS AVANT DE FAIRE FONCTIONNER (CET APPAREIL). Pour réduire les risques d'incendie, de chocs électriques, ou de blessures. Durant la manoeuvre de la machine, prendre garde aux personnes environnantes et notamment aux enfants. N'utiliser cette machine que comme décrit dans le présent manuel.
-
Page 7: Hazard Intensity Level
Safety The following symbols are used throughout this guide as indicated in their descriptions HAZARD INTENSITY LEVEL There are three levels of hazard intensity identified by signal words -WARNING and CAUTION and FOR SAFETY. The level of hazard intensity is determined by the following definitions: WARNING - Hazards or unsafe practices which COULD result in severe personal injury or death. - Page 8 Safety Les symboles ci-dessous sont utilisés à travers ce manuel comme illustré dans leurs descriptions: DEGRÉS DE RISQUES EN CAS DE DANGER Il existe trois degrés de risques identifiés par les termes signalétiques -AVERTISSEMENT et ATTENTION et POUR VOTRE SÉCURITÉ. Le degré de risque est défini de la manière suivante: AVERTISSEMENT - Dangers ou méthodes dangereuses qui POURRAIENT provoquer de graves blessures ou entraîner la mort.
-
Page 9: Safety Labels
Safety Safety Labels NOTE: These drawings indicate the location of safety labels on the machine. If at any time the labels become illegible, promptly replace them. EMPLACEMENT DE L'ÉTIQUETTE DE SÉCURITÉ REMARQUE: Ces dessins indiquent l'emplacement des étiquettes de sécurité sur la machine. Si, à tout moment, les étiquettes deviennent illisibles, contactez votre représentant autorisé... -
Page 10: Operations
Operations Machine Operation Only use chemicals approved for use with this machine. Use of non-compatible chemicals may cause machine damage and will not be covered under the warranty. Carefully read ingredients on manufacturer’s label before using any product in this machine. Care must be exercised in the use of all chemicals. -
Page 11: Technical Specifications
Operations Technical Specifications ITEM MEASURE Solution Capacity 2.3 Gal 8.7Lt Recovery Capacity 2.3 Gal 8.7Lt Height 42.5 inches 1080MM (Handle adjusted to highest position) Length 43.5 inches 1105MM (Handle adjusted to highest position) Width without Deck 21.5 inches 546MM Width of Deck 28 inches 711MM Length... -
Page 12: How This Machine Works
Operations How This Machine Works The function of the Recovery System is to pump the soiled solution from the floor to the recovery bucket. The B60/10C is a manually propelled hard floor cleaner The recovery System consists of the squeegee, the intended for commercial use. -
Page 13: Pre-Run Inspection
Operations Pre-Run Inspection 1. Check all fittings and connectors for proper assembly. 2. Check all hoses for leaks. Repair or replace any damaged hoses. Equipment Set-up 1. Using a clean container, fill the solution tank with clean hot water. The machine is equipped with two fill ports. A large covered port on the side of the machine and a smaller uncovered port on the top of the machine. -
Page 14: Cleaning
Operations Cleaning 1. Pre-sweep area to be cleaned to remove debris. 2. Lower deck to the floor. 3. Turn solution knob to open solution valve to desired flow rate. Solution will begin flowing as soon as knob is turned from “Off” position. 4. - Page 15 Notes 86390990 B60/10C ECO...
-
Page 16: Maintenance
Maintenance Periodic Maintenance Daily/Regular Maintenance Periodically inspect all hoses and connections on your 1. Empty unused cleaning solution from the solution machine. Frayed or cracked hoses should be repaired tank. or replaced to eliminate vacuum or solution loss. 2. After each use, rinse tank with fresh water. Periodi- cally inspect the recovery bucket and decontami- nate if necessary, using a Hospital Grade Virucide or a 10-1 bleach to water solution. -
Page 17: Pad Installation
Maintenance Pad Installation Line up notches in pad with both ends of the squeegee and press firmly into place on all five plastic flippers. 86390990 B60/10C ECO... -
Page 18: Squeegee Installation
Maintenance Squeegee Installation 1. Assemble squeegee from right to left. Hook squeegee on metal hook on the right side and align notches with tabs until squeegee is hooked on the metal tab on the left side. 2. Slip the plastic strap under the tab (#1) on the right side of the deck and slide towards the left side so that the strap is hooked under the metal tab (#2). -
Page 19: Troubleshooting
Maintenance Troubleshooting Problem Cause Solution No Solution Flow Solution Tank Empty Fill Solution Tank Solution Valve Closed Turn Solution Knob to Open Valve Hose Kinked or Clogged Repair or Replace Hose Debris in Solution Valve Remove Valve and Clean Poor or No Solution Recovery Machine Moving too Slow Increase Machine Speed Clean Outlet Check Valve, ensure... - Page 20 Notes: 86390990 B60/10C ECO...
-
Page 21: Options Installation
Options Installation OPTIONS INSTALLATION 86390990 B60/10C ECO... -
Page 22: Front Bucket Bracket
Options Installation Front Bucket Bracket This must be installed by qualified personnel. Read all instructions thoroughly. Place machine on level surface. Ce produit doit être installé par du personnel qualifié. Lire soigneusement toutes les instructions. Placer l'appareil sur une surface de niveau Parts in Kit: 4 Gal. - Page 23 Options Installation 3. Slip each side of the bracket over bushings. 4. Install bucket. NOTE: For part numbers, see Models w/ Options section. 86390990 B60/10C ECO...
-
Page 24: Accessory Holder
Options Installation Accessory Holder This must be installed by qualified personnel. Read all instructions thoroughly. Place machine on level surface. Ce produit doit être installé par du personnel qualifié. Lire soigneusement toutes les instructions. Placer l'appareil sur une surface de niveau Parts in Kit: Accessory Holder 2x Screw... -
Page 25: Accessory Hook
Options Installation Accessory Hook This must be installed by qualified personnel. Read all instructions thoroughly. Place machine on level surface. Ce produit doit être installé par du personnel qualifié. Lire soigneusement toutes les instructions. Placer l'appareil sur une surface de niveau Parts in Kit: Accessory Hook Screw... -
Page 26: Wringer Bracket
Options Installation Wringer Bracket This must be installed by qualified personnel. Read all instructions thoroughly. Place machine on level surface. Ce produit doit être installé par du personnel qualifié. Lire soigneusement toutes les instructions. Placer l'appareil sur une surface de niveau Parts in Kit: Wringer Bracket 2x Spacer... - Page 27 Options Installation 3. Slide wringer assembly over the spacers and push down firmly until it bottoms out. NOTE: For part numbers, see Models w/ Options section. 86390990 B60/10C ECO...
- Page 28 Notes: 86390990 B60/10C ECO...
Need help?
Do you have a question about the B60/10CB and is the answer not in the manual?
Questions and answers