
Related Manuals for Chauvet Legend 6000X


Summary of Contents for Chauvet Legend 6000X
-
Page 1: User Manual
LEG-6000 Legend™ 6000X (575W) USER MANUAL CHAUVET, 3000 N 29 Ct, Hollywood, FL 33020 U.S.A (800) 762-1084 – (954) 929-1115 FAX (954) 929-5560 www.chauvetlighting.com Revision: 2007-03-06/09:06... -
Page 2: Table Of Contents
ABLE ONTENT TABLE OF CONTENT... 2 ... 3 HAT IS INCLUDED ... 3 NPACKING NSTRUCTIONS AC P ... 3 OWER ... 3 AFETY NSTRUCTIONS INTRODUCTION ... 4 ... 4 ONTROL EATURES ... 4 EATURES DMX C ... 4 HANNEL UMMARY ... -
Page 3: Before You Begin
Before You Begin What is included DMX-DMW6000X Legend™ 6000X Power cord with plug HMI575 Discharge lamp Unpacking Instructions Immediately upon receiving a fixture, carefully unpack the carton, check the contents to ensure that all parts are present, and have been received in good condition. Notify the shipper immediately and retain packing material for inspection if any parts appear damaged from shipping or the carton itself shows signs of mishandling. -
Page 4: Control Features
NTRODUCTION Control Features Legend™ 6000X • Mechanical dimmer • Variable shutter/strobe (7fps) • Color wheel - 6 colors plus open - Red, Blue, Green, Purple, 3200 & 5000K correction-filters - Rainbow color spin in both directions at variable speeds • CMY Color Mix System •... -
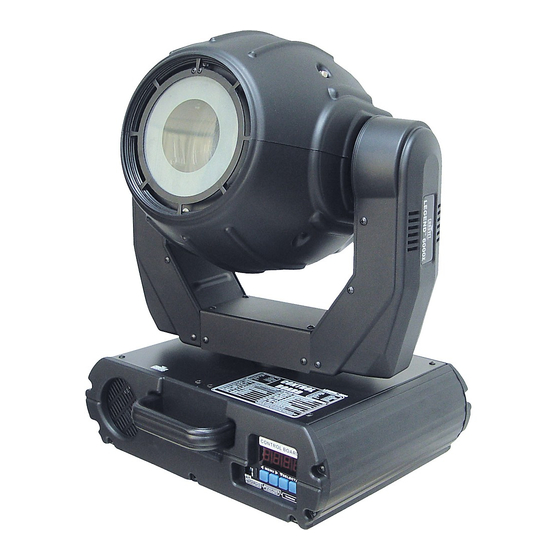
Page 5: Product Overview
Product Overview DMX signal indicator UTTONS MENU◄ Toggles Menu Functions MENU► Toggles Menu Functions Steps backwards through SELECT▼ selections or addressing Steps forward through SELECT▲ selections or addressing LEG-6000 User Manual SEGMENT BUTTONS I/O PANEL OVERVIEW I/O P ANEL DMX Out & In DMX-512 connectors Power AC input IEC 60320 C14 and fuse holder... -
Page 6: Setup
ETUP Lamp You will need to install a lamp prior to the initial operation of the fixture. A HMI575 high intensity discharge lamp is included. Warning! When replacing the lamp, please wait 15 minutes after powering down to allow the unit to cool down! Always disconnect from main power prior to lamp replacement. -
Page 7: Power
Power Your product is equipped with an internal input-voltage select switch. Warning! Verify that the power select switch on your unit matches the line voltage applied. All fixtures must be connected to circuits with a suitable Earth Ground. • To determine the power requirements for a particular fixture, see the label affixed to the back plate of the fixture or refer to the fixture’s specifications chart. -
Page 8: Mounting
Mounting Orientation All models described in this manual can sit on stage or be mounted on a truss using a clamp in any position, provided, there is adequate room for ventilation. Warning It is important never to obstruct the fan or vents pathway. -
Page 9: Operating Instructions
PERATING NSTRUCTIONS Control Board On the control panel you can set the DMX address, reset the fixture and change fixture personality trait. Control Board Functions (All) UNCTION PTIONS Addr 000~512 DMX channel addressing LP.ti Shut Off/On CoLo Off/On Focu Off/On r.PAn Off/On r.tilt... -
Page 10: Applying Changes To Functions (Quick Instructions)
Applying changes to Functions (Quick Instructions) Unless otherwise stated changes in the control board can be applied in the following manner. 1. Press any of the [MENU] arrow buttons repeatedly until the display reads the menu function you wish to change. 2. -
Page 11: User Configurations
If this is your first time addressing a fixture using the DMX-512 control protocol than I suggest jumping to the Appendix Section and read the heading “DMX Primer”. It contains very useful information that will help you understand its use. S et t i ng t he sta rt in g a dd re ss 1. -
Page 12: Segment Display Configurations
{ S h ut } - Sh utt er a uto -c lo se The shutter will close momentarily during color changes. The shutter will re-open once the desired color is reached. UNCTION Shut { C o Lo } - Co lor w hee l lin ea r /step be ha vio r This function set to “Off”... -
Page 13: Self Demonstration
{ d F .S E} - F i xtu re R es et ( e xc l ud es Pa n & T i l t ) This function will re-initialize the fixture with exception of the Pan and Tilt motors. UNCTION dF.SE { L P .t i} –... -
Page 14: Appendix
XLR male to female connectors. The shield connection is pin 1, while pin 2 is Data Negative (S-) and pin 3 is Data positive (S+). CHAUVET carries 3-pin XLR DMX compliant cables, DMX-10 (33’), DMX-4.5 (15’) and DMX-1.5 (5’) -
Page 15: Dmx Channel Values
DMX Channel Values 16 Bit Movement HANNEL ALUE LEG-6000 User Manual UNCTION Dimmer Closed > Open (0-100%) Shutter/Strobe Blackout Open Strobe: Slow > Fast (max 7fps) Open Pulse Strobe: Dark > Bright & Slow > Fast Open Pulse Strobe: Bright > Dark & Slow > Fast Open Random Strobe: Slow >... -
Page 16: Bit Movement
HANNEL ALUE 8 Bit Movement In the 8 bit Pan/Tilt resolution setting both (FINE) channels is removed. All other channel parameters remain the same as in the “DMX Channel Values” table. HANNEL UNCTION Dimmer Shutter/Strobe Color Wheel Cyan Magenta Dip Switches (settings explained) WITCH VENT The lamp will strike first. -
Page 17: Color Calibration
Package must be clearly labeled with a Return Merchandise Authorization Number (RA #). Products returned without an RA # will be refused. Call CHAUVET and request RA # prior to shipping the fixture. Be prepared to provide the model number, serial number and a brief description of the cause for the return. -
Page 18: General Troubleshooting
Remote does not work Make sure connector is firmly connected to device Stand alone mode All CHAUVET lighting fixtures featuring stand-alone functions do not require additional settings, simply power the fixture and it will automatically enter into this mode Unit wobbles when... -
Page 19: Technical Specifications
Technical Specifications WEIGHT & DIMENSIONS Length... 394 mm (15.5 in) Width ... 419 mm (16.5 in) Height ... 610 mm (24 in) Weight ... 32.66 Kgs (72 lbs) Shipping weight ... 39.78 Kgs (87.7 lbs) POWER Switch-selectable power settings (Internal)...100V, 220V, 230V, 240V – 50/60Hz AC input...
Need help?
Do you have a question about the Legend 6000X and is the answer not in the manual?
Questions and answers