
Related Manuals for Intellian v100NX


Summary of Contents for Intellian v100NX
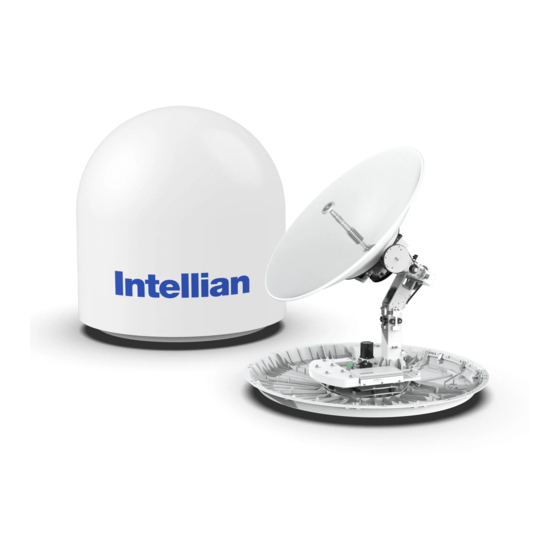
- Page 1 105 cm Ku-Ka Convertible Maritime VSAT Antenna System Installation & Operation User Guide...
- Page 3 Except as expressly provided in any written license agreement from Intellian, the furnishing of this document does not give you any license to these patents, trademarks, copyrights, or other intellectual property. All other logos, trademarks, and registered trademarks are the property of their respective owners.
-
Page 4: Table Of Contents
Table of contents Table of contents Precautions Warnings, Cautions, and Notes General Precautions Certifications Certifications Introduction Intellian v100NX Introduction Intellian v100NX Features Antenna Unit Antenna Control Unit (ACU) Planning Installation ACU Box (Including Components Kit) Antenna Specification Antenna Dimensions Heading Alignment Mast Designing (Installation Example) Option 2. - Page 5 Table of contents Installing ACU Selection of ACU Installation Site ACU Dimensions Mounting ACU 19" Rack Mount Type System Configurations Single Antenna System Configuration (Basic Antenna System) Dual Antenna System Configuration (Optional) ACU Cable Connection Name of ACU Rear Panel Connecting to the Antenna Connecting to Antenna (Optional: For Dual Antenna System) Connecting to Modem...
- Page 6 Table of contents Antenna Information Interface Information USB Function Using AptusNX Introduction How to access AptusNX for ACU Main Page Page Login Top Menus Account Menu Account Registration System User Manager Dashboard How to Add & Remove Panels (Dashboard Setting) How to Arrange Dashboard Layout How to Use Shortcut Settings Install Wizard...
- Page 7 Precautions Technical Specification Environmental Specification Warranty Warranty Policy Appendix A Starting Dual Antenna System (Optional)
-
Page 8: Precautions
Precautions Precautions Warnings, Cautions, and Notes WARNING, CAUTION, and NOTE statements are used throughout this manual to emphasize important and critical information. You must read these statements to help ensure safety and to prevent product damage. The statements are defined below. WARNING WARNING indicates a potentially hazardous situation which, if not avoided, could result in death or serious injury. - Page 9 Certifications...
-
Page 10: Certifications
EIRP spectral density limit -14.00 dBW/ 4KHz Intellian Technologies, Inc. declares that the above antenna will maintain a pointing error of less than or equal to 0.2 degree under specified ship motion conditions in accordance with the requirements of §25.222 (a)(1)(ii). - Page 11 Certifications RED Declaration of Conformity (DoC) We, Intellian Technologies, Inc. located at 18-7, Jinwisandan-ro, Jinwi-myeon, Pyeongtaek-si, Gyeonggi-do 17709, Korea declare under our sole responsibility that the product(s) described in the below to which this declaration relates is in conformity with the essential requirements and other relevant requirements of the Radio Equipment Directive (2014/53/EU).
-
Page 12: Introduction
Pedestal is fully optimized to withstand the demanding maritime conditions and to ensure reliable broadband communications. The v100NX is even more operator-friendly in that it combines TX, RX and DC power into one cable, simplifying installation. With the new radome design, the dome-on external single cable connection means that installers do not need to remove the radome during installation either. -
Page 13: Intellian V100Nx Features
Ku- and Ka-bands. Single Coaxial Cable Combined Tx, Rx and DC power in a Single Cable solution, the v100NX enables faster and reduced costs of installation. Dynamic Motor Brakes, eliminating the requirement of shipping brackets, and Dome-On external RF cable connection on the base allow easier and quicker installation without removing the radome. -
Page 14: Antenna Unit
Introduction Antenna Unit The antenna unit includes an antenna pedestal inside a radome assembly unit. The pedestal consists of a satellite antenna main dish with RF components mounted on a stabilized pedestal. The radome protects the antenna pedestal assembly unit from the severe marine environment. Figure: Radome &... -
Page 15: Antenna Control Unit (Acu)
Planning Installation Antenna Control Unit (ACU) Antenna Control Unit (ACU) controls Antenna system operation. The following functions are supported by ACU. • High power supply for the high power BUC • Mediator function included • Spectrum analyzer function included • OLED display •... -
Page 16: Acu Box (Including Components Kit)
ACU to Modem Modem Interface Cable 1.5 m ACU to Modem (iDirect Modem) (For iDirect Modem) Ethernet Cable (RJ45/LAN) ACU to PC/Intellian M&C Wi-Fi Dongle Hex Bolt (BUMAX) M12 x 80 L Bolt Kit for Antenna - Deck (Mast) Flat Washer... -
Page 17: Antenna Specification
Planning Installation Antenna Specification Antenna Dimensions Confirm the height and diameter of the bottom surface of the antenna unit before installing it. The mounting surface and overall space occupied by the antenna must be sufficient for the height and diameter of the fully constructed radome on top of its base frame. -
Page 18: Heading Alignment
Planning Installation Heading Alignment The radome assembly should be positioned with the BOW marker aligned as close as possible to the center line of the ship. Direction Radome Hatch Front View Radome Hatch Direction Cable Entry Cable Entry Cover Bottom View Figure: Antenna Heading Alignment... -
Page 19: Mast Designing (Installation Example)
Planning Installation Mast Designing (Installation Example) The ADU mast must be designed to carry the weight of the ADU unit. The mast must also be able to withstand on-board vibrations and wind speeds on the radome. Option 1. When Placing Cable Inside Mast 247.5 mm (9.74") 4- ø13 mm (0.51") ø110 mm (4.3") -
Page 20: Option 2. When Placing Cable Outside Mast
Planning Installation Option 2. When Placing Cable Outside Mast 247.5 mm (9.74") 4- ø13 mm (0.51") ø254 mm (10") Min. 10 mm (0.39") Max. 20 mm (0.78") Figure: Recommended Size of Mast (Option 2) -
Page 21: Antenna Mounting Hole Pattern
Planning Installation Antenna Mounting Hole Pattern The mounting holes must be in the exact same place as shown in the diagram below. 4-ø13 Holes 247.5 mm (9.74”) ø445 mm (17.5”) Figure: Antenna Mounting Hole Pattern... -
Page 22: Preparing Installation
Planning Installation Preparing Installation The antenna installation requires extreme precaution and safety measures given its size and weight. Failure to follow the correct installation process may lead to injury of the installer and/or cause damage to the system. In order to maximize the performance of the system, a thorough review of this installation guide is strongly recommended, as well as executing the installation process as it is noted in this manual. -
Page 23: Avoid Rf Interference
Planning Installation Avoid RF Interference Do not install the antenna near the high power shortwave radar. Most radar transmitters emit RF energy within an elevation range of -15° to +15°. For this reason, It is recommended to position the antenna at least 15 feet (4.6 m) away from the radar. -
Page 24: Preparing System Cables
• RF Cable (Customer Supplied) Due to the signal losses across the length of the RF coax on L-Band, Intellian recommends the following 50 ohm coax cable types for standard system installations. For cables that run longer than 120 meters (except LMR600 coaxial cable type), please consult Intellian Technologies. -
Page 25: Placing Cable On Mast
Planning Installation Placing Cable on Mast The cable must be routed from the antenna and through various areas of the ship to end up at the antenna control unit. When pulling the cables in place, avoid sharp bends, kinking, and excessive force. After placement, seal the deck penetration gland and tie the cable securely in place. -
Page 26: Installing Antenna
Installing Antenna Installing Antenna Antenna Installation Unpacking Wooden Crate The pallet should be lifted by means of a forklift. To unpack the wooden crate, follow the procedure below. 1. Locate one of the side panels with a paper sticker (Unpack Guide). Detach this side panel by removing the fixing screw (1EA) and clips (6EA). - Page 27 Installing Antenna 3. Running Diagnostic Tests: This step is optional. After removing one of the side panels, you can run the diagnostic tests easily to verify the condition of the antenna. First, prepare the "RF Cable (Customer Supplied)" to connect the antenna and the ACU. 3-1.
-
Page 28: Removing Antenna From Wooden Crate
Installing Antenna 5. Remove the fixing screws (7 EA) from the remaining side panels, then detach the side panels. : 7 EA Removing Antenna from Wooden Crate Four radome brackets secure the antenna to the pallet. To remove the radome bracket, follow the procedures below. -
Page 29: Placing Antenna On Mast
Fully Tighten Radome Bolt Placing Antenna on Mast The Intellian antenna comes with the lifting straps pre-mounted from the factory. Check the condition of the lifting strap ensure the shackle is tightened up. Lift the antenna above the mast using a crane and carefully put the antenna down on the mast. When placing the radome, consider that the antenna should be positioned with the BOW marker aligned as close as possible to the ship's heading. -
Page 30: Attaching Waterproof Foam
Installing Antenna Attaching Waterproof Foam The waterproof foam must be attached to prevent water from penetrating inside the Radome before fully mounting the radome to the mast. Make sure the foam is attached in the same position as in the picture below. Adhesive Cable Tape... -
Page 31: Mounting Radome
Installing Antenna Mounting Radome Bring the Bolt Kit (4EA) from the ACU box. Before assembling bolts, apply Loctite #263 to the bolt's threads to ensure the bolts are fastened firmly. Insert the bolts and washers from under the mast into the radome, and fasten them to the nuts assembled inside the radome. -
Page 32: Connecting Rf Cable (Customer Supplied)
When closing the cover of cable entry, this bolt must be used. NOTE 2. Terminate N(M) connector on the end of the RF Cable. Intellian recommends using a genuine cable connector and tools. Refer to the cable termination instructions provided by the manufacturer to terminate the N connector. -
Page 33: Switching On Power Box
Installing Antenna Switching On Power Box Access the ADU modules inside the radome to check that the power switch is on through the radome hatch. Make sure that there is sufficient free space underneath the ADU to open the radome hatch. 1. -
Page 34: Installing Acu
Installing ACU Installing ACU Selection of ACU Installation Site The ACU should be installed below deck, in a location that is: • Dry, cool and ventilated. • The front panel should be easily accessible to users. ACU Dimensions Confirm the dimension of the ACU before installing it. 431 mm (16.96") 466 mm (18.34") 485 mm (19.09") -
Page 35: Mounting Acu
Installing ACU Mounting ACU Intellian supplies 19" Rack Mounting Brackets to mount the ACU in a rack. 19" Rack Mount Type The ACU should be installed using the two supplied 19" Rack Mounting Brackets. Using the Flat Head Screw supplied, attach the mounting brackets to the sides of the ACU. Place the ACU in the location where it is going to be installed. -
Page 36: System Configurations
Installing ACU System Configurations For your satellite communication system to work properly, the system will have to be connected with all of the provided components as shown in the figure below. Separate purchase of a satellite modem, switch router and ship's gyrocompass may be required. Single Antenna System Configuration (Basic Antenna System) The Basic system consists of one VSAT antenna and one ACU. -
Page 37: Dual Antenna System Configuration (Optional)
Installing ACU Dual Antenna System Configuration (Optional) The dual system consists of two VSAT antennas and two ACUs. The ACUs have embedded Dual Antenna Mediator function, which is capable of controlling and managing two VSAT antenna systems simultaneously. As shown in the configuration below, connect the cables correctly. Primary Secondary Antenna... -
Page 38: Acu Cable Connection
LAN 3 Port Figure: Name of ACU Rear Panel Connecting to the Antenna Connect the "RF Cable (not supplied by Intellian)" from the "ANTENNA" connector on the rear of the ACU to the "RF Connector" inside cable entry of radome (Antenna). Antenna... -
Page 39: Connecting To Antenna (Optional: For Dual Antenna System)
To use the Dual Antenna System, the antenna system needs to be installed with two ACUs and two antennas to support the Dual Antenna System operation. Connect the "RF Cable (not supplied by Intellian)" from the "ANTENNA" connector on the rear of the "Primary ACU" to the "RF Connector" inside cable entry of radome (Primary Antenna). -
Page 40: Connecting To Additional Acu (Optional: For Dual Antenna System)
Installing ACU Connecting to Additional ACU (Optional: For Dual Antenna System) To use the Dual Antenna System, the antenna system needs to be installed with two ACUs and two antennas to support the Dual Antenna System operation. The Primary ACU is connected to the additional Secondary ACU as follows. -
Page 41: Connecting Ship's Gyrocompass
For satellite tracking, you must connect a ship's gyrocompass to the antenna system through the gyrocompass interface on the rear of the ACU. Intellian's ACU supports NMEA 0183 (GYRO) and NMEA 2000 gyrocompass inputs. If the ship's gyrocompass output uses a different standard, a compass converter should be installed to supply the required NMEA input. -
Page 42: Acu Connector Pinouts Guide
Installing ACU ACU Connector Pinouts Guide The ACU connector pins and their corresponding descriptions are shown in the figure and table. Console Connector (Modem Interface) Antenna Control Unit (ACU): Cable Connector D-Sub 9 Pin: MODEM CONSOLE D-Sub 9 Pin (Female Connector Type) (Male Connector Type) Signal GPS_OUTA... -
Page 43: Rs232 Connector (Pc Interface)
Installing ACU RS232 Connector (PC Interface) Antenna Control Unit (ACU): Cable Connector D-Sub 9 Pin: PC I/F D-Sub 9 Pin (Male Connector Type) (Female Connector Type) Signal PC RX PC TX IARM TO PC_ DBG_ TX PC TO IARM_ DBG_ RX RS232/RS422 Connector (BUC Interface) Antenna Control Unit (ACU): Cable Connector... -
Page 44: Nmea 2000 Connector
Installing ACU NMEA 2000 Connector Antenna Control Unit (ACU): Cable Connector Sockets Pins Connector Connector Connector hreads Threads Threads NMEA 2000 Connector NMEA 2000 Connector (Male Connector Type) (Female Connector Type) Male Female Male Signal Shield NET-S, (power supply positive, +V) NET-C, (power supply common, -V) NET-H, (CAN-H) -
Page 45: Acu To Pc Communication Setup
1. Connect an Ethernet cable from the Management LAN port on the front of the ACU to the LAN port of PC. 2. The network connection is established automatically. 3. Use the following IP address to access Intellian AptusNX page. • IP Address: 192.168.2.1 (Default) -
Page 46: Wi-Fi Connection
Wi-Fi Connection Connection through Rear Panel Wi-Fi Dongle Intellian provides the Wi-Fi Dongle for Wi-Fi connection. You can connect to the ACU via Wi-Fi for easy management and control whenever you are on the vessel. 1. Connect an Ethernet cable from the Management LAN port on the front of the ACU to the LAN port of PC. -
Page 47: Operating Install Wizard
1. Connect an Ethernet cable from the Management LAN port on the front of the ACU to the LAN port of PC. 2. The network connection is established automatically. 3. Use the following IP address to access Intellian AptusNX page. • IP Address: 192.168.2.1 (Default) 4. -
Page 48: Setting Up Modem Configuration
Operating Install Wizard Setting up Modem Configuration Before starting installation wizard, set up the modem configuration. 1. After accessing the AptusNX main page, go to the "SETUP" "Modem/BUC" on the main menu then follow these steps. 2. Select your modem type from the "Select Modem" drop-down list for loading a pre-configuration for the type of modem used. - Page 49 Operating Install Wizard 4. When clicking the "Apply" button after entering the modem settings, this pop-up message will appear. If you want to automatically save and reboot the system, select the checkbox and click the "Confirm" button. The system will perform the "iARM Save & Reboot" automatically. 5.
-
Page 50: Starting Install Wizard
Operating Install Wizard Starting Install Wizard The Install Wizard will guide you through the steps of setting up the antenna system for commissioning. We highly recommend using this wizard to complete your installation and commissioning the system. You can choose to exit the wizard at any time by clicking the Finish button. You can also skip a step by clicking the Next button. - Page 51 Operating Install Wizard ü Step 2: Heading Description Set the ship's heading device. Choose the device type from the "Current Device" drop-down list. The indicator right of the title shows the device connection status. • Blue: a ship's heading device is connected.
- Page 52 Operating Install Wizard ü Step 4: Set Bow Offset For setting bow offset, a trackable satellite must be selected. There are two satellite tracking methods. Select the desired tracking type. When Antenna tracks the selected satellite, the bow offset will be set up automatically pbased on the GPS information.
- Page 53 ü Step 5: Blockage Description It is important to set up the blockage zones for Intellian VSAT. The ACU can be programmed with relative azimuth and elevation sectors to create up to five zones where transmit power could endanger personnel who are frequently in that area or blockage exists.
- Page 54 Operating Install Wizard (Option 2: Using Manual Setup) Description When you did not set the modem connection, select the "Manual Setup" button and enter the satellite information and NBD information manually to track a satellite. Click the "Apply" button. If you have no problems, click the "Next" button.
- Page 55 Operating Install Wizard NOTE. A The "Cable Compensation Range" is determined by the condition of installation (Modem, BUC). There exist four cases of cable compensation as follows. Case Modem* BUC M&C** Compensation Method Compensation path IF signal Source: iDirect iDirect Full path Calibration Output Power monitor: BUC M&C IF signal Source: iDirect...
- Page 56 Operating Install Wizard Refer to the following table for a detailed explanation of each menu. Item Description Checks the iDirect Open AMIP modem information. The indicator right of the title shows the device connection status. (Blue: a iDirect Open AMIP modem is connected.
- Page 57 Operating Install Wizard (Option 2: Using Other Modems) Description 1. Enter the "RF Uplink Frequency" received from the satellite operator through communication and click the "Apply" button. 2. Adjust the "Antenna Angle". 3. Enter "Test Result" value received from the satellite operator. If you have no problems, click the "Next"...
- Page 58 Operating Install Wizard ü Step 9: Report NOTE The following image in this step shows when the system is using the Open AMIP modem. In case of using other modems, the report items displayed may vary with the image below. NOTE Description Displays the configuration report (System...
-
Page 59: Operating Acu
Operating ACU Operating ACU Introduction Antenna Control Unit (ACU) The Antenna Control Unit (ACU) controls the various settings of the antenna. ACU Front Panel The following figure shows the ACU's front panel. Right USB Port: OLED Display For Log Data Download, Backup/Restore Antenna Settings, POWER Indicator Move Key... -
Page 60: Acu Display Menu
Operating ACU ACU Display Menu The following figure shows the ACU display menu. F:12.490/11.300 RX:H TX:V TRACKING 062.2 E HDG:120.4 GPS: ACTIVE The following table shows the function of each touch key. Item Description Satellite Lock Displays the satellite lock status. Signal Level Displays the antenna signal level. -
Page 61: Startup
With the system is installed and power is applied, the ACU display will show the following sequence. ü Startup Intellian XXXXXXX ("Intellian XX..." will appear. The "XX..." is the model name.) ANTENNA INFO ü Initialize Antenna Information ü Initialize Elevation Angle EL INITIALIZE ü... - Page 62 Operating ACU When the antenna is controlled by AptusNX, the ACU displays the control mode status. REBOOT ü Control Mode Status (in Reboot Mode, Setup Mode, Test Mode) ANTENNA SETUP MODE TEST MODE If the antenna is not communicating with ACU, the "COMMUNICATION ERROR" message will appear. COMMUNICATION ERROR...
-
Page 63: Diagnosis
Operating ACU Diagnosis Executes antenna Diagnosis test and shows the real-time diagnosis result. Press Move Key F:12.490/11.300 RX:H TX:V TRACKING 062.2 E ü Main Display HDG:120.4 GPS: DIAGNOSIS ü Diagnosis Display Press DIAG ALL Select Key DIAG : CODE 101 ü... - Page 64 Operating ACU Item Description Displays the diagnosis code. Code Test The data communication between the antenna and the ACU is tested. The azimuth axis is tested. The elevation axis is tested. The cross-level axis is tested. Not Available Not Available The rate sensor is tested.
-
Page 65: Antenna Information
Operating ACU Antenna Information Displays the Antenna/ACU serial number, PCU/STAB/ACU/i-ARM Version of the product. Press Move Key F:12.490/11.300 RX:H TX:V TRACKING 062.2 E ü Main Display HDG:120.4 GPS: Press Move Key DIAGNOSIS ü Diagnosis Display DIAG ALL ü Antenna Information Display PRODUCT : XXXXXXX (The "XX..."... -
Page 66: Interface Information
Operating ACU Interface Information Displays the modem/heading type in use and the network connection status. Press Move Key F:12.490/11.300 RX:H TX:V TRACKING 062.2 E ü Main Display HDG:120.4 GPS: Press Move Key DIAGNOSIS ü Diagnosis Display DIAG ALL Press ü Antenna Information Display PRODUCT : XXXXXXX Move Key... -
Page 67: Usb Function
Operating ACU USB Function To use this function, a USB Memory Stick must be connected to the USB port (the right USB port on the front of the ACU). The USB Function supports the four menus (LOG DOWNLOAD, FIRMWARE UPLOAD, BACKUP TO USB, RESTORE FROM USB). - Page 68 Operating ACU LOG DOWNLOAD Downloads all data logs to the USB memory stick Press USB FUNCTION Move Key BACK ü USB Function Menu Display LOG DOWNLOAD FIRMWARE UPLOAD BACKUP TO USB RESTORE FROM USB USB FUNCTION BACK Press LOG DOWNLOAD FIRMWARE UPLOAD Select Key BACKUP TO USB...
- Page 69 To use Firmware Upload function, you must follow the folder structure guide to configure the folders properly. It supports up to FAT32. The antenna system is upgraded with the FWP file in the designated folder of a USB memory stick. v100NX v100NX_190101_V1.01.fwp Press...
- Page 70 Operating ACU BACKUP TO USB Backs up the antenna setting files to the USB. Press USB FUNCTION Move Key BACK ü USB Function Menu Display LOG DOWNLOAD FIRMWARE UPLOAD x3 times BACKUP TO USB RESTORE FROM USB USB FUNCTION BACK Press LOG DOWNLOAD FIRMWARE UPLOAD...
- Page 71 Operating ACU RESTORE FROM USB Restores the antenna setting by using the setting files saved in USB. Press USB FUNCTION Move Key BACK ü USB Function Menu Display LOG DOWNLOAD FIRMWARE UPLOAD x4 times BACKUP TO USB RESTORE FROM USB USB FUNCTION BACK Press...
-
Page 72: Using Aptusnx
Using AptusNX Using AptusNX Introduction With embedded AptusNX software, the antenna can be monitored, controlled, and diagnosed remotely from anywhere, anytime through TCP/IP protocol. This not only can save time but also save the cost generated from the hundreds of routine maintenance activities such as operating firmware upgrades, tracking parameters resets, and system Diagnosis. -
Page 73: Main Page
Main Page Page Login The Intellian software Aptus provides a different user level access to ensure safe operation of the system. Depending on the user level, a limited range or a full range of functions can be accessed and operational. -
Page 74: Top Menus
Using AptusNX Top Menus Once you log in, the following information and menus are displayed. Item Description Target Satellite Displays the name of the targeted satellite. When clicking this top menu area (marked as red dots), the "Quick Status Screen" appears. You can quickly monitor Quick Status each status of the five items (Enable Mode, Blockage, Screen Area... -
Page 75: Account Menu
Using AptusNX Account Menu 1. Select the "Account" button and enter the user management menu. 2. The "Account", "System", "User Mgr.", and "Logout" menu options will appear. Select one of the first three options to manage or control details, or select the "Logout" menu to log out of the AptusNX web page. Account Item Description... -
Page 76: Registration
Using AptusNX Registration V5-85-U1JW V0918070001 Item Description Enters product registration information for the convenient use of a product. Click Registration the "Register (Update)" button to apply the settings to the system. Displays the antenna information. Product • Antenna: displays the antenna name. •... -
Page 77: System
Using AptusNX System 85 cm / 33.5 inch V5-85-U1JW VP-T84G1 V0918070001 V0918070001 v1.00 v1.00 v1.00 v1.00 v1.00 v1.00 v1.00 v1.00 192.168.2.1 2018-08-17 Item Description Displays system information such as the antenna, S/W version, and network IP System address. Antenna Displays antenna information. Information S/W Version Displays S/W version information. -
Page 78: User Manager
Using AptusNX User Manager Editable User Permissions Menu Item Description The captain with admin permissions can control and manage user permissions User Manager separately. To add a new user, click the "Add User" button. The registration window will Add User appear in the pop-up window. -
Page 79: Dashboard
Using AptusNX Dashboard The Dashboard menu is displayed as below to provide quick monitoring of the antenna status. The Dashboard helps you arrange panels on a single screen while providing you with a broad view of a variety of information at once. -
Page 80: How To Arrange Dashboard Layout
Using AptusNX Removing Panels 1. On the right side of the page, you will see the gear icon to edit your dashboard. To start editing, click on the gear icon indicated by the red mark. 2. Uncheck the box of the panel that you wish to remove from the dashboard. 3. -
Page 81: How To Use Shortcut Settings
Using AptusNX How to Use Shortcut Settings Each panel on the dashboard provides a shortcut function. Using the "Shortcut" button on right side of the panel, you can easily access the detailed information and manage the each panel's settings. 1. Click the "Shortcut" button indicated by the red mark to open the setting page. 2. -
Page 82: System Tools
Using AptusNX System Tools This menu sets and displays the F/W Upgrade, iARM Upgrade, iARM Save&Reboot, Satellite Library, Spectrum Graph and Graph function. Firmware Upgrade v1.00 v1.00 v1.00 v1.00 v1.00 v1.00 v1.00 v1.00 v1.00 v1.00 v1.00 v1.00 v1.00 v1.00 Item Description Firmware Displays current firmware versions and upgrades antenna firmware. - Page 83 Using AptusNX Antenna Firmware Upgrade (Manual Upgrade method) Procedures: 1. Choose "Manual Upgrade" from the pull-down menu of Upgrade Method. Browse and select the upgrade package file to upload. Click on the "Upload" button to transfer the Firmware package file ("*.fwp") to iARM module.
-
Page 84: Iarm Upgrade
Using AptusNX iARM Upgrade Item Description iARM Upgrade Upgrades the firmware of iARM module. Browse and select the iARM firmware file to upload and click "Start Upload" button. The update may take a few minutes to complete. The upload time may vary due to a variety of factors such as the speeds of your network. -
Page 85: Iarm Save & Reboot
Using AptusNX iARM Upgrade Procedures: 1. Browse and select the iARM firmware file (.tgz) that you wish to upgrade. Click on "Start Update" button to update the iARM firmware. Wait until the page is loaded. NOTE When selecting the box "Ignore warnings during installation and force the installation to continue" before performing the upgrade, the warning messages do not appear during the upgrade. -
Page 86: Satellite Library
Using AptusNX Satellite Library Item Description Satellite Library Sets the satellite library information. Reads or manages satellite information from the library. • Get Library from ACU: obtains satellite library file from the ACU. Satellite List • Get Library from PC: obtains the satellite library file from the PC. •... -
Page 87: Spectrum Graph
Using AptusNX Spectrum Graph Item Description Displays a spectrum analyzer, measures an input Rx signal frequency within the Spectrum Graph full frequency range, and sets spectrum data view options. The disconnect fault can be checked and solved through spectrum analyzer results. Displays measurement results. -
Page 88: Graph
Using AptusNX Graph Multi Chart View Single Chart View AZ & EL View Item Description This view provides information on the Signal Level, EL Graph, AZ Absolute, AZ Graph Relative, Heading in the Multi Chart, Single Chart or AZ & EL formats. Sets detailed options for the graph. -
Page 89: System Troubleshooting
Using AptusNX System Troubleshooting This menu sets and displays the Diagnosis, Antenna Log, Antenna Event Log and Support function. Diagnosis Item Description Diagnosis Executes antenna diagnosis test to check the antenna status. Select the checkbox (full diagnosis test or single diagnosis test) before modifying the settings. - Page 90 Using AptusNX 2. Once the diagnosis starts, the page will indicate test status. It should take a few minutes to complete the test. 3. After the diagnosis is completed the system shows the diagnosis results of each item. You can save the results to the ACU by clicking the "Save Report"...
-
Page 91: Antenna Log
Using AptusNX Antenna Log Item Description Antenna Log Displays the antenna log data. Turns on/off the GPS log download option. Click the "Apply" button to apply the GPS Log Option settings to the system. Any log data within three months can be downloaded. Select the duration on the calendar view that you want to show. -
Page 92: Antenna Event Log
• View Manual: click the "View Manual" button to open the manual web page. Manual and Help • Support Desk: click the "Support Desk" button to open Intellian's contact details for support. Provides answers to frequently asked questions about the product. -
Page 93: System Setting
Using AptusNX System Setting This menu sets and displays the Ship, Antenna, Satellite, Network, Modem/BUC, SNMP, Backup & Restore and Mediator function. Ship Setting Item Description Ship Sets the ship information and block zone. Sets the GPS position of the vessel for searching for a satellite. Check the GPS status connected to the antenna system. - Page 94 Click the "Apply" button to apply the settings to the system. It is important to set up the blockage zones for Intellian VSAT. The ACU can be programmed with relative azimuth and elevation sectors to create up to five zones where transmit power could endanger personnel who are frequently in that area or blockage exists.
-
Page 95: Antenna Setting
Using AptusNX Antenna Setting NOTE NOTE The "Set Rate Sensor Bias" function must used experienced NOTE engineers only. Item Description Sets current antenna position and search parameters. Antenna Setting These parameters should only be changed by an authorized service technician. Improper setting of these parameters will render your system inoperable. - Page 96 Refer to the replacement manual for detailed procedures. The separate device (e.g. level indicator) for manual adjustment is not provided by Intellian. Enter "Setup Mode" to modify settings. Tilt Sensor Bias Maintain the elevation and the cross-level axes in order to keep the pedestal parallel to the horizon.
- Page 97 (Consolidated Skew Offset = satellite skew offset + mechanical skew offset). Due to each satellite having its own skew offset, Intellian recommends you check with your service provider or satellite operator to get the satellite skew offset value and input it in "SETUP main menu...
-
Page 98: Tracking Satellite Setting
Using AptusNX Tracking Satellite Setting Item Description Tracking Satellite Sets the current tracking satellite settings. Setting Sets the current tracking satellite settings. • Satellite Name: sets the satellite name. • Longitude(º): sets the satellite orbit position. • Skew Offset(º): sets the skew offset. Satellite •... -
Page 99: Network Configuration
Using AptusNX Network Configuration This function is available after performing the "iARM Save & Reboot" on page 85. Item Description Network Sets the ACU's Internal IP address and ports. Configuration Sets the Management Port's network configuration. The Management Port is located on the ACU front panel. - Page 100 • UDP Port: sets the management port. Configuration • Message Type: selects message type (Intellian message level) to send to the management server (Lower number indicates higher emergency). • Syslog Target Level: if you select this target level, the management server receives a log message equal to or less than this level.
-
Page 101: Modem/Buc Setting
Using AptusNX Modem/BUC Setting... - Page 102 Using AptusNX Item Description Modem/BUC Sets the modem and BUC interface. Setting Sets the interface between the ACU and the satellite modem. • Select Modem: selects your modem type from the "Select Modem" drop-down list for loading a pre-configuration for the type of modem used. The settings related to the modem interface will be set automatically once the modem type is selected.
- Page 103 Using AptusNX Item Description Sets the information for connecting with the modem. • Modem IP: sets the modem IP address. • Port: sets the connection Port. • ID: sets the connection ID. Modem • Password: sets the connection Password. Connection •...
-
Page 104: Snmp Setting
Using AptusNX SNMP Setting Item Description SNMP Setting Sets SNMP configuration. Sets the SNMP configuration. • SNMP V1/V2 Status: sets SNMP mode. • V1/V2 Community Name: sets SNMP V2 community name. • V3 Authentication Type: sets SNMP V3 authentication mode. •... -
Page 105: Backup & Restore Setting
Using AptusNX Backup & Restore Setting Item Description Backup & Backs up & Restores the antenna setting files and the iARM files. Restore Setting • Antenna Backup: Backs up antenna setting files to ACU or PC. Click the "Backup" button to apply the settings to the system. Antenna Backup •... -
Page 106: Mediator Setting (Optional: For Dual Antenna System)
Secondary Antenna's AptusNX View Item Description Intellian's new ACU has embedded Dual Antenna Mediator function, which can be utilized to switch between two Intellian VSAT antenna systems simultaneously. When Mediator Setting one antenna is blocked by obstacles or has suddenly lost service, another antenna will immediately provide fail-safe operation to maintain the highest levels of system performance and reliability. - Page 107 Specification Item Description This menu is differently shown in the Primary Antenna's AptusNX and the Secondary Antenna's AptusNX. To clearly distinguish the primary antenna and the secondary antenna, enter a description to each antenna. • Primary: you can enter the description in the primary antenna's AptusNX Antenna (Editable).
-
Page 108: Specification
Min. 30 deg. Polarization Linear (X-pol, Co-pol) NJRC 8 W (standard), 16 W, 25 W (optional) Intellian PLL LNB Single 50 Ω coax cable for Rx, Tx, FSK, Reference and Power ACU to ADU Cable (Antenna Cable) from ACU to ADU... - Page 109 Embedded in ACU, Primary, Secondary control on AptusNX Modem Interface Ethernet port, RS-232C, RS-422C, I/O Console Input Power 100 ~ 240 V AC, 50 ~ 60 Hz, 3 A Environmental Specification Test Intellian Standard Operational IEC-60945 (-25 °C to +55 °C, Power On) Temperature IEC-60945 Survival (ADE) (-40 °C to +80 °C, Powered On and a non-functional state)
- Page 110 This product is warranted by Intellian Technologies Inc., to be free from defects in materials and workmanship for a period of THREE (3) YEARS on parts and TWO (2) YEARS on labor performed at Intellian Technologies, Inc. service center from the purchased date of the product.
- Page 111 Appendix A Starting Dual Antenna System (Optional) Intellian's new ACU has embedded Dual Antenna Mediator function, which can be utilized to switch between two Intellian VSAT antenna systems simultaneously. When one antenna is blocked by obstacles or has suddenly lost service, another antenna will immediately provide a fail-safe operation to maintain the highest levels of system performance and reliability.
- Page 112 Appendix A. Starting Dual Antenna System (Optional) 2.3 Assigning Antenna Role Access the AptusNX (IP Address: 192.168.2.1) to manage and control the Dual Antenna System. Go to SETUP menu > Mediator menu > Mediator setting. Select the "Yes" in the Use Mediator menu. 2.3.1 Assigning Primary Antenna Role when connecting the master ACU, which is connected to the modem and the gyrocompass, select the "Primary"...
- Page 113 Appendix A. Starting Dual Antenna System (Optional) 3.1.2 Performing Install Wizard Perform the Install Wizard process. Refer to the "Starting Install Wizard" on page 48 for more details. 3.2 Performing Install Wizard for Secondary Antenna System To perform the Install Wizard of the secondary antenna system, follow the steps below. 3.2.1 Assigning Active Antenna Select the "Secondary"...
Need help?
Do you have a question about the v100NX and is the answer not in the manual?
Questions and answers