Table of Contents
Advertisement
Quick Links
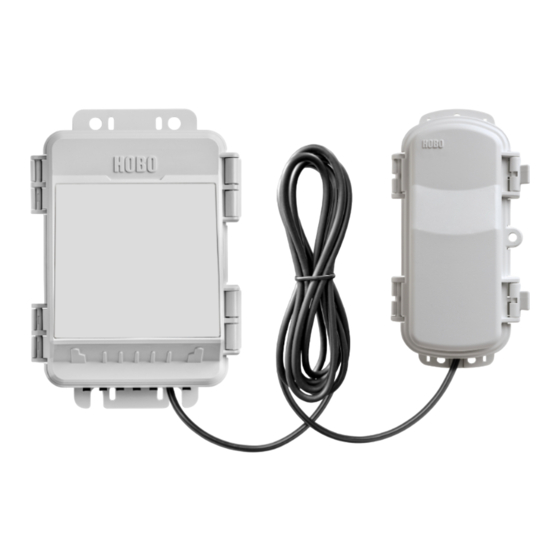
HOBO® MicroRX Station for HOBOnet® (RX2105 and RX2106) Manual
RX2105 model shown
HOBO MicroRX Station for
HOBOnet
Models:
RX2105 MicroRX Station
RX2106 MicroRX Station with
Solar Panel
• RX210x-900 (US)
• RX210x-868 (Europe)
• RX210x-921 (Taiwan)
• RX210x-922 (Australia/NZ)
Included Items:
• RX Manager
• Grease packet
• Screws and washers
• Cable ties
• Six AA lithium batteries and
AC adapter (P-AC-1) with
RX2105
• Rechargeable battery pack
with RX2106
Required Items:
• HOBOlink
• HOBOnet RXW motes
Optional Items:
• Smart sensors
• Ground wire (CABLE-
MICRO-G)
• 2-meter tripod (M-TPB)
• 3-meter tripod (M-TPA)
• 1.5 meter mast (M-MPB)
• 1-5/8 inch U-bolts (U-BOLT-
KIT2)
• Guy wire kit (M-GWA)
• 1/2 inch stake kit (M-SKA)
Sensors and accessories are
available at
www.onsetcomp.com.
24500-C
The HOBO MicroRX Station for HOBOnet provides continuous logging for both indoor and
outdoor environments with wireless sensor motes and up to five smart sensors. Logged data
from the station is transferred at regular connection intervals to HOBOlink® web-based
software where you can check the latest conditions, view graphs, configure sensors and alarms,
set up a dashboard, download your data, or schedule data delivery via email or FTP. This
durable, compact station has a built-in LCD screen to check the current system configuration
and status, start and stop logging, add and remove sensors, and connect to HOBOlink on
demand. The station offers two primary power source options depending on your deployment
needs: the RX2105 model includes user-replaceable AA lithium batteries and an AC adapter
while the RX2106 model is designed with a built-in solar panel and rechargeable NiMH battery
pack.
Specifications
Station
Operating Range
Smart Sensor Connectors
Smart Sensor Network Cable
Length
Smart Sensor Data Channels
Logging Rate
Time Accuracy
Battery Type/Power Source
Battery Life/Power Source
Alarm Notification Latency
Enclosure Access
LCD
Materials
RX2105: -40° to 60°C (-40° to 140°F)
RX2106: -20° to 60°C (-4° to 140°F)
5
100 m (328 ft) maximum
Maximum of 15 (some smart sensors use more than one data
channel; see sensor manual for details)
1 minute to 18 hours
±8 seconds per month in 0° to 40°C (32°F to 104°F) range;
±30 seconds per month in -40° to 60°C (-40° to 140°F) range
RX2105: AC power adapter (P-AC-1) and 6 AA 1.5 V lithium batteries
RX2106: Integrated 1.7 watt solar panel and NiMH rechargeable
battery pack; optional AC power adapter (P-AC-1) or external solar
panel (SOLAR-xW) can be used in place of integrated solar panel
RX2105:
Runs continuously with the included AC adapter.
Batteries can be used as a backup to AC power; battery life of 3
months with 1 minute logging and daily connections or 2 months
with 1 minute logging and hourly connections, and with
approximately 10 motes. Note: Deployments in areas with weak
cellular strength could reduce battery life.
RX2106:
Typical 3–5 years when operated in the temperature range -20° to
40°C (-4° to 104°F); operation outside this range will reduce the
battery service life.
Maximum connection rates with built-in solar panel, in full sun:
• 10 minute connections year round for latitudes less than ±40°
• 10 minute connections through three seasons in other regions,
reduced to 30 minute connections in winter
Maximum connection rates with external 5W or 15W solar panels:
• 10 minute connections year round, in full sun
• Connection rate with external solar panels may be less if
deployed in partial sun
Battery life of 1 month without solar recharging, with hourly
connections, 1 minute logging, and approximately 10 motes.
Logging interval plus 2–4 minutes, typical
Hinged door secured by two latches with eyelets for use with user-
supplied padlocks
LCD is visible from 0° to 50°C (32° to 122°F); the LCD may react
slowly or go blank in temperatures outside this range
Outer enclosure: Polycarbonate/PBT blend with brass inserts;
Interior: Polycarbonate/PBT; Gasket: Silicone foam; Cable channel:
Santoprene™ TPE; U-Bolts (not included): Steel with zinc dichromate
finish
Advertisement
Table of Contents

Subscribe to Our Youtube Channel
Related Manuals for Hobo HOBOnet RX2105


Summary of Contents for Hobo HOBOnet RX2105
- Page 1 HOBO® MicroRX Station for HOBOnet® (RX2105 and RX2106) Manual The HOBO MicroRX Station for HOBOnet provides continuous logging for both indoor and outdoor environments with wireless sensor motes and up to five smart sensors. Logged data from the station is transferred at regular connection intervals to HOBOlink® web-based software where you can check the latest conditions, view graphs, configure sensors and alarms, set up a dashboard, download your data, or schedule data delivery via email or FTP.
- Page 2 Data Rate Up to 250 kbps, non-adjustable Duty Cycle <1% Maximum Number of Motes Up to 50 wireless sensors or 336 data channels per one HOBO RX station Power Source Powered by the station Dimensions Mote: 16.2 x 8.59 x 4.14 cm (6.38 x 3.38 x 1.63 inches) Cable length: 2 m (6.56 ft)
- Page 3 HOBO MicroRX Station for HOBOnet (RX2105 and RX2106) Manual Device Components and Operation Station Door: This is the protective, hinged door covering the LCD and electronics. The station serial number and device key Station Door needed for HOBOlink registration are located on the inside of the door.
-
Page 4: Lcd Operation
HOBO MicroRX Station for HOBOnet (RX2105 and RX2106) Manual Mounting Mounting Tab: Use the tabs at the top and bottom of the mote to mount it (see Deployment Guidelines). Antenna Cable: Use this cable to connect the manager to the station. - Page 5 HOBO MicroRX Station for HOBOnet (RX2105 and RX2106) Manual Battery and This part of the LCD shows the current battery level and memory. Memory Status The battery indicator shows the approximate battery power remaining. In this example, the battery is fully charged.
-
Page 6: Setting Up The Station
HOBO MicroRX Station for HOBOnet (RX2105 and RX2106) Manual Plug in solar Notes on LCD Operation: panel cable • The LCD will turn off after 5 minutes of inactivity. Press here in any button to turn the LCD back on. - Page 7 HOBO MicroRX Station for HOBOnet (RX2105 and RX2106) Manual b. Install the batteries in the mote and press the button on the mote for 3 seconds. Use the Next button to save changes and move through each configuration screen Press this button...
- Page 8 HOBO MicroRX Station for HOBOnet (RX2105 and RX2106) Manual b. Select the logging interval to be used for all wireless Tip: When a sampling interval is configured, the station sensors, which can be different than the one used for will take multiple measurements within a given logging smart sensors (if applicable).
-
Page 9: Start Logging
HOBO MicroRX Station for HOBOnet (RX2105 and RX2106) Manual 7. Start logging. the last connection. You can also view any enabled graphs as shown in the following example. Press the Start button on the station to start logging. The station will connect to HOBOlink (“Connection” will blink... -
Page 10: System Alarms
HOBO MicroRX Station for HOBOnet (RX2105 and RX2106) Manual System Alarms 2. Click Add a Sensor Alarm. 3. Set up the Sensor Condition for the alarm. To add a system alarm: a. Select the sensor. 1. In HOBOlink, click Devices and then RX Devices, and find the b. -
Page 11: Starting And Stopping Logging
HOBO MicroRX Station for HOBOnet (RX2105 and RX2106) Manual then it will be 4 hours before an alarm clear message is sent of silicone grease. Push each new sensor cable into the hole after the alarm is triggered--unless enough rain has continued that lines up with the corresponding sensor connector. - Page 12 HOBO MicroRX Station for HOBOnet (RX2105 and RX2106) Manual 3. Press the Search button (the magnifying glass). The 7. Repeat steps 4–6 for any additional motes to add. magnifying glass icon will blink while the station is in search 8. Press the Search button (the magnifying glass) on the mode.
-
Page 13: Deployment Guidelines
HOBO MicroRX Station for HOBOnet (RX2105 and RX2106) Manual 1. Click Devices and then RX Devices, and find the station you RX2106 models as it is charged and the antenna in both models will not have optimal range. want to configure. Click the arrow next to on the Devices page and select Readout Configuration. -
Page 14: Installing The Grounding Wire
• The HOBOnet wireless network can support up to 50 wireless sensors or 336 data channels per one HOBO RX station. • Use the Map feature in HOBOlink for a bird’s eye view of the network and wireless paths. -
Page 15: Mounting The Station
HOBO MicroRX Station for HOBOnet (RX2105 and RX2106) Manual grounding wire may prevent the logger from being flat 2. Use the integrated plugs to fill any unused holes. Bend the against the surface. Be careful not to bend the case when plugs up so that you can push them into the holes. -
Page 16: Care And Maintenance
HOBO MicroRX Station for HOBOnet (RX2105 and RX2106) Manual Care and Maintenance installation is complete, the LCD symbols return and the mote will automatically rejoin the network. Periodically inspect the station and manager as follows: Notes: • Verify the station enclosure is free of visible damage or •... - Page 17 HOBO MicroRX Station for HOBOnet (RX2105 and RX2106) Manual Deployments in extremely cold or hot temperatures, a logging WARNING: Do not cut open, incinerate, heat above 85°C interval faster than 1 minute, or a sampling interval faster than (185°F), or recharge the lithium batteries. The batteries may 15 seconds can impact battery life.
- Page 18 The said legal communications means radio communications is operated in compliance with the Telecommunications Act. The low power radio- frequency devices must be susceptible with the interference from legal communications or ISM radio wave radiated devices. © 2020 Onset Computer Corporation. All rights reserved. Onset, HOBO, HOBOlink, HOBOnet, and 1-800-LOGGERS (564-4377) • 508-759-9500 HOBOware are trademarks or registered trademarks of Onset Computer Corporation.
Need help?
Do you have a question about the HOBOnet RX2105 and is the answer not in the manual?
Questions and answers