
Related Manuals for Eneo IED-62V2812P0A


Summary of Contents for Eneo IED-62V2812P0A
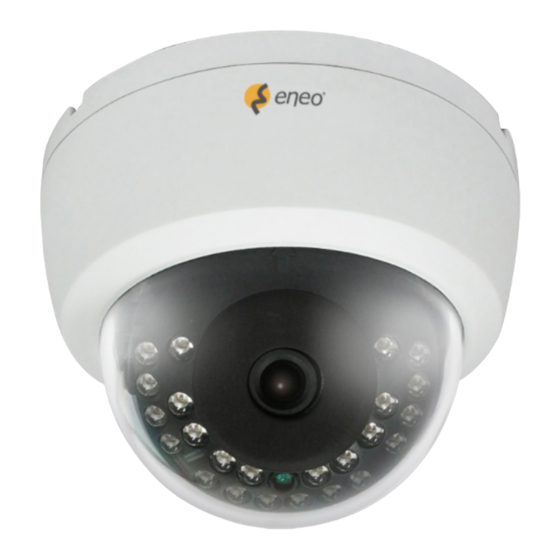
- Page 1 Quick Installation Guide 1/2.8” Network Dome, Fixed, Day&Night, 1920x1080, Infrared 12VDC, PoE, Indoor IED-62V2812P0A IED-62F0036P0A...
-
Page 2: Table Of Contents
Table of contents Parts supplied .......................5 Part names ........................6 Installation instructions ....................7 Pan & Tilt adjustments ..............................8 Zoom & focus adjustments (Vari-focal lens type) ....................8 Installation and commissioning Instructions ......................9 Quick Network Setup ....................10 Web viewer description .............................. 11 Player control & Display ............................11 User Manual ................................ - Page 3 Safety instructions General safety instructions • Before switching on and operating the system, first read this safety advice and the operating instructions. • Keep the operating instructions in a safe place for later use. • Installation, commissioning and maintenance of the system may only be carried out by authorised individuals and in accordance with the installation instructions - ensuring that all applicable standards and guidelines are followed.
- Page 4 Class A device note This is a Class A device. This device can cause malfunctions in the living area; in such an event, the operator may need to take appropriate measures to compensate for these. WEEE (Waste Electronical & Electronic Equipment) Correct Disposal of This Product (Applicable in the European Union and other European countries with separate collection systems).
-
Page 5: Parts Supplied
Parts supplied • Network Camera • Operating Instruction • Installation CD • Mounting Template • Plastic Anchor: 6 x 30mm (3x) • Mounting Screw: 4 x 25mm (3x) • Open Driver (1x) -
Page 6: Part Names
Part names Vari-focal lens type Fixed lens type Power Cable Dome Base Zoom lever IP RESET button Focus lever Dome Cover Bubble Dome Open the dome cover Turn the open key in the dome cover gap as shown. -
Page 7: Installation Instructions
Installation instructions 1. Drill three holes for mounting on the ceiling or wall. 2. Place the dome base at the pre-drilled installation position and fix it by using mounting screws. 3. Route the power & ethernet cable to the connecting place. 4. -
Page 8: Pan & Tilt Adjustments
Pan & Tilt adjustments Pan limit: Adjusts the first pan angle by turning the gimbal 360˚. Tilt limit: Tilt is limited to 25°min ~ 90°max. with reference to the ceiling when the inclina- tion of camera module is 0°, that is, the image is aligned horizontally. Rotation limit (Horizontal image alignment): Adjust the rotation angle by turning the upper gimbal 360°. -
Page 9: Installation And Commissioning Instructions
Installation and commissioning Instructions Make sure the power is removed before the installation. After all connections are finished properly, follow the order for applying power. 1. Plug the network cable into RJ-45 Ethernet Port. If PoE is the unique power, there will be no need to connect Power jack. -
Page 10: Quick Network Setup
IP addresses. The network camera‘s default IP address is: 192.168.1.10. 5. Right clicking the device name in the eneo Site Manager will bring up the context menu. Use the ‘Open Device Web Site’ option to access the camera. 6. The web viewer login page will open up in your default web browser. -
Page 11: Web Viewer Description
Web viewer description (A) Menu button : Click the button to show or hide the setup menu bar. (B) Model name : Show a camera model name connected. (C) Select Language : Set the web viewer language English, Deutsch or French. (D) Main setup menu bar : Set the camera or network functions. -
Page 12: User Manual
(3) Record: Not Available (4) Window Fit: Display live view to fit the window size. (5) Full Screen: Resizes the live view display to fit to the monitor resolution. ESC key returns to the previous view. (6) Custom: Selects the live view display scale, 0%~200%, by the control bar. 100% is the original size. -
Page 13: Setup Menu Table
Setup Menu Table Category Menu Configuration Pause, Snapshot, Record (*) Player Control Display (Window Fit, Full Screen, Custom) LIVE VIEW Video Stream Stream1, Stream2, Stream3 Protocol HTTP, TCP, UDP PTZ Contol (*) Zoom, Focus, Push AF PLAYBACK (*) Event Search, Timeline Search, Timeline Bar Information General, Open source Information Source... - Page 14 Overwrite when storage is full, Record Continuous record setting Record (*) Schedule Storage Format, Remove, Storage Information Motion, VCA, Tamper, Alarm In, System, Manual, Network, Triggers Timer, Day/Night Event Record (*), Alarm Out, E-Mail, FTP, Video Boost, Notification Actions Server SETUP Rules Event Processing, ONVIF Mapping...
-
Page 15: Quick Setup
Quick Setup Information Shows the overall information about the system such as Model name, MAC address, IP address, Zeroconf, IP address, Firmware version, Server time, Running time, CPU usage, Inbound/Outbound Bandwidth and Open source list. Users Manages the user accounts by names, groups and authorities. •... -
Page 16: Add
Click the Add, Edit, or Delete button for managing user account. To add a new user: 1. Click the Add tab, and type a new user name. (1 to 14 alphanumeric characters). User names are not case sensitive. 2. Type a password and retype confirm password. (1 to 8 alphanumeric characters). Passwords are case sensitive. -
Page 17: Delete
2. Click the Edit tab, then new pop-up window appears. 3. Type a password (1 to 8 alphanumeric characters) and retype confirm password. The user name can’t be modified. 4. Select one of the groups you wish to assign to the user. 5. -
Page 18: Day & Time Display
Day & Time Display Select the date & time formats to be displayed. Network The DHCP (Dynamic Host Configuration Protocol) server has a feature that automatically assigns an IP address to the device if there is a device on the network. IPv4 Address Obtain IP address via DHCP : Gets the IP address assigned by the DHCP (Dynamic Host Configuration Protocol) server. -
Page 19: Ipv6 Address
IP address, Subnet mask, Gateway: Displays the current IP address which is obtained from the DHCP Use the following IP address: Select the choice box if you want to assign the IP address manually. IPv6 Address Mark ENABLE check box to use IPv6 address and click SAVE button, then new IPv6 address will be obtained. -
Page 20: Further Information
Further information Make sure to always upgrade to the latest firmware version available from the eneo web- site at www.eneo-security.com to receive the latest functionality for your product. The manual, and other software tools are available on the eneo website at www.eneo-security.com or on the included CD. - Page 21 Inhaltsverzeichnis Lieferumfang .......................24 Bezeichnungen von Gerätekomponenten ...............25 Installationsanweisungen ..................26 Einstellung von Schwenkung und Neigung ......................27 Zoom- und Fokuseinstellung (nur das Modell mit variabler Brennweite) ..........28 Montage- und Inbetriebnahmeanleitung......................28 Schnelle Netzwerkkonfiguration ................29 Beschreibung des Web-Viewers ..........................30 Player-Steuerung & Anzeige ..........................30 Benutzerhandbuch ..............................
- Page 22 Sicherheitsanweisungen Sicherheitshinweise allgemein • Bevor Sie das System anschließen und in Betrieb nehmen, lesen Sie zuerst diese Sicherheitshinweise und die Betriebsanleitung. • Bewahren Sie die Betriebsanleitung sorgfältig zur späteren Verwendung auf. • Montage, Inbetriebnahme und Wartung des Systems darf nur durch dafür autorisierte Personen vorgenom- men und entsprechend den Installationsanweisungen - unter Beachtung aller mitgeltenden Normen und Richtlinien - durchgeführt werden.
- Page 23 • Bei abgedunkelter Umgebung und direktem Blick in den IR-Scheinwerfer ist ein Sicherheitsabstand von > 1 m zum Scheinwerfer einzuhalten. • Unsichtbare LED Strahlung nicht direkt mit optischen Instrumenten (z.B. Lupe, Vergrößerungsglas oder Mikroskop) betrachten, da dies Augen gefährden kann, LED Klasse 1M. •...
-
Page 24: Lieferumfang
Lieferumfang • Netzwerk Kamera • Betriebsanleitung • Installations-CD • Bohrschablone • Kunststoffdübel: 6 x 30 mm (3x) • Befestigungsschraube: 3,5 x 25mm (3x) • Werkzeug zum Öffnen (1x) -
Page 25: Bezeichnungen Von Gerätekomponenten
Bezeichnungen von Gerätekomponenten Variable Brennweite Feste Brennweite Netzkabel Dome-Basis Zoom-Hebel IP Reset Taste Fokus-Hebel Dome-Abdeckung Dome-Kuppel Die Dome-Abdeckung öffnen Drehen Sie das Öffnungswerkzeug wie gezeigt in der Aussparung der Dome-Abdeckung. -
Page 26: Installationsanweisungen
Installationsanweisungen 1. Bohren Sie drei Löcher zur Montage an der Decke oder an der Wand. 2. Setzen Sie die Dome-Basis an die Stelle mit den vorgebohrten Löchern und befes- tigen Sie sie mit den Befestigungsschrauben. 3. Verlegen Sie das Netz-/Ethernet-Kabel an die Anschlussstelle. 4. -
Page 27: Einstellung Von Schwenkung Und Neigung
ACHTUNG: Achten Sie besonders darauf, die Abdeckkuppel der Dome- Kamera während der Installation oder der Einstellung NICHT zu verkratzen. Es muss sorgfältig darauf geachtet werden, das Kabel NICHT zu beschädigen, zu knicken oder Gefahrenbereichen auszusetzen. Setzen Sie die Kamera nie direkt einer starken Licht- quelle wie der Sonne oder einem Scheinwerfer aus. -
Page 28: Zoom- Und Fokuseinstellung (Nur Das Modell Mit Variabler Brennweite)
ACHTUNG: Achten Sie bitte darauf, dass sich die Kabel beim Einstellen des Betrachtungswinkels nicht verdrehen. Zoom- und Fokuseinstellung (nur das Modell mit variabler Brennweite) • Drehen Sie den Fokus-Hebel in Richtung "N" (Nah) oder "∞" (Fern), bis der schärfste Fokus erreicht ist. •... -
Page 29: Schnelle Netzwerkkonfiguration
IP-Adressen zu vermeiden. Die Standard-IP-Adresse der IP-Kamera ist: 192.168.1.10. 5. Klicken Sie mit der rechten Maustaste auf den Gerätenamen im eneo Site Mana- ger, um das Kontextmenü anzuzeigen. Wählen Sie die Option ‘Open Device Web Site’ (Geräte-Webseite öffnen), um auf die Kamera zugreifen. -
Page 30: Beschreibung Des Web-Viewers
Beschreibung des Web-Viewers (A) Menütaste: Klicken Sie auf diese Taste zum Anzeigen oder Verbergen des Konfigurationsmenüs. (B) Modellname: Zeigt den Modellnamen der verbundenen Kamera an. (C) Sprache auswählen: Wählen Sie Englisch, Deutsch oder Französisch als Web-Viewer-Sprache. (D) Hauptkonfigurationsmenü: Zum Einstellen der Kamera- oder Netzwerk-Funktionen. -
Page 31: Benutzerhandbuch
(2) Snapshot: Nehmen Sie ein Standbild von einem aktuell auf der Anzeige darge- stellten Bild auf. Unterstützt das Anzeigen, Ausdrucken und Speichern in der Original-Bildgröße. Lautsprecher: Aktiviert das Ausgeben von Audio an den Audioausgang. (3) Aufnahme: Nicht verfügbar (4) An Fenstergröße anpassen: Die Live-Ansicht wird an die Fenstergröße angepasst. (5) Vollbild: Passt die Darstellung von Live-Ansicht-Anzeige der Monitor-Auflösung an. -
Page 32: Übersicht Des Konfigurationsmenüs
Übersicht des Konfigurationsmenüs Kategorie Menü Konfiguration Pause, Snapshot, Aufnahme (*) Player-Steuerung Anzeige: (An Fenstergröße anpassen, Vollbild, Benutzerdefiniert) LIVE-BILD Video-Stream Stream 1, Stream 2, Stream 3 Protokoll HTTP, TCP, UDP PTZ-Steuerung(*) Zoom, Fokus, Push AF Wiedergabe (*) Ereignissuche, Zeitleistensuche, Zeitleiste Information Allgemein, Open Source Informationen Quelle Stream 1/2/3... - Page 33 Bei vollem Speicher überschreiben, Aufzeichnung Einstellungen für Daueraufnahme Aufnahme (*) Zeitplan Speicher Formatieren, Entfernen, Speicherinformationen Bewegung, Manipulation, VCA, Alarmeingang, System, Auslöser Manuell, Netzwerk, Timer, Tag-Nacht Ereignis Aufnahme (*), Alarmausgang, E-Mail, FTP, Video Boost, Aktionen Benachrichtigungsserver Regeln Ereignisverarbeitung, ONVIF Mapping Benutzer, HTTPS, IP-Filter, ONVIF, Video-Stream, Export/ KONFIGURATION Sicherheit Import...
-
Page 34: Schnellkonfiguration
Schnellkonfiguration Information Zeigt allgemeine Informationen über das System an wie Modellname, MAC-Adresse, IP- Adresse, Zeroconf-IP-Adresse, Firmware-Version, Serverzeit, Betriebszeit, CPU-Auslastung, den ein- und ausgehenden Datenverkehr und die Open-Source-Liste. Benutzer Verwaltung der Benutzerkonten nach Gruppen, Namen und Verantwortungsbereichen. • Markieren Sie ENABLE ANONYMOUS VIEWER LOGIN (Anmeldung anonymer Benut- zer erlauben), um anonymen Benutzern die Anmeldung an der Kamera zu gestat- ten. -
Page 35: Hinzufügen
Klicken Sie auf die Schaltflächen Hinzufügen, Ändern oder Löschen, um die Benutzerkon- ten zu verwalten. Hinzufügen Zum Hinzufügen eines neuen Benutzers: 1. Klicken Sie auf Hinzufügen und geben Sie einen neuen Benutzernamen ein. (1 bis 14 alphanumerische Zeichen). Bei den Benutzernamen wird nicht zwischen Groß- und Kleinschreibung unterschieden. -
Page 36: Bearbeiten
Bearbeiten Zum Bearbeiten eines Benutzers: 1. Wählen Sie den Namen des Benutzers aus der Benutzerliste aus, den Sie bearbei- ten möchten. 2. Klicken Sie auf die Registerkarte Bearbeiten, dann erscheint ein neues Popup-Fenster. 3. Geben Sie ein Passwort ein (1 bis 8 alphanumerische Zeichen) und tippen Sie diesen anschließend zur Bestätigung erneut ein.Der Benutzername kann nicht geändert werden. -
Page 37: Zeitzone
• Synchronize with NTP Server (Synchronisation mit NTP-Server): Stellt die Uhrzeit alle 60 Minuten anhand des zugewiesenen NTP-Servers ein. Die IP-Adresse oder der Host-Name des NTP-Servers wird im Zeitserver angegeben. Zeitzone Der ausgewählte NTP-Server soll mit der Zeitzone übereinstimmen, in der die Kamera installiert wurde. -
Page 38: Netzwerk
Netzwerk Wenn im Netzwerk ein DHCP-Server (Dynamic Host Configuration Protocol) vorhanden ist, weist dieser Netzwerkgeräten automatisch eine IP-Adresse zu. IPv4-Adresse Obtain IP address via DHCP (IP-Adresse von DHCP-Server beziehen): Ruft die IP-Adresse ab, die vom DHCP-Server (Dynamic Host Configuration-Protokoll) zugewiesen wurde. Status: 'Allocated' zeigt an, dass die IP-Adresse vom DHCP bezogen wurde. - Page 39 • PRIMARY DNS SERVER (Primärer DNS-Server): Geben Sie die IP-Adresse des primä- ren DNS-Servers ein. • SECONDARY DNS SERVER (Sekundärer DNS-Server): Geben Sie die IP-Adresse des sekundären DNS-Servers ein.
-
Page 40: Weitere Informationen
Die aktuellsten Firmware-Versionen finden Sie auf unserer Website unter www.eneo-security.com. Das Benutzerhandbuch und weitere Software-Tools sind auf der eneo Website unter www.eneo-security.com oder auf der mitgelieferten CD verfügbar. Informationen zu kompatiblen Video Management Software-Lösungen finden Sie in der Kategorie Videomanagement unter www.eneo-security.com. - Page 41 Contenu Matériel livré .......................44 Noms des pièces ......................45 Instructions d'installation ..................46 Réglages Panoramique/Inclinaisons ........................47 Ajustements du zoom et de la mise au point (uniquement pour le type d'objectif à focale variable) 48 Instructions pour l’installation et la mise en service ..................48 Configuration rapide du réseau .................49 Description de la visionneuse web (Web viewer) .....................
- Page 42 Instructions de sécurité Consignes de sécurité générales • Avant de brancher et de mettre en service le système, veuillez lire d'abord ces consignes de sécurité ainsi que la notice d'instructions. • Conservez soigneusement la notice d'instructions en vue d'une utilisation ultérieure. •...
- Page 43 • Une distance de sécurité > 1 m doit être respectée par rapport au projecteur dans un environnement sombre, quand on regarde directement dans le projecteur IR. • Les rayons invisibles des LED ne doivent pas être observés directement avec des instruments optiques (par ex.
-
Page 44: Matériel Livré
Matériel livré • Caméra de réseau • Mode d'emploi • CD d'installation • Gabarit de perçage • Chevilles en plastique : 6 x 30mm (3x) • Vis de montage : 4 x 25 mm (3x) • Tourne-vis (1x) -
Page 45: Noms Des Pièces
Noms des pièces Type d'objectif à focale variable Type d'objectif fixe Câble d'alimentation Base du dôme Levier du zoom Bouton de réinitialisation IP Levier de mise au point Couvercle du dôme Dôme à coupole Ouvrir le couvercle du dôme Tourner la clé dans l'ouverture du cou- vercle du dôme comme sur l'illustration. -
Page 46: Instructions D'installation
Instructions d'installation 1. Percer trois trous pour le montage au plafond ou sur le mur. 2. Placer la base du dôme à la position d'installation pré-percée et la fixer à l'aide des vis de montage. 3. Acheminer le câble d'alimentation/Ethernet vers le lieu de connexion. 4. -
Page 47: Réglages Panoramique/Inclinaisons
Réglages Panoramique/Inclinaisons Limite de panoramique : ajuster le premier angle de panoramique en tournant le cadran sur 360° Limite d'inclinaison : l’inclinaison est limitée à une fourchette de 25° min ~ 90° max. pour une installation murale (au plafond) par rapport au plafond lorsque l’inclinaison du mo- dule caméra est à... -
Page 48: Ajustements Du Zoom Et De La Mise Au Point (Uniquement Pour Le Type D'objectif À Focale Variable)
Ajustements du zoom et de la mise au point (uniquement pour le type d'objectif à focale variable) • Tournez le levier de la mise au point à « N » (Near/proche) ou « ∞ » (Far/loin) afin d'obtenir la mise au point la plus nette. •... -
Page 49: Configuration Rapide Du Réseau
5. Cliquez avec la touche droite de la souris sur le nom de l'appareil dans le ges- tionnaire de site « eneo Site Manager » pour faire apparaître le menu contextuel. Utilisez l'option ‘Open Device Web Site’ pour accéder à la caméra. -
Page 50: Description De La Visionneuse Web (Web Viewer)
Description de la visionneuse web (Web viewer) (A) Bouton Menu : cliquez sur le bouton pour afficher ou masquer la barre de menu de configuration. (B) Nom du modèle : afficher un nom de modèle de caméra connecté. (C) Sélectionner une langue : définir la langue de visionneuse web anglais, allemand ou français. -
Page 51: Manuel De L'utilisateur
(2) Snapshot (Instantané) : permet de prendre une photo de l'image vidéo actuelle- ment affichée. Prend en charge les fonctions « origin image size view » (consulta- tion de la taille d’origine de l’image), « print » (imprimer) et « save » (enregistrer). Speaker (Haut-parleur) : permet la sortie du signal audio au port de sortie audio. -
Page 52: Tableau Du Menu Configuration
Tableau du menu Configuration Catégorie Menu Configuration Pause, instantané, enregistrement(*) Commande du lecteur Afficher (Ajustement de la fenêtre, Plein écran, Personnalisé) LIVE VIEW (Affichage en Flux vidéo Stream1, Stream2, Stream3 direct) Protocole HTTP, TCP, UDP Commande PTZ(*) Zoom, Focus, Push AF LECTURE (*) Recherche par évènement, recherche chronologique, barre temporelle Information... - Page 53 Écraser lorsque le disque est plein, Enregistrement paramètres d'enregistrement continu Enregistrement (*) Programmation Stockage Formater, supprimer, stocker des informations Motion, VCA, Manipulation, Alarme, Système, Manuel, Déclencheurs Réseau, Minuterie, Jour / Nuit Événement Enregistrement (*), sortie d'alarme, e-mail, FTP, optimisa- Actions tion vidéo, serveur de notification Règles Traitement d'évènement, mappage ONVIF...
-
Page 54: Configuration Rapide
Configuration rapide Information Affiche les informations générales sur le système telles que le nom du modèle, l'adresse MAC, l'adresse IP, Zeroconf, l'adresse IP, la version du micro-programme, l'heure du ser- veur, le temps de fonctionnement, l'utilisation du processeur, la bande passante entrante / sortante et la liste des sources libres. -
Page 55: Ajouter
Cliquez sur le bouton Add (Ajouter), Modify (Modifier) ou Remove (Supprimer) pour gérer le compte utilisateur. Ajouter Pour ajouter un nouvel utilisateur : 1. Cliquez sur l’onglet Add (Ajouter) et tapez un nouveau nom d'utilisateur. (1 à 14 caractères alphanumériques). Les noms d’utilisateur ne sont pas sensibles à la casse. -
Page 56: Éditer
Éditer Pour modifier un utilisateur : 1. Sélectionnez l'un des noms d'utilisateur que vous souhaitez modifier dans la liste d’utilisateurs (User List). 2. Cliquez sur l'onglet Edit (Éditer) ; une nouvelle fenêtre pop-up s'affiche alors. 3. Entrez un mot de passe (1 à 8 caractères alphanumériques) et retapez-le dans Confirmer le mot de passe.Le nom d’utilisateur ne peut être modifié. -
Page 57: Fuseau Horaire
Fuseau horaire Sélectionnez le fuseau horaire à référencer sur le serveur NTP où la caméra est installée. Marquer la case à cocher AUTOMATICALLY ADJUST FOR DAYLIGHT SAVING CHANGES pour mettre à jour automatiquement l'heure d'été Affichage du jour et de l'heure Sélectionnez les formats de date et d'heure à... -
Page 58: Adresse Ipv4
Adresse IPv4 Obtenir l'adresse IP via le serveur DHCP : Obtient l'adresse IP attribuée par le serveur DHCP (Dynamic Host Configuration Protocol). Statut : 'Allocated' montre que l'adresse IP est obtenue auprès du DHCP. Adresse IP, Masque de sous-réseau, Passerelle : Affiche l'adresse IP actuelle qui est obtenue à... -
Page 60: Complément D'information
Le manuel utilisateur et d’autres outils logiciels sont disponibles sur le site web eneo www.eneo-security.com ou sur le CD joint. Des informations concernant les solutions logicielles de gestion vidéo compatibles sont disponibles dans la catégorie Videomanagement (gestion des vidéos) sur www.eneo-se-... - Page 61 Indice Parti fornite .........................64 Denominazione dei componenti ................65 Istruzioni per l'installazione ..................66 Regolazione della panoramica e dell'inclinazione ..................... 67 Regolazione dello zoom e della messa a fuoco (tipo con obbiettivo varifocale) ........68 Istruzioni per l'installazione e la messa in funzione ................... 68 Configurazione rapida della rete ................69 Descrizione del visualizzatore Web .........................
- Page 62 Istruzioni per la sicurezza Istruzioni generali per la sicurezza • Prima di collegare e mettere in funzione il sistema, leggete le istruzioni per la sicurezza e le istruzioni per l'uso. • Conservate con cura le istruzioni per l'uso per un eventuale utilizzo futuro. •...
- Page 63 • Deve essere mantenuto un margine di sicurezza di > 1 m dal proiettore se si guarda direttamente nel proiettore IR in un ambiente buio. • Non guardare direttamente le radiazioni LED invisibili utilizzando strumenti ottici (ad es. lente, lente di ingrandimento o microscopio) per prevenire danni agli occhi ( LED classe 1M).
-
Page 64: Parti Fornite
Parti fornite • Telecamera di rete • Istruzioni per l'uso • CD di installazione • Dima di montaggio • Tasselli di plastica: 6 x 30 mm (3x) • Viti di montaggio: 4 x 25 mm (3x) • Dispositivo di apertura (1x) -
Page 65: Denominazione Dei Componenti
Denominazione dei componenti Tipo di obbiettivo varifocale Tipo di obbiettivo fisso Cavo di alimentazione Base della cupola Leva dello zoom Tasto RESET IP Leva della messa a fuoco Coperchio cupola Cupola Apertura del coperchio della cupola Ruotare il dispositivo di apertura nell'aper- tura della cupola come raffigurato. -
Page 66: Istruzioni Per L'installazione
Istruzioni per l'installazione 1. Fare tre fori per il fissaggio al soffitto o alla parete. 2. Disporre la base della cupola in corrispondenza dei fori e fissarla utilizzando le viti di montaggio. 3. Collegare il cavo di alimentazione/Ethernet al relativo collegamento. 4. -
Page 67: Regolazione Della Panoramica E Dell'inclinazione
ATTENZIONE: prestare estrema attenzione a NON graffiare l'obbiettivo e la superficie della cupola durante le operazioni di installazione o regolazione. Fare attenzione a NON danneggiare, annodare o avvicinare il cavo alla zona di pericolo. Non esporre la telecamera a forti sorgenti di luce dirette quali il sole o faretti. Regolazione della panoramica e dell'inclinazione Limite panoramica: regolare il primo angolo di panoramica ruotando la staffa di 360˚. -
Page 68: Regolazione Dello Zoom E Della Messa A Fuoco (Tipo Con Obbiettivo Varifocale)
ATTENZIONE: prestare attenzione a non torcere il cavo durante la regolazione della panoramica o dell'inclinazione. Regolazione dello zoom e della messa a fuoco (tipo con obbiettivo varifocale) • Girare la leva della messa a fuoco su “N” (vicino) o “∞” (lontano) fino a ottenere la messa a fuoco ottimale. -
Page 69: Configurazione Rapida Della Rete
IP identici. L'indirizzo IP predefinito della telecamera di rete è: 192.168.1.10. 5. Facendo clic con il tasto destro del mouse sul nome del dispositivo nel tool eneo Site Manager si apre il menu di scelta rapida. Utilizzare l'opzione "Open Device Web Site"... -
Page 70: Descrizione Del Visualizzatore Web
Descrizione del visualizzatore Web (A) Pulsante Menu: fare clic sul pulsante per visualizzare o nascondere la barra del menu di impostazione. (B) Model name (Nome modello): mostra il nome del modello di telecamera collegato. (C) Select Language (Seleziona lingua): imposta la lingua del visualizzatore Web (inglese, tedesco o francese). -
Page 71: Manuale Utente
(1) Pause (Pausa): congela il video corrente. (2) Snapshot (Istantanea): scatta una fotografia dell'immagine video visualizzata. Sup- porta le funzioni di visualizzazione del formato dell'immagine originale, di stampa e di salvataggio. Altoparlante: consente l'uscita audio alla porta uscita audio. (3) Registrazione: non disponibile (4) Window Fit (Adatta alla finestra): adatta la visualizzazione live alle dimensioni della finestra. -
Page 72: Tabella Del Menu Di Impostazione
Tabella del menu di impostazione Categoria Menu Configurazione Pause, Snapshot, Record (*) Player Control Display (Window Fit, Full Screen, Custom) LIVE VIEW Video Stream Stream1, Stream2, Stream3 Protocol HTTP, TCP, UDP PTZ Control (*) Zoom, Focus, Push AF PLAYBACK (*) Event Search, Timeline Search, Timeline Bar Informazioni General, Open source Information... - Page 73 Sovrascrittura quando la memoria è piena, Registrazione registrazione continua Record (*) Schedule Storage Format, Remove, Storage Information Motion, VCA, Tamper, Alarm In, System, Manual, Network, Triggers Timer, Day/Night Event Record (*), Alarm Out, E-Mail, FTP, Video Boost, Notification Actions Server SETUP Rules Event Processing, ONVIF Mapping...
-
Page 74: Configurazione Rapida
Configurazione rapida Informazioni Visualizza le informazioni generali sul sistema come il nome del modello, l'indirizzo MAC, l'indirizzo IP, l'indirizzo IP Zeroconf, la versione del firmware, l'ora del server, il tempo di esecuzione, l'utilizzo della CPU, la larghezza di banda in entrata / in uscita e l'elenco Open Source. -
Page 75: Add (Aggiungi)
Fare clic sui pulsanti Add (Aggiungi), Edit (Modifica) o "Delete" (Elimina) per gestire l'ac- count utente. Add (Aggiungi) Per aggiungere un nuovo utente: 1. Fare clic sulla scheda Add (Aggiungi) e digitare un nuovo nome utente (da 1 a 14 caratteri alfanumerici). I nomi utente non fanno differenza tra maiuscole e minuscole. -
Page 76: Edit (Modifica)
Edit (Modifica) Per modificare un utente: 1. Selezionare il nome utente da modificare dall'elenco degli utenti. 2. Fare clic sulla scheda Edit (Modifica); si apre una nuova finestra popup. 3. Digitare una password (da 1 a 8 caratteri alfanumerici) e ridigitarla per confermar- la.Non è... -
Page 77: Time Zone (Fuso Orario)
Time Zone (Fuso orario) Selezionare il fuso orario da utilizzare sul server NTP in cui è installata la telecamera. Sele- zionare la casella di controllo AUTOMATICALLY ADJUST FOR DAYLIGHT SAVING CHANGES (Regola automaticamente per le modifiche dell'ora legale) per aggiornare automatica- mente l'ora con l'ora legale. -
Page 78: Indirizzo Ipv4
Indirizzo IPv4 Obtain IP address via DHCP (Ottieni indirizzo IP tramite DHCP): Ottiene l'indirizzo IP assegnato dal server DHCP (Dynamic Host Configuration Protocol). Status (Stato) 'Allocated' indica che l'indirizzo IP viene ottenuto dal DHCP. IP address (Indirizzo IP), Subnet mask, Gateway Mostra l'indirizzo IP corrente ottenuto da DHCP Use the following IP address (Utilizza il seguente indirizzo IP): Selezionare questa casella per assegnare l'indirizzo IP manualmente. -
Page 80: Altre Informazioni
Il software fornito con questo prodotto contiene software protetto da copyright il cui utilizzo viene concesso con licenze open source. È possibile richiedere a Eneo il codice sorgente completo per un periodo di tre anni dopo l'ultima spedizione di questo prodotto inviando un'e-mail a: opensource@eneo-security.com. - Page 84 VIDEOR E. Hartig GmbH Exclusive distribution through specialised trade channels only. VIDEOR E. Hartig GmbH Carl-Zeiss-Straße 8 63322 Rödermark/Germany Tel. +49 (0) 6074 / 888-0 Technical changes reserved Fax +49 (0) 6074 / 888-100 www.videor.com...
Need help?
Do you have a question about the IED-62V2812P0A and is the answer not in the manual?
Questions and answers