Table of Contents
Advertisement
Quick Links
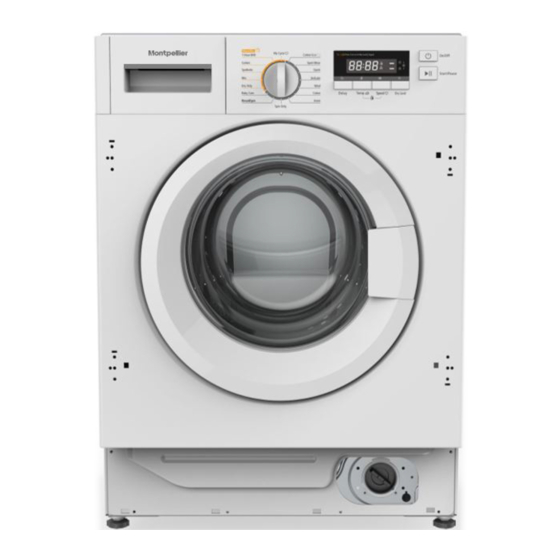
Built-In Washing Machine
MIWM65 - 6kg 1200rpm
Please read these instructions carefully before attempting to install or use this appliance.
We recommend that you keep these instructions in a safe place for future reference.
THE PERFECT BALANCE OF FUNCTION AND STYLE
LAUNDRY - DISHWASHING - COOKING - COOLING
Installation and Operating Instructions
Advertisement
Table of Contents

Related Manuals for montpellier MIWM65


Summary of Contents for montpellier MIWM65
- Page 1 LAUNDRY - DISHWASHING - COOKING - COOLING Installation and Operating Instructions Built-In Washing Machine MIWM65 - 6kg 1200rpm Please read these instructions carefully before attempting to install or use this appliance. We recommend that you keep these instructions in a safe place for future reference.
- Page 2 Welcome Thank you for choosing this Montpellier appliance. Our appliances have been designed to provide you with the best combination of style, reliability and performance to give you years of trouble-free use. You may be familiar with a similar product, but please take time to read these instructions carefully before installing or using your appliance to ensure you get the most from your purchase.
-
Page 3: Table Of Contents
CONTENTS SAFETY INSTRUCTIONS Safety Instructions ..........INSTALLATION Product Description ..........Installation ............. OPERATIONS Quick Start .............. Before Each Wash ..........Detergent Dispenser ........... Control Panel ............Option................ Other Functions ............. Programmes............Washing Programmes Table ......MAINTENANCE Cleaning And Care ..........TROUBLE SHOOTING........ -
Page 4: Safety Instructions
SAFETY INSTRUCTIONS Safety Instructions For your safety,the information in this manual must be followed to minimize the risk of fire or explosion, electric shock, or to prevent property damage, personal injury or loss of life. Explanation of the symbols: ! Warning! This combination of symbol and signal word indicates a potentially dangerous situation which may result in death or serious injuries unless it’s avoided. - Page 5 SAFETY INSTRUCTIONS Always unplug the machine and turn off the water supply • after use, especially if not being used for a prolonged period of time. To ensure your safety, the power plug must be inserted • into an earthed three-pole socket. Check carefully and make sure that your socket is properly and reliably earthed.
- Page 6 SAFETY INSTRUCTIONS • Glass door may be very hot during the operation. Keep kids and pets far away from the machine during the operation very wet rooms as well as in the rooms with explosive or caustic gas. • Remove all packages and transport bolts before using the appliance.
- Page 7 SAFETY INSTRUCTIONS Risk of damaging the appliance ! • Remove all packaging and transit bolts before using the appliance otherwise serious damage may result ! • This washing machine is only for domestic use and is only designed for the textiles suitable for a domestic washing machine.
- Page 8 SAFETY INSTRUCTIONS • Make sure that all pockets are checked and emptied. Sharp or rigid items such as coins, jewellery, nails and screws etc may cause serious damage to the appliance and clothing. This will also not be covered under your guarantee. •...
-
Page 9: Installation
INSTALLATION Product Description Detergent Drawer Control Panel Power Plug Door Drain hose Note! • The product line chart is for reference only, please refer to real product as standard. Accessories Owner’s manual Transport Supply hose hole plug cold water... -
Page 10: Installation
INSTALLATION Installation ! Warning! • Stability is extremely important for quiet and vibration free running. • Make sure the appliance doesn't stand on the mains cable. Before installing the appliance ensure that all below points are adhered to: Install on a dry, rigid and level surface. Avoid direct sunlight. - Page 11 INSTALLATION Levelling the washer dryer ! Warning! • The lock nuts on all four feet must be screwed tightly against the housing. 1. Check if the legs are closely attached to the cabinet. If not, please turn them to their original positions tighten the nuts. 2.
- Page 12 INSTALLATION Connect the Drain Hose Your Washer can be connected to your household drainage system in one of two ways: The drain hose can be connected to a standpipe (see Figure A) The drain hose can be connected to a household sink (see Figure B) In either option the Note! drain hose must be between...
-
Page 13: Operations
OPERATIONS Quick Start Caution! Before using the appliance make sure that it is correctly installed. Before washing for the first time it is advisable to run the appliance through one complete wash cycle at a minimum temperature of 40°C without any clothes and using half your usual amount of detergent. -
Page 14: Before Each Wash
OPERATIONS 3. After Washing Buzzer will beep or “End” will show on the display. Before Each Wash • The working condition of the washer should be between 0-40°C. If used under 0°C,the inlet valve and draining system may be damaged. •... -
Page 15: Detergent Dispenser
OPERATIONS Detergent Dispenser Pre wash detergent Main wash detergent Softener Pull out the dispenser Caution! • Detergent only need to be added in "case I “after selecting pre-washing for machines with this function. Programme Programme Baby Care Quick 15 Wool Rapid 45 Delicate 20℃... -
Page 16: Control Panel
1 1 1... - Page 17 OPERATIONS Option Delay Set the Delay function: 1. Select a programme 2. Press the Delay button to choose the time(the delaying time is 0-24 H.) 3. Press [Start/Pause] to commence the delay operation Delay Setting time Start On/Off Choose the Programme Cancel the Delay function: Press the [Delay] button until the display be 0H.It should be pressed before starting the programme.
-
Page 18: Other Functions
OPERATIONS Other Functions My Cycle Memorise your frequently used programme. Press for 3 seconds to memorise your favourite cycle. Default is Cotton. Child Lock To avoid mis operation by children. Temp. Speed Start/Pause Press [Temp.] and [Speed] On/Off 3 sec. till buzzer beep. Caution! •... - Page 19 OPERATIONS Temp. Press the button to regulate the temperature(Cold,20℃, 30℃, 40℃, 60℃, 90℃) Mute the buzzer Temp. On/Off Start/Pause Temp Press the Temp button for 3 seconds to deactivate the buzzer function. If you wish to reinstate the buzzer press the Temp button again for 3 seconds.
-
Page 20: Programmes
OPERATIONS Programmes Programmes are available according to thelaundry type. Programmes Cotton Hard-wearing textiles, heat-resistant textiles made of cotton or linen. Rapid 45' Washing few and not very dirty clothes quickly. Synthetic Wash synthetic articles, for example: shirts, coats, blending. While washing the knitting textiles, detergent quantity shall be reduced due to its loose string construction and easily forming bubbles. -
Page 21: Washing Programmes Table
OPERATIONS Washing Programme Table Model:) MIWM65 Washing/Drying Load Default Temp. Programme °C Default Time (H) (kg) Quick 15 0:15 Cold Rapid 45 0:45 20℃ 1:01 Jeans 1:45 Eco 40-60 – 3:22 Intensive 3:48 – Rinse&Spin 0:20 Spin Only – 0:12... -
Page 22: Maintenance
MAINTENANCE Cleaning And Care ! Warning! • Before your maintenance starts, please unplug the machine and close the tap. Cleaning The Cabinet Proper maintenance on the washing machine can extend its working life. The surface can be cleaned with diluted non-abrasive neutral detergents when necessary. - Page 23 MAINTENANCE Cleaning The Inlet Filter Note! • Inlet filter must be cleaned if the water flow is reduced. Washing the filter in the tap 1.Close the tap. 2.Remove the water supply hose from the tap. 3.clean the filter. 4.Reconnect the water supply hose Washing the filter in the washer : 1.Screw off the inlet pipe from the backside...
- Page 24 MAINTENANCE Cleaning Drain Pump Filter Caution! • When the appliance is in use and depending on the programme selected there can be hot water in the pump. Never remove the pump cover during a wash cycle, always wait until the appliance has finished the cycle, and is empty.
-
Page 25: Trouble Shooting
MAINTENANCE Trouble Shooting The start of the appliance does not work or it stops during operation. First try to find a solution to the problem, If not, contact the service centre. Description Reason Solution Washer Restart after the door is closed Door is not closed properly cannot start up Check if the clothes is stuck... -
Page 26: Technical Specification
Technical Technical Specifications MAX.Current Standard Water Pressure 0.05MPa~1MPa Model Rated Power Dimension Net Weight Washing Capacity (W*D*Hmm) MIWM65 6.0kg 595*540*825 57kg 2050W... -
Page 27: Product Fiches
Product Information Sheet COMMISSION DELEGATED REGULATION (EU) 2019/2014 with regard to energy labelling of household washing machines and washer-dreys Montpellier Domestic Appliances Ltd. Unit 1, Tewkesbury Retail Park, Northway Lane, Tewkesbury, Gloucestershire, GL20 8JU MIWM65 Model identifier: General product parameters:... -
Page 28: Building In
Building In Built-in installation Appendix Self-tapping Self-tapping Hinges Counter magnet Spacer Fixed position screws screws paper (ST4*12) (M5*12) Tool Screw driver Automatic driver Ruler Pencil Install Steps 600mm 580mm 825mm 152.5mm Overview The door is open from left to right The door is open from right to left Preparation and assembly of the door... - Page 29 Building In Position Paper Make the mark on the door Position Paper Position Paper Left Open Right Open Fixed position paper on the door. Drill hole on the door taking care not to drill all the way through.
- Page 30 Building In Installation the hinges and spacer Installation the counter magnet Installation the door ! Warning! • When installing the appliance into the kitchen ensure furniture ,if possible, the hoses are placed in either of the two recesses on the back of the appliance. This will help to prevent the hoses from becoming kinked or trapped.
-
Page 31: Here For You
Your 2 year Manufacturer's guarantee THIS DOES NOT AFFECT YOUR STATUTORY RIGHTS. Your new Montpellier appliance carries a free guarantee which protects you against the cost of repairs during the first 24 months from date of purchase provided that: Any claim is accompanied by evidence of the model reference, model serial number and proof of purchase, such as a Sales Receipt, showing that the appliance was purchased within the 24 months prior to the date of claim.
Need help?
Do you have a question about the MIWM65 and is the answer not in the manual?
Questions and answers