Advertisement
Quick Links
THE PERFECT BALANCE OF FUNCTION AND STYLE
LAUNDRY - DISHWASHING - COOKING - COOLING
Installation and Operating Instructions
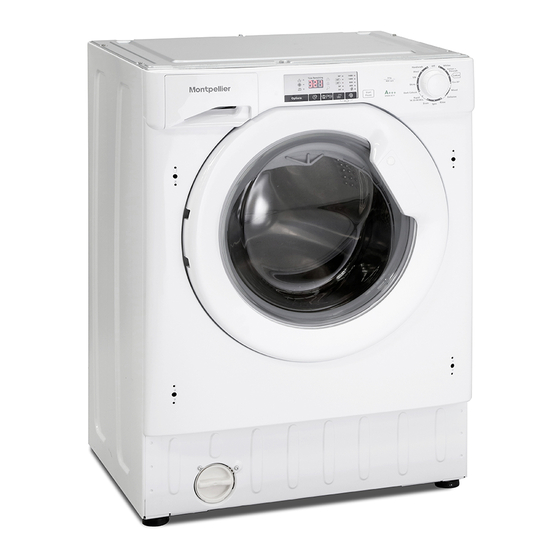
Integrated Washing Machine
MWBI8014 -8kg - 1400rpm - A+++
Please read these instructions carefully before attempting to install or use this appliance.
We recommend that you keep these instructions in a safe place for future reference.
Advertisement

Related Manuals for montpellier MWBI8014


Summary of Contents for montpellier MWBI8014
- Page 1 Installation and Operating Instructions Integrated Washing Machine MWBI8014 -8kg - 1400rpm - A+++ Please read these instructions carefully before attempting to install or use this appliance. We recommend that you keep these instructions in a safe place for future reference.
- Page 2 Welcome Thank you for choosing this Montpellier Integrated Washing Machine. Our Integrated Washing Machine has been designed to provide you with the best combination of style, reliability and performance to give you years of trouble-free use. You may be familiar with a similar product, but please take time to read these instructions carefully before installing or using your Integrated Washing Machine to ensure you get the most from your purchase.
-
Page 3: Table Of Contents
Carefully read this manual for correct and Environmental conditions safe appliance use and for helpful tips on efficient maintenance. This appliance is marked acc ording to the European directive 2012/19/EU on Waste Electrical and Electronic Equipment (WEEE). Only use the washing machine WEEE contains both polluting substances (which after carefully reading these instructions. -
Page 4: General Safety Rules
in a safe way and understand the 1. GENERAL SAFETY hazards involved. RULES Children shall not play with the This appliances is intended to appliance. Cleaning and user be used in household and maintenance shall not be made similar applications such as: by children without supervision. - Page 5 After installation, the appliance Do not expose the washing must be positioned so that the machine to rain, direct sunlight plug is accessible. or other weather elements. Protect from possible freezing. The maximum load capacity of dry clothes depends on the When moving, do not lift the model used (see control panel).
-
Page 6: Installation
2. INSTALLATION Release the power chord and drain hose from the securing clip at the rear of the machine. Remove the 2 or 4 transportation screws (A) on the back and remove the 2 or 4 flat washers, rubber bungs and plastic sp acer tubes (B) as illustrated in figure 1. - Page 7 Instructions for mounting the furniture door Position the template onto the reverse of the furniture door. It is possible to mount the hinges and closure magnet on the right or left- hand side depending on your requirements. Mark the screw hole positions, then drill out these positions.
- Page 8 Mount the furniture door to the front of the washer using the hinges. Place spacers under the hinges (I) and then fix in position with screw (H). We suggest mounting the furniture door so that it opens towards the left, which is the same direction as the porthole door.
- Page 9 Hydraulic connections Connect the water hose to the water supply tap (fig. 3) only using the hose supplied with the appliance (do reuse old hose-sets). SOME MODELS may include o ne or more of the following features: HOT&COLD (fig. 4): water mains connection settings with hot and cold water for higher energy savings.
- Page 10 Level the appliance using the feet as illustrated in figure 8: a. turn the nut clockwise to release the screw; b. rotate the fo ot to raise or lower it until it touches to the floor; b. lock the foot, screwing in the nut, until it tightens against to the bottom of the washing machine.
-
Page 11: Practical Tips
3. PRACTICAL TIPS Pretreat stains with stain remover or soak dried in stains in water before washing to reduce the necessity of a hot wash Load tips programme. Save up to 50% energy by using a 60°C wash programme. WARNING: when sorting laundry, make sure: Following is a quick guide with tips and recommendations on detergent use at the... -
Page 12: Maintenance And Cleaning
Remove and clean the filter; when 4. MAINTENANCE AND finished, replace it turning it clockwise. CLEANING The filter handle will be locked when it is not possible to turn any further and the To clean the washing machine exterior, use handle is horizontal. -
Page 13: Quick User Guide
5. QUICK USER GUIDE 6. CONTROLS AND PROGRAMS This washing machine automatically adjusts the level of the water to the type and quantity of washing. This system gives a reduction in energy consumption and a saving in washing times. Program selection Turn on the washing machine and select the required program. - Page 14 Opening the door Press to start the selected cycle. When the START/PAUSE button has A special safety device prevents the been pressed, the appliance can take door from being opened immediately few seconds before it starts working. after the end of the cycle. Wait for 2 minutes after the wash cycle has finished and the "Door ADD OR REMOVE ITEMS AFTER THE...
- Page 15 time the button is pressed, until h24 - EASY IRON appears on the display, at which point This function allows you to minimizes pressing the button again will reset the creases as much as possible, eliminating delay start to zero. the intermediate spins or reducing the intensity of the last one.
- Page 16 SPIN SPEED button The key lock can be simply cancelled by pressing the two buttons simultaneously By pressing this button, it is possible to again or turning off the appliance. reduce the maximum speed, and if you wish, the spin cycle can be cancelled. Digital Display If the label does not indicate specific information, it is possible to use the...
- Page 17 When START/PAUSE is pressed on - adjusts the spin speed according to the the machine with the door closed, the load, thus avoiding any imbalance. indicator will flash momentarily and then illuminate. 5) KEY LOCK INDICATOR LIGHT If the door is not properly closed, The indicator light show that the keys are the light will continue to flash for locked.
- Page 18 Table of programmes (MAX.) PROGRAMME (see control panel) (MAX.) Whites 90° Cottons + 60° Prewash Cottons 60° Eco 20° 20° Mixed 60° Delicates 40° Rinse Spin Drain 30° 30° Rapid 40° Dark Colours 40° Shirts 30° Silk 30° Wool 40° Hand Wash 30°...
- Page 19 Selecting the RAPID program on the knob, it will be possible to select with the RAPID button, one three rapid programs available among 14’, 30’ and 44’. ** STANDARD COTTON PROGRAMMES ACCORDING TO (EU) No 1015/2010 and No 1061/2010. COTTON PROGRAMME WITH A Please read these notes: TEMPERATURE OF 60°C.
- Page 20 Rinse Programmes selection This program performs 3 rinses with an intermediate spin (which can be reduced or To clean different types of fabrics and excluded by using the appropriate button). It various levels of dirt, the washing machine is used for rinsing any type of fabric, for has specific programs to meet every need example after a wash carried out by hand.
-
Page 21: Throubleshooting And Warranty
7. THROUBLESHOOTING AND WARRANTY If you believe the washing machine is not working correctly, consult the quick guide provided below which includes some practical tips on how to fix the most common problems. ERROR CODE FORMAT Models with a display: the error is shown by a number preceded by the letter “E” (example: E2 = Error 2). - Page 22 OTHER ANOMALIES Problem Possible causes and practical solutions Make sure the product is plugged into a working supply socket. The washing machine Make sure power is on. does not work / start Make sure the wall socket is working, testing it with another appliance such as a lamp.
- Page 23 The use of ecological detergents without If the problem persists or if you suspect a phosphates may cause the following effects: malfunction, immediately contact Authorised Customer Service Centre. - cloudier rinse drain water : This effect is tied to the suspended zeol ites which do It is always recommended to use original not have negative effects on rinse spare parts, that are available at our...
- Page 24 Your 2 year Manufacturer’s guarantee THIS DOES NOT AFFECT YOUR STATUTORY RIGHTS. Your new Montpellier appliance carries a free guarantee which protects you against the cost of repairs during the first 24 months from date of purchase provided that: Any claim is accompanied by evidence of the model reference, model serial number and proof of purchase, such as a Sales Receipt, showing that the appliance was purchased within the 24 months prior to the date of claim.
- Page 25 Montpellier Domestic Appliances Ltd. Unit 1, Tewkesbury Retail Park, Northway Lane, Tewkesbury, Gloucestershire GL20 8JU www.montpellier-appliances.com The symbol on the product or on its packaging indicates that this product may not be treated as household waste. Instead it shall be handed over to the applicable collection point for the recycling of electrical and electronic equipment. By ensuring this product is disposed of correctly, you will help prevent potential negative consequences for the environment and human health, which could otherwise be caused by inappropriate waste handling of this product.
Need help?
Do you have a question about the MWBI8014 and is the answer not in the manual?
Questions and answers