Table of Contents
Advertisement
Quick Links
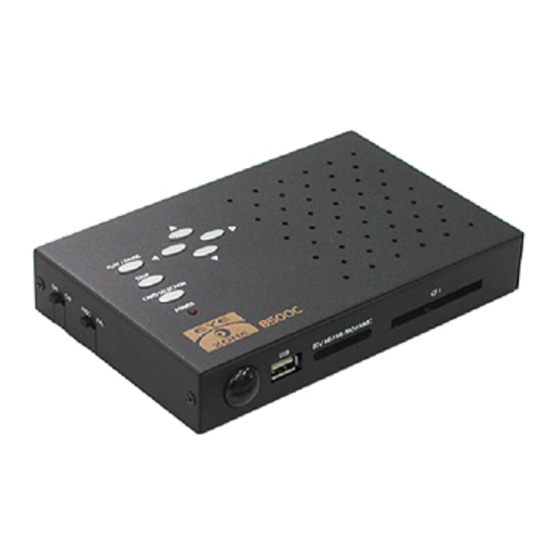
B500C
User Manual
J a n 1 9 , 1 0
3 4 5 2 0 0 1
CONTENTS
1. Package Contents.......................................................
2. Introduction................................................................
3. Features...................................................................
4. Hardware Overview.....................................................
5. Remote Control..........................................................
6. Start The B500C..........................................................
7. Setting Up.................................................................
7.1 Preferences...........................................................
7.2 Photo Setup..........................................................
7.3 Firmware Setup.....................................................
8. Using the B500C......................................................... 10
8.1 USB Auto-Copy Function......................................... 10
8.2 One File Repeat Function........................................
8.3 Programmed Play Function....................................... 12
9. Optional Function........................................................ 13
9.1 Timer Function........................................................ 13
9.2 Schedule Function................................................... 14
9.3 IR Cable................................................................ 20
9.4 PIR Sensor............................................................ 20
9.5 Play-Button Box...................................................... 21
9.6 Touch-Sensor Buttons.............................................. 22
9.7 Bar-Code Scanner.................................................. 23
10. Troubleshooting......................................................... 41
1
2
2
3
4
5
6
7
7
9
9
11
Advertisement
Table of Contents

Subscribe to Our Youtube Channel
Related Manuals for EYEZONE B500C


Summary of Contents for EYEZONE B500C
-
Page 1: Table Of Contents
6. Start The B500C…...…..……………………………………….. 7. Setting Up……………………………………………………….. 7.1 Preferences…….…………………..….……………………. 7.2 Photo Setup…………….…………………………………… 7.3 Firmware Setup…………………………………………….. 8. Using the B500C…….……………………..…………………... 10 8.1 USB Auto-Copy Function………….………………………. 10 8.2 One File Repeat Function…………………………………. 8.3 Programmed Play Function.…..…………...……………. 12 9. Optional Function…………………………..…………………... 13 9.1 Timer Function..……..…………..…………..…………. 13 9.2 Schedule Function……..…………..…………..…………. -
Page 2: Package Contents
Bar-Code Scanner: The B500C will display the corresponding file when the bar-code The B500C is a palm-size digital signage player that plays picture, music and video without a scanner scans the bar-code. computer. It uses media files from CF, SD(HC), MMC and MS(Pro) memory card. By connecting... -
Page 3: Hardware Overview
4. HARDWARE OVERVIEW 5. REMOTE CONTROL Power on/ off Mute sound Open the setup menu Go to the main menu Open the timer setup window (optional) Volume up/ down Move the cursor Confirm the selection/ entry Go to the previous/ next page or image List all the pictures. -
Page 4: Start The B500C
Status After Power On Status 1: If the “Auto Start (ALL, Photo + Music, One File Repeat or Programmed Play)” function is enabled and there are media files on the memory card, the B500C will auto play media files after power on. -
Page 5: Photo Setup
7.2 PHOTO SETUP Auto Start: Enable/ disable the auto play function after power on. OFF: Disable the auto start function Slideshow Mode: Enable/ disable the slideshow function. ALL: Play all media files on the memory card after power on. Photo + Music: Play the pictures with music. One File Repeat: Repeat only the selected file. -
Page 6: Using The B500C
Step2: Put the files that you want to copy and the file “AUTOCOPY.ini” to the USB pen driver. NOTE: 1. If the file “AUTOCOPY.ini” is not on Pen Driver, the B500C will not execute the Auto-Copy function. 2. Please confirm there are no “Folder”, “Hidden File” and “System File” on the USB pen driver and CF card. -
Page 7: Programmed Play Function
Auto Start Programmed Play 9.1 TIMER FUNCTION Please restart the B500C after setting, and the B500C will play the file automatically. Step1: Press the “EDIT” button on remote control to open the timer setup window. Use the buttons on the remote control to select each item. -
Page 8: Schedule Function
9.2 SCHEDULE FUNCTION A. Basic Schedule 9.2.1 INSTALL THE SCHEDULE SOFTWARE In the “Basic Schedule” mode, you can select files that you want to play and set up the volume and the Execute “setup.exe” to install the Schedule software in the CD driver, and finish the installation play times of each file. - Page 9 “SAVE” button to save your setup. NOTE: Do not rename the file (schedule.ini), otherwise the B500C will not be able to read the file. Step 2: Click the “Add” button in the “File Setup” section to open the “Schedule File Editor” window.
- Page 10 No any schedule file in advance schedule!Can’t Save! NOTE: Do not rename the file (schedule.ini), otherwise the B500C will not be able to read the file. There is no schedule file in the advance schedule. Please add files that you want to play in the advance schedule.
-
Page 11: Ir Cable
Demo File 4: a01.xxx Demo File 5: b55.xxx Step4: Press one of the play-buttons to play the corresponding demo file. If the B500C finishes playing the demo file without having any buttons be pressed, it will resume playing the default file (07.xxx) automatically. -
Page 12: Touch-Sensor Buttons
Step5: The B500C will play the default file (00_xxx) automatically while powered on. Step6: Press one of the touch-sensor buttons to play the corresponding demo file. If the B500C finishes playing the demo file without having any buttons be pressed, it will resume playing the default file (00_xxx) automatically. - Page 13 If the message “READ AGAIN” will be showed on the screen, please scan again. Show the bar-code number on the screen when scanning <PREFERENCE> → <Barcode Number> → <ON> Enter/Exit Programming Mode All framed barcode names represent 9.7.2 Setting the Bar-Code Scanner as default settings.
- Page 14 Code 39 Enable Codabar Enable Codabar Disable Code 39 Disable...
- Page 15 UPC/EAN/JAN Enable ITF 2 of 5 Enable ITF 2 OF 5 Disable UPC/EAN/JAN Disable...
- Page 16 Chinese Post Code Enable Code 128 Disable Chinese Post Code Disable...
- Page 17 Code 93 Enable EAN-128 Enable Code 93 Disable EAN-128 Disable...
- Page 18 Code 32 Enable MSI enable (Italian Pharmacy Code) Code 32 Disable (Italian Pharmacy Code) MSI Disable...
- Page 19 EAN-13 Convert to ISBN/ISSN Enable UPC/EAN ADD ON OFF EAN-13 Convert to ISBN/ISSN Disable ADD ON 5 only...
- Page 20 ADD ON 2 only EAN/UPC +Add on (none mandatory) ADD ON 2 or 5 EAN/UPC + Add on ( mandatory)
-
Page 21: Troubleshooting
No Response From control and it is inserted the correctly. the Remote Control Check for any barrier between the remote control and the B500C. Check if the mute function is on. No sound Check if the volume is set properly.
Need help?
Do you have a question about the B500C and is the answer not in the manual?
Questions and answers