Table of Contents
Advertisement
Quick Links
EYEZONE B1080P-4
User Manual
F e b 2 5 , 0 9
F 3 4 4 8 1 1 8
FCC Notices
It's herewith confirmed to comply with the requirements of FCC Part 15 Rules. Operation is
subject to the following two conditions:
This device may not cause harmful interference.
This device must accept any interference received, including interference that may
cause undesired operation.
Note: This equipment has been tested and found to comply with the limits for a Class B
digital device, pursuant to part 15 of the FCC Rules. These limits are designed to provide
reasonable protection against harmful interference when the equipment is operated in a
residential installation. This equipment generated uses and can radiate radio frequency
energy and if not installed and used in accordance with the instruction manual may cause
harmful interference to radio communications. However, there is no guarantee that
interference will not occur in a particular installation. If this equipment does cause harmful
interference to radio of television reception, which can be determined by turning the
equipment off or on, the user is encouraged to try to correct the interference by one or more
of the following measures:
Reorient or relocate the receiving antenna.
Increase the separation between the equipment and receiver.
Connect the equipment into an outlet on a circuit different from that to which the
receiver is connected.
Consult the dealer or an experienced radio TV technician for help.
CE Declaration
This device complies with CE class B.
EN55022
EN61000-3-2
EN61000-3-3
EN55024
IEC 61000-4-2
IEC 61000-4-3
Printed in Taiwan R.O.C.
All contents are subject to change without notice.
All trademarks are the property of their respective owner.
1
2
IEC 61000-4-4
IEC 61000-4-5
IEC 61000-4-6
IEC 61000-4-8
IEC 61000-4-11
Advertisement
Table of Contents

Related Manuals for EYEZONE B1080P-4


Summary of Contents for EYEZONE B1080P-4
- Page 1 FCC Notices EYEZONE B1080P-4 It’s herewith confirmed to comply with the requirements of FCC Part 15 Rules. Operation is subject to the following two conditions: This device may not cause harmful interference. User Manual This device must accept any interference received, including interference that may cause undesired operation.
-
Page 2: Table Of Contents
8.1 Play Media Files on the CF Card…………………………. 16 8.2 Multiple Display Zones…………..…………...……………. 19 The Eyezone B1080P-4 is a digital media player that plays HD WMV9 and WMA files 8.3 Live Video Display….………………………………………. 20 from CF memory card without a computer. The Eyezone B1080P-4 supports High Definition movie 8.4 Download Function…………………………………………. -
Page 3: Features
Audio Output: Connects to sound input. (HDTV with amplified speaker) The configuration can be modified on your PC, and can be applied to the B1080P-4 or others. Compatible with Windows Media Player 11: Play media files stored in a network computer. -
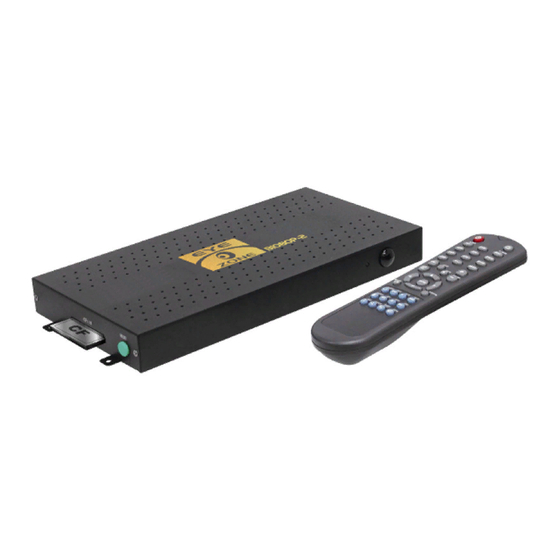
Page 4: Remote Control
Open the setup menu Mute sound OSD display function on/ off there are media files on the CF card or the B1080P-4 is already connected to the display Auto-play function on/ off device, the Eyezone B1080P-4 will auto play media files or live video after power on. -
Page 5: Setting Up
IP Assigned by DHCP: If you have a DHCP-enabled router, please select “On”, and then the router will automatically assigns an IP address to the Eyezone B1080P-4. If you don’t have a DHCP –enabled router, select “Off” and type the network information in “Assign IP Address”. -
Page 6: Ftp Setup
Continental GMT (U.S. & (GMT-07:00) (GMT+03:30) Tehran Local FTP Server: Turn on/ off the Eyezone B1080P-4 server. Canada) (If you use the Eyezone B1080P-4 server, please disable the DHCP function and input a fixed (GMT-07:00) Arizona (GMT+04:00) Baku, Tbilisi, Ere van (GMT-06:00) -
Page 7: Video Setup
③ Download Time: Set the FTP auto-download time. Local HTTP Server: Enable/ Disable the HTTP command function. Local HTTP Server Setup: To set the “Port”, “User ID” and “Password” of the Eyezone B1080P-4. (The Default Port: 80, User ID: root, Password: admin) Play OSD Display: Enable or disable the OSD display. -
Page 8: Using The B1080P-4
8.1 PLAY MEDIA FILES ON THE CF CARD Step 1: Insert the CF card with media files, then turn on the Eyezone B1080P-4 and press the “ENTER” button on the remote control when “’mnt/CF” is highlighted to take you into the CF card. - Page 9 8.1.1 Using the Remote Control When Media File Is Playing PAUSE/STEP: Pause the playback or play frame by frame. SETUP: Press the button to adjust the brightness, contrast or saturation while the video or picture ZOOM: Zoom in/ out on the movie or picture. is playing.
-
Page 10: Multiple Display Zones
Step 1: Connects the video source (TV Box, DVD Player or camera) to video and audio input of named the file “message.txt”. B1080P-4. Step 2: Turn off the background of scrolling text (refer to 7.3 Video Setup). Step 2: Select the Multiple Display Zones item to display the movies and pictures with scrolling text Step 3: Select the Video In item to directly play the live video on your screen. -
Page 11: Download Function
Step 5: Select the Video In item to directly play the live video, pictures and scrolling text simultaneously on your screen. Screen Saver 8.4.2 Auto Download Function If there is more than one Eyezone B1080P-4, you can use ftp tools to divide them into different regional group. - Page 12 “RETURN” button. Please enter the “Network Timer NTP” window of Eyezone B1080P-4, and set up the “Download Time”, then the Eyezone B1080P-4 will download all the files from the FTP server at the designated time. NOTE: The filename of the media files in FTP server cannot have any spaces.
-
Page 13: Play The Media Files On The Pc
8.5 PLAY THE MEDIA FILES ON THE PC Step 5: Click the “Library” tab, and then click “Media Sharing”. Using Windows Media Player Version 11 ( Windows XP/ Vista only ) Step 1: Please download and install Windows Media Player Version 11 on your PC first. Step 2: Launch the Windows Media Player Version 11 and the window below will appear. -
Page 14: Download/ Upload Media Files
Step 8: Confirm that the Eyezone B1080P-4 is connected to the network. play the file. In the list of devices below the “Share my media to” check box, select the device (Eyezone B1080P-4), and click “Allow” to share the media files. - Page 15 - Select the files you want upload to the Eyezone B1080P-4, or download the files to your PC. Step 6: After logging on, all the media files in the CF card on the Eyezone B1080P-4 will be listed. You can download and upload the media files between CF card and your PC.
-
Page 16: Rs-232 Function
2. The reaction time of B1080P-4 is around three seconds. Setup” set has been completed (refer to 7.2). Set your router or firewall, and open a port 80 for the Eyezone B1080P-4. The following figure is an example, please refer to your user’s manual of router for opening ports. -
Page 17: Player Control
(Default User Name: root, Default Password: admin) to log on. After logging on all the media files in the CF card on the Eyezone B1080P-4 will be listed. You can download and upload the media files between CF card and your PC. -
Page 18: Network Setup
B1080PW). DHCP: Enable/ Disable the DHCP function. IP Address: Enter the fixed IP address, Mask, Gateway and DNS for the Eyezone B1080P-4. FTP Server: Enable/ Disable the FTP Server function. You can also change the User ID, Password and port of the FTP Server. -
Page 19: Schedule Function
10. SCHEDULE FUNCTION 10.2 START THE SCHEDULE SOFTWARE You might double click the “Schedule Maker” icon on your desktop for opening the “Schedule NOTE: The “NTP Server” or “Local Time” must be set before using the Schedule Generator”. Or you might click on <Start> → <Programs> → <Schedule Maker 20090217> → < Function. - Page 20 Select the file that you want to modify in the list, and press the “Modify” button. button to save your setup. NOTE: Do not rename the file (schedule.ini), otherwise the B1080P-4 will not be able to read the file. Remove: Click this button to remove the file from the list.
-
Page 21: Apply The Schedule On The B1080P-4
Step 4: After finishing all setup, press the “SAVE” button and a pop-up window will appear. Select the path, then click the “SAVE” button to save. NOTE: Do not rename the file (schedule.ini), otherwise the B1080P-4 will not be able to read the file. 10.3 APPLY THE SCHEDULE ON THE B1080P-4 Put the “eyezone.ini”... -
Page 22: Optional Auxiliary Equipment
11.3.1 Using the PIR Sensor Play the Media File By the Play-Button Step 1: Insert the CF card to the Eyezone B1080P-4, and the Eyezone B1080P-4 will play the default ex. 5 Play-Buttons (supports up to 12 play buttons) file automatically while powered on. -
Page 23: Troubleshooting
No sound Check if the volume is set properly. Step 1: Insert the CF card to the Eyezone B1080P-4, and the Eyezone B1080P-4 will play the default Check if audio cable has been connected correctly. file automatically while powered on.
Need help?
Do you have a question about the B1080P-4 and is the answer not in the manual?
Questions and answers