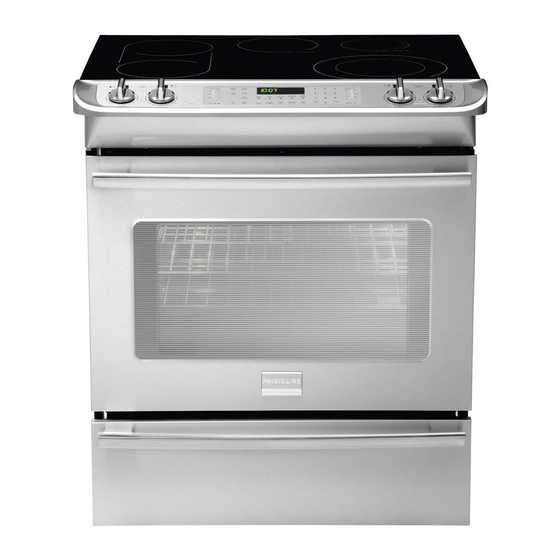
Frigidaire Professional FPCS3085LF Use And Care Manual
Built-in range
Hide thumbs
Also See for Professional FPCS3085LF:
- Installation instructions manual (33 pages) ,
- Product specifications (5 pages) ,
- Wiring diagram (2 pages)
Table of Contents
Advertisement
All about the
Use
of your
Welcome & Congratulations ...................................2
Important Safety Instructions .................................3
Features at a Glance ..............................................6
Before Setting Surface Controls ..............................7
Setting Radiant Surface Controls ..........................12
Setting Induction Surface Controls ........................14
Setting Warm Zone Controls .................................15
www.frigidaire.com USA 1-800-944-9044
&
Built-In Range
TA B L E O F C O N T E N T S
www.frigidaire.ca Canada 1-800-265-8352
Care
Before Setting Oven Controls ...............................16
Setting Oven Controls ..........................................19
Care & Cleaning (Cleaning Chart) .........................36
Care & Cleaning ..................................................37
Before You Call ..................................................41
Major Appliance Warranty ....................................44
Advertisement
Table of Contents

Related Manuals for Frigidaire Professional FPCS3085LF


Summary of Contents for Frigidaire Professional FPCS3085LF
-
Page 1: Table Of Contents
Before Setting Surface Controls ...7 Setting Radiant Surface Controls ...12 Setting Induction Surface Controls ...14 Setting Warm Zone Controls ...15 www.frigidaire.com USA 1-800-944-9044 & Care TA B L E O F C O N T E N T S Before Setting Oven Controls ...16 Setting Oven Controls ...19... -
Page 2: Welcome & Congratulations
Welcome & congratulations Product registration register Your Product The Product registration card should be filled in completely, signed and returned to Electrolux Home Products. serial Plate location delay bake start time clock keep bake broil convect preheat powerplus warm favorite start cancel chicken... -
Page 3: Important Safety Instructions
Canada with CSA C22.1 PART 1-latest edition and local code requirements. Install only per installation instructions provided in the literature package for this range. Ask your dealer to recommend a qualified technician and an authorized repair service. Know how to disconnect the electrical power to the appliance at the circuit breaker or fuse box in case of an emergency. - Page 4 imPortant saFetY instructions Warning Do not use the oven or warm & serve drawer (if equipped) for storage. • Storage in or on Appliance. Flammable materials should not be stored in an oven, near surface burners or in the warm & serve drawer (if equipped).
-
Page 5: Using Your Oven
• Glazed Cooking Utensils—Only certain types of glass, glass/ceramic, ceramic, earthenware, or other glazed utensils are suitable for cooktop service without breaking due to the sudden change in temperature. Check the manufacturer’s recommendations for cooktop use. • ventilating hood. The ventilating hood above your cooking surface should be cleaned frequently, so the grease from cooking vapors does not accumulate on the hood or filter. -
Page 6: Features At A Glance
Features at a glance Your Built-in Range Features: Electronic oven control with kitchen timer. Digital displays for element controls. Keep warm zone control. Warm & serve drawer control. Left front element control. Left rear element control. Right rear element control. -
Page 7: Before Setting Surface Controls
About the ceramic glass cooktop The ceramic cooktop has inductors and radiant surface elements located below the surface of the glass. The design of the ceramic cooktop outlines the area of the surface element underneath. Be sure to match the pan size with the diameter of the element outline on the cooktop and only flat-bottom cookware should be used. - Page 8 BEFORE SETTING SURFACE CONTROLS Using proper cookware with radiant elements The size and type of cookware used will influence the setting needed for best cooking results. Be sure to follow the recommendations for using proper cookware as illustrated in Figures 1 & 2. Cookware should have flat bottoms that make good contact with the entire surface heating element (Figure 1).
- Page 9 cookware recommendations for inductions elements Be sure to follow the following recommendations for using cookware as shown: INCORRECT CORRECT • Cookware centered cor- • Cookware not centered on rectly on Cooking Zone Cooking Zone surface. surface. • Curved or warped pan •...
- Page 10 BEFORE SETTING SURFACE CONTROLS Use the correct cookware type for induction elements For the induction zones, the magnetic Cooking Zone sensors located below the cooktop surface require the use of cookware made with magnetic material in order to start the heating process on any of the Cooking Zones. When purchasing pans, look for cookware specifically identified by the manufacturer for use with Induction cooktops.
- Page 11 (approx. 10 min). Power failure indicator message (PF) When the range is first plugged in or when the power supply to the range has been interrupted, the ESEC control will display the message "PF" (Power Failure; Figure 7). After a few seconds the "PF"...
-
Page 12: Setting Radiant Surface Controls
setting radiant surFace controls single radiant surface element The cooktop has 1 SINGLE radiant surface element: the left rear position (Figures 1). The left rear element may also be used with the Bridge element. To Operate the Single Radiant Surface Elements 1. - Page 13 Bridge surface radiant element The cooktop is equipped with a “BRIDGE” surface element located at the left front and middle (Fig. 1) positions. The Bridge can be used when cooking with rectangular (like a griddle) or oval shaped cookware. The element will maintain an even temperature setting across both portions of the Bridge.
-
Page 14: Setting Induction Surface Controls
setting induction surFace controls Operating the induction surface elements The cooktop is equipped with 2 induction surface elements: the RIGHT FRONT and REAR positions (Figure 1). To Operate the Induction Surface Elements 1. Place the correctly sized cookware of the proper material on the induction surface element. -
Page 15: Setting Warm Zone Controls
Keep warm zone The purpose of the keep warm zone is to keep hot cooked foods at serving temperature. Use the keep warm feature to keep cooked foods hot such as: vegetables, gravies, casseroles, soups, stews, breads, pastries and oven-safe dinner plates. Always start with hot food. -
Page 16: Before Setting Oven Controls
BEFORE SETTING OVEN CONTROLS Oven vent location The oven is vented at the center rear of the cooktop. When the oven is on, warm air is released through the vent. This venting is necessary for proper air circulation in the oven and good baking results. DO NOT BLOCK oven vent. - Page 17 Types of oven racks Your appliance is equipped with three types of the oven rack, as shown; • Flat Handle Oven Rack (Figure 1). • Flat Oven Half Rack (Figure 2 & 3). • Offset Oven Rack (Figure 4). Flat Handle Oven Rack Figure 1 Flat Half Oven Rack - Closed Position Figure 2...
- Page 18 3. Place the oven rack in positions 1, 2 or 3 only (see previous page to verify positions). Be sure the rack connector brackets are at the rear of the range and pointing towards oven bottom (See Figure 2). 4. Assemble one connector arm at a time. With the oven...
-
Page 19: Control Pad Features
control Pad Features READ THE INSTRUCTIONS CAREFULLY BEFORE USING THE OVEN. For satisfactory use of your oven, become familiar with the various features and functions of the oven as described below. detailed instructions for each feature and function follow later in this use & care guide. delay bake start... -
Page 20: Minimum And Maximum Control Pad Settings
12 or 24 hour time of day operation. The clock has been preset at the factory for the 12 hour operation. When the range is first plugged in, or when the power supply to the range has been interrupted, the timer in the display will flash. -
Page 21: Setting Silent Control Operation
To change control from normal sound operation to silent control operation 1. To tell if your range is set for normal or silent operation press and hold delaY start. “-- --” will appear and “delaY” will flash in the display. After 6 seconds “beeP on”... -
Page 22: Setting Lockout Feature
setting oven controls setting minute timer The timer on . oFF pad controls the Minute Timer feature. The Minute Timer serves as an extra timer in the kitchen that will beep when the set time has run out. It does not start or stop cooking. -
Page 23: Setting Powerplus Preheat
setting PoWerPlus PreHeat The PreHeat pad controls the PowerPlus The Preheat feature will bring the oven up to temperature and then indicate when to place the food in the oven. Use this feature when recipes call for preheating. Preheating is not necessary when roasting or cooking casseroles. The oven can be programmed to preheat at any temperature between 170°F to 550°F. - Page 24 setting oven controls SETTING CONVECTION BAKE This mode of cooking enables you to obtain the best culinary results when baking with multiple pans and racks. Multiple rack baking may slightly increase cook time for some foods but the overall result is time saved. Some food may cook faster and more evenly with Convection Bake.
-
Page 25: Setting Convection Convert
setting convection convert The Convection Convert pad is used to automatically convert a standard baking recipe for convection baking. When set properly, this feature is designed to display the actual converted (reduced) temperature in the display. Convection Convert may ONLY be used with a Convection Bake cooking mode. - Page 26 setting oven controls SETTING CONVECTION BROIL Use this mode for thicker cuts of meat, fish and poultry. The Convection Broiling gently browns the exterior and seals in the juices. Convection broiling uses the broil element and a fan to circulate the oven’s heat evenly and continuously within the oven.
-
Page 27: Setting Delay Start
SETTING BAKE TIME Bake Time allows the oven to be set to cook for a specific length of time and shut off automatically. The oven will shut off and will beep when the countdown is finished. This feature can be used with Bake, Convection Bake, Convection Roast, Pizza and Chicken Nuggets cooking modes. -
Page 28: Setting Keep Warm
setting oven controls setting keeP Warm This mode is best for keeping oven baked foods warm for serving after cooking has finished. The keeP Warm pad turns ON the Keep Warm feature and will maintain an oven temperature of 170°F (77°C). The Keep Warm feature will keep oven baked foods warm for serving up to 3 hours after cooking has finished. -
Page 29: Setting Chicken Nuggets/My Favorite
setting cHicken nuggets The cHicken nuggets pad has been designed to give optimum cooking performance when cooking your favorite chicken nuggets. The Chicken Nuggets pad is preset for a Convection Bake at (400°F) with a Bake Time of 18 minutes, ending with a Keep Warm setting. -
Page 30: Setting Broil
setting oven controls SETTING BROIL This mode is best for meats, fish and poultry up to 1” thick. Broiling is a method of cooking tender cuts of meat by direct heat under the broil element of the oven. The high heat cooks quickly and gives a rich, brown outer ap- pearance. - Page 31 SETTING THE SABBATH FEATURE the Jewish Sabbath & Holidays) The BAKE TIME and delaY start pads are used to set the Sabbath feature. The Sabbath feature may only be used with the BAKE pad. The oven temperature may be set higher or lower after setting the Sabbath feature (the oven temperature adjustment feature should be used only during Jewish Holidays), however the display will not visibly show or provide any audible tones indicating whether the...
-
Page 32: Adjusting Oven Temperature
setting oven controls adjusting oven temPerature The temperature in the oven has been pre-set at the factory. When first using the oven, be sure to follow recipe times and temperatures. If you think the oven is cooking too hot or too cool for the temperature you select, you can adjust the actual oven temperature to be more or less than what is displayed. - Page 33 During the Self-Cleaning cycle, the outside of the range can become very hot to the touch. do not leave small children unattended near the appliance.
- Page 34 setting oven controls SETTING SELF-CLEAN CYCLE TIME LENGTH The selF clean pad controls the Self-Cleaning feature. If you are planning to use the oven directly after a self-clean cycle remember to allow time for the oven to cool down and the oven door to unlock. This normally takes about one hour.
-
Page 35: Setting Keep Warm Drawer Control (If Equipped)
SETTING KEEP WARM DRAWER CONTROL (If equipped) Keep warm drawer rack positions The rack can be used in 2 ways: In the upright position (Figure 1) to allow low • profile food items to be placed both under and on top of the rack (for example, rolls or biscuits on top of the rack and a casserole dish underneath). -
Page 36: Care & Cleaning (Cleaning Chart)
NOT use spray oven cleaners on the cooktop. Easy Care™ Stainless Your range finish is may be made with Easy Care™ Stainless Steel (some models). Steel Oven Door & Drawer Clean the stainless with warm soapy water using a clean sponge or cloth. Rinse with Front Panel and Decorative clean water and dry with a soft clean cloth. -
Page 37: Care & Cleaning
Ceramic glass cooktop cleaning & maintenance Consistent and proper cleaning is essential to maintaining your Ceramic glass cooktop. Prior to using your cooktop for the first time, apply the recommended CERAMA BRYTE® Cleaning Creme to the ceramic surface. Clean and buff with a non abrasive cloth or pad. -
Page 38: Care And Cleaning Of Stainless Steel
care & cleaning cleaning recommendations for the ceramic glass cooktop (continued) Plastic or foods with a high sugar content: These types of soils need be removed immediately if spilled or melted onto the ceramic cooktop surface. Permanent damage (such as pitting of the cooktop surface) may occur if not removed immediately. -
Page 39: Changing Oven Light
Around Oven door Hinge Figure 3 Special door care instructions - doors contain glass that can break. Read the following recommendations: 1. Do not close the oven door until all the oven racks are fully in place. 2. Do not hit the glass with pots, pans, or any other ob- ject. - Page 40 care & cleaning To remove and replace storage drawer with extendible glide (some models) To Remove Storage Drawer 1. Open the drawer to the fully opened position. 2. Locate the latches on both sides of the warmer drawer. 3. Pull up on the left glide latch and push down on the right glide latch.
-
Page 41: Troubleshooting
• Incorrect pan size. • Pan not centered in oven. Cakes not level. • Range not level. • Pan too close to oven wall or rack overcrowded. • Pan warped. Foods not done • Oven too cool. - Page 42 Poor installation. Place oven rack in center of oven. Place a level on the oven rack. Adjust leveling legs at base of range until the rack is level. When range is level, cooktop may appear out of alignment if countertop is not level.
- Page 43 BEFORE YOU CALL occurrence POSSIBLE CAUSE/SOLUTION Drip bowls turning Bottom surface of cookware extends beyond surface elements and touches cooktop surface. color or distorted This can cause high enough temperatures to discolor the drip bowls. DO NOT use cookware out of shape. of this type.
-
Page 44: Major Appliance Warranty
major aPPliance WarrantY Your appliance is covered by a one year limited warranty. For one year from your original date of purchase, Electrolux will pay all costs for repairing or replacing any parts of this appliance that prove to be defective in materials or workmanship when such appliance is installed, used and maintained in accordance with the provided instructions.
Need help?
Do you have a question about the Professional FPCS3085LF and is the answer not in the manual?
Questions and answers