Page 1
MANUALE D’USO INSTRUCTIONS MODE D’EMPLOI BEDIENUNGSANLEITUNG GEBRUIKSAANWIJZINGEN MANUAL DE INSTRUCCIONES MANUAL DE INSTRUÇÕES ΟΔΗΓΙΕΣ ΧΡΗΣΗΣ ИНСТРУКЦИИ ПО ЭКСПЛУАТАЦИИ UŽIVATELSKÁ PŘÍRUČKA INSTRUKCJA OBSŁUGI BRUKSANVISNING ماكينة إعداد القهوة BRUGERVEJLEDNING إرشادات االستعمال 
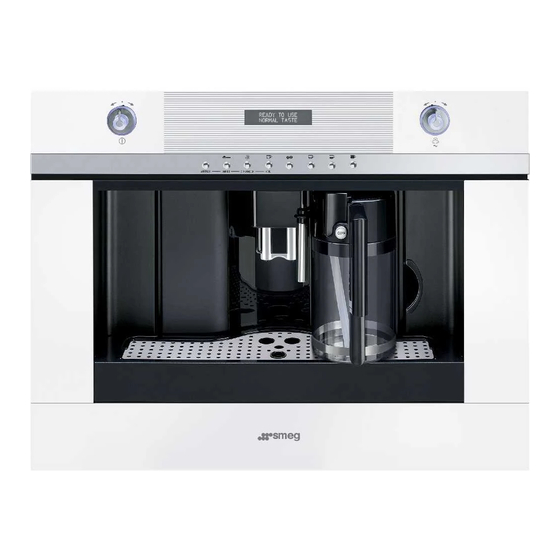
MACCHINA PER CAFFÈ E CAPPUCCINO COFFEE AND CAPPUCCINO MAKER MACHINE À CAFÉ ET À CAPPUCCINO KAFFEE-/CAPPUCCINO-VOLLAUTOMAT KOFFIE- EN CAPPUCCINOAPPARAAT CAFETERA PARA CAFÉ...
CONTENTS Descaling ................18 Changing coffee temperature ..........19 INTRODUCTION ............7 Changing the length of time the appliance remains on ..19 Symbols used in these instructions ..........7 Setting water hardness ............19 Letters in brackets ..............7 Resetting default values (reset) ..........19 Troubleshooting and repairs ............7 Washing procedure ..............19 SAFETY ..............
physical, sensory or mental capabilities, or INTRODUCTION Thank you for choosing the automatic coffee and cappuccino lack of experience and knowledge, unless maker. We hope you enjoy using your new appliance. they have been given supervision or instruc- Take a few minutes to read these instructions. This will avoid all risks and damage to the machine.
ties or lack of experience and knowledge if which could obstruct movement or unstable objects on the appliance. they have been given supervision or instruc- tion concerning use of the appliance in a safe Important! Never make drinks, hot water or steam way and understand the hazards involved.
A20. Tray • Installation must be performed by a qualified professional A21. IEC connector in compliance with legislation in force in the country of installation (see section: BUILT-IN INSTALLATION). Description of milk container and accessories • The packing elements (plastic bags, polystyrene foam, etc.) should be kept out of reach of children as they are a (page 3 - B) safety hazard.
BUILT-IN INSTALLATION Verify the minimum measurements required for correct instal- lation of the appliance. The coffee maker must be installed in a column and the column must be firmly fixed to the wall with commercially available brackets. Important: • Important: all installation or maintenance operations must be performed with the appliance disconnected from the mains electricity supply.
Page 7
x 16 x 16 x 16 x 16 Position the rails on the sides of the cabinet as shown in the figure. Fix with the screws, then extract them completely. Position the appliance on the rails, making sure the pins are If the coffee maker is installed over a warmer drawer (500 W correctly inserted in the housings, then fix it with the screws max.), use the top surface of this as a reference to position the...
USING THE APPLIANCE FOR THE FIRST TIME right or left. • Coffee has been used to factory test the appliance and it is TURNING ON AND HEATING UP therefore completely normal for there to be traces of coffee in the mill. Each time the appliance is turned on, it performs an automatic The machine is, however, guaranteed to be new.
Take care to avoid scalds). NOTE 1: If the coffee is delivered a drop at a time or not at all, turn the grinding adjustment knob (fig. 12) one click clockwise (see “Adjusting the coffee mill”). Proceed one click at a time until coffee delivery is satisfactory. NOTE 2: If the coffee is delivered too fast and the cream is not satisfactory, turn the grinding adjustment knob (fig.
ADJUSTING THE COFFEE MILL enable the coffee mill. NOTE 1: Never introduce pre-ground coffee when the machine is The coffee mill is preset in the factory to make coffee correctly off or it could spread through the inside of the appliance. and should not require adjusting initially.
• Remove the lid of the milk container. least 3 seconds (fig. 25). The appliance displays “CLEAN- • Fill the container with about 100 grams of milk for each ING”. cappuccino to be prepared (fig. 19). Never exceed the MAX After cleaning, remove the milk container and place in the level (corresponding to about 750 ml) marked on the jug. refrigerator.
CLEANING AND MAINTENANCE To remove the tray: 1. Open the service door (A2) (fig. 14). Before performing any cleaning operations, leave the machine 2. Remove the drip tray (A11) and the grounds container (A4) to cool down completely and unplug from the mains power (fig.
Cleaning the milk container 2. Open the service door (A2) (fig. 14). 3. Remove the drip tray (A11) and grounds container (fig. 15). 4. Press the two red release buttons inwards and at the same Important! Always clean the tubes inside the milk time pull the infuser outwards (fig.
• DESCALE NO relating to the procedure to follow in the event of contact with • TEMPERATURE MEDIUM the skin and eyes. • OFF AFTER 1 HOUR N:B:: Use the descaler recommended by the manufac- • WATER HARDNESS 4 turer only. Use of other descalers invalidates the guarantee. •...
• Press the OK button (C5) and refill the water tank with from its packaging then dip it fully in the water for a few clean water. seconds, • The descale programme is now terminated and the appli- Then remove and wait about 30 seconds (until it changes ance is ready to make coffee again.
B) If your appliance is not fitted with a plug, please follow the instructins provided below: N.B.: If the appliance is not used for an extended period, WARNING - THIS APPLIANCE MUST BE EARTHED place the main switch (A19) on the back of the appliance in the IMPORTANT 0 position.
DISPLAYED MESSAGES DISPLAYED MESSAGE POSSIBLE CAUSE REMEDY FILL TANK The water tank is empty or positioned Fill the tank with water and/or insert it incorrectly. correctly, pushing it as far as it will go. GROUND TOO FINE ADJUST MILL The grinding is too fine and the coffee is Turn the grinding adjustment knob one Insert water spout and press OK (C5) delivered too slowly.
TROUBLESHOOTING If the problem cannot be resolved as described, contact Custom- er Services. Below is a list of some of the possible malfunctions. PROBLEM POSSIBLE CAUSE REMEDY The coffee is not hot. The cups were not preheated. Heat the cups by rinsing them in hot wa- ter or leaving them to rest for at least 20 minutes on the cup warmer tray.
PROBLEM POSSIBLE CAUSE REMEDY The milk contains bubbles or squirts out The milk is not cold enough or is not You should ideally use skimmed or of the milk spout. semi-skimmed. semi-skimmed milk at refrigerator tem- perature (about 5°C). If the result is still disappointing, try another brand of milk.