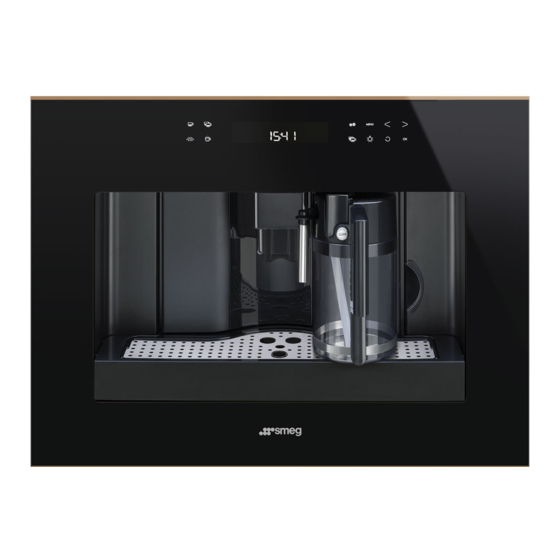
Smeg CMS4601NR Instructions Manual

Smeg CMS4601NR Instructions Manual

Coffee and cappuccino maker
Table of Contents

Advertisement

MANUALE D'USO
INSTRUCTIONS
MODE D'EMPLOI
BEDIENUNGSANLEITUNG
GEBRUIKSAANWIJZINGEN
MANUAL DE INSTRUCCIONES
MANUAL DE INSTRUÇÕES
使用手册
ΟΔΗΓΙΕΣ ΧΡΗΣΗΣ
InstructIons
ИНСТРУКЦИИ ПО ЭКСПЛУАТАЦИИ
Mode d' eMploI
UŽIVATELSKÁ PŘÍRUČKA
BedIenunGsAnleItunG
INSTRUKCJA OBSŁUGI
GeBruIksAAnwIjzInGen
BRUKSANVISNING
MAnuAl de InstruccIones
BRUGERVEJLEDNING
MAnuAl de Instruções
‫إرشادات االستعمال‬
使用手册
ΟΔΗΓΙΕΣ ΧΡΗΣΗΣ
InstructIons
ИНСТРУКЦИИ ПО ЭКСПЛУАТАЦИИ
Mode d' eMploI
u IVAtelskÁ p Íru kA
BedIenunGsAnleItunG
InstrukcjA oBs uGI
GeBruIksAAnwIjzInGen
BruksAnVIsnInG
MAnuAl de InstruccIones
BruGerVejlednInG
КОФЕМАШИНА ДЛЯ ПРИГОТОВЛЕНИЯ КОФЕ И КАПУЧЧИНО
MAnuAl de Instruções
ΟΔΗΓΙΕΣ ΧΡΗΣΗΣ
ИНСТРУКЦИИ ПО ЭКСПЛУАТАЦИИ
u IVAtelskÁ p Íru kA
MACCHINA PER CAFFÈ E CAPPUCCINO
MACHINE À CAFÉ ET À CAPPUCCINO
KAFFEE-/CAPPUCCINO-VOLLAUTOMAT
KOFFIE- EN CAPPUCCINOAPPARAAT
CAFETERA PARA CAFÉ Y CAPUCHINO
PŘÍSTROJ NA PŘÍPRAVU KÁVY A KAPUČÍNA
EKSPRES DO KAWY I KAWY CAPPUCCINO
KAFFEMASKIN FÖR ESPRESSO OCH CAPPUCCINO
COFFEE AND CAPPUCCINO MAKER
MÁQUINA DE CAFÉ E CAPPUCCINO
ΜΗΧΑΝΗ ΚΑΦΕ ΚΑΙ CAPPUCCINO
KAFFE- OG CAPPUCCINOMASKINE
‫ماكينة إعداد القهوة‬
咖啡和卡布奇诺咖啡机
‫إرشادات االستعمال‬
AR
ZH
AR

Advertisement

Table of Contents
loading

Summary of Contents for Smeg CMS4601NR

  • Page 1 MANUALE D’USO INSTRUCTIONS MODE D’EMPLOI BEDIENUNGSANLEITUNG GEBRUIKSAANWIJZINGEN MANUAL DE INSTRUCCIONES MANUAL DE INSTRUÇÕES 使用手册 ΟΔΗΓΙΕΣ ΧΡΗΣΗΣ InstructIons ИНСТРУКЦИИ ПО ЭКСПЛУАТАЦИИ Mode d’ eMploI UŽIVATELSKÁ PŘÍRUČKA BedIenunGsAnleItunG INSTRUKCJA OBSŁUGI GeBruIksAAnwIjzInGen BRUKSANVISNING ‫ماكينة إعداد القهوة‬ MAnuAl de InstruccIones BRUGERVEJLEDNING MAnuAl de Instruções ‫إرشادات...
  • Page 2: Table Of Contents

    CONTENTS Cleaning the brewing unit ..........10 Cleaning the milk container ...........11 INTRODUCTION ......... 3 CHANGING AND SETTING MENU PARAMETERS ..Symbols used in these instructions .........3 Setting the language ............12 Letters in brackets ............3 Rinsing ................12 Troubleshooting and repairs ..........3 Changing the length of time the appliance remains on .12 SAFETY .............
  • Page 3: Introduction

    INTRODUCTION Symbols used in these instructions Danger of burns! Failure to observe the warning could result in scalds or burns. Important warnings are identified by these symbols. It is vital to respect these warnings. N.B.! Failure to observe the instructions could result in electric shock, This symbol identifies important advice or information for the serious injury, burns, fire or damage to the appliance.
  • Page 4: Designated Use

    of children aged less than 8 years. Appliances can be used by persons with reduced physical, sensory or mental capabilities or lack of experience and knowledge if they have been given supervision or instruction con- cerning use of the appliance in a safe way and understand the hazards involved. Children shall not play with the appliance.
  • Page 5: Description Of The Control Panel

    A4. Waste coffee container C3. CLEAN button A5. Brewing unit C4. Milk intake tube A6. Cup tray lights C5. Frothed milk spout A7. On/OFF/stand-by button C6. Milk frother A8. Control panel C7. Hot water spout A9. Tray A10. Hot water and steam nozzle PRELIMINARY CHECKS A11.
  • Page 6: Turning On And Heating Up

    USING THE APPLIANCE FOR THE TURNING ON AND HEATING UP Each time the appliance is turned on, it performs an automatic FIRST TIME preheat and rinse cycle which cannot be interrupted. The appli- • Coffee has been used to factory test the appliance and it is ance is ready for use only after completion of this cycle. therefore completely normal for there to be traces of coffee in the mill.
  • Page 7: Changing The Quantity Of Coffee In The Cup

    NOTE 2: If the coffee is delivered too fast and the cream is not the appliance will display “GROUND TOO FINE ADJUST MILL AND satisfactory, see the “Adjusting the coffee mill” section. PRESS OK” and then “FILL TANK”. Check the level of water in the NOTE 3: Tips for a hotter coffee: tank and replace in the appliance.
  • Page 8: Adjusting The Coffee Mill

    ADJUSTING THE COFFEE MILL NOTE 5: If more than one measure of pre-ground coffee is used and the funnel clogs, push the coffee down with a knife (fig. 21) The coffee mill is preset in the factory and should not require then remove and clean the brewing unit and machine as de- adjusting.
  • Page 9: Changing The Quantity Of Milk And Cof- Fee For Cappuccino

    cappuccino to be prepared (fig. 23). Never exceed the MAX When the CLEAN button is released, the function stops. level (corresponding to about 750 ml) marked on the con- After cleaning, remove the milk container and place in the tainer. You should ideally use skimmed or semi-skimmed refrigerator.
  • Page 10: Using The Appliance For The First Time

    CLEANING with a damp cloth and a little mild washing up liquid. 2. Remove all traces of washing up liquid. Cleaning the coffee maker Do not use solvents or abrasive detergents to clean the coffee Cleaning the spouts maker. A soft damp cloth will suffice. 1.
  • Page 11: Cleaning The Milk Container

    onto the internal support and pin at the bottom, then push 1. Turn the lid of the milk container clockwise then remove it. the PUSH symbol fully in until it clicks into place. 2. Remove the milk spout and intake tube. Support spout milk intake tube...
  • Page 12: Setting The Language

    Changing the length of time the appliance • Water hardness • Program coffee remains on • Program cappuccino The appliance is set by default to go off automatically 30 minutes • Program jug (not present) after the last coffee has been made. • Program water To change this interval (max. 120 min), proceed as follows: •...
  • Page 13: Changing Coffee Temperature

    Changing coffee temperature Programming water To change coffee temperature, proceed as follows: For instructions, see the “CHANGING THE QUANTITY OF HOT WA- • Press the MENU icon (B2) to enter the menu and then the TER” section. icons (B7) and (B8) until “TEMPERATURE” is dis- Descaling played. • Press the OK icon (B9). • Press the icons (B7) and (B8) to select the required Important! Descaler contains acids.
  • Page 14: Resetting Default Values (Reset)

    Adjusting contrast “DESCALE COMPLETE” is displayed, then “FILL TANK!”. Fill the tank again with clean water. To increase or reduce the contrast of the display, proceed as fol- • The descale programme is now terminated and the appli- lows: ance is ready to make coffee again. • Press the MENU icon (B2) to enter the menu and then the NOTE: If descaling is interrupted before completion, the icons (B7) and (B8) until “CONTRAST”...
  • Page 15: Disposing Of The Appliance

    Disposing of the appliance The appliance must not be disposed of with household waste, but taken to an authorised waste separation and recycling cen- tre.
  • Page 16: Displayed Messages

    DISPLAYED MESSAGES DISPLAYED MESSAGE POSSIBLE CAUSE REMEDY FILL TANK! The water tank is empty or positioned Fill the tank with water and/or insert it correctly, incorrectly. pushing it as far as it will go. GROUND TOO FINE ADJUST MILL AND The grinding is too fine and the coffee Turn the grinding adjustment knob one click alternating with PRESS OK...
  • Page 17: Troubleshooting

    TROUBLESHOOTING Below is a list of some of the possible malfunctions. If the problem cannot be resolved as described, contact Custo- mer Services. PROBLEM POSSIBLE CAUSE REMEDY The coffee is not hot The cups were not preheated. Warm the cups by rinsing them with hot water.
  • Page 18 PROBLEM POSSIBLE CAUSE REMEDY The milk does not come out of the milk The intake tube is not inserted or is inser- Insert the intake tube (C4) in the rubber spout (C5). ted incorrectly. washer in the milk container lid (fig. 24). The milk is not well frothed.
  • Page 19: Recipes

    RECIPES coffee. Grand Marnier or Calvados can also be added. Coffee punch Coffee sorbet Ingredients (serves 6): Ingredients (serves 4): 1/2 l of hot coffee 200 g of granulated sugar 1/2 l of white Port 2 dl of espresso coffee 1/2 l of rum Method: Combine ½...
  • Page 23 SMEG S.p.A. Via Leonardo Da Vinci, 442016 Guastalla (RE) Italia www.smeg.com...

This manual is also suitable for:

Cms4601nxCms4601

Table of Contents