Table of Contents
Advertisement
Quick Links
Use & Care
MANUAL
7 SERIES
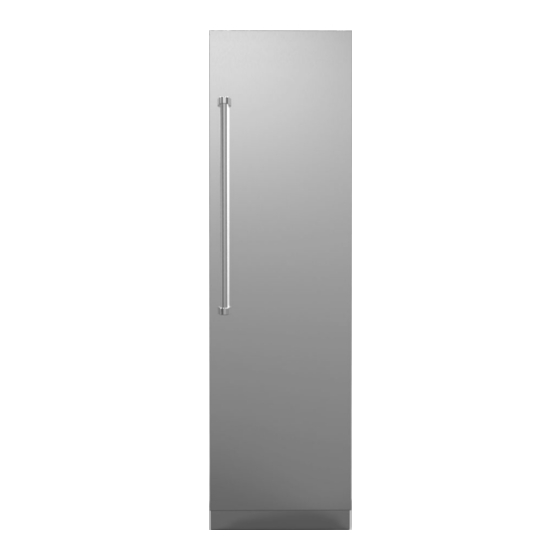
Integrated All Refrigerator
VRI7240 / CVRI7240 / VRI7300 / CVRI7300 / VRI7360 / CVRI7360
FRI7240 / CFRI7240 / FRI7300 / CFRI7300 / FRI7360 / CFRI7360
MVRI7240 / CMVRI7240 / MVRI7300 / CMVRI7300 / MVRI7360 / CMVRI7360
Integrated All Freezer
VFI7180 / CVFI7180/ VFI7240 / CVFI7240 / VFI7300 / CVFI7300 / VFI7360 / CVFI7360
FFI7180 / CFFI7180 / FFI7240 / CFFI7240 / FFI7300 / CFFI7300 / FFI7360 / CFFI7360
MVFI7180 / CMVFI7180 / MVFI7240 / CMVFI7240 / MVFI7300 / CMVFI7300 / MVFI7360 / CMVFI7360
Advertisement
Table of Contents

Related Manuals for Viking Range CVRI7240


Summary of Contents for Viking Range CVRI7240
- Page 1 MANUAL 7 SERIES Integrated All Refrigerator VRI7240 / CVRI7240 / VRI7300 / CVRI7300 / VRI7360 / CVRI7360 FRI7240 / CFRI7240 / FRI7300 / CFRI7300 / FRI7360 / CFRI7360 MVRI7240 / CMVRI7240 / MVRI7300 / CMVRI7300 / MVRI7360 / CMVRI7360 Integrated All Freezer...
-
Page 2: Table Of Contents
Congratulations We hope you will enjoy and appreciate the care and attention we have put into every detail of your new, state-of-the-art refrigerator. Your appliance is designed to off er years of reliable service. This Use and Care Guide will provide you with the information you need to become familiar with your refrigerator’s care and operation. -
Page 3: Warnings
Warnings Your safety is important to us. This use and care manual contains safety symbols and statements. Please pay special attention to these symbols and follow any instructions given. This symbol alerts you to hazards such as fi re, electrical shock or other injuries. -
Page 4: Proper Disposal (Of Old Refrigerator)
Important Safety Instructions • Install and level your refrigerator on a fl oor that will hold its weight,plus food weight (approximately 1200 pounds [540kg]) and in an area suitable for its size and use. • DO NOT install a refrigeration unit near a heat source, nor in a location where the surrounding temperature will fall below 60°F (16° C). •... -
Page 5: Features
Features All Freezer Models All Refrigerator Models Control Panel (inside / below header panel) Control Panel (inside / below header panel) Door Bins (3) Bluezone® Fresh Preservation Technology* Wire Shelves (3) (Rear Inside Wall) Wire Baskets Door Bins (3) Water Filter (behind access panel) Internal Water dispenser (left inside wall) Ice Bucket Spillproof Shelves with Nano Technology (3) -
Page 6: Settings And Functions
Settings and Functions Power Switch I n order for your new refrigerator to work properly, it is important that you understand its various features, controls, and how to use them. Power On/Off Switch Your unit is shipped with the power switch on. When fi rst plugged in, the display will fl ash. - Page 7 Settings and Functions VFI/FFI/MVFI Models only The ice button will turn on or turn off ice production. The default setting is on. The button will illuminate in blue. Press to turn off ice production. VFI/FFI/MVFI Models only The “MAX ICE” button sets ice maker to full capacity. Press “MAX ICE” button to activate. The max ice mode sets the freezer to its lowest setting (-7 ) for 48 hours and will end after function is completed.
-
Page 8: Refrigerator
Refrigerator (VRI/FRI/MVRI models) Spillproof Plus Shelves with Nano Technology The spillproof shelves with Nano Technology contain liquids with no raised edges in order to provide extra shelf capacity. Note: Foods and beverages placed on the uppermost shelf under the air vent may freeze. Shelf Adjustment You can adjust the shelves to match the way you use your refrigerator. - Page 9 Refrigerator (VRI/FRI/MVRI models) Door Bin Adjustment Your refrigerator’s door bins hold two-liter bottles and can be placed in any position on the refrigerator door. To remove a bin, grasp both sides, push the bin up from the sides, and pull it out.
-
Page 10: Freezer
Freezer (VFI/FFI/MVFI/VFFI models) Wire Shelf Adjustment You can easily adjust your freezer’s shelves. To remove a shelf, simply tilt it up at the front, releasing the hooks from the shelf support. Then, pull the shelf straight out. To replace, guide the rear hooks of the shelf into the slots in the shelf supports. -
Page 11: Food Storage Guide
Food Storage Guide Your refrigerator / freezer is equipped with Bluezone® technology, a unique fresh preservation system that helps extend shelf life and maintain quality of the fruits and vegetables in your refrigerator. The Bluezone cleans the refrigerator air of ethylene gas, a naturally occurring ripening agent that comes from fruit like apples, pears, melons, and stone fruit. -
Page 12: Cleaning And Maintenance
Cleaning & Maintenance WARNING CAUTION ELECTRICAL SHOCK HAZARD To avoid personal injury or property damage, read and follow all T o avoid electrical shock which can cause severe cleaning product manufacturer’s directions. personal injury or death, turn power disconnect switch to OFF before cleaning. - Page 13 Cleaning & Maintenance Condenser Cleaning Indicator The refrigerator temperature display will be blinking “CL” to indicate that it is time to clean the condenser coil. Condenser Cleaning: There is always chance of getting the condenser clogged due to dust in the air, pet hair, etc. We recommend cleaning the condenser once every 6 months.
- Page 14 When it comes time to replace the Bluezone bulb, Bluezone will appear along the bottom of the digital display. A bulb kit (P/N: RBZB7) will need to be purchased from Viking Range, LLC. The new bulb kit can be ordered online at www.vikingrange.com or by calling 1-888-845-4641.
- Page 15 Cleaning & Maintenance Door Stop Adjustment Your refrigerator is factory set at a 90 degrees with the longer end of the door stop facing away from the door. To change to 105 door stop, locate the door stop on top of the door hinge. Remove the two screws and door stop. Rotate the door stop 180 degrees so that the shorter end faces away from the door.
-
Page 16: Troubleshooting
Troubleshooting Understanding Sounds You May Hear Your new refrigerator may make diff erent sounds than your old one. Hard surfaces, such as the ceilings, walls, and cabinets around the unit can make these sounds seem louder. However, these sounds are normal and will soon become familiar; they indicate that your refrigerator is working properly. -
Page 17: Service Information
Clearly describe the problem that you are having. If you are unable to obtain the name of an authorized service agency, or if you continue to have service problems, contact Viking Range at (888) 845-4641 or write to: VIKING RANGE, LLC... -
Page 18: Warranty
(2) years from the date of original retail purchase or closing date for new construction, whichever period is longer. Viking Range, LLC, warrantor, agrees to repair or replace, at its option, any part which fails or is found to be defective during the warranty period. - Page 20 Viking Range, LLC 111 Front Street Greenwood, Mississippi 38930 USA (662) 455-1200 For product information, call 1-888-(845-4641) or visit the our web site at vikingrange.com 062222-000A EN (050119)
Need help?
Do you have a question about the CVRI7240 and is the answer not in the manual?
Questions and answers