Table of Contents
Advertisement
Quick Links
Advertisement
Table of Contents

Related Manuals for Triton Blue WALLYOK12Z


Summary of Contents for Triton Blue WALLYOK12Z
- Page 1 PROFESSIONAL MOVING HEAD USER MANUAL WALLYOK12Z KEEP THIS MANUAL FOR FUTURE NEEDS...
-
Page 2: Table Of Contents
Contents 1. Features ................................2 2. Fixture Overview ............................. 3 3. SAFETY INSTRUCTIONS ..........................3 3.1) Important safety warns........................3 3.2) GENERAL GUIDELINES ........................4 4. INSTALLATION INSTRUCTIONS......................5 4.1) Mounting the device ..........................5 5. DMX-512 control connection.......................... 8 6. -
Page 3: Features
Thank you for your patronage. We are confident that our excellent products and service can satisfy you. For your own safety, please read this user manual carefully before installing the device. In order to install , operate, and maintain the lighting safety and correctly. We suggest that the installation and operation should be done by the verified technician and follow the instruction strictly. -
Page 4: Fixture Overview
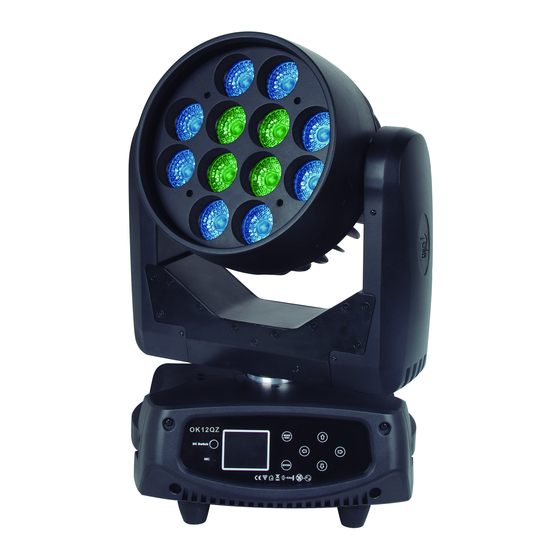
2. Fixture Overview 1: Leds button DC Switch- 3: Microphone 4: Display 5: Mode/Esc-button 6: ENTER-button 7: Left-button 8: Down-button 9: Up-button 10: Right-button 11: Handle 12: Power switch 13: Fuse 14: Power In 15: Power Out 16: 3-Pin DMX Out 17: 3-Pin DMX In 3. -
Page 5: General Guidelines
This device falls under protection-class I. Therefore it is essential that the device be earthed. If protection screen,lens or ultraviolet screen in the fixture is apparently damaged or is damaged to exceed their own effective degree, such as cracked and gashed, it must be replaced. The electric connection must carry out by qualified person. -
Page 6: Installation Instructions
Operate the device only after having familiarized with its functions. Do not permit operation by persons not qualified for operating the device. Most damages are the result of unprofessional operation. Please use the original packaging if the device is to be transported. For safety reasons, please be aware that all modifications on the device are forbidden. - Page 7 Installation via the Omega holders a) Fixed the clamp on the bracket by tighten up the M12 screw on the bracket to the Ф13 hole in the middle of the bracket. b) Insert the quick-lock fasteners of the first Omega holder into the respective holes on the bottom of the device.
- Page 8 Dimensional Drawings: XM1115-V1.0.0-NR...
-
Page 9: Dmx-512 Control Connection
Layout Drawings: Mounting points Be sure this fixture is kept at least 0.5m away from any flammable materials (decoration etc.). Always use and install the supplied safety cable as a safety measure to prevent accidental damage and/or injury in the event the clamp fails. Overhead mounting requires extensive experience, including amongst others calculating working load limits, a fine knowledge of the installation material being used, and periodic safety inspection of all installation material and the fixture. -
Page 10: Dmx-512 Connection With Dmx Terminator
Address 41 Address 21 Address 1 6. DMX-512 connection with DMX terminator For installations where the DMX cable has to run a long distance or is in an electrically noisy environment, such as in a discotheque, it is recommended to use a DMX terminator. This helps in preventing corruption of the digital control signal by electrical noise. -
Page 11: Control Board
8. Control Board The Control Board offers several features: you can simply set the starting address , run the pre-programmed program or make a reset. The main menu is accessed by pressing the -button until the display starts flashing. Browse through the menu by pressing the -button , -button , -button or... -
Page 12: Function
Shutoff Time 02~60m 05m Display shutoff time Display Reverse ON/OFF Reverse 180 degree Display Setting Key Lock ON/OFF Key Lock Disp Flash ON /OFF Disp Flash Celsius Temperature switch between Temperature C/F Fahrenheit ℃ ℉ Initial Status PAN =XXX Initial effect position Standard Standard Stage... -
Page 13: Dmx Value
3. Press ENTER, the display will show “Set DMX Address”. 4. Tap the <Up/Down>button,the display will show “A001~AXXX” 5. Press ENTER to confirm or press <MODE/ESC> to return to the main menu. 8.1.2 Dmx Value With this function you can display the DMX 512 value of each channel. The display automatically shows the channel with a value changing. - Page 14 the display will show “Time Information”. 2. Press <Up/Down>, the display will show “Current Time”. 3. Press< ENTER>, the display will show“Current Time”. 4. The display will show “XXXX” (Hours) ; 5. Press <ENTER> to confirm or press <MODE/ESC> to return to the main menu. Total Run Time With this function, you can display the running time of the device.
-
Page 15: Temperature.info
2. Press <Up/Down>, the display will show “Clean Last Run”. 3. At “ L-Timer Password” menu input right password, Press< ENTER>, the display will show “Clean Last Run”. 4. The display show “OFF”,Press <Up/Down>, the display will show “ON”. 5. Press <ENTER> to confirm or press <MODE/ESC> to return to the main menu. 8.2.2 Temperature.Info Head Temp. - Page 16 2. Press <Up/Down>, the display will show “ ”. No DMX Mode 3. Press< ENTER>, the display will show“ ”. No DMX Mode 4. The display show “Hold” ,Press <Up/Down>, the display will show “Close”, “Auto”, “Music”. 5. Press <ENTER> to confirm or press <MODE/ESC> to return to the main menu. Pan Reverse With this function you can reverse the Pan-movement.
-
Page 17: Service Setting
5. Press <ENTER> to confirm or press <MODE/ESC> to return to the main menu. Movement Speed With this function, you can select scan mode from 1 to 4. 1. Tap <MODE/ESC>button,access the main menu,Tap the <Up/Down>button until “Personality” is displayed. Press ENTER, the display will show “Personality” . Tap the <Up/Down>button until the display will show “Status settings”. -
Page 18: Fans Control
Manual settings like adjusting the DMX starting address are no longer needed. This is especially useful when the device is installed in a remote area. RDM ready and conventional DMX devices can be operated in one DMX line. The RDM protocol sends own packages in the DMX512 data feed and does not influence conventional devices. -
Page 19: Temperature C/F
4.The display show “OFF”,Press <Up/Down>, the display will show “ON”. 5.Press <ENTER> to confirm or press <MODE/ESC> to return to the main menu. Disp Flash With this function you can the entire display to be flipped by 180˚ to allow for better view when the fixture is hung from truss or a ceiling. -
Page 20: Reset Function
4.The display show “OFF”,Press <Up/Down>, the display will show “ON”. 5.Press <ENTER> to confirm or press <MODE/ESC> to return to the main menu. 8.4 Reset Function With this function you can reset the device via the Control Board. You can select the different reset functions by turning the encoder. -
Page 21: User Mode
8.6.1 User mode With this function, you can create user defined channel orders. 8.6.2 Edit User Mode With this function, you can adjust the rest user defined channel order. 1.Tap <MODE/ESC>button,access the main menu,Tap the <Up/Down>button until “Users mode set” is displayed. Press ENTER, the display will show “Users mode set” . 2.The display show “Edit User Mode”... - Page 22 2. Automatic Program Run • Select “Function Mode” by turning the encoder. • Press the Enter button to confirm. • Select “Auto Program” by turning the encoder. • Press the Enter button to confirm. • Turn the encoder to select “Master” or “Alone”. The selection "Alone" means Stand Alone-mode and "Master"...
-
Page 23: Instructions On Use
The 3 Slave groups run the Auto Program in certain time segments, as shown in the following picture: 9. INSTRUCTIONS ON USE: DMX channel´s functions and their values (24DMX channels): Mode/Channel Value Function PAN Movement 8bit : 0-255 Pan Movement Pan Fine 16bit 0-255 Fine control of Pan movement... - Page 24 Green LED-array 1 0-255 Green ( 0-Black , 255-100% Green ) Blue LED -array 1 : 0-255 Blue ( 0-Black , 255-100% Blue ) White LED -array 1 : 0-255 White ( 0-Black , 255-100% White ) Red LED -array 2 : 0-255 Red ( 0-Black , 255-100% Red ) Green LED-array 2...
- Page 25 0-255 Fine control for Zoom adjustment Color Macro: No function 8--255 Color Rainbow from slow to fast Color Presets: 0-10 No function 11--20 White2700k 21--30 White3200k 31-40 White4300k 41-50 White5600k 51-60 White6500k 61-70 White8000k 71--100 Blue/Red 101--130 Blue/Green 131--160 Green/Red 161 --190 Red/Blue 191--220...
-
Page 26: Error Message
160-179 Internal program 4 (secne25~32 of EEPROM) 180-199 Internal program 5 (secne33~40 of EEPROM) 200-219 Internal program 6 (secne41~48 of EEPROM) 220-239 Internal program 7 (secne49~56 of EEPROM) 240-255 Music Control (secne of Program 1) 10. ERROR MESSAGE When you turn on the fixture, it will make a reset at first. The display may show“Err channel is XX”... -
Page 27: Technical Specifications
1) Clean the inside and outside lens each week to avoid the weakness of the lights due to accumulation of dust. 2) Clean the fan each week. 3) A detailed electric check by approved electrical engineer each three month, make sure that the circuit contacts are in good condition, prevent the poor contact of circuit from overheating.
Need help?
Do you have a question about the WALLYOK12Z and is the answer not in the manual?
Questions and answers