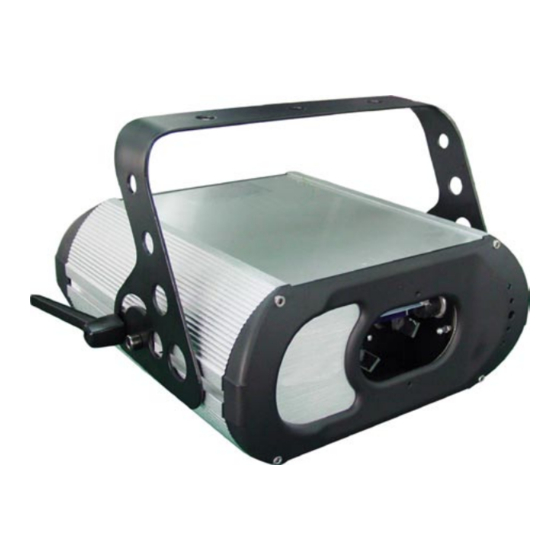
Summary of Contents for Triton Blue Laser TR2-64
- Page 1 Triton Blue USER MANUAL MANUAL DE USUARIO Laser TR2-64 Read kindly this user manual before using the machine Lea atentamente este manual antes de utilizar el aparato...
- Page 2 Triton Blue USER MANUAL Laser TR2-64 English...
- Page 3 Following is a guide to installing your new LASER CHROMA 100mW LDRGY projector. Please remember that due care and attention should always be taken when working with electricity. We recommend that your projector be installed by a professional installer and a licensed Electrician.
-
Page 4: To Protect Yourself And Others From Electric Shock
If you have questions about how to operate the projector safely, please contact your Triton Blue reseller. To protect yourself and others from electric shock •... -
Page 5: To Protect Yourself And Others From Injury Due To Falls
fire • Do not place any part of your body in the beam path whilst projecting a stagnant beam. • Never attempt to bypass the fuses. Always replace defective fuses with ones of the specified type and rating. • Keep all combustible materials (for example fabric, wood, paper) at least 0.3 meters (12 inches) away from the projector. -
Page 6: To Install The Main Fuse
POWER Warning! For protection from electric shock, the projector must be grounded (earthed). The power supply shall have overload and ground-fault protection. Important! Install fuse and verify that power supply settings match local AC supply before use. To install the main fuse Use only the fuse specified for the operating voltage. -
Page 7: To Apply Power
We recommend that you contact either a Triton Blue Technician or a Licensed Electrician to do this. Alternatively, at your own risk, you can follow the instructions below to install an Earth connection. -
Page 8: Installation
Ensure to place the projector on a raised platform, if working above 1.5m. 4. A clamp can be used to hang the projector from a truss or similar. Triton Blue offers a range of optional Clamps and truss mounting components. -
Page 9: Compliance Statement
Operating Instructions CAUTION: Use of controls, adjustments, or performance of procedures other than what is specified herein may result in hazardous radiation exposure which can result in server eye damage and or physical injury This projector is designed to Operate using DMX-512. DMX-512 allows you to control the Projector using any DMX-512 Protocol controller, however a profile will need to be created for some controllers. - Page 10 As you can see, from dipswitch 3, the numbers increase by multiplying the previous value by 2. A Combo label with the Product Model Number, Serial Number, Date of Manufacture, Laser Light Warning Label, Warranty Void Label and Interlocked Housing Label This laser product is a ClassIIIB laser and has an Interlocked housing.
- Page 11 laser light. Never intentionally expose your eyes or others to direct laser radiation. As you can see, from dipswitch 3, the numbers increase by multiplying the previous value by 2. A Combo label with the Product Model Number, Serial Number, Date of Manufacture, Laser Light Warning Label, Warranty Void Label and Interlocked Housing Label A Combo label with the Product Model Number, Serial Number, Date of Manufacture, Laser Light Warning Label, Warranty Void Label and Interlocked Housing Label...
- Page 12 radiation. As you can see, from dipswitch 3, the numbers increase by multiplying the previous value by 2. A Combo label with the Product Model Number, Serial Number, Date of Manufacture, Laser Light Warning Label, Warranty Void Label and Interlocked Housing Label...
-
Page 13: Dmx Control
Below are is the DMX profile settings used by the TR2-64 projector. NOTE: Some Software based DMX controllers already have the TR2-64 profile. Usually fixtures are listed under the manufactures name. This projector is listed under Triton Blue. CHANNEL FUNCTION VALUE... -
Page 14: Dip Switch Settings
Connecting your projector to a DMX-512 Controller DMX-512 uses a three pin cable similar to XLR or Mic leads. We recommend that you use DMX designated cables only as the use of XLR or Mic Leads can affect the operation of your projector. - Page 16 You will also notice dipswitch numbers 10, 11, and 12. These are used to select between the following modes: - • SOUND ACTIVE MODE • AUTO MODE • MASTER-SOUND • MASTER-AUTO • SLAVE • DMX MODE • TEST MODE Depending on how you wish to control your projector, you will need to assign the correct dipswitch address according to the chart below.
-
Page 18: Cleaning The Optics
Cleaning the optics One of the most critical components in a Laser projector is the optics. If the optics are dirty, you will experience a loss in power output. To ensure that your projector outputs at its maximum power follow these simple instructions illustrated below. -
Page 19: Technical Specifications
Technical Specifications Model: LASER TR2-64 projector Laser Type: LASER DIODE Laser Life: 6,000 to >10,000 Hours Output Type:CW Cooling: TEC Thermal Electronically Cooled Color: 650nm Red, 532nm Green Output: As Designated by Model Modulation: Analog AC Power: 220VAC 60Hz / 110VAC 50Hz Optional... - Page 20 Triton Blue Product lighting www.triton-blue.com info@triton-blue.com...


Need help?
Do you have a question about the Laser TR2-64 and is the answer not in the manual?
Questions and answers