Table of Contents
Advertisement
Quick Links
Advertisement
Table of Contents

Related Manuals for Medeli MK200


Summary of Contents for Medeli MK200
- Page 2 INFORMATION FOR YOUR SAFETY! THE FCC REGULATION WARNING (for USA) PRECAUTIONS PLEASE READ CAREFULLY BEFORE PROCEEDING This equipment has been tested and found to comply with the limits for a Class B digital device, pursuant to Part 15 of Please keep this manual in a safe place for future reference. the FCC Rules.
-
Page 3: Table Of Contents
Contents Panel & Display Description Arpeggiator..............15 Front Panel..............4 Rear Panel..............5 Mixer.................15 Display.................5 Function Menu Setup Tune................16 Power Supply...............6 Octave...............16 Split Point..............16 Connections Beat Type..............17 Connecting an MP3/CD Player........7 Touch.................17 Connecting a pair of Headphones.......7 Modulation..............17 Connecting a Microphone...........7 DSP................17 Connecting a Sustain Pedal........7 Reverb Type..............17 Connecting a Computer..........7 Reverb Level.............17... -
Page 4: Panel & Display Description
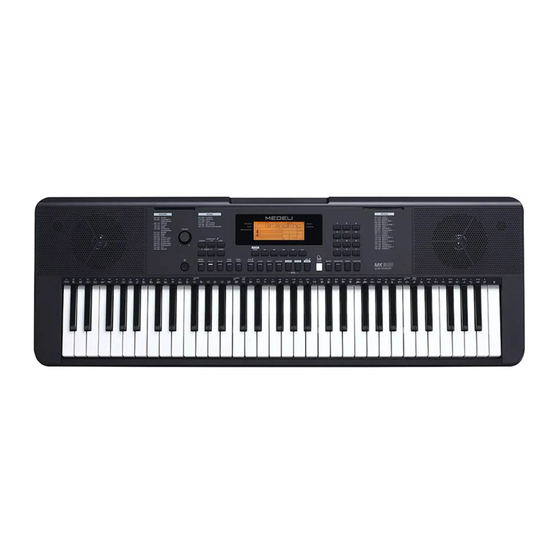
Panel & Display Description Front Panel 1. [VOLUME] Knob 12. [START/STOP] Button 21. [STYLE] Button Adjust the master volume. Start or stop playing the style or Switch to Style Mode. song. Press [SOUND] and [STYLE] at the 2. [ ] Button same time to enter Demo Mode. -
Page 5: Rear Panel
Panel & Display Description Rear Panel SUSTAIN PHONES AUX IN MIC IN 30. USB Jack 33. AUX IN Jack Connect to a computer. Connect an external audio source, such as MP3 or CD player. 31. SUSTAIN Jack 34. MIC Jack Connect a sustain pedal. -
Page 6: Setup
Setup This section contains information about setting up your instrument and preparing to play. Please go through this section carefully before turning the power on. Power Supply You can power the instrument either by batteries or by power adaptor. Follow the instructions described below. Using Batteries The instrument needs 6 pieces of AA size or equivalent alkaline batteries for power supply. -
Page 7: Connections
Connections Connecting an MP3/CD Player The rear-panel AUX IN jack receives audio signals from an external SUSTAIN PHONES AUX IN MIC IN audio source such as an MP3 or a CD player. Use an audio cable to connect the AUX IN jack of the instrument to the OUTPUT jack of the MP3/CD player. -
Page 8: Power Switch And Master Volume
Power Switch and Master Volume Power Switch Before you switch your instrument on, please turn down the volume of instrument and the connected audio equipment first. Make sure the instrument is properly connected to power supply. Press POWER SWITCH, the LCD screen is lit, and displays “Loading!”, indicating the instrument is powered on. -
Page 9: Playing The Sounds
Playing the Sounds The instrument features a variety of exceptionally realistic sounds. Please refer to Sound List. Playing a Sound Press the [SOUND] button. Enter the SOUND mode. LCD shows “SOUND R1”, the sound number and the sound name. Select a sound. Use the number keys, the [+]/[-] buttons to select the sound you want to play. -
Page 10: Sustain
Playing Sounds Sustain SUSTAIN When the Sustain feature is ON, all notes played on the keyboard will have a longer sustain. Press the [SUSTAIN] button to turn sustain on or off. Note: When using a sustain pedal, you can produce a much stronger and more natural sustain effect than by using the [SUSTAIN] button. -
Page 11: Auto Accompaniment
Auto Accompaniment The auto accompaniment function puts a full backing band at your fingertips. All you have to do is to play chords with your left hand, and the accompaniment will automatically play along, instantly following the chords you play. With auto accompaniment, even a solo performer can enjoy playing with the backing of an entire band or orchestra. -
Page 12: Fade In/Out
Auto Accompaniment Playing a Fill FILL A FILL B Auto fill in function automatically adds a fill to your performance. When the fill-in is finished,accompaniment shifts to the Main section (A,B). Note: If you keep pressing [FILL A]/[FILL B] buttons during style playback, the fill-in pattern will repeat playing until the button is released. -
Page 13: Auto Bass Chord
Auto Accompaniment Auto CHORD mode Press the [CHORD] button, the LCD will display the “FINGERED” CHORD indicator. The left hand section of the keyboard is the chord section. You can play different chords in the chord section. Press [CHORD] button again to enter Full Range mode. The “FULL RANGE”... -
Page 14: Quick Setting
Auto Accompaniment Multi-finger Multi-finger allows you to play chords in normal fingering. Try playing the 32 chord types in C scale as listed on the right. Note: In full range mode, the entire keyboard will only recognize chords played in normal fingering. Quick Setting When Quick Setting is switched on, you can instantly recall all auto accompaniment related settings including sounds selection and... -
Page 15: Arpeggiator
Arpeggiator The arpeggiator function will automatically generate arpeggios. Simply play a chord with your left hand, and the instrument will play a preset arpeggio pattern to produce a beautiful melody. Turn the Arpeggiator on or off ARP. Press and hold the [ARP.] button for 2 seconds to turn on the function. -
Page 16: Function Menu
Function Menu Press the [FUNCTION] button to enter the function menu. The LCD displays the current parameter item. FUNCTION Press repeatedly the [FUNCTION] button to select an item, then use the [+]/ [-] buttons to change the value of the selected item. Parameter items and the value range in the function menu: Parameter Item LCD Display... -
Page 17: Beat Type
Function Menu Beat Type Repeatedly press the [FUNCTION] button to select the beat menu. The LCD displays “Beat”. Use the [+ ]/ [-] buttons to change the beat type. Pressing [+] and [-] buttons at the same time will reset the beat type to default “004”. -
Page 18: Chorus Type
Function Menu Chorus Type Repeatedly press the [FUNCTION] button to select the chorus type menu. The LCD displays “Chr Type”. Use the [+]/ [-] button to change the type value. Pressing [+] and [-] buttons at the same time will reset the chorus type to default “003”. -
Page 19: Performance Memory
Performance Memory The Performance Memory feature allows you to save virtually all panel settings to a Performance memory, and you can instantly recall them by pressing a single button. The instrument has 8 memory banks, and each bank has 4 memories (M1-M4). -
Page 20: Playing The Songs
Playing the Songs The instrument has a variety of songs (Please refer to the Song List). Each song can be practiced in LESSON mode. Listening to the Songs Press the [SONG] button to enter the song mode. It will play all songs circularly. -
Page 21: Recording And Playback
Recording and Playback You can record you performance and then play it back. PLAY RECORD Press the [RECORD] button, the RECORD indicator will be lit, and the beats will flash. Play the keyboard or press the [START/STOP] button to start recording. -
Page 22: Trouble Shooting
Trouble Shooting Problem Possible Cause and Solution The speakers produce a “pop” sound whenever This is normal and is no cause for alarm. the power is turned ON or OFF. No sound results when the keyboard is played. 1. Check if the master volume is set too low. 2. -
Page 23: Sound List
Sound List Englich Name LCD Name Celesta 2 Celesta2 PIANO Dark Celesta CelestD Acoustic Grand Piano GrandPno Dark Celesta 2 CelestD2 Piano Dark GrdPnD Celesta & Sine Cele&Sin Piano Dark 2 GrdPnD2 Reecho Bell ReBell Octave Piano OctPno Reecho Bell 2 ReBell2 Octave Piano 2 OctPno2... - Page 24 Sound List Pick Bass 2 Analog Organ 2 AnaOrg2 PickBs2 Pick Bass 3 Reed Organ ReedOrgn PickBs3 Mute Pick Bass Reed Organ 2 RedOrgn2 PickBsM Pick & Finger Bass Stereo Reed Organ ReedOrgS Pk&FgBs Pick Bass & Clean Guitar Accordion Acordin PBs&ClGt Detuned Pick Bass...
- Page 25 Sound List Analog Orchestra AnaOrch Analog Brass AnaBrass Analog String AnaStr Analog Brass 2 AnaBras2 Analog String 2 AnaStr2 Dynamics Analog Brass DyAnaBra Slow Strings SlowStr Octave Synth Brass SynBrasO REED Slow Strings 2 SlowStr2 Choir Aahs ChoirAah Soprano Sax SprnSax Choir Aahs 2 ChoirAh2...
- Page 26 Sound List Classic TRI ClassTRI Control Control Stereo Analog Wind StAnWind Vague Vocals VagueVo Stereo Analog Wind 2 StAnWid2 Singl Synth SinglSyn Sawtooth Lead SawLead Analog Filter AnaFilt Sawtooth Lead 2 SawLead2 Analog Voice AnaVo Sawtooth Lead 3 SawLead3 Analog Voice 2 AnaVo2 Stereo Sawtooth SawLdS...
- Page 27 Sound List Analog Pad 4 AnalPd4 Soundtrack Soundtrk Detuned Sitar DetSitar Analog Pad 5 AnalPd5 Lost Garden Garden Banjo Banjo Analog Wah AnaloWah Far Away FarAway Banjo 2 Banjo2 Sharp Sharp Crystal Crystal Shamisen Shamisn Warm Pulse WarmPul Crystal 2 Crystal2 Shamisen 2 Shamisn2...
-
Page 28: Style List
Style List Cool Funky CoolFunk English Name LCD Name Soul 1 Soul1 LATIN 1 Soul 2 Soul2 Cha Cha ChaCha Soul Shuffle SoulShfl Pop Cha Cha P.ChaCha Soul Blues SoulBlue Rhumba Rhumba R & B R&B Pop Rhumba P.Rhumba 6/8 Gospel 6/8Gospl Bossa Nova 1 Bossa1... - Page 29 Style List Bossa Nova 1-2 Bossa1-2 Pop Swing-2 PopSwin2 Bossa Nova 2-2 Bossa2-2 Swing Fox-2 SwinFox2 Tango-2 Tango-2 Big Band-2 BigBand2 Jazz Samba-2 JzSamba2 Big Band Medium-2 BandMed2 Reggae-2 Reggae2 Jazz Waltz-2 JzWaltz2 Pop Reggae-2 P.Regga2 Ragtime-2 Ragtime2 DANCE 2 Dixieland 1-2 Dixla1-2 Disco 1-2...
-
Page 30: Song List
Song List English Name LCD Name Wiegenlied 2 Wieglid2 CLASSIC Her Bright Smile Haunts Me Still HerSmile Chanson Du Toreador Toreador Old Black Joe BlackJoe Meditation Meditati Old Dog Tray DogTray Wiegenlied WieGenli Are You Lonesome Tonight? Lonesome A Lover's Concerto Concerto Arirang Arirang... - Page 31 Song List Basic Tutorial Beyer Piano 45 Beyer45 Christmas Eve XmasEve Basic Tutorial Beyer Piano 50 Beyer50 Basic Tutorial Beyer Piano 52 Beyer52 Basic Tutorial Beyer Piano 55 Beyer55 Basic Tutorial Beyer Piano 59 Beyer59 Beyer Eight Degrees Jump Etude BeyrJump Basic Tutorial Beyer Piano The Scale Of C Major BeyerC...
-
Page 32: Midi Implementation Chart
MIDI Implementation Chart MK200_OM07EN...
Need help?
Do you have a question about the MK200 and is the answer not in the manual?
Questions and answers