
Subscribe to Our Youtube Channel
Related Manuals for Nixeus Vue NX-VUE22


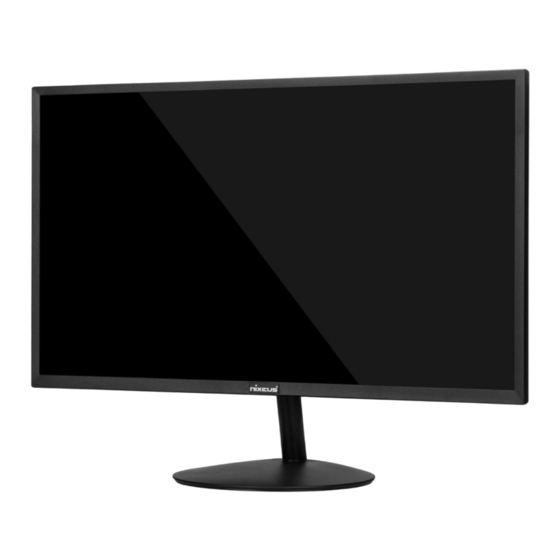
Summary of Contents for Nixeus Vue NX-VUE22
- Page 1 Nixeus Vue 22" IPS 1920 x 1080 60Hz Monitor Model# NX-VUE22 User Manual ver. 3-3-2019...
-
Page 2: Table Of Contents
OSD Timer Language On Screen Display (OSD) – Reset Sub-Menu Reset Settings On Screen Display (OSD) – Misc Sub-Menu Signal Source Mute Volume Warranty Information 30 - 32 Nixeus Technology, Inc - Contact Information Electronics Recycling and Proper Electronics Disposal... -
Page 3: Important Information
DC power line wires for normal operation. 6) Please use only approved power line and power adapters provided by Nixeus. If any power connections are missing, please contact Nixeus for a replacement. Using un-authorized power connectors may damage your monitor and void your warranty. - Page 4 “brand,” “incidental image” or “after image” will gradually disappear. Also by displaying a pure white image for the entire screen for the same duration that you had the static image that caused the image persistence may remove the image persistence. Please contact Nixeus if you need assistance in removing image persistence.
-
Page 5: Getting Started
Getting Started Box Contents: • Nixeus Vue 22” IPS 1920 x 1080 Monitor (NX-VUE22) • Stand Base x 1 • VGA Cable x 1 • Power Lead Cable (North America) x 1 • NX-VUE22 Quick Start Guide • 3.5mm AUX Audio Cable (When using with VGA video input connections) Installing Base Stand: (Tools not needed) Please refer to quick start guide for installation of Stand Base and Stand Shaft. -
Page 6: Video Input, Audio And Power Ports
Video Input Ports, Audio, and Power HDMI: This video input supports up to 1920 x 1080 Full HD resolution at 60Hz (HDMI cable not included). HDMI also transmit audio to the NX-VUE22's speakers so you do not need to connect the 3.5mm audio cable. VGA: This is a legacy video input that allows the NX-VUE22 to be used with older computers. -
Page 7: Button Functions (Not In On Screen Display Menu)
Button Functions (During Normal Use and NOT in On Screen Display Menu) (During Normal Use and NOT in On Screen Display Menu) (During Normal Use and NOT in On Screen Display Menu) NOTE: Instructions are when you facing the display and not the back of the monitor. when you facing the display and not the back of the monitor. -
Page 8: Button Functions And Features For On Screen Display Menu (Osd)
Button Functions and Features for On Screen Display (OSD) Main Menu Button Functions and Features for On Screen Display (OSD) Main Menu Button Functions and Features for On Screen Display (OSD) Main Menu NOTE: Monitor functions monitor's On Screen Display Menu ctions monitor's On Screen Display Menu is enabled (see above picture) is enabled (see above picture). -
Page 9: On Screen Display (Osd) Brightness Sub-Menu
2) On Screen Display (OSD) BRIGHTNESS SUB-MENU BRIGHTNESS (Sub-Menu) - BRIGHTNESS a) To bring up the OSD Main Menu, press the "MENU" Button b) Make sure the BRIGHTNESS sub-menu is highlighted in red (see picture) and press "MENU" to confirm selection. -
Page 10: Contrast Adjustment
BRIGHTNESS (Sub-Menu) - CONTRAST The CONTRAST Feature allows you to set your preferred static contrast ratio of the luminance of the brightness color (white) to that of the darkest color (black). a) In the PICTURE sub-menu, use the buttons "RIGHT ARROW BUTTON” or "LEFT ARROW BUTTON"... -
Page 11: Black Equalizer Adjustment
BRGITHNESS (Sub-Menu) - BLACK EQUALIZER a) In the PICTURE sub-menu, use the arrow buttons "RIGHT ARROW BUTTON" or "LEFT ARROW BUTTON" to navigate and to highlight Black Equalizer. Next press "MENU" to confirm selection. b) Press "RIGHT ARROW BUTTON" to make BLACK EQUALIZER lower or press "LEFT ARROW BUTTON"... -
Page 12: Low Blue Light
BRIGHTNESS (Sub-Menu) – LOW BLUE The LOW BLUE feature reduces the amount of blue light from the monitor to minimize or prevent eye strain and eye fatigue. Enabling this feature may affect the accuracy of picture color (we recommend leaving this feature OFF when working with applications that requires accurate colors). -
Page 13: Eco Pre-Sets
BRIGHTNESS (Sub-Menu) - ECO ECO feature allows you to set multiple preset color/brightness settings to suit your viewing, gaming, and professional needs: STANDARD = for normal use including professional content creation, photography, video editing, and office work. RTS = for Real Time Strategy type of PC Games. FPS = for First Peron Shooters type of PC Games. -
Page 14: Dynamic Contrast Ratio (Dcr)
BRIGHTNESS (Sub-Menu) - DYNAMIC CONTRAST RATIO (DCR) The DCR (DYNAMIC CONTRAST RATIO) feature allows you to display a dark image or dark scene by increasing the contrast ratio dynamically. Enabling this feature may affect the accuracy of picture color or be over exposed (we recommend leaving this feature off). -
Page 15: On Screen Display (Osd) Image Sub-Menu
IMAGE (Sub-Menu) – ASPECT (ASPECT RATIO) NOTE: ASPECT is the only feature in the IMAGE (Sub-Menu) that can be changed. Everything else can not be adjusted. The ASPECT (ASPECT RATIO) feature allows you to adjust the aspect ratio of the video image displayed on the monitor. -
Page 16: On Screen Display (Osd) Color Temp Sub-Menu
COLOR TEMP (SUB-MENU) - COLOR TEMPERATURE The NX-VUE22 has three preset color temperature settings for your professional use, general use and gaming needs – WARM, COOL, and USER. Only the USER settings allow for changes in RED, GREEN, and BLUE to calibrate your monitor to your color preference. -
Page 17: Preset Color Temperatures
COLOR TEMP (Sub-Menu) - Preset Color Temperatures NOTE: The default color temperature is WARM. a) In the COLOR TEMP sub-menu, use the buttons "RIGHT ARROW BUTTON" or "LEFT ARROW BUTTON" to navigate and to highlight the desired preset color temperature to use for your environment. b) Next press "MENU"... -
Page 18: User Setting (Red, Green, Blue Adjustment For Color Calibration)
COLOR TEMP (Sub-Menu) - USER (Color Calibration) NOTE: Only Custom Calibrate the Monitor's Color Temperature if you have a Colorimeter. The NX-VUE22 has a premium feature to allow you to custom calibrate the color temperature and color settings for RED, GREEN, and BLUE without the assistance or need of your computer's operating system or graphics card. - Page 19 a) To adjust the RED setting, highlight RED and press "MENU" b) Use the arrow buttons "RIGHT ARROW BUTTON" or "LEFT ARROW BUTTON" to adjust between 0 to 100 for the RED temperature settings. c) Once you set your desired RED settings, press "GO BACK BUTTON" to confirm selection and exit to COLOR sub-menu to adjust the next color settings.
- Page 20 a) To adjust the BLUE setting, Use the "RIGHT ARROW BUTTON" or "LEFT ARROW BUTTON" to ." navigate and highlight GREEN and press "MENU b) Use the buttons "RIGHT ARROW BUTTON" or "LEFT ARROW BUTTON" to adjust between 0 to 100 for the GREEN temperature settings.
-
Page 21: On Screen Display (Osd) - Osd Settings Sub-Menu
4) On Screen Display (OSD) - OSD Settings Sub-Menu OSD SETTINGS (Sub-Menu) - HORIZONTAL The OSD H. POS. feature allows you to set the OSD MENU (On Screen Display Menu) to move to either the left or right of your monitor. a) To bring up the OSD Main Menu, press "MENU"... - Page 22 OSD SETTINGS (Sub-Menu) - VERTICAL The OSD V. POS. feature allows you to set the OSD MENU (On Screen Display Menu) to either towards the top or bottom of your monitor. a) Make sure the OSD V. POS selection is highlighted in red (see picture) and press "MENU" to confirm selection.
-
Page 23: Transparency
OSD SETTINGS (Sub-Menu) - TRANSPARENCY The TRANSPARENCY feature allows you to make the OSD Menu more solid or transparent. a) To bring up the OSD Main Menu, press "MENU" Next use the arrow buttons "RIGHT ARROW BUTTON" or "LEFT ARROW BUTTON" to navigate to the OSD SETTINGS sub-menu and press "MENU"... -
Page 24: Osd Timer
OSD SETTINGS (Sub-Menu) – OSD TIMER The OSD TIMER feature allows you to set how long or how short the OSD Menu remains on screen. If you want the OSD Menu to immediately to go away you can always press "GO BACK BUTTON" a) To bring up the OSD Main Menu, press "MENU"... -
Page 25: Language
OSD SETTINGS (Sub-Menu) – Language a) Use the arrow buttons "RIGHT ARROW BUTTON" or "LEFT ARROW BUTTON" to navigate to LANGUAGE. Make sure selection is highlighted (see picture) and press "MENU" to confirm selection. b) Use the buttons "RIGHT ARROW BUTTON" or "LEFT ARROW BUTTON" to navigate to the preferred "LANGUAGE. -
Page 26: On Screen Display (Osd) - Reset Sub-Menu
RESET SUB-MENU The RESET feature in the REST sub-menu will allow you to reset all On Screen Display (OSD) configurations or changes you have made - back to the monitors default settings. In the RESET sub-menu the options “IMAGE AUTO ADJUST” and “COLOR AUTO ADJUST” settings are not selectable or not available and are grayed out. -
Page 27: On Screen Display (Osd) - Misc Sub-Menu
MISC – SIGNAL SOURCE The SIGNAL feature in the MISC sub-menu configures the video signal source for the monitor. To use the monitor's internal speaker, you must use either an HDMI connection or the 3.5mm audio jack connection - both connection types can transmit audio to the monitor. -
Page 28: Mute
MISC Sub-Menu - MUTE The MUTE feature in the MISC sub-menu mutes the audio volume for the monitor’s internal speakers. a) In the MISC sub-menu, use the buttons "DOWN" or "UP" to navigate to MUTE. Make sure selection is highlighted (see picture) and press "MENU" to confirm selection. b) Use the buttons "DOWN"... -
Page 29: Volume
MISC - VOLUME The VOLUME feature in the MISC sub-menu configures the audio volume for the monitor’s internal speakers. a) In the MISC sub-menu, use the buttons "DOWN" or "UP" to navigate to VOLUME. Make sure selection is highlighted (see picture) and press "MENU" to confirm selection. b) Use the buttons "DOWN"... -
Page 30: Warranty Information
Nixeus Technology, Inc. (“Nixeus”) provides this Limited Warranty: • Only to the person or entity that originally purchased the product from Nixeus or its authorized reseller or distributor, and • Only for products purchased and delivered within the United States, the District of Columbia, U.S. - Page 31 Nixeus’s Office. Nixeus will ship back the repaired or replacement package any common carrier selected by Nixeus. Return shipping fees shall be paid by Nixeus, if a United States address is used, otherwise the product will be shipped to you using freight collect. Expedited shipment methods are available at Customers (End Users) expense upon request.
-
Page 32: Nixeus Technology, Inc - Contact Information
IS REPAIR, OR REPLACEMENT OF THE DEFECTIVE OR NONCONFORMING PRODUCT. THE MAXIMUM LIABILITY OF NIXEUS UNDER THIS WARRANTY IS LIMITED TO THE PURCHASE PRICE OF THE PRODUCT COVERED BY THE WARRANTY. THE FOREGOING EXPRESS WRITTEN WARRANTIES AND REMEDIES ARE EXCLUSIVE AND ARE IN LIEU OF ANY OTHER WARRANTIES OR REMEDIES, EXPRESS, IMPLIED OR STATUTORY. -
Page 33: Electronics Recycling And Proper Electronics Disposal
Michigan, Indiana, Illinois: Nixeus Customers can recycle or send back their end of life or unwanted Nixeus electronic devices with us anytime. There are no fees or charges for this service. Simply contact us at recycle@nixeus.com, info@nixeus.com or call us at 888-983-4128. This free electronics recycling/collection mail back program is limited to only Nixeus branded products and is subject to product verification and approval.
Need help?
Do you have a question about the Vue NX-VUE22 and is the answer not in the manual?
Questions and answers