Table of Contents
Advertisement
Quick Links
Advertisement
Table of Contents

Subscribe to Our Youtube Channel
Related Manuals for Nixeus NX-EDG274K


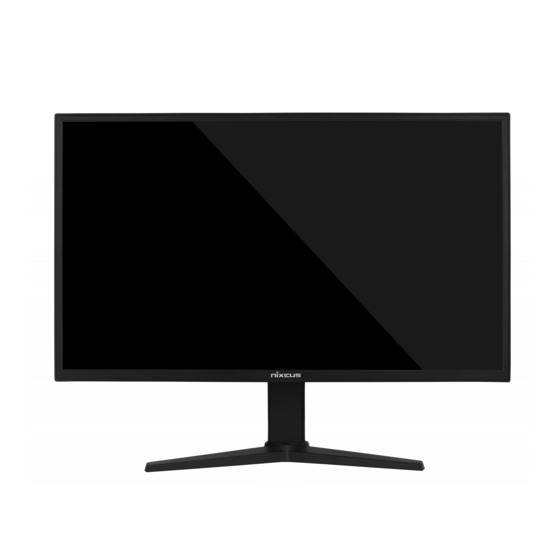
Summary of Contents for Nixeus NX-EDG274K
- Page 1 NX-EDG274K User Manual Version 8.1.2020 www.nixeus.com...
-
Page 2: Table Of Contents
Table of Contents Important Information Getting Started Stand Installation (Please Refer to the Quick Start Guide) Input and Connection Ports Monitor and Stand Adjustment Monitor Button Operations Legends and Functions Hot Key Button Functions (Without OSD Menu Enabled) Button Functions and Features for On Screen Display (OSD) Main Menu On Screen Display (OSD) Picture Settings Sub-Menu Backlight Adjustment Brightness Adjustment... - Page 3 Dark Enhance Sharp Enhance HDR Contrast Color Enhance Light Enhance On Screen Display (OSD) – AUDIO Sub-Menu Volume Mute Audio Source 52 – 53 Warranty Information Electronics Recycling and Proper Electronics Disposal Nixeus Technology, Inc - Contact Information Disclaimer...
-
Page 4: Important Information
3840x2160 resolution at 144Hz refresh rates. Avoid using 3rd party cable adapters/convertors to connect the NX-EDG274K to HDMI, VGA, and DVI output devices - we cannot guarantee they will be compatible with the NX-EDG274K. If you are not sure, please contact your computer hardware’s manufacturer. - Page 5 Back light bleed and IPS glow may disappear or minimize over time during normal use. If your monitor needs replacement parts, warranty service, and repairs please do not attempt to do it yourself! Doing so may void the warranty. Please contact techsupport@nixeus.com for warranty support. For more Information, please visit www.nixeus.com...
-
Page 6: Getting Started
Getting Started Box Contents for NX-EDG274K Nixeus EDG 27” IPS 3840 x 2160 AMD FreeSync Premium Certified 144Hz Gaming Monitor (NX-EDG274K) Stand Arm/Shaft x 1 Pre-installed (with 4 screws) DisplayPort 1.4 Cable x 1 Stand Base with 1 x Tool-less screw ... -
Page 7: Input And Connection Ports
Input and Connection Ports DC-IN: Power input for the external power adapter HDMI 2 (D4): HDMI 2.0 input (Supports up to 3840 x 2160 with refresh rate up to 60Hz with HDMI 2.0 compliant cable and source device). HDMI 1 (D3): HDMI 2.0 input (Supports up to 3840 x 2160 with refresh rate up to 60Hz with HDMI 2.0 compliant cable and source device). -
Page 8: Monitor And Stand Adjustment
Monitor and Stand Adjustment Monitor Tilting Forward/Back: Make sure the NX-EDG274K is on a stable level surface. Using both hands, hold the top and bottom of the frame to tilt the monitor forward or backward by up to 15°. Monitor Swivel Left/Right: Make sure the NX-EDG274K is on a stable level surface. -
Page 9: Monitor Button Operations Legends And Functions
Monitor Button Operations – Legends and Functions Note: The monitor’s button are on the bottom right of the monitor on the back of the monitor bezel, however the button functions correspond to the legends (symbols) on the front and not the texts right below the buttons (See picture below): Menu Button: Press to display the On Screen Display (OSD) menu or enter sub-menus or to confirm. -
Page 10: Hot Key Button Functions (Without Osd Menu Enabled)
Hot Key MENU Buttom Functions (Not for OSD) Backlight The BACKLIGHT settings allow you to adjust the LED brightness of the monitor. Left Arrow Button: Backlight Hot Key ) Press the button to bring up the BACKLIGHT settings. b) Press the [M]. -
Page 11: Button Functions And Features For On Screen Display (Osd) Main Menu
Button Functions and Features for On Screen Display (OSD) Main Menu Note: When operating the OSD menu, only refer to the symbols on the front bezel for the menu buttons, not the texts on the back of the monitor or the symbols in the OSD Menu to avoid confusion with the actual buttons. Menu Button: Press to display the On Screen Display (OSD) menu or enter sub-menus or to confirm. -
Page 12: On Screen Display (Osd) Picture Settings Sub-Menu
On Screen Display (OSD) PICTURE (Sub-Menu) Backlight The NX-EDG27K has a feature to allow the end user to apply lower or higher LED backlight settings independent of the BRIGHTNESS settings. Please note the higher the BACKLIGHT settings, there may be more noticeable IPS glow due to the monitor’s LED being much brighter. -
Page 13: Brightness Adjustment
BRIGHTNESS Please note the higher the BRIGHTNESS settings, there may be more noticeable IPS glow due to the monitor’s native brightness of up to 400 cd/m2 being brighter than other monitors. To maximize and minimize brightness, both the BACKLIGHT and BRIGHTNESS settings need to be adjusted at the same time accordingly. [M]. -
Page 14: Contrast Adjustment
CONTRAST This setting adjusts the contrast ratio in regards to the brightness difference between white and black for pictures and videos. [M]. a) To bring up the OSD Main Menu, press b) Using the [M] to enter the PICTURE sub-menu. buttons, navigate to PICTURE and press c) Using the [M]. -
Page 15: Sharpness Adjustment
SHARPNESS This setting adjusts the sharpness of texts, video, pictures and icons. [M]. a) To bring up the OSD Main Menu, press b) Using the [M] to enter the PICTURE sub-menu. buttons, navigate to PICTURE and press c) Using the [M]. -
Page 16: On Screen Display (Osd) Color Settings Sub-Menu
On Screen Display (OSD) COLOR (Sub-Menu) IMPORTANT NOTE: When adjusting settings in the COLOR (SUB-MENU), use of a display colorimeter is recommended. GAMMA Depending on your hardware or operating system, you may adjust the GAMMA accordingly for better color quality or accuracy. -
Page 17: Color Temperature - Presets
COLOR TEMPERATURE IMPORTANT NOTE: When adjusting settings in the COLOR (SUB-MENU), using a display colorimeter is recommended. COLOR TEMPRATURE allows you to set your preferred colors to be cooler or warmer. [M]. a) To bring up the OSD Main Menu, press b) Using the [M] to enter the COLOR sub-menu. -
Page 18: Color Temperature User
COLOR TEMPERATURE USER IMPORTANT NOTE: When adjusting settings in the COLOR (SUB-MENU), using a display colorimeter is recommended. To enable COLOR TEMPERATURE USER settings, the above COLOR TEMPERATURE setting must be set to USER. When adjusting settings in the individual RED, GREEN, BLUE using a display colorimeter is recommended for color accuracy. [M]. - Page 19 The COLOR TEMPRATURE USER allows you to individual RED, GREEN, and BLUE settings to your preference. When adjusting settings in the individual RED, GREEN, BLUE using a display colorimeter is recommended for color accuracy. f) Using the [M]. buttons, navigate to either USER RED, USER GREEN, or USER BLUE and press g) Next use the [M] to buttons to adjust the settings from 0 to 255 to your desired color settings and press...
-
Page 20: Color Effect - Presets
COLOR EFFECT The COLOR EFFECT setting allows you to apply several pre-set color settings for your preference. The available COLOR EFFECT preset settings are USER, STANDARD, GAME, MOVIE, PHOTO and VIVID. [M]. a) To bring up the OSD Main Menu, press b) Using the [M] to enter the COLOR sub-menu. -
Page 21: Color Effect User
COLOR EFFECT USER IMPORTANT NOTE: When adjusting settings in the COLOR (SUB-MENU), using a display colorimeter is recommended. To enable COLOR EFFECT USER settings, the above COLOR EFFECT setting must be set to USER. The COLOR EFFECT USER settings allow you to adjust the individual HUE and SATURATION settings for the monitor. [M]. - Page 22 f) Using the [M]. a nd buttons, navigate to any of the individual HUE and SATURATION settings and press g) Next use the [M] to buttons to adjust the settings from 0 to 100 to your desired settings and press confirm the settings.
-
Page 23: Color Format
COLOR FORMAT The COLOR FORMAT setting allows you to adjust between RGB and YUY (For PAL). We recommend using the default COLOR FORMAT setting RGB. [M]. a) To bring up the OSD Main Menu, press b) Using the [M] to enter the COLOR sub-menu. buttons, navigate to COLOR and press c) Using the [M]. -
Page 24: Print And Color Management (Pcm)
PRINT and COLOR MANAGEMENT (PCM) The PCM (Print and Color Management) settings allow you to switch between the settings USER (From your custom USER settings in COLOR TEMP and COLOR EFFECT USER), NATIVE, sRGB, and AdobeRGB to match your professional printer color output [M]. -
Page 25: Hue
IMPORTANT NOTE: When adjusting settings in the COLOR (SUB-MENU), using a display colorimeter is recommended. This setting allows you to adjust the overall HUE settings of the monitor. [M]. a) To bring up the OSD Main Menu, press b) Using the [M] to enter the COLOR sub-menu. -
Page 26: Saturation (Page 2 Of Color Sub-Menu Osd)
SATURATION IMPORTANT NOTE: When adjusting settings in the COLOR (SUB-MENU), using a display colorimeter is recommended. The SATURATION setting allows you to adjust the overall SATURATION setting of the monitor. [M]. a) To bring up the OSD Main Menu, press b) Using the [M] to enter the COLOR sub-menu. -
Page 27: On Screen Display (Osd) - Advance Settings Sub-Menu
On Screen Display (OSD) ADVANCE (Sub-Menu) ASPECT RATIO The ASPECT RATIO allows you to adjust the aspect ratio of the monitor to FULL, 16:9, 4:3, 5:4, 1:1, REDUCE, and ENLARGE. [M]. a) To bring up the OSD Main Menu, press b) Using the [M] to enter the ADVANCE sub-menu. -
Page 28: Over Scan
OVER SCAN The OVERSCAN settings allow you to adjust the overs can and under scan of the image or video for the monitor. [M]. a) To bring up the OSD Main Menu, press b) Using the [M] to enter the ADVANCE sub-menu. buttons, navigate to ADVANCE and press c) Using the [M]. -
Page 29: Over Drive
Last, press [E] to exit out of the ADVANCE sub-menu or proceed to the next ADVANCE setting you want to adjust. Note: The NX-EDG274K has adaptive – over drive working with FreeSync ON at the default OVER DRIVE setting. -
Page 30: Ddcci (Display Data Channel Command Interface)
DDC/CI to OFF. The DDC/CI protocol is mainly used to control the settings of display devices, such as brightness and contrast. It is a half-duplex communication protocol based on the I2C protocol. The PC initiates a control request and displays device in passive response mode. Nixeus does not provide the software to use with DDCI features. -
Page 31: Ultra Vivid
ULTRA VIVID The ULTRA VIVID settings allow you to control the over vivid colors or Red, Green and Blue. [M]. a) To bring up the OSD Main Menu, press b) Using the [M] to enter the ADVANCE sub-menu. buttons, navigate to ADVANCE and press c) Using the [M]. -
Page 32: Dcr (Dynamic Contrast Ratio)
DCR (Dynamic Contrast Ratio) The DCR (Dynamic Contrast Ratio) settings allows you to enable the monitor’s internal processing to automaticall increase the contrast ratio of the monitor for particular white or darker images/videos. Leaving this setting ON may cause minor brightness flickering when moving the mouse cursor between dark and light images. We recommend leaving this setting OFF. -
Page 33: Dp Option (Displayport Version Option)
ADVANCE sub-menu or proceed to the next ADVANCE setting you want to adjust. Note: To support the NX-EDG274K native full 3840 x 2160 (4K) resolution with native 144Hz refresh rate, please leave the DP OPTION settings at 1.4 (DisplayPort 1.4) for but DisplayPort inputs (D0 and D1) since at that setting the monitor is... -
Page 34: Dsc (Display Stream Compression)
2000 Graphics Card Series or Newer, or Nvidia GTX 1600 Graphics Card Series are required with a Certified DisplayPort 1.4 cable to support DSC for the NX-EDG274K to support its native 4K 144Hz features. When switching between 144Hz and lower refresh rates, you may hear an audio “POP” sound – please do not be alarmed, this is just DSC switching between ON and OFF (since DSC is not need at lower refresh rate settings). -
Page 35: Freesync (Page 2 Of Advance Sub-Menu Osd)
Free Sync (AMD FreeSync) The NX-EDG274K has an AMD FreeSync Premium Certified range of 48Hz to 144Hz for both of its DisplayPort inputs. By default the NX-EDG274K FreeSync is set at OFF. We recommend setting FREESYNC ON in the OSD Settings and using Radeon Software to turn FreeSync OFF or ON (Or Nvidia settings for G-Sync). -
Page 36: Osd - On Screen Display Sub-Menu
OSD (On Screen Display Menu Settings) RESET The RESET setting allows you to reset the monitor back to its original factory settings. [M]. a) To bring up the OSD Main Menu, press b) Using the [M] to enter the OSD sub-menu. buttons, navigate to OSD and press c) Using the [M]. -
Page 37: Menu Time
MENU TIME The MENU TIME setting allows you adjust the time the OSD Menu stays active on your monitor from 10 second to 60 seconds. [M]. a) To bring up the OSD Main Menu, press b) Using the [M] to enter the OSD sub-menu. buttons, navigate to OSD and press c) Using the [M]. -
Page 38: Osd H Position
OSD H POSITION (On Screen Display Horizontal Position) The OSD H POSITION setting allows you to move the location of the monitor’s OSD MENU from left to right on the monitor screen. [M]. a) To bring up the OSD Main Menu, press b) Using the [M] to enter the OSD sub-menu. -
Page 39: Osd V Position
OSD V POSITION (On Screen Display Vertical Position) The OSD V POSITION setting allows you to move the location of the monitor’s OSD MENU from towards the top or bottom on the monitor screen. [M]. a) To bring up the OSD Main Menu, press b) Using the [M] to enter the OSD sub-menu. -
Page 40: Language
LANGUAGE The LANGUAGE setting allows you to switch the language of the OSD between ENGLISH or CHINESE. [M]. a) To bring up the OSD Main Menu, press b) Using the [M] to enter the OSD sub-menu. buttons, navigate to OSD and press c) Using the [M]. -
Page 41: Osd Transparency
OSD TRANSPARENCY The OSD TRANSPARENCY allows you to adjust the level of transparency of the OSD Menu. [M]. a) To bring up the OSD Main Menu, press b) Using the [M] to enter the OSD sub-menu. buttons, navigate to OSD and press c) Using the [M]. -
Page 42: Osd Rotate
OSD ROTATE The OSD ROTATE setting allows you to rotate the OSD menu to your preferred orientation. [M]. a) To bring up the OSD Main Menu, press b) Using the [M] to enter the OSD sub-menu. buttons, navigate to OSD and press c) Using the [M]. -
Page 43: On Screen Display (Osd) - Ultra Hdr (High Dynamic Range) Sub-Menu
ULTRA HDR (High Dynamic Range) IMPORTANT NOTE: When adjusting settings in the HDR (SUB-MENU), using a display colorimeter is recommended. To enable HDR features, your operating system and graphics card must also support HDR. We recommend leaving the HDR setting on AUTO and to enable HDR to go into Windows 10 HDR setting to turn HDR ON to enable HDR for the display. -
Page 44: Dark Enhance
DARK ENHANCE NOTE: To enable DARK ENHANCE, HDR setting must be setting must be set at FORCE ST .2084. [M]. a) To bring up the OSD Main Menu, press b) Using the [M] to enter the OSD sub-menu. buttons, navigate to ULTRA HDR and press c) Using the [M]. -
Page 45: Sharp Enhance
SHARP ENHANCE NOTE: To enable SHARP ENHANCE, HDR setting must be setting must be set at FORCE ST .2084. [M]. a) To bring up the OSD Main Menu, press b) Using the [M] to enter the OSD sub-menu. buttons, navigate to ULTRA HDR and press c) Using the [M]. -
Page 46: Hdr Contrast
HDR CONTRAST NOTE: To enable HDR CONTRAST, HDR setting must be setting must be set at FORCE ST .2084. [M]. a) To bring up the OSD Main Menu, press b) Using the [M] to enter the OSD sub-menu. buttons, navigate to ULTRA HDR and press c) Using the [M]. -
Page 47: Color Enhance
COLOR ENHANCE NOTE: To enable COLOR ENHANCE, HDR setting must be setting must be set at FORCE ST .2084. [M]. a) To bring up the OSD Main Menu, press b) Using the [M] to enter the OSD sub-menu. buttons, navigate to ULTRA HDR and press c) Using the [M]. -
Page 48: Light Enhance
LIGHT ENHANCE NOTE: To enable LIGHT ENHANCE, HDR setting must be setting must be set at FORCE ST .2084. [M]. a) To bring up the OSD Main Menu, press b) Using the [M] to enter the OSD sub-menu. buttons, navigate to ULTRA HDR and press c) Using the [M]. -
Page 49: On Screen Display (Osd) - Audio Sub-Menu
AUDIO (On Screen Display Sub-Menu) VOLUME The VOLUME setting allows you to adjust the sound volume of the monitor’s speakers. [M]. a) To bring up the OSD Main Menu, press b) Using the [M] to enter buttons, navigate all the way to the right or left to page two to AUDIO and press the OSD sub-menu. -
Page 50: Mute
MUTE The MUTE setting allows you to mute the sound from the monitor’s speakers. [M]. a) To bring up the OSD Main Menu, press b) Using the [M] to enter buttons, navigate all the way to the right or left to page two to AUDIO and press the OSD sub-menu. -
Page 51: Audio Source
AUDIO SOURCE The AUDIO SOURCE allows you to change the sound from the computer to be outputted to the monitors internal speakers to or your external speakers/headphones connected to the monitor’s 3.5mm audio input. [M]. a) To bring up the OSD Main Menu, press b) Using the [M] to enter buttons, navigate all the way to the right or left to page two to AUDIO and press... -
Page 52: Warranty Information
• After an RMA number is assigned, the defective/malfunctioning product must be packaged securely in the original or other suitable shipping package to ensure that it will not be damaged in transit to Nixeus Technology, Inc. The RMA number must be visibly and clearly marked on the outside of the package. - Page 53 Improper or incorrectly performed service maintenance or repairs voids this Limited Warranty. Products that Nixeus’ judge to have been subjected to abuse, accident, alteration, modification, tampering, negligence, misuse, faulty installation, repair or service in any way that is not contemplated in the documentation for the product, or if the model or serial number has been altered, tampered with, defaced or removed, product failures due to power outages, and cosmetic damage, and does not limit damage that are caused by shipment, due to act of God.
-
Page 54: Electronics Recycling And Proper Electronics Disposal
Disclaimer: Nixeus Technology, Inc is not responsible for any misspellings, typographical errors or omissions to this user manual. The contents of this user manual is subject to revisions and changes at any time. AMD, Radeon, FreeSync, Nvidia, Microsoft, G-Sync and all...
Need help?
Do you have a question about the NX-EDG274K and is the answer not in the manual?
Questions and answers