
Related Manuals for Avonic AV-CM41-VCUC-B


Summary of Contents for Avonic AV-CM41-VCUC-B
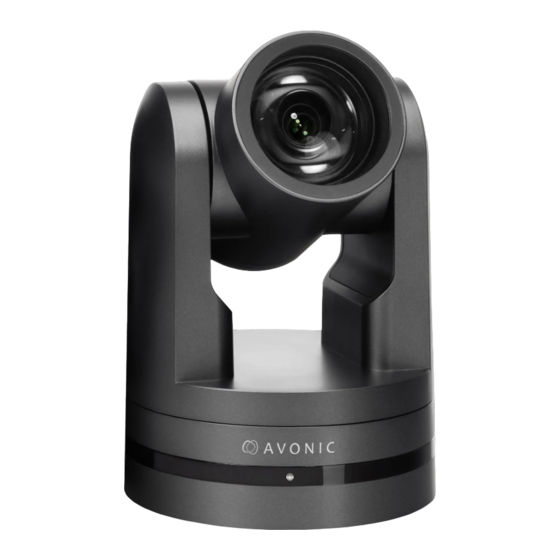
- Page 1 Video Conference Camera USB2.0 Black AV-CM4 -VCUC-B www.avonic.com User Manual | Version 1.0.2...
-
Page 2: Table Of Contents
Join Avonic ................ - Page 3 WebGUI ....................... .. Visca over Serial properties ..................33 Visca over IP properties and command list ............. 33 Pelco-D Protocol Command List ................43 Pelco-P Protocol Command List ................44 Appendix B Dimensions ....................45 CMOS Image Sensors Characteristics ..............46 www.avonic.com...
-
Page 4: Introduction
For any questions or suggestions, contact your reseller or the local distributor of Avonic. Find the local distri- butor on the website of Avonic. For the most recent version of the manual or datasheet, look at the Avonic website: www.avonic.com. -
Page 5: Safety Notes
Installation Set up this Product on a hard, stable surface or mount it to a wall or ceiling. Only use an Avonic mount for mounting to a wall or ceiling. Ensure the mounting construction is capable of supporting four times the weight of the Product. - Page 6 Power adapter To operate the Avonic power adapter safely and reduce the possibility of heat-related injury or damage, plug the power adapter directly into a power outlet. Don’t use the power adapter in wet locations, and don’t connect or disconnect the power adapter with wet hands. Stop using the power adapter and any cables if any of the following conditions exist: •...
-
Page 7: Package Contents And Accessories
PACKAGE CONTENTS AND ACCESSORIES Contents Quantity Description Avonic SKU AV-CM4 -VCUC 1 pc PTZ Camera 1 pc Remote Control AV-CM40-RC 1 pc USB cable type A to type A AV-USB20-AA 1 pc Power Supply 12V/A AV-CM40-PSU 1 pc RS232 9-pin D-Sub female to DIN -8 male... -
Page 8: Accessoiries
SKU black: AV-MT200-B PRODUCT OVERVIEW The Avonic AV- -VCUC is a high-quality PTZ camera, with USB2.0 output. The camera is designed for fixed installations and works very well in low light conditions. The camera is equipped with high quality components like a Panasonic CMOS sensor and a glass lens with x optical zoom. -
Page 9: Installation
RS-232 mini-DIN-8 IN (connect the supplied RS-232 cable) RS-232 mini-DIN-8 OUT for daisy chaining RS-232 connection USB2.0 Type A, UVC video output RJ45 Ethernet connection for IP control or firmware update DC12V power with locking screw (connect the supplied DC PSU) Power ON/OFF www.avonic.com... -
Page 10: System Select Switch
If you are not using the RS232 9-pin D-Sub female to DIN -8 male cable supplied in the box, connect the controller to the back of the camera as is shown in the respectively figures below for Windows DB-9 and Mini-DIN-8. The photo below is a picture of the RS-232 interface of the back of the camera. www.avonic.com... -
Page 11: Rs232 Network Connection Diagram
5m. IP network connection diagram Connect an Avonic camera to a LAN using a standard switch Addressing is done via IP, the Visca address in a Visca over ip environment is always 1. IP controller... -
Page 12: Serial Communication Control
Serial Communication Control COM port settings In default working mode, an Avonic camera is able to connect to a VISCA controller with RS-232 or RS-485 serial interface. The camera can be controlled via RS-232, the parameters of RS-232C are as follows: •... -
Page 13: Operation
OPERATION Remote controller Power Camera select Number Keys Focus + - Auto/Manual Focus Zoom + - Set & Clear Preset PTZ keys (up/down/left/right) Home BLC (Back Light Control) ON/OFF Menu Function Keys (F1/F2/F3/F4) Blank buttons www.avonic.com... - Page 14 + -“ are disabled. When the camera is in “manual focus” modus and the Zoom buttons are used, the camera automatically switces to auto-focus. Zoom + - Zoom the camera with these buttons. When the camera is in “manual focus” modus and the Zoom buttons are used, the camera automatically switches to auto-focus. www.avonic.com...
-
Page 15: Other Key Combinations
[*]+[#]+[9] : Flip switch (just temporary flip to view the image flipped) [*]+[#]+[Auto] : Enter into the aging mode, only for quality control purposes [*]+[#]+[Manual] : Restore the default username, password, and IP address [#]+[#]+[#] : Clear all presets www.avonic.com... -
Page 16: Osd Menu
OSD MENU The OSD menu can be accessed by the Remote Control or an Avonic PTZ controller. In the following pages, the navigating is described for using the IR Remote Control. www.avonic.com... -
Page 17: Menu
Visca Address 1 ~ 7 Visca Address Fix ON / OFF PELCO-P Address 1 ~ 255 PELCO-D Address 1 ~ 255 Baudrate 2400 / 4800 / 9600 / 115200 / 38400 AutoFlip ON/OFF Select Item Change Value [Menu] Back www.avonic.com... -
Page 18: Camera
Remember that this is a software setting, take care to not ‘overdo’ the settings or the picture will become washed out bright or too dark to make out details in shadows. www.avonic.com... - Page 19 If you don’t know exactly what you are doing or the light conditions change a lot, it’s best practice to keep the camera on the automatic exposure setting. www.avonic.com...
- Page 20 Bright level, Gain limit and DRC as low as possibly acceptable to avoid getting too much noise in the picture. If the level of noise in the image becomes unacceptable, noise reduction is available to smooth the picture over.. (See page 23) www.avonic.com...
- Page 21 How saturated the image’s colors are. 0% would produce a black and white image. Hue or tint The balance between green and red. 0 is green, 14 is red. AWB or Auto White Balance Sensitivity how quickly the camera responds to changing light settings. www.avonic.com...
- Page 22 The Dynamic Contrast affects the contrast of the picture. The higher the number, the more contrast you will get. Image Quality Improves the image quality by making the picture slightly more saturated. www.avonic.com...
- Page 23 ‘crispness’of the image. Better practice is to add light to the filmed object to avoid having your dynamic contrast and gain set too high, causing noise in the first place. www.avonic.com...
-
Page 24: Ptz
Preset Pan, Tilt and Zoom Speed: This mode affects the speed to which the camara is switching from one preset to another when you use your (remote) controller. The higher the number, the faster it will switch. www.avonic.com... -
Page 25: Network
AF Version date [Menu] Back 7. RESTORE DEFAULT Here you can restore all the settings to the factory default settings by selecting YES. RESTORE DEFAULT Restore default? NO / YES Select Item Change Value [Menu] Back [Home] OK www.avonic.com... -
Page 26: Webgui
The login screen looks like this: Network In the Network Tab network IP settings can be changed. These settings involve DHCP or fixed IP address, DNS- and port settings. Save changed settings and Reboot the camera to activate any changes. www.avonic.com... -
Page 27: Port Settings
The MAC Address can be found on the last visible line. Save to apply settings, a small dialogue screen appears in the bottom right of the window telling the settings are saved successfully and that a reboot is needed for the changes to take effect. www.avonic.com... -
Page 28: System
Update The update form gives information on the current firmware versions and the possibility to update the firmware by choosing an upgrade file provided by Avonic. Do not turn off the camera while updating. Default This will restore the factory settings. -
Page 29: Reboot
You can set the speed to which the camera will zoom in to the image. The higher te num- ber, the faster the camera will zoom in. This works only when the remote controller is used to control te camera. www.avonic.com... -
Page 30: Maintenance
Turn the camera off and on again and check if the problem persists. • Restore to Factory Default Power Issues • No self-test (applies only to PTZ cameras) and no power LED Check the net power Check the power supply Check the physical power button on the back of the camera www.avonic.com... -
Page 31: Image
Faces: partly hidden faces, sideways filmed faces, diagonal or up side down When the camera itself moves, or when the iris is narrowed down Note: When you experience one or more of the above mentioned problems check also our Appendix D - CMOS characteristics. www.avonic.com... -
Page 32: Control
Reset the factory default ip settings by pressing [*] [#] [Manual] and Reboot • Firmware update failed Check firmware file integrity, download it again. Make sure you are trying to flash the UVC file for the correct color camera (ARM is generic, UVC is color dependant) www.avonic.com... -
Page 33: Visca Over Serial Properties
VISCA OVER IP PROPERTIES AND COMMAND LIST The Avonic IP camera is implemented with a TCP server. The TCP port number is 1259 by default and can be altered in the WebGUI. Once the connection between client and server is set up, the client will be able to send PTZ commands to the server. - Page 34 90 6y 41 FF Returned when a com- table (y: Execution com- mand cannot be exe- mand Socket No. cuted due to current Inquiry command: 0) conditions. For exam- ple, when commands controlling the focus manually are received during auto focus. www.avonic.com...
- Page 35 81 01 04 38 10 FF OnePush Mode 81 01 04 38 04 FF OnePush Trigger 81 01 04 18 01 FF CAM_ZoomFocus Direct 8x 01 04 47 0p 0q 0r 0s 0t pqrs: Zoom Position 0u 0v 0w FF tuvw: Focus Position www.avonic.com...
- Page 36 81 01 04 0C 00 FF Gain Setting 81 01 04 0C 02 FF Down 81 01 04 0C 03 FF Direct 81 01 04 0C 00 00 0p 0q pq: Gain Position Gain Limit 81 01 04 2C 0p FF p: Gain Position www.avonic.com...
- Page 37 Sharpness Manual CAM_Apertu- Reset 81 01 04 02 00 FF Aperture Control re(sharpness) 81 01 04 02 02 FF Down 81 01 04 02 03 FF Direct 81 01 04 42 00 00 0p 0q FF pq: Aperture Gain www.avonic.com...
- Page 38 81 01 06 02 VV WW 0Y 0Y 0Y 0Y 0Z 0Z 0Z 0Z FF RelativePosition 81 01 06 03 VV WW 0Y 0Y 0Y 0Y 0Z 0Z 0Z 0Z FF Home 81 01 06 04 FF Reset 81 01 06 05 FF www.avonic.com...
- Page 39 Iris priority 90 50 0D FF Bright CAM_ShutterPo- 81 09 04 4A FF 90 50 00 00 0p 0q FF pq: Shutter Position sInq CAM_IrisPosInq 81 09 04 4B FF 90 50 00 00 0p 0q FF pq: Iris Position www.avonic.com...
- Page 40 81 09 06 06 FF 90 50 02 FF 90 50 03 FF CAM_LR_Rever- 81 09 04 61 FF 90 50 02 FF seInq 90 50 03 FF CAM_PictureFlipInq 81 09 04 66 FF 90 50 02 FF 90 50 03 FF www.avonic.com...
- Page 41 90 50 00 FF 90 50 01 FF Center 90 50 02 FF Bottom CAM_ColorHueInq 81 09 04 4F FF 90 50 00 00 00 0p FF p: Color Hue setting 0h (− 14 degrees) to Eh ( +14 degrees) www.avonic.com...
- Page 42 81 01 7E 01 0A 00 02 03 FF Tally Light Red ON Green 81 01 7E 01 0A 00 03 02 FF Tally Light Green ON 81 01 7E 01 0A 00 03 03 FF Tally Light OFF www.avonic.com...
-
Page 43: Pelco-D Protocol Command List
0x00 0x00 Query Tilt Position 0xFF Address 0x00 0x5B Value Value Response High Byte Low Byte Query Zoom Position 0xFF Address 0x00 0x55 0x00 0x00 Query Zoom Position 0xFF Address 0x00 0x5D Value Value Response High Byte Low Byte www.avonic.com... -
Page 44: Pelco-P Protocol Command List
Query Tilt Position 0xA0 Address 0x00 0x5B Value Value 0xAF Response High Byte Low Byte Query Zoom Position 0xA0 Address 0x00 0x55 0x00 0x00 0xAF Query Zoom Position 0xA0 Address 0x00 0x5D Value Value 0xAF Response High Byte Low Byte www.avonic.com... -
Page 45: Appendix B Dimensions
APPENDIX B - DIMENSIONS www.avonic.com... -
Page 46: Cmos Image Sensors Characteristics
In this example, the dots represent the sampled data and the curve represents the original signal. Because there are too few sampled data points, the resulting pattern produced by the sampled data is a poor representation of the original. www.avonic.com... - Page 47 Depending on lighting types, such occurrences may not be improved with the antiflicker setting. It is recommended to set the shutter speed to 1/100 sec. in the areas of 50 Hz power supply frequency and to 1/60 in the areas of 60 Hz. www.avonic.com...
Need help?
Do you have a question about the AV-CM41-VCUC-B and is the answer not in the manual?
Questions and answers