Table of Contents
Advertisement
Quick Links
Advertisement
Table of Contents

Related Manuals for Avonic AV-CM40-W


Summary of Contents for Avonic AV-CM40-W
- Page 1 Avonic PTZ Camera 20x zoom AV-CM40 www.avonic.com | User Manual | Version 1.42...
-
Page 2: Disclaimer, Contact, Ip Rating And Ce Marking
“look and feel” and arrangement of such Content, contained in this Manual is owned, controlled or licensed by or to Avonic, and is protected by trade dress, copyright, patent and trademark laws, and various other intellectual property rights and unfair competition laws. -
Page 3: Eu Declaration Of Conformity
EU Declaration of Conformity The Avonic Declaration of Conformity is in accordance with EN ISO/IEC 17050-1 and generated using the ProductIP compliance platform. Below are two declaration of conformities documented: one for the AV-CM-40- W (White) and one for the AV-CM40-B (Black). - Page 4 4. The object of the declaration described in point 1 is in conformity with the EMC2014/30/EU 5. Standards: EN 55032: 2015 EN 61000-3-2: 2014 EN 61000-3-3: 2013 EN 55024: 2010+A1: 2015 6. Signed for and on behalf of Avonic: Delfgauw, 25th of April, 2019 Martijn van Bodegom, Product Manager User Manual | www.avonic.com...
-
Page 5: Important Information
Important Information Liability Avonic will NOT be held responsible for any damage or injury caused by unqualified persons carrying out these tasks, or by not following the instructions in this Manual. Intended Use and Non-Intended Use Installation The following applies to the installation of the camera: •... - Page 6 On-Screen Display Power over Ethernet Pan / Tilt / Zoom RTMP Real-Time Messaging Protocol RTSP Real-Time Streaming Protocol Shutter Auto Exposure Serial Digital Interface Stock Keeping Unit Signal to Noise Ratio Secure Reliable Transport User Datagram Protocol User Manual | www.avonic.com...
-
Page 7: Table Of Contents
Set........................22 c. Camera Select....................22 d. Number Keys....................22 e. Focus + -......................22 f. Auto/Manual Focus................... 22 g. Zoom + -......................23 h. Set & Clear Preset................... 23 i. PTZ Keys (up/down/left/right)................23 j. Home....................... 23 User Manual | www.avonic.com... - Page 8 Visca over Serial Connection..................45 VISCA over IP.......................45 Visca over IP using the full Sony Visca protocol.............47 Camera Return Commands................... 48 Camera Control Commands.................. 49 Inquiry Commands....................55 Appendix A1 - Pelco-D Protocol and command List..............58 User Manual viii | www.avonic.com...
- Page 9 Appendix A2 - Pelco-P Protocol and command List..............59 Appendix B - Dimensions....................... 60 Appendix C - CMOS Image Sensor Characteristics..............61 White Flecks......................... 61 Aliasing.........................61 Focal Plane........................61 Flash Band........................61 Flicker...........................61 User Manual | www.avonic.com...
-
Page 10: Introduction
This Manual describes the safety precautions and the instructions for safe unpackaging, installation, operation, maintenance and disposal of the Avonic CM40 camera. In this Manual the Avonic CM40 camera is referred to as the 'Product'. Target Audience This Manual is developed for installation technicians who install the Product at client sites, and for IT professionals who are responsible for operating the Product. -
Page 11: Safety
• Set up this Product on a hard, stable surface or mount it to a wall or ceiling. • ONLY use an Avonic mount for mounting to a wall or ceiling. • Ensure the mounting construction is capable of supporting four times the weight of the Product. (See 'General Specifications >... -
Page 12: Ventilation
• Don’t open this Product and don’t attempt to repair it yourself. Disassembling the Product may damage it or may cause injury to you. • If this Product is damaged, malfunctioning, or if it comes into contact with liquid, contact Avonic or an Avonic Authorized Service Provider. -
Page 13: Product Overview
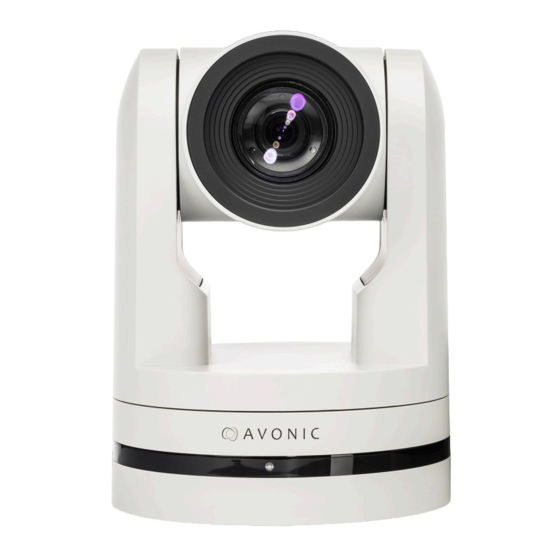
Product Overview Description The Avonic AV-CM40 is a high-quality PTZ camera with 20x optical zoom and a 54.7° horizontal field of view. Its High SNR CMOS combined with digital noise reduction makes this camera extremely silent and delivers a pristine video quality even under very low light conditions. -
Page 14: Unpacking
2. Handling Precautions 3. Unpacking the Camera 4. Return Procedure Package Contents The following tables contains an overview of the package contents of the Product. Quantity Description Avonic SKU 1 pc PTZ Camera AV-CM40-W/B 1 pc Remote Control AV-CM40-RC 1 pc... -
Page 15: Unpacking The Camera
The camera should be in its protective foam as follows: Figure 5: Camera in Foam 3. Verify that the plastic camera bag is sealed. If this is NOT the case, contact Avonic and stop here. 4. Break the seal of the sealed camera bag. -
Page 16: Mounting And Installation
Mounting on Wall or Ceiling The following accessories (AV-MT200 and AV-MT250) are separately available if the client wants to mount the camera to the wall or ceiling. Contact your Avonic reseller or local distributor for purchasing details. Wall and Ceiling mount (AV-MT200) -
Page 17: Connecting The Components To The Camera
White Balance). You can access all other settings through the OSD Menu of the camera using the controller. The camera(s) can be connected via a serial connection to USB, HDMI, SDI, RS-232, RS-485, or via a LAN Ethernet connection. Each of these options is described below. User Manual | www.avonic.com... -
Page 18: Connecting Via Usb, Hdmi Or Sdi
Connect the controller to the back of the camera via the RS-232 cables as shown in the figures below: Figure 7: RS-232 Interface (Mini DIN-8) Figure 8: RS-232 Cable and Interface Connection (Mini DIN-8 and Windows DB-9) User Manual | www.avonic.com... - Page 19 RS-485 Network Connection Execute the following steps to connect multiple cameras to RS-485: 1. Attach the cameras to a 2-wire twisted pair bus (maximum length 1200m) that is terminated at both ends with a 120Ω-impedance resistor. User Manual | www.avonic.com...
-
Page 20: Connecting Via Lan
Figure 11: RS-485 Network Connection Diagram Connecting via LAN Avonic cameras can be controlled by any device using the Visca over IP protocol (see the command list in Appendix A - VISCA Settings and Command List). Settings By default, the IP address of the camera is "192.168.5.163"... -
Page 21: Operation
1. Press the Power button to turn on the camera. If the position preset '0' has been stored, this will be called after initialization. 2. Press the Power button again to turn the camera off. It will turn to the back when turned off, this is called the “privacy mode”. User Manual | www.avonic.com... -
Page 22: Set
If the camera does not respond, check if the camera is set to auto-focus. f. Auto/Manual Focus Set the camera to 'auto focus' or 'manual focus'. If the camera is configured to 'auto focus', the buttons [Focus + -] are disabled. User Manual | www.avonic.com... -
Page 23: Zoom
2. If the menu is not in English, press [*]→[#]→[4] to change the Menu language into English. m. Function Keys (F1/F2/F3/F4) Used to configure the IR channel of the camera. See 'c. Camera Select' above for instructions. n. Blank Buttons These buttons have NO function with this camera. User Manual | www.avonic.com... -
Page 24: Other Key Combinations
The camera returns to the video output setting of the rotary dial after a reboot. Use ONLY presets between 0-9 when using the Remote Control. For presets 10 or higher you need a serial or IP connection! User Manual | www.avonic.com... -
Page 25: Using The Select Switch
• There are four ways to select the video output of the camera (OSD / direct button combination on the remote control / WebGUI / rotary dial). The rotary dial takes priority after a reboot, except on setting F, where all the outputs are defined digitally. User Manual | www.avonic.com... -
Page 26: Osd Menu
The OSD Menu is visible on the HDMI, SDI, USB and IP outputs. The OSD menu can be accessed by the Remote Control or an Avonic PTZ controller. Figure 16: OSD menu structure User Manual | www.avonic.com... -
Page 27: Menu
VISCA address, you set the VISCA address. If you are using PELCO-P or D you set the PELCO address. 2. Set the Baudrate (2400 - 115200). 3. If you want to flip the picture up side down, you can set the Autoflip to "ON". User Manual | www.avonic.com... -
Page 28: Camera
Figure 20: OSD - EXPOSURE If you click in the field after the option ‘mode’, you will see that you have the following Exposure options: Auto, Manual, SAE, AAE and Bright. These options are described below. User Manual | www.avonic.com... - Page 29 This can be a particular helpful setting when the light conditions are challenging. The differences should be clearly visible in dark parts of the image, as they will become lighter/more grey as the level of DRC increases. User Manual | www.avonic.com...
-
Page 30: Color
The color modes inside the camera are designed in such a way that the video output of the camera can match the current light conditions to produce accurate colors. There are several automatic preset modes and a manual mode to set the colors to the preference of the user. User Manual | www.avonic.com... -
Page 31: Image
Hue or tint The balance between green and red. 0 is green, 14 is red. AWB Sensitivity This setting indicates how quickly the camera responds to changing light settings. 3.3 IMAGE Figure 24: OSD - IMAGE User Manual | www.avonic.com... -
Page 32: Focus
‘Medium’, the camera will not react to sudden and short changes in the picture. Note that in some cases the autofocus will have some difficulties to focus. We strongly recommend to focus manually to avoid autofocus issues. See also the Troubleshooting/ Image in this manual. User Manual | www.avonic.com... -
Page 33: Noise Reduction
Here, you can choose the style you want, such as Default (standard setting), Normal (which makes the picture more ‘natural’), Clarity (makes the picture more clear), Bright (which makes the picture more bright) and Soft (which softens the picture). Figure 27: OSD - STYLE User Manual | www.avonic.com... -
Page 34: Ptz
5. VIDEO Format Figure 29: WebGUI > VIDEO > Output Format Here you can select which Video Format you want. This setting is related to the output resolution and frame rate on the HDMI and SDI connectors. User Manual | www.avonic.com... -
Page 35: Network Settings
No changes can be made. This is to view the MCU, Camera and AF Version you have. 8. RESTORE DEFAULT Figure 32: OSD - RESTORE DEFAULT Here you can restore all the settings to the factory default settings by selecting YES. User Manual | www.avonic.com... -
Page 36: Webgui
169.254.0.0 and 169.254.255.255. The IP address is shown on the screen at start-up. After a successful login, the WebGUI is displayed. Here, you can select various tabs that are described below. AUDIO Figure 34: WebGUI > Audio Make your settings as follows: User Manual | www.avonic.com... -
Page 37: Network
Click SAVE to apply your settings. A small confirmation dialogue appears in the bottom right corner. NETWORK - Ethernet In this section, you can specify the IP settings for the Ethernet adapter. Figure 36: WebGUI > NETWORK > Ethernet Execute the following steps to save your settings: User Manual | www.avonic.com... -
Page 38: System
By default, this screen shows a readout of the current firmware versions. The Update file provides a firmware upgrade functionality via this screen. When the camera is done uploading and processing the update, it will automatically reboot. Execute the following steps to perform a firmware upgrade. User Manual | www.avonic.com... - Page 39 Click on the button Reboot to reboot the camera. It will be ready for use again after the boot cycle. P/T/Z Figure 42: WebGUI > SYSTEM > P/T/Z In this window, you can define various P/T/Z settings for your camera. See OSD Menu - PTZ. User Manual | www.avonic.com...
-
Page 40: Maintenance
• Do not film extreme bright objects for a prolonged period of time, such as sunlight, light sources, etc. • Do not operate in unstable lighting conditions, otherwise the produced image could be less than optimal. • Do not operate close to powerful electromagnetic radiation, such as TV or radio transmitters, etc. User Manual | www.avonic.com... -
Page 41: Transport And Storage
Specific guidelines apply to the environmental temperature and humidity when operating and storing the camera. See 'Operating humidity' and 'Storage temperature' in the provided Datasheet for the applicable values. User Manual | www.avonic.com... -
Page 42: Disposal And Recycling
In general, the term 'E-Waste' applies to items of all types of electrical and electronic equipment and its parts that have been discarded by the owner as waste without the intention of re-use. Avonic outsources the disposal and recycling of its E-Waste camera materials to the Stichting Open. https://stichting-open.org/ for more information about the disposal and recycling. -
Page 43: Troubleshooting
3. Check the Noise Reduction settings in the OSD. Color issues Check the OSD settings for exposure, white balance, color temp, Red and Bluetuning. When experiencing image problems, you may also check Appendix D - CMOS Image Sensor Characteristics. User Manual | www.avonic.com... -
Page 44: Autofocus Issues
4. Reset the factory default IP settings by pressing [*] [#] [Manual] and Reboot. Firmware update failed 1. Check firmware file integrity, download it again. 2. Make sure you are trying to flash the UVC file for the correct color camera (ARM is generic, UVC is color-dependent). User Manual | www.avonic.com... -
Page 45: Appendix A - Visca Settings And Command List
You can use Hercules SETUP Utility application and a serial connection to make this work. VISCA over IP Avonic IP cameras are implemented with a TCP and an UDP server. The TCP as well as the UDP port are by default set to port 1259. - Page 46 Note that the pictures below are ONLY an example to show you how a TCP supported application works. The pictures could be different from the application you are using! VISCA IP address and port VISCA command example User Manual | www.avonic.com...
-
Page 47: Visca Over Ip Using The Full Sony Visca Protocol
Visca over IP using the full Sony Visca protocol All Avonic cameras are capable of being controlled using the UDP Sony version of Visca consisting of long Visca commands, including headers and message counters. The advantage of using this version of Visca is the fact that the camera responds with the same header counter as was used in the command. -
Page 48: Camera Return Commands
• z = Camera Address + 8 • This is one list for all Avonic PTZ Cameras (CM40 series and CM70 series). Some features are CM70 series ONLY and will not work with a CM40 series camera. Return/complete Command Command... -
Page 49: Camera Control Commands
Outdoor mode OnePush mode 8x 01 04 35 03 FF One Push WB mode OnePush trigger 8x 01 04 10 05 FF One Push WB Trigger Manual 8x 01 04 35 05 FF Manual Control mode User Manual | www.avonic.com... - Page 50 8x 01 04 4E 00 00 0p 0q FF pq: ExpComp Position (min pq = 0 max pq = 0E) CAM_BackLight 8x 01 04 33 02 FF Back Light Compensation On/ 8x 01 04 33 03 FF User Manual | www.avonic.com...
- Page 51 8x 01 06 06 03 FF Turns the OSD menu On/Off 8x 01 06 06 02 FF CAM_ColorGain Direct 8x 01 04 49 00 00 00 0P FF p: Color Gain setting 0h (60%) to Eh (200%) User Manual | www.avonic.com...
- Page 52 Autoflip ON Autoflip OFF 8x 01 02 70 03 FF Autoflip OFF CAM_SettingSave Save 8x 01 04 A5 10 FF Save Current Setting CAM_Iridix Direct 8x 01 04 A7 00 00 0p 0q pq: Iridix Position User Manual | www.avonic.com...
- Page 53 = setting (autowhitebalance active) whilemaintaining auto white -10 ~ +10(00~14 HEX) balance active Red_Tuning more orless red while 81 0A 01 12 ppFF pp = setting (autowhitebalance active) maintaining auto white -10 ~ +10(00~14 HEX) balance active User Manual | www.avonic.com...
- Page 54 NOT change to that format.) 02: 1080i60 03: 1080i50 04: 720p60 05: 720p50 06: 1080p30 07: 1080p25 08: 720p30 09: 720p25 0A: 1080p59.94 0B: 1080i59.94 0C: 720p59.94 0D: 1080p29.97 0E: 720p29.97 User Manual | www.avonic.com...
-
Page 55: Inquiry Commands
90 50 03 FF Manual Sharpness CAM_ApertureInq(Sharpness) 8x 09 04 42 FF 90 50 00 00 0p 0q FF pq: Aperture Gain CAM_PictureEffectModeInq 8x 09 04 63 FF 90 50 00 FF Color 90 50 04 FF B&W User Manual | www.avonic.com... - Page 56 90 50 03 FF CAM_BrightnessInq 8x 09 04 A1 FF 90 50 00 00 0p 0q FF pq: Brightness Position CAM_ContrastInq 8x 09 04 A2 FF 90 50 00 00 0p 0q FF pq: Contrast Position User Manual | www.avonic.com...
- Page 57 Iris Position CAM_BrightPosInq 8x 09 04 4D FF 90 50 00 00 0p 0q FF pq: Bright Position CAM_PowerInq 8x 09 04 00 FF y0 50 02 FF y0 50 03 FF Off Off (Standby) User Manual | www.avonic.com...
-
Page 58: Appendix A1 - Pelco-D Protocol And Command List
Query Tilt Position 0xFF Address 0x00 0x5B Value High Value Low Response Byte Byte Query Zoom Position 0xFF Address 0x00 0x55 0x00 0x00 Query Zoom Position 0xFF Address 0x00 0x5D Value High Value Low Response Byte Byte User Manual | www.avonic.com... -
Page 59: Appendix A2 - Pelco-P Protocol And Command List
Address 0x00 0x5B Value High Value Low 0xAF Response Byte Byte Query Zoom Position 0xA0 Address 0x00 0x55 0x00 0x00 0xAF Query Zoom Position 0xA0 Address 0x00 0x5D Value High Value Low 0xAF Response Byte Byte User Manual | www.avonic.com... -
Page 60: Appendix B - Dimensions
Appendix B - Dimensions User Manual | www.avonic.com... -
Page 61: Appendix C - Cmos Image Sensor Characteristics
Depending on lighting types, such occurrences may not be improved with the anti-flicker setting. It is recommended to set the shutter speed to 1/100s in areas of 50 Hz power supply frequency, and to 1/60s in areas of 60 Hz power supply frequency. User Manual | www.avonic.com... - Page 62 Avonic PTZ Camera 20x zoom AV-CM40 Version 1.42 © March 2022...
Need help?
Do you have a question about the AV-CM40-W and is the answer not in the manual?
Questions and answers