Table of Contents
Advertisement
Quick Links
www.northlineexpress.com
Installation and Operation Manual
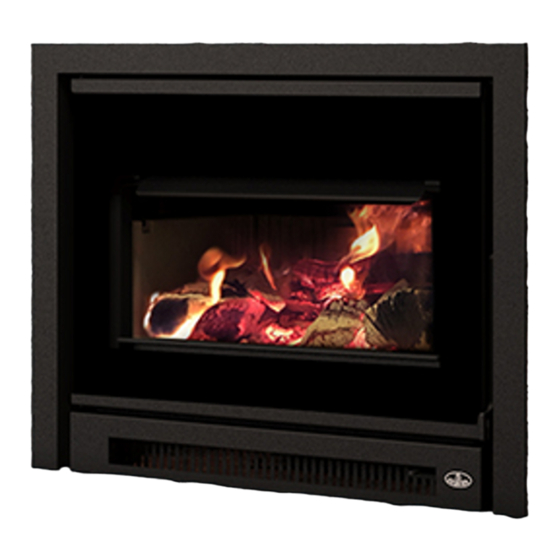
INSPIRE 2000-I INSERT
CONTACT LOCAL BUILDING OR FIRE OFFICIALS ABOUT RESTRICTIONS AND INSTALLATION INSPECTION REQUIREMENTS IN
LOCAL AREA.
READ THIS ENTIRE MANUAL BEFORE INSTALLATION AND USE OF THIS WOOD INSERT. FAILURE TO FOLLOW THESE
INSTRUCTIONS COULD RESULT IN PROPERTY DAMAGE, BODILY INJURY OR EVEN DEATH.
READ AND KEEP THIS MANUAL FOR REFERENCE
Printed in Canada
(OB02045 Model)
1-877-734-2458
Safety tested according to
ULC S628, UL 1482 and UL 737
by an accredited laboratory.
US Environmental Protection Agency
phase II certified wood insert compliant
with 2020 cord wood standard.
45952A
Advertisement
Table of Contents

Related Manuals for Osburn INSPIRE 2000-I


Summary of Contents for Osburn INSPIRE 2000-I
- Page 1 1-877-734-2458 Installation and Operation Manual INSPIRE 2000-I INSERT (OB02045 Model) Safety tested according to ULC S628, UL 1482 and UL 737 by an accredited laboratory. US Environmental Protection Agency phase II certified wood insert compliant with 2020 cord wood standard.
- Page 2 www.northlineexpress.com 1-877-734-2458...
- Page 3 It is also highly recommended to register the warranty online at https://www.osburn-mfg.com/en/warranty/warranty-registration/ Registering the warranty will help to quickly find the information needed on the unit.
-
Page 4: Table Of Contents
www.northlineexpress.com 1-877-734-2458 TABLE OF CONTENTS PART A - OPERATION AND MAINTENANCE ................7 1. Safety Information ......................... 7 2. General Information ....................... 8 Performances ........................ 8 Specifications ....................... 9 Dimensions ........................10 Materials ........................11 Zone Heating .......................12 Emissions and Efficiency ....................12 3. - Page 5 Appendix 4. Air Tubes and Baffle Installation ................47 Appendix 5. Optional Refractory Panels Installation ............... 49 Appendix 6. Removal Instructions .................... 53 Appendix 7. Exploded Diagram and Parts List ................ 54 OSBURN Limited Lifetime Warranty ..................57 Dealer: Installer: Phone Number:...
- Page 6 www.northlineexpress.com 1-877-734-2458 CERTIFICATION PLATE Page 6 Installation and Operation Manual - Inspire 2000 Insert...
-
Page 7: Part A - Operation And Maintenance
www.northlineexpress.com 1-877-734-2458 PART A - OPERATION AND MAINTENANCE 1. Safety Information • Operate only with the door fully closed. If the door is left partly open, gas and flame may be drawn out of the opening, creating risks from both fire and smoke. •... -
Page 8: General Information
Performances Values are as measured per test method, except for the recommended heating area, firebox volume, maximum burn time and maximum heat output. Model Inspire 2000-I Insert (OB02045) Fuel Type Dry Cordwood Recommended heating area (sq. ft. 500 to 2,100 ft... -
Page 9: Specifications
www.northlineexpress.com 1-877-734-2458 Specifications Maximum log length 20 in (508 mm) east-west Flue outlet diameter 6 in (150 mm) Recommended connector pipe diameter 6 in (150 mm) Type of chimney ULC S635, CAN/ULC-S640, UL 1777 Baffle material C-Cast Approved for alcove installation Approved for mobile home installation Shipping weight (without option) 420 lb (191 kg) -
Page 10: Dimensions
www.northlineexpress.com 1-877-734-2458 Dimensions 28 1/2" 724mm 27" 687mm 13 1/2" 343mm 5 5/8" 142mm 8 1/4" 211mm 20" 6" ø 508mm 150mm Figure 1: Top View Figure 2: Door opening 20 7/8" 530mm 20 5/8" 525mm 20 1/4" 514mm 18 7/8" 9 1/2"... -
Page 11: Materials
www.northlineexpress.com 1-877-734-2458 3/8" 10mm 16 3/4" 425mm 21" 11 3/4" 533mm 300mm 13 1/2" 344mm Figure 5: Front Firebox Figure 6: Side Firebox Materials The SBI team is committed to protecting the environment, so they do everything they can to use only materials in their products that will have no lasting negative impact on the environment. -
Page 12: Zone Heating
www.northlineexpress.com 1-877-734-2458 Zone Heating This insert is a space heater, which means it is intended to heat the area it is installed in, as well as spaces that connect to that area, although to a lower temperature. This is called zone heating and it is an increasingly popular way to heat homes or spaces within homes. -
Page 13: Fuel
www.northlineexpress.com 1-877-734-2458 3. Fuel Good firewood has been cut to the correct length for the insert, split to a range of sizes and stacked in the open until its moisture content is down to 15% to 20%. MATERIALS THAT SHOULD NOT BE BURNED - GARBAGE;... -
Page 14: Log Length
www.northlineexpress.com 1-877-734-2458 Log Length Logs should be cut at least 1" (25 mm) shorter than the firebox so they fit in easily. Pieces that are even slightly too long makes loading the insert very difficult. The most common standard length of firewood is 16" (400 mm). Piece Size Firewood dries more quickly when it is split. -
Page 15: Operating The Insert
www.northlineexpress.com 1-877-734-2458 − Hardwoods like oak, maple and ash can take one, or even two years to dry fully, especially if the pieces are big; − Firewood dries more quickly when stacked outside in a location exposed to sun and wind; it takes much longer to dry when stacked in a wood shed;... -
Page 16: Cold Hand
www.northlineexpress.com 1-877-734-2458 Cold Hand The cold hand is a handle, supplied with the insert. It allows to open the door and avoid burns. To open, insert the cold hand into the opening on the right side of the insert. Pull on the cold hand to open the door. -
Page 17: Burning Wood Efficiently
www.northlineexpress.com 1-877-734-2458 Allow the insert to reach operating temperature (approximately one hour) before turning on the blower, since increased airflow from the blower will remove heat and affect the start up combustion efficiency. The blower is equipped with a heat sensor. Therefore, the switch can be left in the automatic position (A). - Page 18 www.northlineexpress.com 1-877-734-2458 Here are three popular and effective ways to ignite wood fires. 5.2.1 Conventional Method The conventional method to build a wood fire is to crumple 5 to 10 sheets of newspaper and place them in the firebox and hold them in place with ten pieces of kindling wood. The kindling should be placed on and behind the newspaper.
-
Page 19: Combustion Cycles
www.northlineexpress.com 1-877-734-2458 Combustion Cycles Wood heating with a space heater is very different than other forms of heating. There will be temperature variations in different parts of the house and there will be temperature variations throughout day and night. This is normal, and for experienced wood burners these are advantages of zone heating woodburning. -
Page 20: Removing Ashes
www.northlineexpress.com 1-877-734-2458 The insert should not be left unattended during ignition and the fire should not burn at full intensity for more than a few minutes. When lighting a new load, the appliance produces a heat surge. This heat surge is pleasant when the room temperature is cool but can be unpleasant when the room is already warm. -
Page 21: Fire Types
www.northlineexpress.com 1-877-734-2458 Fire Types Using the air intake control is not the only way to match the insert heat output to the desired temperature in the house. A house will need far less heating in October than in January to maintain a comfortable temperature. -
Page 22: Maintenance
www.northlineexpress.com 1-877-734-2458 Table 1 : Approximate Maximum Burn Cycle Time FIREBOX VOLUME MAXIMUM BURN CYCLE TIME <1.5 cubic feet 3 to 5 hours 1.5 c.f. to 2.0 c.f 5 to 6 hours 2.0 c.f. to 2.5 c.f. 6 to 8 hours 2.5 c.f. -
Page 23: Insert
www.northlineexpress.com 1-877-734-2458 Insert 6.1.1 Cleaning and Painting the Insert Painted and plated surfaces can be wiped down with a soft, damp cloth. If the paint is scratched or damaged, it is possible to repaint the insert with a heat-resistant paint. Do not clean or paint the insert when it is hot. - Page 24 www.northlineexpress.com 1-877-734-2458 6.2.2 Replacement The glass used is a ceramic glass, 4 mm thick with a dimension of 24 13/16" X 18 ½" (63 cm X 47 cm) tested to reach temperatures up to 1400º F. If the glass breaks, it must be replaced with one having the same specification.
-
Page 25: Door
www.northlineexpress.com 1-877-734-2458 Another glass gasket (A) is located between the door and the glass. The gasket is stuck on the exterior surface of the door (B). Install according to the following illustrations. 3/4" 19mm 5/8" 16mm 3/4" 19mm Figure 15: Replacing the glass gasket on the door Location Length Dimension... - Page 26 www.northlineexpress.com 1-877-734-2458 6.3.1 Adjustment The gasket seal may be improved with a simple latch mechanism adjustment to increase or reduce the pressure on the gasket: Open the door and unscrew the four nuts (A) holding the bracket (B) in place. To increase the pressure on the gasket, remove as much washers (C) as necessary.
- Page 27 www.northlineexpress.com 1-877-734-2458 The door angle can also be adjusted by unscrewing the nuts (F) and sliding the bracket (G) towards the left or the right. Figure 19: Door angle adjustment 6.3.2 Gasket It is important to replace the gasket with another having the same diameter and density to maintain a good seal.
-
Page 28: Exhaust System
www.northlineexpress.com 1-877-734-2458 Exhaust System Wood smoke can condense inside the chimney, forming a inflammable deposit called creosote. If creosote builds up in the system, it can ignite when a hot fire is burned in the insert. A very hot fire can progress to the top of the chimney. Severe chimney fires can damage even the best chimneys. -
Page 29: Part B - Installation
www.northlineexpress.com 1-877-734-2458 PART B - INSTALLATION 7. Masonry Fireplace Requirements The masonry fireplace must meet the minimum requirements found in the building code enforced locally, or the equivalent, for a safe installation. Contact the local building inspector for requirements in the area. An inspection of the fireplace should include the following: Condition of the fireplace and chimney •... -
Page 30: Regulations Covering Insert Installation
www.northlineexpress.com 1-877-734-2458 • DO NOT CONNECT THIS UNIT TO A CHIMNEY FLUE SERVING ANOTHER APPLIANCE. • The insert and its stainless steel chimney liner are to be installed only within a lined masonry chimney and masonry fireplace conforming to building codes for use with solid fuel. Do not remove bricks or mortar from the existing fireplace when installing the insert. -
Page 31: Clearances To Combustible Material
www.northlineexpress.com 1-877-734-2458 9. Clearances to Combustible Material The clearances shown in this section have been determined by tests according to procedures set out in safety standards ULC S628 (Canada), UL1482 (U.S.A.) and UL737 (U.S.A.). When the insert is installed so that its surfaces are at or beyond the minimum clearances specified, combustible surfaces will not overheat under normal and even abnormal operating conditions. -
Page 32: Floor Protection
www.northlineexpress.com 1-877-734-2458 Floor Protection It is necessary to have a floor protection made of non-combustible materials that meets the measurements specified in the «Table 3 : Floor Protection» below. Table 3 : Floor Protection FLOOR PROTECTION Canada 18" (457 mm) 16"... - Page 33 www.northlineexpress.com 1-877-734-2458 9.2.2 Installation Raised of More Than 5" If the extension of the masonry hearth is raised at least 5" (127 mm) from the floor protection, a non- combustible material, without an R-value, must extend at least 16" (406 mm in USA) or 18" (457 mm in Canada) in front of the unit.
-
Page 34: Minimum Masonry Opening And Clearances To Combustibles
www.northlineexpress.com 1-877-734-2458 CONDUCTIVITY (K) RESISTANCE (R) PER INCH MATERIAL PER INCH THICKNESS Concrete 1.050 0.950 Mineral wool insulation 0.320 3.120 Limestone 0.153 Ceramic board (Fibremax) 0.450 0.135 0.920** Horizontal still air (⅛"thick) Example: Required floor protection R of 1.00. Proposed materials: four inches of brick and one inch of Durock®... -
Page 35: The Venting System
www.northlineexpress.com 1-877-734-2458 CLEARANCES MINIMUM MASONRY OPENING 24 ⅝" (625 mm) 16" (406 mm) 9" (229 mm) 29" (737 mm)* 27" (686 mm) 20 ¾" (528 mm) 27" (686 mm) 84" (213 cm) MAXIMUM THICKNESS 5" (127 mm) 12" (305 mm) The Venting System 10.1 General The venting system, made of the chimney and the liner inside the chimney, acts as the engine... -
Page 36: Suitable Chimneys
www.northlineexpress.com 1-877-734-2458 Figure 27: Block-off Plate Figure 28: Block-off Plate 10.3 Suitable Chimneys This wood insert will provide optimum efficiency and performance when connected to a 6" diameter chimney liner. The connection to a chimney having a diameter of at least 5" (Canada only) is permitted if it allows the proper venting of combustion gases and that such application is verified and authorized by a qualified installer. -
Page 37: Liner Connection
www.northlineexpress.com 1-877-734-2458 10.5 Liner Connection Two options are possible to connect the liner to the insert: 10.5.1 Liner Starter Adaptor Install the chimney liner starter adapter, provided with the chimney liner. Follow the chimney liner starter adapter manufacturer’s instructions. In order to connect the chimney liner starter adapter to the flue outlet, install three brackets with the three screws, all provided in the user manual, on top of the insert. -
Page 38: Minimum Chimney Height
www.northlineexpress.com 1-877-734-2458 10.5.2 Liner Offset Adapter A liner offset adapter, sold separately, can also be installed. This should only be installed if no other option is possible and if the total height of the fireplace and chimney is at least 20 feet. This kind of adaptor is restricting the free flow of exhaust gases and may result in smoke roll- out from the insert when the door is open for reloading. -
Page 39: Supply Of Combustion Air
www.northlineexpress.com 1-877-734-2458 When it is cold outside, the warm air in the house is buoyant so it tends to rise. This creates a slight pressure difference in the house. Called ‘stack effect’, it produces a slightly negative pressure in the lower part of the house (compared to the outside) and a slightly positive pressure zone in the high part of the house. - Page 40 www.northlineexpress.com 1-877-734-2458 Figure 35: Air supply in conventional houses If an air intake is installed through the wall of the house, its pressure can vary during windy weather. If there are changes in wood insert performance in windy weather, and in particular if smoke puffs from the insert, the air duct should be disconnected from the insert to determine if it is the cause of the problem.
-
Page 41: Appendix 1. Faceplate Installation
www.northlineexpress.com 1-877-734-2458 APPENDIx 1. FACEPLATE INSTALLATION Three faceplates are available with this wood insert. For more details about the installation, refer to the faceplate installation instructions. Figure 36: U shaped narrow faceplate Figure 37: Narrow faceplate Figure 38: Cuttable faceplate Installation and Operation Manual - Inspire 2000 Insert Page 41... -
Page 42: Appendix 2. Optional Fresh Air Intake Kit Installation
www.northlineexpress.com 1-877-734-2458 APPENDIx 2. OPTIONAL FRESH AIR INTAKE KIT INSTALLATION Only remove the knock-out that will be connected to the fresh air inlet. Using pliers, remove the rectangular knockout plate (A) located on the left or right side of the convection air jacket. -
Page 43: Appendix 3. Blower Replacement
www.northlineexpress.com 1-877-734-2458 APPENDIx 3. BLOWER REPLACEMENT Unplug the blower and remove all electrical sources on the wood insert. Remove the bottom faceplate by removing the four screws holding it in place. Locate the cover under the wood insert. Installation and Operation Manual - Inspire 2000 Insert Page 43... - Page 44 www.northlineexpress.com 1-877-734-2458 Push and rotate counterclockwise to remove the cover. Remove both wing nuts (A) holding the blower mounting plate. Page 44 Installation and Operation Manual - Inspire 2000 Insert...
- Page 45 www.northlineexpress.com 1-877-734-2458 Rotate the blower counterclockwise and gently pull on the blower. Remove both screws (B) and gently pull on the plate (A). Unplug the blower wires (C). Once the blower is unplugged, pull gently for removal. Installation and Operation Manual - Inspire 2000 Insert Page 45...
- Page 46 www.northlineexpress.com 1-877-734-2458 Blower Rocker switch manual (1) / off (2) / automatic (3) White Blanc Black Noir Green/Yellow (ground) Thermal switch (AUTO) (OFF) (MANUAL) Page 46 Installation and Operation Manual - Inspire 2000 Insert...
-
Page 47: Appendix 4. Air Tubes And Baffle Installation
www.northlineexpress.com 1-877-734-2458 APPENDIx 4. AIR TUBES AND BAFFLE INSTALLATION Starting with the rear tube, lean and insert the right end of the secondary air tube into the rear right channel hole. Then lift and insert the left end of the tube into the rear left channel. Align the notch in the left end of the tube with the key of the left air channel hole. - Page 48 www.northlineexpress.com 1-877-734-2458 Note that secondary air tubes (B) can be replaced without removing the baffle board (A) and that all tubes are identical. Page 48 Installation and Operation Manual - Inspire 2000 Insert...
-
Page 49: Appendix 5. Optional Refractory Panels Installation
www.northlineexpress.com 1-877-734-2458 APPENDIx 5. OPTIONAL REFRACTORY PANELS INSTALLATION Remove the center floor bricks (2). Remove the other floor bricks (6). Then, remove the back bottom bricks (2). Installation and Operation Manual - Inspire 2000 Insert Page 49... - Page 50 www.northlineexpress.com 1-877-734-2458 Remove the back bricks (4), then remove the back left brick (1). Remove the brick retainer (1) and the left bricks (3). Repeat on the right side. Page 50 Installation and Operation Manual - Inspire 2000 Insert...
- Page 51 www.northlineexpress.com 1-877-734-2458 Remove the retainers (4) and install the back refractory bricks (2). The retainers cannot be reused after being removed so they can be disposed of. Install the sides (2) refractory slabs. Installation and Operation Manual - Inspire 2000 Insert Page 51...
- Page 52 www.northlineexpress.com 1-877-734-2458 Install the refractory slab retainer (2) on both sides and screw them in place . Install the floor refractory slabs. Page 52 Installation and Operation Manual - Inspire 2000 Insert...
-
Page 53: Appendix 6. Removal Instructions
www.northlineexpress.com 1-877-734-2458 APPENDIx 6. REMOVAL INSTRUCTIONS For inspecting purposes, the insert may need to be removed. To remove the insert, follow these instructions: Remove the faceplate assembly (C) following the faceplate installation instructions. Remove the screws that secure the flue liner to the fixation brackets (A). Unscrew the levelling bolts (B) located on each side of the wood insert. -
Page 54: Appendix 7. Exploded Diagram And Parts List
www.northlineexpress.com 1-877-734-2458 APPENDIx 7. ExPLODED DIAGRAM AND PARTS LIST DETAIL A DETAIL B DETAIL C DETAIL D DETAIL G DETAIL H DETAIL E DETAIL F Page 54 Installation and Operation Manual - Inspire 2000 Insert... - Page 55 SCREW PAN TORX TYPE F 1/4-20 X 1" BLACK PL65853 DOOR LOCKING PLATE PL65938 AIR INTAKE CASING AC01298 5"Ø FRESH AIR INTAKE KIT OVAL 30977 OSBURN STICKER SE65915 BOTTOM FACEPLATE ASSEMBLY SE45952 INSPIRE INSERT INSTRUCTION MANUAL KIT 60331 POWER CORD 6' 30484...
- Page 56 www.northlineexpress.com 1-877-734-2458 Item Description 30221 LOCK NUT HEX #8-32 NYLON SE65914 BLOWER ASSEMBLY 22022 MOULDED LOGO/PLUG STONE 22021 MOULDED BOTTOM STONE 22020 MOULDED RIGHT STONE 22018 MOULDED RIGHT BACK STONE 22017 MOULDED LEFT BACK STONE 22019 MOULDED LEFT STONE AC01237 MOULDED REFRACTORY PANEL KIT FOR MINIMALIST BASE AND INSERT 30060 THREAD-CUTTING SCREW 1/4-20 X 1/2"...
-
Page 57: Osburn Limited Lifetime Warranty
Labour cost and repair work to the account of the manufacturer are based on a predetermined rate schedule and must not exceed the wholesale price of the replacement part. Shall your unit or a components be defective, contact immediately your OSBURN dealer. To accelerate processing of your warranty claim, make sure to have on hand the following information when calling: •... - Page 58 www.northlineexpress.com 1-877-734-2458 NOTES :...
- Page 59 www.northlineexpress.com 1-877-734-2458...
- Page 60 Resale is strictly prohibited. The manufacturer may update St-Augustin-de-Desmaures (Québec) Canada this document from time to time and cannot be responsible G3A 2H3 for problems, injuries, or damages arising out of the use 418-908-8002 of information contained in any document obtained from https://www.osburn-mfg.com/en/ unauthorized sources. tech@sbi-international.com...
Need help?
Do you have a question about the INSPIRE 2000-I and is the answer not in the manual?
Questions and answers