Advertisement
Quick Links
OPERATOR'S MANUAL
A Division of Snow Joe
, LLC
®
THANKS
OF A REMANUFACTURED PRODUCT.
To make sure you get the most out of
your product, be sure to register online at
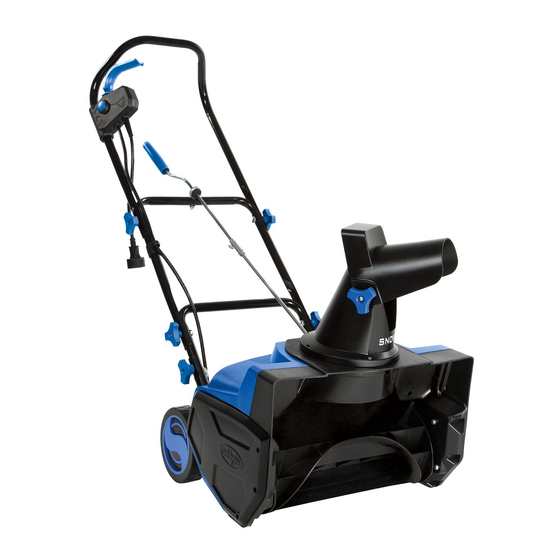
ELECTRIC SNOW THROWER
R
18-INCH | 13-AMP
Model SJ618E-RM
FOR
snowjoe.com
to enjoy full product support.
YOUR
PASTE UPC LABEL HERE
Form No. SJ-SJ618E-RM-880E-V1
PURCHASE
Advertisement

Related Manuals for SNOWJOE SUNJOE SJ618E-RM


Summary of Contents for SNOWJOE SUNJOE SJ618E-RM
- Page 1 , LLC ® Form No. SJ-SJ618E-RM-880E-V1 THANKS YOUR PURCHASE OF A REMANUFACTURED PRODUCT. To make sure you get the most out of your product, be sure to register online at snowjoe.com to enjoy full product support. PASTE UPC LABEL HERE...
- Page 2 ELECTRIC SNOW THROWER 18-INCH | 13-AMP OPERATOR’S MANUAL Model SJ618E-RM A Division of Snow Joe , LLC ® Form No. SJ-SJ618E-RM-880E-V1 IMPORTANT! 5. Avoid body contact with earthed or grounded surfaces (i.e. upper and lower water pipes, radiators, ranges, Safety Instructions refrigerators, microwave ovens, and outer frames of heating equipment).
- Page 3 SJTW-A 14-gauge 50-foot extension cord 2. To prevent electric shock, use only with an extension cord ® with lighted end (Model PJEXT50-B). Visit snowjoe. suitable for outdoor use, such as SW-A, SOW-A, STW-A, com to purchase this extension cord online or, to order STOW-A, SJW-A, SJOW-A, SJTW-A, or SJTOW-A.
- Page 4 Personal Safety operation clear of all spectators, particularly children and pets. 1. Stay alert – Watch what you are doing and use common • Excessive force – The snow thrower was designed to sense when operating the snow thrower. Do not use the respond at a certain rate for various snow conditions for machine when tired, ill, or under the influence of drugs, optimum safety and performance.
- Page 5 Safety Symbols The following table describes safety symbols that may appear on this product. Read, understand, and follow all instructions on the machine before attempting to assemble and operate. Symbols Descriptions Symbols Descriptions READ THE OPERATOR'S MANUAL(S) – Read, understand, WARNING! Do not expose the and follow all instructions in the unit to rain or wet conditions.
- Page 6 Know Your Electric Snow Thrower Read the owner’s manual and safety rules carefully before operating your electric snow thrower. Compare the illustration below to the actual unit in order to familiarize yourself with the location of the various controls and adjustments. Save this manual for future reference.
- Page 7 Instead, contact the Snow Joe + Sun Joe customer ® ® service center at 1-866-SNOWJOE (1-866-766-9563) for assistance. Handle with care during assembly so that electrical wiring does not become damaged.
- Page 8 Chute Crank Assembly 4. Secure the middle frame to the lower frame using 2 knobs and 2 carriage bolts. Install the knobs on the outside of 1. Remove the cotter pin from the lower crank rod (Fig. 7). the unit, and tighten (Fig. 4). Fig.
- Page 9 4. Slide the crank rod connector over the top of the lower Fig. 10 crank rod (Fig. 13). Fig. 13 Crank rod connector Lower crank rod 3. Secure the lower crank rod in place with the cotter pin (Figs. 11 – 12). 5.
- Page 10 7. Slide the upper crank rod into the top of the crank rod Fig. 19 connector (Fig. 16). Fig. 16 Upper crank rod Locking arrow Crank rod connector Lower crank 8. Align the holes on the connector with the holes in the upper crank rod, insert the second thumbscrew and turn 2.
- Page 11 4. Secure the carriage bolts and knobs. Make sure the knobs 3. Insert the female end of the extension cord into the are tightened (Fig. 22). appliance's polarized male plug (Fig. 24). Fig. 22 Fig. 24 Carriage bolt 4. Note that the snow thrower has a polarized male plug – one prong in the plug is slightly longer and wider than the other (Fig.
- Page 12 6. While moving the snow thrower, do not drag the power Fig. 26 cable violently or roughly. The snow thrower should move within the range that the cable can safely reach. 7. Do not push the snow thrower with excessive force. You ON/OFF should push the machine gently and evenly in accordance switch lever...
- Page 13 Changing Throw Direction and Fig. 29 Throw Height WARNING Deflector knob Never direct the snow discharge chute at the operator, at bystanders, at vehicles, or at nearby windows. The discharged snow and foreign objects accidentally picked up by the snow thrower can cause serious damage and personal injury.
- Page 14 3. After each snow removal session, run the snow thrower 2. Remove the belt from the drive wheel on the left side for a few minutes to prevent the collector/impeller from (Fig. 32). freezing. Shut off the motor, wait for all revolving parts to stop completely, and wipe residual ice and snow off the Fig.
- Page 15 6. Install the replacement auger by following the above steps 1. Open the left side plate by removing the five screws in reverse order. (Fig. 38). Replacing the Scraper Bar Fig. 38 1. The scraper bar is located at the base of the snow thrower Screws beneath the rotor housing (Fig.
- Page 16 ® ® be gradually pushed down onto the pulley. When the belt customer service center at 1-866-SNOWJOE is seated on the pulley, adjust it so that the ribs of the belt (1-866-766-9563). match the grooves on the pulley. (Fig. 41).
- Page 17 NOTE: Accessories are subject to change without any obligation on the part of Snow Joe + Sun Joe to provide notice of such ® ® changes. Accessories can be ordered online at snowjoe.com or via phone by contacting the Snow Joe + Sun Joe customer ® ®...
- Page 18 We’re here to help Monday through Friday from 9AM to 6PM EST. You can reach us at 1-866-SNOWJOE (1-866-766-9563), online EXCLUSIONS: at snowjoe.com, via email at help@snowjoe.com or tweet us • Wearing parts like belts, augers, chains and tines are @snowjoe.
- Page 19 WARNING! This product or its power cord contains chemicals, including lead, known to the State of California to cause cancer and birth defects or other reproductive harm. Wash hands after handling. For more information go to www.P65Warnings.ca.gov. WARNING! Some dust created by power sanding, sawing, grinding, drilling, and other construction activities contains chemicals known [to the State of California] to cause cancer, birth defects, or other reproductive harm.
Need help?
Do you have a question about the SUNJOE SJ618E-RM and is the answer not in the manual?
Questions and answers