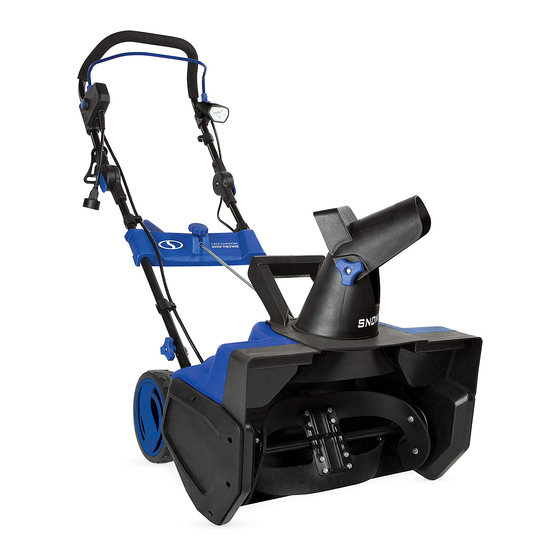
SNOWJOE SJ625E Operator's Manual
Electric snow thrower 21-inch / 15-amp / led light
Hide thumbs
Also See for SJ625E:
- Operator's manual (21 pages) ,
- Quick start manual (4 pages) ,
- User manual
Advertisement
Available languages
Available languages
Quick Links
OPERATOR'S MANUAL
A Division of Snow Joe
, LLC
®
IMPORTANT!
Safety Instructions
All Operators Must Read These
Instructions Before Use
Any electrical appliance can be dangerous if used incorrectly.
Some of the safety precautions given in this manual apply
generally to many appliances. Other warnings are specific
to the use of this snow thrower. Keep this manual for future
reference.
General Safety WARNINGS!
You and any other operator of this snow thrower must read,
understand and follow these instructions in their entirety, and
should reread them at the start of each snow season. Failure
to follow these instructions may result in ELECTRIC SHOCK,
FIRE and/or serious PERSONAL INJURY.
Notice the personal safety alert symbol
manual to draw your attention to a WARNING given along
with the particular operating instruction. This means that
the operation requires special ATTENTION, CAUTION and
AWARENESS.
1. Keep work area clean and well lit. Cluttered, dark areas
invite accidents.
2. Do not operate the snow thrower in an explosive
atmosphere, such as in the presence of flammable
liquids, gases or dust. Electrical appliances create sparks
that may ignite the dust or fumes.
3. Keep children, pets and bystanders away from the
work area. Be aware that the normal noise of the
machine when turned on may make it difficult for you to
hear approaching people. Spectators should wear safety
glasses and be kept a safe distance away from the work
area. Do not let spectators touch the snow thrower or the
extension cord.
4. Electrical plugs must match the outlet. Never modify
the plug in any way. Do not use any adapter plugs with
grounded appliances. Unmodified plugs and matching
outlets will reduce the risk of electric shock.
5. Avoid body contact with earthed or grounded surfaces
(i.e. upper and lower water pipes, radiators, ranges,
refrigerators, microwave ovens and outer frames of
heating equipment). Take necessary precautions to avoid
electric shock. There is an increased risk of electric shock
if your body is earthed or grounded.
© 2020 by Snow Joe
, LLC
®
All rights reserved. Original instructions.
ELECTRIC SNOW THROWER
R
21-INCH | 15-AMP | LED LIGHT
Model SJ625E
m
used in this
6. Do not abuse the cord. Keep the cord away from heat,
oil, sharp edges or moving parts. Never carry the snow
thrower by its cord or yank the cord to disconnect it from
the electrical outlet. Damaged or entangled cords increase
the risk of electric shock.
7. Replace or properly repair damaged cords. If the cord
becomes damaged in any manner while plugged into the
wall receptacle, immediately pull the extension cord plug
from the receptacle.
8. Contact with water while operating the snow thrower
can result in electric shock and serious bodily injury.
Do not use the snow thrower in damp or wet locations or
expose to rain. Do not handle the plug or the appliance
with wet hands or while standing in water.
m
9.
WARNING – Use outdoor extension cords marked
SW-A, SOW-A, STW-A, STOW-A, SJW-A, SJTW-A or
SJTOWA. These cords are rated for outdoor use and
reduce the risk of electric shock.
10. Turn off the power switch and disconnect the power
cable before making any adjustments to the unit and
before inspecting, servicing, changing accessories or
cleaning the snow thrower. Follow the same procedure
if any other dangerous conditions are present during
operation. Any adjustments to the unit should be
performed after revolving parts inside the snow thrower
stop completely. Such preventative safety measures
reduce the risk of starting the power tool accidentally.
11. If you find the main power cable or the extension cable
damaged, please pull out the plug from the socket and
disconnect the power immediately. Repair the cable or
replace it if necessary.
12. When replacing any parts, you must strictly observe
the instructions and procedures described in this
operator's manual. Special care should be paid to any
rubber parts, since these parts may increase the engine
load and decrease its mechanical power if damaged.
13. Do not move or transport the snow thrower when the
plug is connected to the power socket and the switch
is turned on.
14. If, during use, you notice that the unit runs unstably
or hear abnormal sounds from the engine, stop the
machine, disconnect the power immediately and
contact an authorized Snow Joe
center.
1
Form No. SJ-SJ625E-880E-MR7
+ Sun Joe
®
SAVE THESE INSTRUCTIONS
EN
service
®
Advertisement

Related Manuals for SNOWJOE SJ625E


Summary of Contents for SNOWJOE SJ625E
- Page 1 OPERATOR’S MANUAL Model SJ625E A Division of Snow Joe , LLC ® Form No. SJ-SJ625E-880E-MR7 IMPORTANT! 6. Do not abuse the cord. Keep the cord away from heat, oil, sharp edges or moving parts. Never carry the snow Safety Instructions thrower by its cord or yank the cord to disconnect it from the electrical outlet.
- Page 2 SJTW-A 14-gauge 50-foot extension cord 4. Surfaces – This snow thrower is intended for use on ® with lighted end (Model PJEXT50-B). Visit snowjoe. paved surfaces. Do not use on gravel, stone or other com to purchase this extension cord online or, to order unpaved surfaces unless the snow thrower is adjusted for by phone, call 1-866-SNOWJOE (1-866-766-9563).
- Page 3 7. If the snow thrower strikes any object, immediately • Noise control – When using the snow thrower, you must stop the snow thrower, then inspect for damage – respect local laws and regulations regarding noise control Repair any damage before restarting and operating the and environmental protection.
- Page 4 Safety Symbols The following table describes safety symbols that may appear on this product. Read, understand and follow all instructions on the machine before attempting to assemble and operate. Symbols Descriptions Symbols Descriptions READ THE OPERATOR'S MANUAL(S) – Read, understand WARNING! Do not expose the and follow all instructions in the unit to rain or wet conditions.
- Page 5 Know Your Electric Snow Thrower Read the owner’s manual and safety rules carefully before operating your electric snow thrower. Compare the illustration below to the actual unit in order to familiarize yourself with the location of the various controls and adjustments. Save this manual for future reference.
- Page 6 If any damage is seen or suspected, do not assemble. Instead, contact the Snow Joe + Sun Joe customer ® ® service center at 1-866-SNOWJOE (1-866-766-9563) for assistance. Handle with care during assembly so that electrical wiring does not become damaged.
- Page 7 Chute Crank Assembly Fig. 6 1. Remove the cotter pin from the crank rod (Fig. 3). Fig. 3 Cotter pin 3. Secure the crank rod in place with the cotter pin (Figs. 7 – 8). 2. Install the crank rod through the center plate and insert Fig.
- Page 8 Discharge Chute Assembly 2. Secure the carriage bolts and knobs. Make sure the knobs are tightened (Fig. 13). 1. Position the chute deflector over the discharge chute and align the holes, placing the washer between the deflector Fig. 13 and the chute (Figs. 9 – 10). Fig.
- Page 9 3. Insert the female end of the extension cord into the 1. To switch the snow thrower ON, press the safety switch appliance's polarized male plug (Fig. 13). button, then squeeze the switch bar lever (Fig. 15). Fig. 15 Fig. 13 Switch bar lever Extension cord...
- Page 10 Moving the Machine and 10. When working on pebbles, gravel or unpaved surfaces, avoid throwing loose surface material along with the snow Plowing the Snow by pushing down on the handle to raise the scraper bar at the base of the unit above the pebbles or gravel. 11.
- Page 11 1. The discharge chute can be adjusted 180 degrees by rotating the chute crank. Rotate the chute control crank WARNING clockwise to move the discharge chute to the left and counterclockwise to move the chute to the right (Fig. 19). Make sure that the chute deflector snaps and locks completely onto the discharge chute.
- Page 12 6. To protect the snow thrower from corrosion when storing 3. Install the other rubber plate in the same manner (Fig 23). for long periods, lightly oil the metal parts. 7. Store the appliance in a dry area out of reach of children. Fig.
- Page 13 Replacing the Belt 4. Use your right hand to press the belt with the ribbed side down. While holding the belt down with your right hand, NOTE: Under normal operating conditions, it should not be use your left hand to turn the auger forward so that the auger pulley rotates in a clockwise direction.
- Page 14 Service and Support 2. Secure the auger. Using an 18 mm hex socket, turn the pulley clockwise to remove (Fig. 31). If your Snow Joe SJ625E electric snow thrower requires ® service or maintenance, please call 1-866-SNOWJOE Fig. 31 (1-866-766-9563) for assistance.
- Page 15 NOTE: Accessories are subject to change without any obligation on the part of Snow Joe + Sun Joe to provide notice of such ® ® changes. Accessories can be ordered online at snowjoe.com or via phone by contacting the Snow Joe + Sun Joe customer ® ®...
- Page 16 This Warranty gives you specific legal rights, and you may also have other rights which vary from State to State. PRODUCT REGISTRATION: Snow Joe strongly encourages you to register your Product. You can register online at snowjoe.com/register, or by printing and mailing in a registration card available online from our website, or calling our Customer Service Department at 1-866-SNOWJOE (1-866-766-9563), or by e-mailing us at help@snowjoe.com.
- Page 19 53 CM | 15 A | LUZ LED MANUAL DEL OPERADOR Modelo SJ625E Una división de Snow Joe , LLC ® Forma No. SJ-SJ625E-880S-MR7 ¡IMPORTANTE! 5. Evite el contacto de su cuerpo con superficies conectadas a tierra (es decir, tuberías de agua Instrucciones de seguridad en cielorraso o subterráneas, radiadores, cocinas, refrigeradores, hornos microondas o estructuras externas de equipos calefactores).
- Page 20 Sun Joe autorizado. ® con extremo iluminado (modelo PJEXT50-B). ® Visite snowjoe.com para comprar este cable de Seguridad eléctrica extensión, o pídalo llamando al 1-866-SNOWJOE (1-866-766-9563). 1. Un interruptor de circuito de falla de conexión a tierra • No use un cable de extensión de más de 100 pies (GFCI) deberá...
- Page 21 Seguridad personal • Inspección preliminar de la unidad: inspeccione minuciosamente la unidad antes del uso. Asegúrese de que 1. Manténgase alerta: mire lo que esté haciendo y use el todas las partes estén seguras e instaladas correctamente. Si usted nota cualquier anormalidad, no use la máquina sentido común al operar el quitanieve.
- Page 22 • Almacenamiento seguro: guarde el quitanieve en interiores, en un área seca, después de cada uso. Manténgalo en un área bajo llave, a donde no puedan acceder niños ni personas no autorizadas. No guarde la máquina mientras esté conectada a la fuente de alimentación ya que esto puede causar daños y lesiones.
- Page 23 Símbolos de seguridad La siguiente tabla describe los símbolos de seguridad que pueden aparecer en este producto. Lea, comprenda y siga todas las instrucciones de la máquina antes de intentar ensamblarla y operarla. Símbolo Descripción Símbolo Descripción LEA EL(LOS) MANUAL(ES) DEL OPERADOR: lea, comprenda y ¡ADVERTENCIA! No exponga la siga todas las instrucciones en...
- Page 24 Conozca su quitanieve Lea cuidadosamente el manual del operador y las reglas de seguridad antes de operar su quitanieve eléctrico. Compare la ilustración debajo con la unidad real para familiarizarse con la ubicación de los diversos controles y ajustes. Guarde este manual para futuras referencias.
- Page 25 ® ® 2. Alinee los orificios en la parte inferior del ensamblado de llamando al 1-866-SNOWJOE (1-866-766-9563). mango intermedio con aquellos del mango inferior (Fig. 2). NOTA: no se deshaga de la caja de transporte ni del 3. Asegure el ensamblado de mango intermedio al mango material de embalaje hasta que usted esté...
- Page 26 Ensamblado de la manivela del Fig. 6 conducto 1. Retire el pasador de la manivela inferior (Fig. 3). Fig. 3 Pasador 3. Asegure la manivela en su lugar con el pasador (Figs. 7 – 8). Fig. 7 2. Instale la manivela a través de la placa central e insértela en la abertura en la parte posterior de la carcasa con los orificios alineados (Figs.
- Page 27 Ensamblado del conducto de descarga 2. Ajuste los pernos de cabeza de hongo y perillas. Asegúrese de apretar bien las perillas (Fig. 13). 1. Posicione el deflector de conducto sobre el conducto de descarga y alinee los orificios, colocando la arandela entre Fig.
- Page 28 3. Inserte el extremo hembra del cable de extensión en el 1. Para encender el quitanieve, presione el botón interruptor conector macho polarizado del artefacto (Fig. 13) de seguridad, y luego apriete la barra de seguridad (Fig. 15). Fig. 13 Fig.
- Page 29 Movimiento de la máquina el quitanieve con partes congeladas. Si las partes se congelan mientras el quitanieve está siendo usado, y retiro de nieve detenga el quitanieve, desenchufe el cable de extensión e inspeccione las partes congeladas. Libere todas las partes antes de volver a encender u operar el quitanieve.
- Page 30 Cambio de la dirección Fig. 20 y altura de lanzado Perilla de deflector ¡ADVERTENCIA! Nunca apunte el conducto de descarga de nieve al operador, espectadores, vehículos o ventanas cercanas. Los objetos extraños lanzados junto con la nieve accidentalmente por el quitanieve pueden causar daños y lesiones personales severas.
- Page 31 Consejos generales de mantenimiento Fig. 22 1. No intente reparar la máquina a no ser que usted tenga las herramientas e instrucciones apropiadas para desensamblarla y repararla. 2. Verifique los pernos y tornillos en intervalos frecuentes para un ajuste correcto y asegurarse de que el equipo esté...
- Page 32 2. Retire los tornillos que aseguran la barra raspadora al Fig. 27 quitanieve (Fig. 25). Fig. 25 Correa 3. Coloque la correa en la polea impulsora primero y luego Tornillos que aseguran la barra raspadora coloque la correa en el extremo inferior de la polea de barrena (Fig.
- Page 33 Cubra holgadamente la unidad con una lona para una mayor protección. Asistencia y servicio Correa Si su quitanieve SJ625E de Snow Joe requiere reparaciones ® Cubierta lateral o mantenimiento, por favor llame al 1-866-SNOWJOE (1-866-766-9563) para asistencia.
- Page 34 NOTA: los accesorios están sujetos a cambios sin obligación alguna por parte de Snow Joe + Sun Joe de notificar sobre ® ® dichos cambios. Los accesorios pueden ser pedidos en línea en www.SnowJoe.com o vía telefónica llamando al centro de servicio al cliente Snow Joe + Sun Joe al 1-866-SNOWJOE (1-866-766-9563). ®...
- Page 35 Web, llamando a nuestra central de servicio al cliente al 1-866-SNOWJOE (1-866-766-9563), o enviándonos un e-mail a help@snowjoe.com. Si usted no registra su Producto sus derechos de garantía no disminuirán; sin embargo, registrar su Producto permitirá que Snow Joe le pueda atender mejor si usted tiene alguna necesidad como cliente.
- Page 37 53 cm | 15 A | PHARE DEL MANUEL D'UTILISATION Modèle SJ625E Une division de Snow Joe , LLC ® Formulaire n° SJ-SJ625E-880F-MR7 IMPORTANT! laissez pas les spectateurs toucher la souffleuse à neige ou la rallonge électrique. Consignes de sécurité 4. Les fiches électriques doivent correspondre à la prise.
- Page 38 (modèle arrêtez la machine, débranchez-la immédiatement du PJEXT50-B). Visiter snowjoe.com pour acheter en secteur et communiquez avec un centre d'entretien et ligne cette rallonge électrique ou, pour la commander de réparation Snow Joe...
- Page 39 Consignes de sécurité pour les 5. Ne pas utiliser le cordon à mauvais escient. Ne jamais tirer la souffleuse à neige par le cordon et ne pas tirer souffleuses à neige poussées brusquement sur le cordon pour le retirer de la prise. Maintenir le cordon éloigné de toute source de chaleur, • Lisez attentivement le manuel d'utilisation – Apprenez de l’huile et des objets tranchants.
- Page 40 • Lutte contre le bruit – Quand vous utilisez la souffleuse à neige, vous devez respecter les lois et réglementations locales antibruit ainsi que celles concernant la protection de l'environnement. Pour éviter toute agression sonore, vous devez soigneusement choisir l'heure appropriée à laquelle utiliser la machine et tenir compte des conditions environnementales.
- Page 41 Symboles de sécurité Le tableau suivant décrit et explique les symboles de sécurité pouvant être marqués sur cette machine. Lisez, comprenez et suivez toutes les instructions sur la machine avant d'essayer de procéder à son assemblage et de l'utiliser. Symboles Descriptions Symboles Descriptions...
- Page 42 Apprenez à mieux connaître votre souffleuse à neige Lisez attentivement le manuel de l'utilisateur et les consignes de sécurité avant d'utiliser votre souffleuse à neige électrique. Comparez l'illustration ci-dessous avec la machine réelle pour vous familiariser avec l'emplacement des différents réglages et commandes. Conservez ce manuel pour pouvoir vous y reporter dans le futur. 1.
- Page 43 Si le moindre dommage est constaté ou soupçonné, ne pas procéder à l'assemblage. Appeler plutôt le service clientèle Snow Joe + Sun Joe ® ® au 1-866-SNOWJOE (1-866-766-9563) pour de l'aide. Procéder à l'assemblage avec précautions pour ne pas endommager le câblage.
- Page 44 Assemblage de la manivelle de Fig. 6 commande de goulotte 1. Retirez la goupille fendue de la tige de manivelle (Fig. 3). Fig. 3 Goupille fendue 3. Une fois en place, attachez la tige de manivelle à l'aide de la goupille fendue (Fig. 7 et 8). Fig.
- Page 45 Assemblage de la goulotte d'éjection 2. Attachez les boulons de carrosserie et les boutons. Assurez-vous que les boutons soient serrés (Fig. 13). 1. Placez le déflecteur de goulotte sur la goulotte d'éjection et alignez les trous en plaçant la rondelle entre le déflecteur Fig.
- Page 46 Mise en route et arrêt 3. Insérez l'extrémité femelle de la rallonge électrique dans la prise mâle polarisée de la machine (Fig. 13). AVERTISSEMENT! La tarière commence à tourner immédiatement après avoir mis en marche la souffleuse à Fig. 13 neige.
- Page 47 2. Le phare DEL peut s’orienter en le déplaçant vers le haut projetée contre le vent (dans votre visage et sur le chemin venant juste d’être déblayé). ou vers le bas comme cela est illustré (Fig. 17). 6. En déplaçant la souffleuse à neige, ne tirez pas violemment ou brutalement sur la rallonge électrique.
- Page 48 Changement de l'orientation et de la Fig. 20 hauteur du jet de neige Bouton de déflecteur AVERTISSEMENT Ne jamais orienter la goulotte d'éjection vers l'utilisateur de la machine, des spectateurs, des véhicules ou des fenêtres. Les projections de neige et de tout ce qui a été accidentellement ramassé par la souffleuse à neige peuvent provoquer de graves dommages matériels et corporels.
- Page 49 2. Inspectez régulièrement les boulons et les vis et vérifiez 2. Posez le premier patin de rechange en caoutchouc et qu’ils sont bien serrés pour que le matériel puisse insérez le boulon approprié dans les trous correspondants fonctionner en toute sécurité. sur chaque partie du patin en caoutchouc.
- Page 50 2. Retirez les vis qui attachent la lame de raclage à la 2. Utilisez la main droite pour tourner le côté nervure de la souffleuse à neige (Fig. 25). courroie vers le haut et le tirer vers le haut tout en faisant tourner dans le sens contraire des aiguilles d'une montre la poulie de tarière à...
- Page 51 (Fig. 31). Si votre souffleuse à neige électrique Snow Joe SJ625E ® nécessite une intervention technique ou un entretien, veuillez appeler le 1-866-SNOWJOE (1-866-766-9563) pour de l'aide. Fig. 31 Numéros de modèle et de série Lorsque vous communiquez avec l'entreprise pour commander des pièces ou prendre rendez-vous pour une...
- Page 52 ® ® donner un préavis desdits changements. Les accessoires peuvent être commandés en ligne sur le site snowjoe.com ou par téléphone en communiquant avec le service clientèle Snow Joe + Sun Joe au 1-866-SNOWJOE (1-866-766-9563).
- Page 53 Snow Joe vous recommande vivement d’enregistrer votre Produit. Vous pouvez l’enregistrer en ligne sur le site snowjoe.com/register, ou en imprimant et en envoyant par courrier une carte d’enregistrement offerte en ligne sur notre site Web, ou par téléphone en appelant notre Service à la clientèle au 1-866-SNOWJOE (1-866-766-9563), ou encore en nous envoyant un courriel à...
- Page 56 snowjoe.com...
Need help?
Do you have a question about the SJ625E and is the answer not in the manual?
Questions and answers