
Related Manuals for Electro-Voice EKX-15SP


Summary of Contents for Electro-Voice EKX-15SP
- Page 1 EKX Powered Loudspeakers EKX-12P, EKX-15P, EKX-15SP, and EKX-18SP en | User Manual...
-
Page 3: Table Of Contents
Subwoofer DSP control menu Recommended configurations Daisy-chaining full-range systems MP3 player MONO configuration MP3 player STEREO configuration Using full-range systems as monitors Stacking full-range systems with subwoofers Cardioid Control Technology Troubleshooting Technical data Frequency response Electro-Voice User Manual 2017.01 | 06 | F.01U.318.952... -
Page 4: Safety
When a cart is used, use caution when moving the cart/apparatus combination to avoid injury from tip-over. 13. Unplug the apparatus during lightning storms or when unused for long periods of time. 2017.01 | 06 | F.01U.318.952 User Manual Electro-Voice... -
Page 5: Suspension
Electro-Voice loudspeakers can only be suspended using accessories and hardware described in Electro-Voice manuals and installation guides. Do NOT use handles to suspend the loudspeaker. Handles on Electro- Voice loudspeakers are intended to only be used for temporary transport by people. -
Page 6: Fcc Information
Consult the dealer or an experienced radio/TV technician. Precautions If an Electro-Voice loudspeaker is used outdoors on a sunny day, place the loudspeaker in a shaded or covered area. The loudspeaker amplifiers have protection circuits that temporarily shut the loudspeaker off when extremely high temperatures are reached. -
Page 7: Notices
(in accordance with the European Waste Electrical and Electronic Equipment Directive). To dispose of old electrical or electronic devices, you should use the return and collection systems put in place in the country concerned. Electro-Voice User Manual 2017.01 | 06 | F.01U.318.952... -
Page 8: Description
EV system and fully utilize its performance capabilities. The EKX series is the newest member of the Electro-Voice portable loudspeaker family, and combines legendary EV sound quality and reliability with the latest technology — all in a compact package suitable for a wide range of sound reinforcement scenarios, including musicians/DJs and live/club/installed sound applications. -
Page 9: System Features
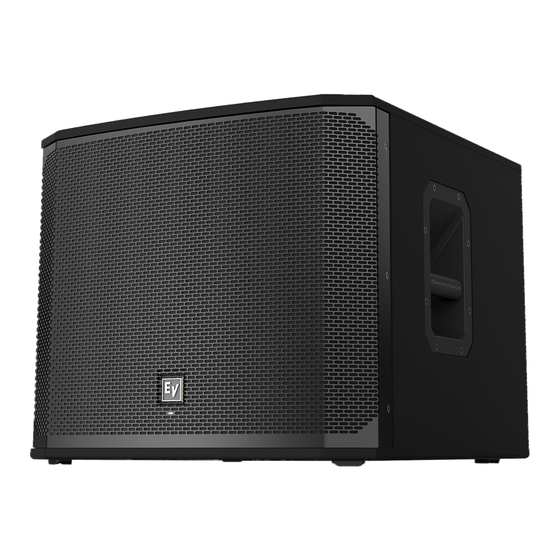
Lightweight, compact 15-mm wood enclosure with internal bracing, durable EVCoat finish, eight M10 threaded mounting points, aluminum pole-mounts, and all-metal handles. EKX-15SP – 15-inch powered subwoofer loudspeaker system ▪ QuickSmartDSP features best-in-class processing, EV's signature single-knob user interface, and intuitive menu navigation via LCD. -
Page 10: Quick Setup
M20 threaded pole mount plate. Quick Setup The EKX powered loudspeakers from Electro-Voice with carefully matched electronics and transducers. These products make it easy to set up a high quality system quickly with a minimum amount of cables and external electronics. - Page 11 Subwoofer Models: EKX-15SP and EKX-18SP To set up a subwoofer, do the following: Step Illustration Connect the AC power cord from a grounded line receptacle to the MAINS Connect the XLR or TRS cable from an audio source to INPUT 1 or INPUT 2.
-
Page 12: System Overview
EKX Powered Loudspeakers System overview Dimensions Figure 3.1: EKX-12P dimensions Figure 3.2: EKX-15P dimensions Figure 3.3: EKX-15SP dimensions Figure 3.4: EKX-18SP dimensions 2017.01 | 06 | F.01U.318.952 User Manual Electro-Voice... -
Page 13: Tripod And Floor Monitor Operation
Do not attempt to suspend more than one loudspeaker on a stand designed for a single loudspeaker. Using two hands lift the loudspeaker. Set the pole cup located on the bottom of the loudspeaker onto the pole. Electro-Voice User Manual 2017.01 | 06 | F.01U.318.952... - Page 14 Turn the M20 threaded pole clockwise to secure the pole to the subwoofer. Using two hands lift the loudspeaker. Set the pole cup located on the bottom of the loudspeaker onto the pole. 2017.01 | 06 | F.01U.318.952 User Manual Electro-Voice...
-
Page 15: Floor Monitor
Place the loudspeaker on a level stable surface. Safely route cables to prevent injury to performers, production crew, and audience members. Notice! Secure cables with wire ties or tape whenever possible. Figure 4.3: Optimum coverage in monitor position Electro-Voice User Manual 2017.01 | 06 | F.01U.318.952... -
Page 16: Suspension
Suspending any object is potentially dangerous and should only be attempted by individuals who have a thorough knowledge of the techniques and regulations of suspending objects overhead. Electro-Voice strongly recommends all loudspeakers be suspended taking into account all current national, federal, state, and local laws and regulations. It is the responsibility of the installer to ensure all loudspeakers are safely installed in accordance with all such requirements. - Page 17 Replace the M10 screw with the fender washer and eyebolts. Notice! If the eyebolts are removed reinstall the screws. If the screws are not reinstalled air leaks occur in the enclosure, resulting in undesirable performance. Electro-Voice User Manual 2017.01 | 06 | F.01U.318.952...
- Page 18 1.5 inch in diameter and 1/16 inch thick under the eyebolt to distribute the load on the enclosure. Figure 5.2: Eyebolt shown with and without washer Figure 5.3: Eyebolts shown oriented in the plane of pull 2017.01 | 06 | F.01U.318.952 User Manual Electro-Voice...
- Page 19 Warning! Never exceed the limitations or maximum recommended working load for Electro-Voice loudspeakers. Disregarding this warning could result in serious injury or death. Figure 5.4: Maximum working load - vertical orientation Warning! Never suspend EKX Series loudspeakers in a vertical column array.
-
Page 20: Amplifier Dsp
OUTPUT – XLR output sends the mix of both input signals to another loudspeaker or subwoofer. INPUT LEVEL controls the signal level to OUTPUT. The MASTER VOL or DSP control settings do not affect OUTPUT. 2017.01 | 06 | F.01U.318.952 User Manual Electro-Voice... - Page 21 The inputs can be used simultaneously with XLR/TRS INPUT 1. Subwoofer control and monitoring interface The subwoofer DSP control menu selections are available for the EKX-15SP and EKX-18SP. Figure 6.2: Subwoofer amplifier panel LCD – DSP control and monitoring interface.
-
Page 22: System Status
The large LIMIT indicates the sound is negatively affected. Reducing the output volume (MASTER VOL) is strongly recommended when the large limit indication is shown. See also • Full-Range loudspeaker DSP control menu, page 28 2017.01 | 06 | F.01U.318.952 User Manual Electro-Voice... -
Page 23: Dsp Controls
The setting is saved. The focus returns to the menu items on the left side of the DSP menu. Repeat steps 2 through 5 to modify additional DSP and system settings. Select EXIT to return to the home screen. Electro-Voice User Manual 2017.01 | 06 | F.01U.318.952... -
Page 24: Full-Range Loudspeaker Dsp Control Menu
LOCATION TRIPOD (Default) MONITOR WALL SUSPEND OFF (Default) 80Hz 100Hz 120Hz 150Hz EKX-15SP EKX-18SP ELX118P TREBLE 0 db (Default) -12 dB to +6 dB 0 db (Default) -12 dB to +6 dB BASS 0 db (Default) -12 dB to +6 dB... - Page 25 If used on a column, it is recommended to use the SUSPEND mode. ▪ SUSPEND – is used when the loudspeaker is suspended in a 3-point suspension by eyebolts. Electro-Voice User Manual 2017.01 | 06 | F.01U.318.952...
- Page 26 The Sub menu is used to select a high pass frequency for use with a subwoofer or a matched subwoofer. Available options for this selection are: OFF, 80Hz, 100Hz, 120Hz, 150Hz, EKX-15SP, EKX-18SP, and ELX118P . The high passes are 24 dB/octave Linkwitz/Riley crossovers. The 80 Hz, 100 Hz, 120 Hz, and 150 Hz choices are generic high pass settings for use with other subwoofers.
- Page 27 EXIT, 1, 2, 3, 4, and 5. To recall customized user settings, do the following: From the DSP menu, scroll to RECALL. Push the MASTER VOL knob to select RECALL. The recall screen appears. Electro-Voice User Manual 2017.01 | 06 | F.01U.318.952...
- Page 28 The five user customized settings in the STORE and RECALL menus return to <EMPTY>. INFO Menu The Information menu is used to display the product name and firmware version. The Mode menu is used to configure the type of sound the loudspeaker delivers. 2017.01 | 06 | F.01U.318.952 User Manual Electro-Voice...
-
Page 29: Subwoofer Dsp Control Menu
6.3.2 Subwoofer DSP control menu The subwoofer DSP control menu selections are available for the EKX-15SP and EKX-18SP subwoofers. EXIT MODE MUSIC (Default) LIVE CLUB LOCATION NORMAL (Default) CARDIOID LOW PASS 80Hz 100Hz (Default) 120Hz 150Hz EKX-12P EKX-15P ELX112P ELX115P... - Page 30 The LED menu shows power on and indicates limit. Available options for this selection are: ON, OFF or LIMIT. ▪ ON – turns the LED on when the power to the loudspeaker is ON. (Default) ▪ OFF – turns the LED off. 2017.01 | 06 | F.01U.318.952 User Manual Electro-Voice...
- Page 31 Push the MASTER VOL knob to select the desired character. Turn the MASTER VOL knob to move to the next character entry. Continue selecting characters until the desired name is entered. Use the MASTER VOL knob to scroll to SAVE. Electro-Voice User Manual 2017.01 | 06 | F.01U.318.952...
- Page 32 NO or YES. The default is NO. To reset the system to original factory settings, do the following: From the DSP menu, select RESET. The reset are you sure message appears. 2017.01 | 06 | F.01U.318.952 User Manual Electro-Voice...
- Page 33 Performing a reset erases the user customized settings saved under the STORE menu. The five user customized settings in the STORE and RECALL menus return to <EMPTY>. INFO Menu The Information menu is used to display the product name and firmware version. Electro-Voice User Manual 2017.01 | 06 | F.01U.318.952...
-
Page 34: Recommended Configurations
EKX Powered Loudspeakers Recommended configurations Daisy-chaining full-range systems Notice! The direction of the arrow indicates the signal path. Mode: Speech Location: Tripod Sub: Table 7.1: DSP settings loudspeaker on a tripod 2017.01 | 06 | F.01U.318.952 User Manual Electro-Voice... -
Page 35: Mp3 Player Mono Configuration
MP3 player MONO configuration Notice! The direction of the arrow indicates the signal path. Mode: Music Location: Tripod Sub: Table 7.2: DSP settings loudspeaker on a tripod Electro-Voice User Manual 2017.01 | 06 | F.01U.318.952... -
Page 36: Mp3 Player Stereo Configuration
EKX Powered Loudspeakers MP3 player STEREO configuration Notice! The direction of the arrow indicates the signal path. Mode: Music Location: Tripod Sub: Table 7.3: DSP settings loudspeaker on a tripod 2017.01 | 06 | F.01U.318.952 User Manual Electro-Voice... -
Page 37: Using Full-Range Systems As Monitors
Using full-range systems as monitors Notice! The direction of the arrow indicates the signal path. Mode: Live Location: Monitor Sub: Table 7.4: DSP settings loudspeakers as monitors Electro-Voice User Manual 2017.01 | 06 | F.01U.318.952... -
Page 38: Stacking Full-Range Systems With Subwoofers
The direction of the arrow indicates the signal path. EKX-15P Mode: Live Location: Tripod Sub: EKX-18SP EKX-18SP Mode: Live Location: Normal Low Pass: EKX-15P Table 7.5: DSP settings loudspeaker and subwoofer stacked 2017.01 | 06 | F.01U.318.952 User Manual Electro-Voice... -
Page 39: Cardioid Control Technology
For best performance, adhere to the following guidelines: The subwoofers must all be the same model, for example all - EKX-15SP or all - EKX-18SP. ▪ The subwoofers must be physically placed in one of the options shown. See Cardioid physical alignment. - Page 40 (Rejection direction). Cardioid option B: Either three EKX-15SP or three EKX-18SP subwoofers orientated vertically. Direct the top two subwoofers towards the audience and the bottom subwoofer away from the audience (Rejection direction).
-
Page 41: Troubleshooting
MIC microphone pre-amp. position Sound is distorted Excessive input level Reduce the input level or loudspeaker level knobs to front LED is OFF, prevent limit. LCD screen LIMIT is Electro-Voice User Manual 2017.01 | 06 | F.01U.318.952... - Page 42 Press and hold the MASTER VOL knob for 5 seconds. function has been turned on. A lock symbol displays on the LCD screen. If these suggestions do not solve your problems, contact your nearest Electro-Voice dealer or Electro-Voice distributor. See also • System status, page 22 •...
-
Page 43: Technical Data
100 – 240 V~, 50 – 60 Hz, 1.8A Full space measurement using the music DSP preset. Maximum SPL is measured at 1 m using broadband pink noise at maximum output. Current rating is 1/8 power. Electro-Voice User Manual 2017.01 | 06 | F.01U.318.952... - Page 44 EKX Powered Loudspeakers EKX-15SP and EKX-18SP EKX-15SP EKX-18SP Freq. Response (-3 dB): 45 Hz - 150 Hz 40 Hz - 150 Hz Freq. Range (-10 dB): 40 Hz - 180 Hz 35 Hz - 180 Hz Maximum SPL: 133 dB Peak...
-
Page 45: Frequency Response
Frequency response Figure 9.1: EKX-12P Frequency response graph: live, music, speech, and club modes Figure 9.2: EKX-15P Frequency response graph: live, music, speech, and club modes Electro-Voice User Manual 2017.01 | 06 | F.01U.318.952... - Page 46 EKX Powered Loudspeakers Figure 9.3: EKX-15SP Frequency response graph: live, music, and club modes Figure 9.4: EKX-18SP Frequency response graph: live, music, and club modes 2017.01 | 06 | F.01U.318.952 User Manual Electro-Voice...
- Page 47 Bosch Sicherheitssysteme GmbH Bosch Security Systems, Inc Robert-Bosch-Ring 5 12000 Portland Avenue South 85630 Grasbrunn Burnsville MN 55337 Germany www.boschsecurity.com www.electrovoice.com © Bosch Sicherheitssysteme GmbH, 2017...
Need help?
Do you have a question about the EKX-15SP and is the answer not in the manual?
Questions and answers