birddog EYES P100 User Manual
Hide thumbs
Also See for EYES P100:
- User manual (17 pages) ,
- User manual (10 pages) ,
- User manual (24 pages)
Table of Contents
Advertisement
Advertisement
Table of Contents

Related Manuals for birddog EYES P100


Summary of Contents for birddog EYES P100
- Page 1 EYES P100 FULL ND I . NO COMPROMISES. USER MANUAL...
-
Page 2: Table Of Contents
Contents IMPORTANT INFORMATION ...........................................4 WHAT’S IN THE BOX ............................................5 Overview .................................................5 Features ...................................................5 Camera Diagrams ..............................................6 Remote Controller ...............................................7 System Configuration ............................................8 Obtain Video Signal ............................................8 Audio IN / OUT ..............................................10 Camera Control Methods and System Configurations................................ 10 Use the Infrared Remote Controller ...................................... - Page 3 Before operating the unit, please read this manual thoroughly and retain it for future reference. Copyright Copyright 2019 BirdDog Australia all rights reserved. No part of this manual may be copied, reproduced, translated, or distributed in any form or by any means without prior consent in writing from our company.
-
Page 4: Important Information
IMPORTANT INFORMATION to the camera. Legal Notice Maintenance Precautions: Attention: • If there is dust on the front glass surface, remove the dust To ensure account security, please change the password after gently using an oil-free brush or a rubber dust blowing ball. your first login. -
Page 5: What's In The Box
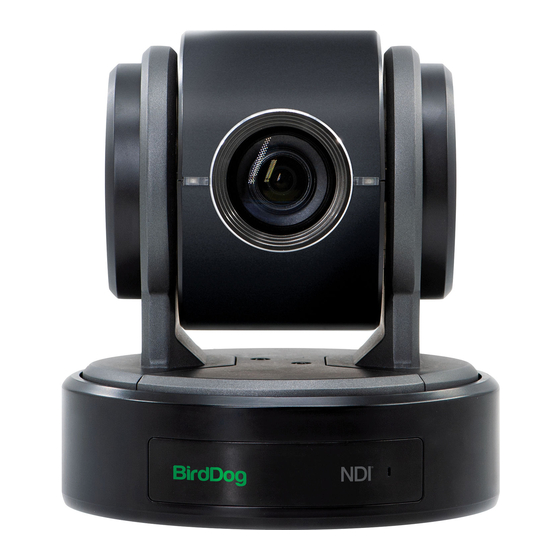
Note: The camera color may be in white or black per the item This user guide is suitable for the following models: that is purchased. BirdDog Eyes P100 1x BirdDog Eyes P100 Features • Resolution: Up to 1080P60, 1080i59.94 1x IR Remote Controller •... - Page 6 12V DC Power Port Connect the supplied DC power adaptor and cord. Lens This is a 10X magnification optical zoom lens ® Ethernet Port 10. Communication LED Indicator HDMI Port (HDMI 1.4) Flashes orange when the camera receives commands from the infrared remote controller.
-
Page 7: Remote Controller
Remote Controller MENU POWER Power • Power ON the camera to turn the camera in operation sta- CAMERA SELECT tus. • Power OFF the camera to turn the camera in standby sta- tus. • When the camera is powered OFF, the camera turns to the back and would be on standby mode. -
Page 8: System Configuration
System Configuration Power • Use only the DC power adaptor (JEITA type4) supplied with the Connection unit. Do not use any other DC power adaptor. When the camera is connected to a computer and joystick key- board with a VISCA cable (cross type, RS-232), you can operate •... - Page 9 System Requirements for your PC • When the camera setting HDMI video format at 1080P60/1080P30/720P60, USB2.0 resolution with frame Operating System: Microsoft Windows 10/Windows 8/Win- rate are available as following list. dows 7, Linux Ubuntu 16.04LTS, macOS Sierra, Microsoft HDMI FORM AT USB 2.0 RES.
-
Page 10: Audio In / Out
System Configurations Camera Initial setting status Information Information of the camera initial setting status will display for 5 seconds. This unit has multiple ways of controlling the camera and various system configuration capabilities using optional products. This Camera PELCO ID for RS-485 control section describes the ways of controlling and typical system ex- amples with the required components and usage of each system. -
Page 11: Use Rs422(Visca) / Rs485 (Pelco P/D)
Set Baud Rate on Bottom Dip Switch to the same as Baud camera. Rate setting on the keyboard you are using. To perform pan/tilt and zoom operations using the joystick of the Set specific camera address that you want to control the control keyboard, and to perform the Preset operation using the camera for on Bottom Dip Switch. - Page 12 13. How to make RS422 Daisy Chain multiple camera connec- tion with RS422 standard serial port controller: 10. How to make RS422 connection and RS422 Daisy Chain multiple cameras connection with Non-Sony controller as below: VISCA (Non-Sony) Keyboard RS422 Connection 5.
-
Page 13: Pelco P/D Keyboard Rs485 Connection
PELCO P/D Keyboard RS485 Connection • Or you can use CAT5/6 T-568B Standard Ethernet cable di- rect connect between the camera and the controller to make NOTE: Use RS422 ports for RS485 connection. Only use TX+ and RS485 connection by following the pin definition below: TX- for RS485 connection. -
Page 14: Operating Multiple Cameras
• You cannot use the RS-232 connections while you are using Re-assign the camera the RS422/485 connection. The default information of the IP camera is following: • Static IP: 192.168.0.13 Operating Multiple Cameras Using RS-232,422/485 • Subnet mask: 255.255.255.0 • Using RS-232 (VISCA), you can connect to 7 cameras. - Page 15 camera takes either the way of OSD menu setting or the way of bottom DIP switch setting. They override each other. After the camera is turned on, the camera takes the last setting before it is turned on, either set through the OSD or bottom DIP switch. The Bottom DIP Switch Settings BOTTO M LEF T:...
-
Page 16: Adjusting And Setting With Menus
Adjusting and Setting with Menus NOTE: In some product models, only use “←” button on the in- frared remote controller to change the value. To confirm the val- About On-Screen Menus ue, you can use either “→” button or HOME button. You can change various settings, such as shooting conditions and Control Button system setup of the camera, while observing menus displayed on... -
Page 17: White Balance Menu
OS D EXPOSURE MENU: IRIS PRI S. SHUTTER LIMIT: When the subject becomes dark, the shutter EXPOSURE MODE IRIS PRI speed becomes slow and the gain is increased. This is a function WHITE BALANCE IRIS F1.6 to put a limit on the shutter speed. It prevents the camera shake PICTURE 1 GAIN LIMIT 21.4dB... -
Page 18: Picture1 Menu
Balance. NOTE: When you select the OPW (One Push White Balance) Perform the following operations: Place an image of white subject (For example: A piece of white paper) in the center of the screen. Press the HOME button of the infrared remote controller. The one-push white balance adjustment is activated. -
Page 19: Pan Tilt Zoom Menu
CHROMA: You can set the brightness from OFF, LOW, MID, HIGH in each mode of the variable gamma mode. HLC MODE: HLC (Highlight Light Compensation) is a function to adjust AE and AF, and to perform the masking of light area as The PAN TILT ZOOM menu is used to select the pan/tilt/ zoom required when a high intensity spot light is detected. -
Page 20: Operation Using The Infrared Remote Controller
Operation Using the Infrared Remote Controller PELCO ID: When using RS485 (PELCO P/D) control, Set Camera Pan/Tilt and Zoom Operation ID to the address that you want to control to. This value is from 001-255. CAMERA SELEC T L/R DIRECTION SET IR-RECEIVE (Infrared Signal Reception): When this is set to OFF, the camera does not receive the signal from the infrared remote controller. -
Page 21: Operating Multiple Cameras With The Infrared Remote Controller
To reset the setting, press the 1 (STD) button while holding down Press the CAMERA SELECT button on the infrared remote the L/R DIRECTION SET button. controller that corresponds to the number set in step. Arrow Button Movement of the Camera Setting Then, you can operate the camera(s) specified by number. -
Page 22: Dimensions
CAMERA SELECT • Focus Auto/Manual • Focus Position Press a POSITION button • AE Mode • Shutter control parameters PRESET RESET While holding down RESET Butto n • Bright Control • Iris control parameters Notes: • Gain control parameters • When the power is turned on, the camera starts with the settings stored in POSITION 1. - Page 24 WELCOME TO THE FUTURE. bird-dog.tv hello@bi rd-dog.tv...
Need help?
Do you have a question about the EYES P100 and is the answer not in the manual?
Questions and answers