
Related Manuals for GIA GIA-MDI-09M01


Summary of Contents for GIA GIA-MDI-09M01
- Page 1 OWNER’S AND INSTALLATION MANUAL DUCTS GIA-MDI-09M01 | GIA-MDI-12M01 GIA-MDI-18M01 | GIA-MDI-24M01 Thanks for choossing our product. Please, read carefully this manual before using the product...
- Page 2 User Notice ◆ The total capacity of the indoor units which runs at the same time can not exceed 150% of that of the outdoor units; otherwise, the cooling (heating) effect of each indoor unit would be poor. ◆ Switch the main power on 8 hours before start the unit, helpful for a successful startup.
- Page 3 ◆If the supply cord is damaged, it must be replaced by the manufacturer, its service agent or similarly qualified persons in order to avoid a hazard. ◆The appliance shall be installed in accordance with national wiring regulations. Correct Disposal of this product This marking indicates that this product should not be disposed with other household wastes throughout the EU.
-
Page 4: Table Of Contents
Contents Ⅰ Safety Precautions ....................1 Ⅱ Installation Location and Matters Needing Attention ..........3 1 How to select the installation location for the indoor unit ........3 2 Electric Wiring ....................4 3 Earthing Requirements ..................4 4 Accessories for Installation ................4 Ⅲ... -
Page 5: Ⅰ Safety Precautions
Unitary Duct Split Unitary Duct Split Ⅰ Safety Precautions Please read this manual carefully before use and operate correctly as instructed in this manual. Please especially take notice of the following two symbols: Warning! It indicates improper operation which will lead to human casualty or sever injury. - Page 6 Unitary Duct Split Unitary Duct Split requirement specified on the nameplate and also check its security. ◆Before use, please check if the piping and wiring are correct to avoid water leakage, refrigerant leakage, electric shock, fire etc. ◆The main power supply must be earthed to avoid the hazard of electric shock and never connect this earth wire to the gas pipe, running water pipe, lightening rod or phone cable’s earth lead.
-
Page 7: Ⅱ Installation Location And Matters Needing Attention
Where there is no corrosive gas, heavy dust, salt mist, smog or moisture. CUATION! The unit which is installed in the following places is likely to run abnormally. If unavoidable, please contact the professional personnel at the GIA appointed service center: ① Where is full of oil;... -
Page 8: Electric Wiring
Unitary Duct Split Unitary Duct Split 2 Electric Wiring a. The installation must be done in accordance with the national wiring regulations. b. Only the power cord with the rated voltage and exclusive circuit for the air conditioning can be used. c. -
Page 9: Ⅲ Installation Instructions
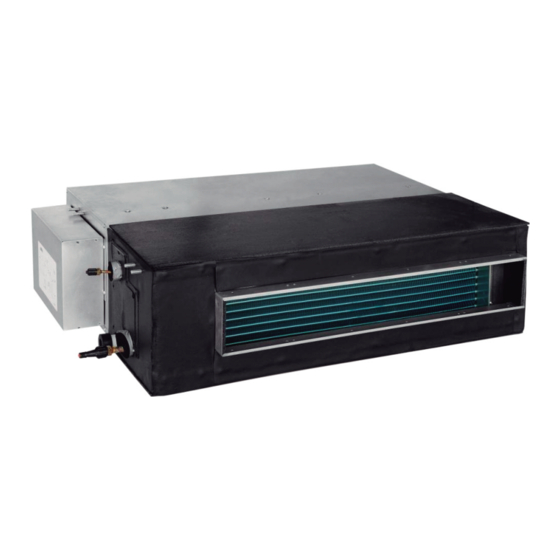
Unitary Duct Split Unitary Duct Split Ⅲ Installation Instructions 1 Outline Dimension Drawings of the Indoor Unit Note: the unit in the followings figures is mm, unless otherwise specified. Fig.1 is applicable to GIA-MDI-09M01, GIA-MDI-12M01, GIA-MDI-18M01, GIA-MDI-24M01: Fig.1 : Table 1: Outline Dimensions Item... -
Page 10: Dimension Requirements On The Installation Space Of The Indoor Unit
Unitary Duct Split Unitary Duct Split 2 Dimension Requirements on the Installation Space of the Indoor Unit Fig. 2 3 Installation of the Indoor Unit a. Requirements on the Installation Location 1) Ensure the hanger is strong enough to withstand the weight of the unit. 2) The drainage of the drain pipe is easy. - Page 11 Unitary Duct Split Unitary Duct Split between holes and see Fig.3 for the installation of the expansion bolt. Fig.3 Fig.4 Install the hanger on the indoor unit, as shown n Fig.4. Install the indoor unit on the ceiling, as shown in Fig.5. Fig.5 CUATION!...
-
Page 12: Horizontality Check Of The Indoor Unit
Unitary Duct Split Unitary Duct Split prevent it vibrating. Consult the user and builder for more details. ③.If the strength of the ceiling is not strong enough, a beam made of angle iron can be used and then fix the unit on it. ④.If the indoor unit is not installed in the air conditioning area, please use sponge around the unit to prevent condensing. - Page 13 10 meters far away from the corresponding diffuser. The standard accessories supplied by GIA is the transition duct 200mm long and round air outlet φ200, however, those of other specifications can be purchased.
-
Page 14: Drawings Of The Air Supply Outlet And Return Air Inlet
Fig.10 Return Air Inlet Table 4 Dimensions of the Air Supply Outlet and Return Air Inlet (unit: mm) Air Supply Outlet Return Air Inlet Item Model GIA-MDI-09M01 GIA-MDI-12M01 GIA-MDI-18M01 GIA-MDI-24M01 1062 7 Installation of the Return Air Duct a. The default installation location of the rectangular flange is in the back and the return air cover plate is in the bottom, as shown in Fig.11. -
Page 15: Installation Of The Condensate Pipe
Unitary Duct Split Unitary Duct Split and the other to the return air louver. For the sake of the convenience to freely adjust the height, a cutting of canvas duct will be helpful, which can be reinforce and folded by 8#iron wire. -
Page 16: Design Of The Drain Pipe
Unitary Duct Split Unitary Duct Split b. There is a condensate outlet on both left and right sides of the unit. Once one is confirmed to be used, the other should be clogged by a rubber plug, bundled by the binding wire and insulated by the insulation material to avoid water leakage. -
Page 17: Precautions For The Lift Pipe
Unitary Duct Split Unitary Duct Split (Right) with a min. degree of slope 1/100 (Wrong) Fig.14 e. Insert the drain hose into the drain hole and tighten it with clamps. f. Wrap the clamps with large amount of sponge for thermal insulation. g. -
Page 18: Test For The Drainage System
Unitary Duct Split Unitary Duct Split Fig.16 Notes: ①.The inclination height of the drain hose should be within 75mm so that the outlet of the drain hose does not suffer the external force. ②.If multiple drain pipes converge, please follow the installation steps below. Fig.17 12 Test for the Drainage System a. -
Page 19: Piping
Unitary Duct Split Unitary Duct Split 13 Piping a. Let the flare end of the copper pipe point at the screw and then tighten the screw by hand. b. After that, tighten the screw by the torque wrench unit it clatters (as shown in Fig.18). -
Page 20: Insulation For The Refrigerant Pipe
Unitary Duct Split Unitary Duct Split 14 Insulation for the refrigerant pipe a. The refrigerant pipe should be insulated by the insulating material and plastic tape in order to prevent condensing and leaking. b. The joints of the indoor unit should be wrapped with the insulating material and no gas is allowed on the joint of the indoor unit, as shown in Fig.19. - Page 21 Unitary Duct Split Unitary Duct Split 1) Strip the insulating layer at the end of the wire about 25mm off with a wire striper. 2) Loosen the screw off on the wiring board of the air conditioning unit. 3) Shape with the pliers the end of the wire to a circle matching with the size of the screw.
-
Page 22: Wiring Of The Power Cord (Single-Phase)
“3”;black wire(the communication wire) to the Terminal board“2”;blue wire to the Terminal board“N(1)”,and connect the earthing wire to the screw terminal on the electric box. Clamp them with the corresponding wire clamp packed in the chassis. ④. Fix the power cord tightly with the binding wire. GIA-MO4-36M01 Fig.21... -
Page 23: Wiring Of The Signal Line Of The Wired Controller
Unitary Duct Split Unitary Duct Split GIA-MO5-42M01 Fig.22 17 Wiring of the Signal Line of the Wired Controller 1) Open the cover of the electric box of the indoor unit. 2) Let the signal line go through the rubber ring. -
Page 24: Electric Installation
Indoor Unit Current Input Power(W) Recommended Power Cord Power Cord (Sectional Indoor Area× Pieces) Type Model Cooling Heating Motor 220-240V~ 0.406 1.0×4 GIA-MDI-09M01 50Hz 220-240V~ 0.348 1.0×4 GIA-MDI-12M01 50Hz Cooling 220-240V~ 0.428 1080 1.0×4 GIA-MDI-18M01 50Hz Heating 220-240V~ GIA-MDI-24M01 0.588 1610 1.0×4... -
Page 25: Ⅴ Error Analysis
Unitary Duct Split Unitary Duct Split Ⅴ Error Analysis If your conditioning unit runs abnormally, please check the following items before contact the maintenance serviceman. Table 9 Errors Possible Causes There is no power supply. Failed startup The breaker opens owing to electrical leakage. Voltage is too low. -
Page 26: Ⅵ Maintenance
Unitary Duct Split Unitary Duct Split Ⅵ Maintenance CAUTION! Take notice of the following items before clean your air conditioning unit. ①. Cut off the main power supply before contact any wiring device. ②. Only when the unit is turn off and the main power supply is cut off, can the unit be cleaned;... - Page 27 C./ Industria, 13 l Polígono Industrial El Pedregar 08160 Montmeló Barcelona (Spain) Phone: (0034) 93 390 42 20 Fax: (0034) 93 390 42 05 info@giatsu.com www.giatsu.com...
Need help?
Do you have a question about the GIA-MDI-09M01 and is the answer not in the manual?
Questions and answers