Cognex MX-1502 Reference Manual
Hide thumbs
Also See for MX-1502:
- Reference manual (36 pages) ,
- User manual (26 pages) ,
- Quick reference manual (25 pages)
Table of Contents
Advertisement
Quick Links
Advertisement
Table of Contents

Subscribe to Our Youtube Channel
Related Manuals for Cognex MX-1502


Summary of Contents for Cognex MX-1502
- Page 1 MX-1502 Reference Manual 2020 June 05 Revision: 1.0.0.10...
-
Page 2: Legal Notices
Copyright © 2020. Cognex Corporation. All Rights Reserved. Portions of the hardware and software provided by Cognex may be covered by one or more U.S. and foreign patents, as well as pending U.S. and foreign patents listed on the Cognex web site at: cognex.com/patents. -
Page 3: Table Of Contents
Setting up the MX-1502 Assembling the MX-1502 Assembling the Reader with the Pistol Grip Charging Charging an MX-1502 Using the Wireless Charging Station USB Type-C Charging Changing Battery in the MX-1502 Reader Changing Battery in the Pistol Grip Reading Codes with your MX-1502 MX-1502-LR Readers with 6.2 mm Lens... -
Page 4: Symbols
Symbols Symbols The following symbols indicate safety precautions and supplemental information: WARNING: This symbol indicates a hazard that could cause death, serious personal injury or electrical shock. CAUTION: This symbol indicates a hazard that could result in property damage. Note: This symbol indicates additional information about a subject. Tip: This symbol indicates suggestions and shortcuts that might not otherwise be apparent. -
Page 5: Getting Started
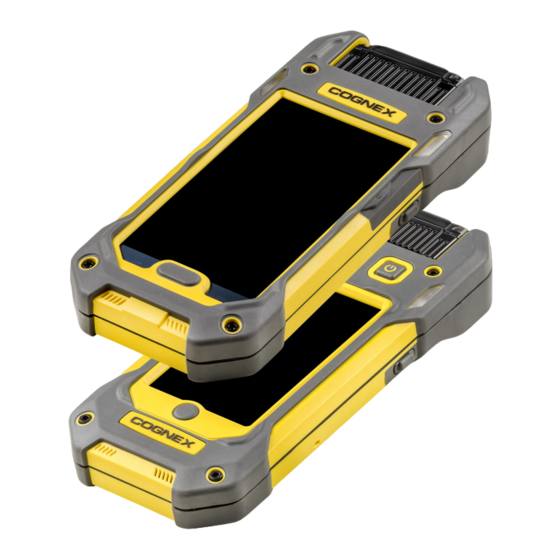
This section provides general information about the Cognex MX-1502 Vision-Enabled Mobile Terminal (henceforth referred to as "MX-1502 reader"). You can also find information on the MX-1502 accessories and the physical layout of the reader and the charging station in this section. - Page 6 Getting Started Note: A mobile device is necessary to work with the MX-1502 reader. The currently supported devices are: Galaxy S6, S7, S8 S9 Galaxy J3 Galaxy A3 Galaxy XCover 4 iPhone SE, 5S, 6, 6S, 7, 8 iPod touch generations 5th and 6th...
-
Page 7: Mx-1502 Accessories
Getting Started MX-1502 Accessories Accessory Battery for reader (3120 mAh) DMA-MTBATTERY-01 Battery for pistol grip accessory (3070 mAh) DMA-HHBATTERY-01 Pistol grip DMA-GRIP-01 Note: The grip features its own trigger button and an additional battery which can be charged via the charging station. - Page 8 Getting Started Accessory Wireless car charger DMA-VMCHARGER-00 DMA-24VPWR-US Power supply for charging station 24V/24W DMA-24VPWR-EU USB Type-C battery charger kits: 1. DMA-MXUSB-01 1. USB Type-C Battery Cover (DMA- MXUSB-00) + USB Type-C 3Amp Car Charger (DMA-MXUSB-CHARGER) 2. DMA-MXUSB-02 2. USB Type-C Battery Cover (DMA- MXUSB-00) + Handstrap (DMA- MXSTRAP-00) 3.
- Page 9 Getting Started Accessory Top Cover DMA-COVERKIT-S4 DMA-COVERKIT-S5 DMA-COVERKIT-S6 DMA-COVERKIT-S7 DMA-COVERKIT-S8 DMA-COVERKIT-S9 DMA-COVERKIT-J3 DMA-COVERKIT-J327 DMA-COVERKIT-J330 DMA-COVERKIT-A3 DMA-COVERKIT-X4 DMA-COVERKIT-I5 DMA-COVERKIT-I6 DMA-COVERKIT-iX DMA-COVERKIT-S10e DMA-COVERKIT-N42...
-
Page 10: Mx-1502 Layout
Getting Started MX-1502 Layout Layout Standard front cover Indicator LEDs Side trigger buttons Power button Touch screen Home button Speaker vents Recessed area for mobile camera Slider to lock battery cover Battery cover Lanyard hook End cap of pistol grip*... -
Page 11: Layout Of The Charging Station
Getting Started Layout of the Charging Station Top view: Layout Charging station power LEDs Device charger bay Battery charger LED Spare battery charger bay Bottom view: Layout Cable guide Power plug (24 V, jack) Power plug (24 V, terminal block) Note: Supply power by using only one of the connectors. -
Page 12: Indicator Leds
Getting Started Indicator LEDs MX-1502 indicator LEDs Type Signal Color Interval Meaning Status Battery health RED and GREEN blinking Battery health low Configuration GREEN 2 short blinks/1 sec Internal reconfiguration Overheat protection 2 short blinks/1.5 sec Overheat protection Status Low battery status... -
Page 13: Dimensional Drawings
Getting Started Dimensional Drawings MX-1502 standard front cover model:... -
Page 14: Mx-1502 Specifications
Note: The operating and charging temperature may be lower depending on the installed mobile phone. Imager Specifications Specification MX-1502 Standard and Long Range Imager Image Sensor 1/3 inch CMOS Image Sensor Properties 4.8mm x 3.6mm (W x H), 3.75 µm square pixels... - Page 15 Getting Started Specification Charging Station Charging Temperature 0ºC — +35ºC (+32ºF — +95ºF) Maximum Humidity 95% (non-condensing) Environmental IP40 24 V, 24 W maximum LPS or NEC Class 2 power supply Power Supply Requirements 0.5A (inductive) and 1A (non-inductive) Note: The operating and charging temperature may be lower depending on the installed mobile phone.
-
Page 16: Setting Up The Mx-1502
This section provides information on how to assemble, and how to set up your MX-1502 reader. Assembling the MX-1502 The first step in preparing your MX-1502 is assembling the components of your MX-1502 Kit. The MX-1502 Kit contains the following components: Base unit Battery + cover... - Page 17 Top cover Pistol grip (optional) Perform the following steps to assemble the MX-1502 reader: 1. Carefully place the rubber insert on the base unit which is the lower part of the reader. 2. Take the provided USB cable and plug it into the base unit. Then take your phone and put it on the rubber insert.
-
Page 18: Assembling The Reader With The Pistol Grip
If you want to use your reader with a pistol grip, perform the following steps: 1. Open the back cover of the reader by unlocking the sliders and take out the battery. Note: For more information about back cover locking and opening, see Changing Battery in the MX-1502 Reader). -
Page 19: Charging
Setting up the MX-1502 2. Plug the pistol grip accessory cable into the grip accessory connector. WARNING: Do not insert the battery into the pistol grip during the assembly process. Note: For more information on how to insert the battery into the grip after the assembly process, see Changing Battery in the Pistol Grip on page 25... -
Page 20: Charging An Mx-1502 Using The Wireless Charging Station
Charging an MX-1502 Using the Wireless Charging Station You can charge your MX-1502 reader using the wireless charging station. It has threaded inserts at the bottom to be securely mountable on different surfaces. It allows the charging of both the spare battery and the main unit. - Page 21 Setting up the MX-1502 When the wireless reader is removed from the device bay, the charging station power led becomes red. It indicates that the charger is inactive. To charge the spare battery, you need to insert it to the battery charging bay of the charging station. Make sure that the...
- Page 22 Setting up the MX-1502 Once you put the spare battery into the battery bay, the battery charger LED light turns to red, while the flashing red light indicates an error. When charging is finished, the LED light turns green. Note: For more information on the battery charger LED lights, see...
-
Page 23: Usb Type-C Charging
Note: Both the cable and the power supply must be compatible with 5V/3A. Changing Battery in the MX-1502 Reader The MX-1502 reader contains a battery (lithium polymer battery, capacity: 3000 mAh) which you can charge by putting it into the spare battery charging bay of the charging station. - Page 24 Setting up the MX-1502 Note: For more information on charging the batteries, see Charging. 3. Put a new battery into the battery bay of your reader or wait until the charging process of the discharged battery is finished. Make sure that the battery is properly installed in the battery bay.
-
Page 25: Changing Battery In The Pistol Grip
The battery used in the devices may present a risk of fire or chemical burn if mistreated. Do not disassemble, heat above 60 ºC (140 ºF), or incinerate. Replace battery with Cognex DMA-HHBATTERY-01 only. The use of another battery may present a risk of fire or explosion. - Page 26 Setting up the MX-1502 3. Put the replacement battery into the slot. The battery has a small triangle on one side. Make sure that you insert the battery into the slot with the side depicting the triangle pushed in first.
-
Page 27: Reading Codes With Your Mx-1502
Reading Codes with your MX-1502 Reading Codes with your MX-1502 The following map shows the field of view (FoV) of MX-1502 readers. Reading distance values are also provided for 2-D and Code39 example code distances. MX-1502-LR Readers with 6.2 mm Lens The following map shows the FoV of the MX-1502-LR readers with a 6.2 mm lens. -
Page 28: Mx-1502-Xr Readers With 20 Mm Lens
Reading Codes with your MX-1502 MX-1502-XR Readers with 20 mm Lens The following map shows the FoV of the MX-1502-XR readers with a 20 mm lens at various distances. The FoV values are shown as follows:... -
Page 29: Mx-1502-Dl Readers With 6.2 Mm Lens
Reading Codes with your MX-1502 MX-1502-DL Readers with 6.2 mm Lens The following map shows the FoV of the MX-1502-DL readers with a 6.2 mm lens at various distances. The FoV values are shown as follows:... - Page 30 Reading Codes with your MX-1502...
- Page 31 Reading Codes with your MX-1502 Working Distance Horizontal Values Vertical Values = 15 mm = 6.4 mm = 4.09 mm = 210 mm = 148.31 mm = 94.67 mm = 420 mm = 301.14 mm = 192.22 mm Distances in mm / 1D min code...
-
Page 32: Cleaning And Maintenance
Cleaning and Maintenance Cleaning and Maintenance Cleaning the Reader Housing To clean the outside of the reader housing, use a small amount of mild detergent cleaner or isopropyl alcohol on a cleaning cloth. Do not pour the cleaner directly onto the reader housing. CAUTION: Do not attempt to clean any MX Series product with harsh or corrosive solvents, including lye, methyl ethyl ketone (MEK) or gasoline. -
Page 33: Compliance Statements
Statement For European Union Users Cognex complies with Directive 2012/19/EU OF THE EUROPEAN PARLIAMENT AND OF THE COUNCIL of 4 July 2012 on waste electrical and electronic equipment (WEEE). This product has required the extraction and use of natural resources for its production. It may contain hazardous... -
Page 34: Compliance Statements: Wireless Charging Station
2014., and has been certified to be under the limits of a Class 2 Laser device. For European Union Users Cognex complies with Directive 2012/19/EU OF THE EUROPEAN PARLIAMENT AND OF THE COUNCIL of 4 July 2012 on waste electrical and electronic equipment (WEEE). -
Page 35: 中 国 大 陆 Rohs (Information For China Rohs Compliance)
Compliance Statements This product has required the extraction and use of natural resources for its production. It may contain hazardous substances that could impact health and the environment, if not properly disposed. In order to avoid the dissemination of those substances in our environment and to diminish the pressure on the natural resources, we encourage you to use the appropriate take-back systems for product disposal. - Page 36 Compliance Statements Hazardous Substances 有害物质 Part Name Lead (Pb) Mercury (Hg) Cadmium Hexavalent Polybrominated Polybrominated 部件名称 铅 汞 (Cd) Chromium biphenyls (PBB) diphenyl ethers (PBDE) 镉 多溴联苯 多溴二苯醚 (Cr (VI)) 六价铬 Regulatory Model R00045 Regulatory Model 1ABA This table is prepared in accordance with the provisions of SJ/T 11364. 这个标签是根据SJ / T 11364 的规定准备的。...
-
Page 37: Precautions
Precautions Precautions To reduce the risk of injury or equipment damage, observe the following precautions when you install the Cognex product: Route cables and wires away from high-current wiring or high-voltage power sources to reduce the risk of damage or malfunction from the following causes: over-voltage, line noise, electrostatic discharge (ESD), power surges, or other irregularities in the power supply. - Page 38 Copyright © 2020 Cognex Corporation. All Rights Reserved.
Need help?
Do you have a question about the MX-1502 and is the answer not in the manual?
Questions and answers