Table of Contents
Advertisement
Quick Links
Distributed by: ABQ Industrial LP USA
Tel: +1 (281) 516-9292 / (888) 275-5772 eFax: +1 (866) 234-0451
Web: https://www.abqindustrial.net E-mail: info@abqindustrial.net
TI-25MX Ultrasonic Wall Thickness Gauge - Instruction Manual
Distributed by: ABQ Industrial LP USA
Tel: +1 (281) 516-9292 / (888) 275-5772 eFax: +1 (866) 234-0451
Web: https://www.abqindustrial.net E-mail: info@abqindustrial.net
Advertisement
Table of Contents

Summary of Contents for ABQ Industrial CHECKLINE TI-25MX
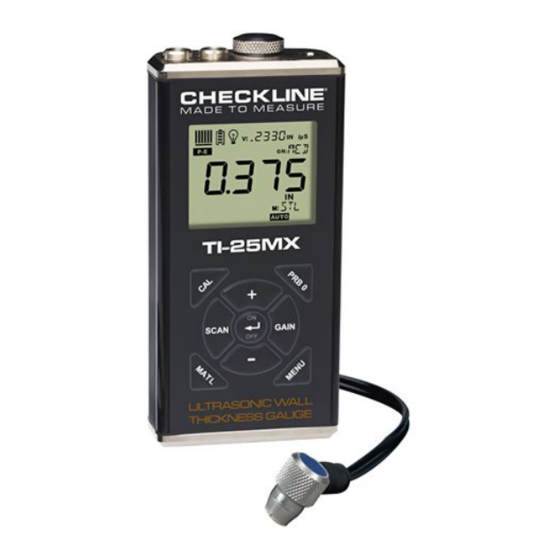
- Page 1 Distributed by: ABQ Industrial LP USA Tel: +1 (281) 516-9292 / (888) 275-5772 eFax: +1 (866) 234-0451 Web: https://www.abqindustrial.net E-mail: info@abqindustrial.net TI-25MX Ultrasonic Wall Thickness Gauge - Instruction Manual Distributed by: ABQ Industrial LP USA Tel: +1 (281) 516-9292 / (888) 275-5772 eFax: +1 (866) 234-0451...
-
Page 2: Table Of Contents
1 4 .0 W ABLE OF ON T EN T S ARRAN T Y ELECTROMATIC Equipment Co., Inc. (ELECTROMATIC) warrants to the 01.0 Introduction..........original purchaser that this product is of merchantable quality and confirms 02.0 Precautions . -
Page 3: Introduction
1 .0 I 13.3 Measuring laminated materials N T RODU CT I ON Laminated materials are unique in that their density (and therefore sound-veloci- The TI-25M-MMX is a multi-mode Ultrasonic thickness gauge that is capable of ty) may vary considerably from one piece to another. Some laminated materials measuring the thickness of various materials with accuracy as high as ±... -
Page 4: Overview
1 3 .0 A PPLI CAT I ON OT ES 3 .0 V ERV I EW AU GE 13.1 Measuring pipe and tubing 3.1 Gauge When measuring a piece of pipe to determine the thickness of the pipe wall, ori- entation of the transducers is important. -
Page 5: Contents Of Kit
1 2 .0 M (M SDA) 3.2 Contents Of Kit AT ERI AL AFET Y H EET Section 1— Product Identification The TI-25M-MMX is supplied as a complete kit with the following: a. Gauge Product Name: TI-25M Generic Name: Ultrasonic Couplant Manufacturer: Electromatic Equipt. -
Page 6: Probe
3.4 The Keypad 1 1 .0 S PECI FI CAT I ON S The TI-25M-MMX interacts with the operator through the Range ALRM membrane keypad and the LCD display. The functions of SCAN TI-25M-MMX* Pulse-Echo Mode (Pit & Flaw Detection): DUAL the various keys on the keypad are detailed below, followed SEND... -
Page 7: Lcd Display
The DOWN arrow key has two functions. When the 11.2 Acoustic Velocity Table TI-25M-MMX is in the CAL mode, this key is used to decrease Material Velocity Velocity numeric values on the display. An auto-repeat function is built in, Type Inches/µs Meters/s so that when the key is held down, numeric values will decrement... -
Page 8: Probe Zero Plate
7. Press the CAL key again and the acoustic velocity units indicator MM/µs When the IN symbol is on, the TI-25M-MMX is “IN/µs” or“M/s” will be flashing showing the acoustic velocity displaying a thickness value in inches. The 1.8.8.8.8 value that was calculated for this sample. If desired, record this maximum thickness that can be displayed is value so it can be re-entered easily in the future. -
Page 9: Probe Connector Receptacle
1 1 .0 CALI BRAT I ON FOR M EASU RI N G T H I CK N ESS OF 3.7 Probe Connector Receptacle M AT ERI ALS OT H ER T H AN ST EEL Located on the top edge of the TI-25M-MMX housing are the receptacles for the probe and the probe zero plate. - Page 10 10.4 Temperature of the Material 4 .0 M AK I N G EASU REM EN T S When it is necessary to measure on surfaces that are exceedingly hot, high tem- In order for the transducer to do its job, there must be no air gaps between the perature transducers must be used.
-
Page 11: Condition And Preparation Of Surfaces
4.1 Condition and Preparation of Surfaces 1 0 .0 T RAN SDU CER SELECT I ON In any ultrasonic measurement scenario, the shape and roughness of the test sur- The TI-25M-MMX is inherently capable of performing measurements on a wide face are of paramount importance. -
Page 12: Calibration
9 .0 RS2 3 2 S 5. Press the transducer against the probe-disc, making sure that the transducer ERI AL sits flat against the surface. The display should show some thickness value, and The TI-25M-MMX is equipped with an RS232 serial port. Using the accessory the Stability Indicator should have nearly all its bars illuminated. - Page 13 Note: The calibration function has been disabled in E-E (echo-echo) mode. 8 .0 D U AL U LT I If the CAL key is pressed while in E-E mode, “nO” followed by “CAL” will Often times users and inspectors in the field are faced with coated materials such be displayed.
- Page 14 7 .0 A 4. Press the CAL key once more to exit the calibration mode. The TI-25M-MMX LARM is now ready to perform measurements. The Alarm Mode feature of the TI-25M-MMX allows the user to set an audible NOTE: At any time during the calibration procedure (IN, MM, IN/ms, or M/s and visual parameter when taking measurements.
-
Page 15: Quick Start Instructions
6 .0 S 5 .0 QU I CK START I N ST RU CT I ON S — ST EEL T H I CK N ESS While the TI-25M-MMX excels at making single point measurements, it is These Quick Start procedures are intended for those applications where the thick- sometimes desirable to examine a larger region, searching for the thinnest point.


Need help?
Do you have a question about the CHECKLINE TI-25MX and is the answer not in the manual?
Questions and answers