
Subscribe to Our Youtube Channel
Related Manuals for Petsafe PIF-300-2


Summary of Contents for Petsafe PIF-300-2
- Page 1 Model Number PIF-300 wireless pet containment system ™ operating and training guide Please read thIs eNtIre guIde beFore begINNINg...
- Page 2 Not all pets can be trained to avoid crossing the boundary! Therefore, if you have reason to believe that your pet may pose a danger to others or harm himself if he is not kept from crossing the boundaries, you should NOT rely solely upon the PetSafe Wireless Pet Containment ®...
- Page 3 • Do not place anything on the top of the Transmitter or cover any ventilation holes. This may overheat the Transmitter and cause early transmit failure. • Do not place Transmitter in a closet or any other confined, unventilated area. www.petsafe.net...
-
Page 4: Table Of Contents
— essentials that influence memories for a lifetime. If you have any questions about our products or training your pet, please visit our website at www.petsafe.net or contact our Customer Care Center at 1-800-732-2677. -
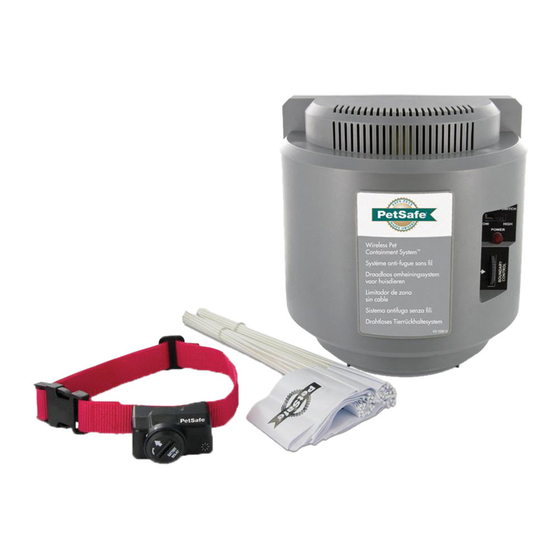
Page 5: Components
• Scissors • Lighter • Drill & mounting hardware • Tape measure • Non-metallic collar and leash Set up and training help: www.petsafe.net Want professional installation help? Invisible Fence Brand installers will come to your home and install your ® new PetSafe System for an additional cost. Contact your local dealer at 1-877-866-DOGS(3647) or visit our ®... -
Page 6: How The System Works
How the System Works The PetSafe Wireless Pet Containment System has been proven safe, comfortable, and effective for pets over ® ® 8 pounds. The system works by transmitting a radio signal up to 90 feet in all directions. You temporarily define the Pet Area with Boundary Flags for a visual aid in training your pet. -
Page 7: Operating Guide
Check the tightness weekly. To Insert and Remove the Receiver Collar Battery Note: Do not install the battery while the Receiver Collar is on your pet. This Receiver Collar utilizes a replaceable PetSafe battery (RFA-67). This unique ®... -
Page 8: Battery Contact Verification
To Set the Static Correction Level Read all steps before attempting to set the Static Correction Level. 1. Remove the clear plastic cover with the edge of the Test Light Tool to expose the Correction Level Button (2D). 2. With the battery installed, press the Correction Level Button and release when the Receiver LED Indicator Light lights up (2E). -
Page 9: Adjust The Pet Area To Desired Size
Test Light flashes. If the Receiver Collar beeps before or after the desired Boundary Zone, return to the Transmitter and adjust the Boundary Control Dial. Repeat this process until the Receiver Collar is beeping at the desired location. Record your settings on page 10 for future reference. www.petsafe.net... -
Page 10: Transmitter Range Chart
Transmitter Range Chart Record Your Settings Boundary Boundary Boundary Final Boundary Final Boundary Receiver Control Switch Switch Switch Setting Control Dial Static Cor- Dial HIGH (HIGH or LOW) Position (1-8) rection Position Level (1-6) 5-10 ft. 5-10 ft. Home 5-10 ft. 5-10 ft. -
Page 11: Fit The Receiver Collar
Remove the Receiver Collar from your pet and cut off the excess. c. Before placing the Receiver Collar back onto your pet, seal the edge of the cut collar by applying a flame along the frayed edge. 8. Put battery in Receiver Collar. www.petsafe.net... -
Page 12: Training Guide
The ridges must be facing up; the collar will slip if it is not properly threaded. Training Guide Be Patient With Your Pet Important: Proper training of your pet is essential to the success of the PetSafe Wireless ® Pet Containment System . -
Page 13: Day 1 - Boundary Awareness
4. Repeat this process at the same Boundary Flag until your pet resists going into the Boundary Zone. 5. Aim to master 3-4 Boundary Flags per session. Make this FUN! Praise if your pet quickly retreats or resists going into the Boundary Zone. www.petsafe.net... -
Page 14: Days 2 Thru 4 - Continue Boundary Awareness
Days 2 thru 4 - Continue Boundary Phase Awareness Introduction to Static Correction Perform three sessions per day, each lasting 10-15 minutes. Goal: To train your pet to stay in the Pet Area and respect the boundary. Setup: • Program the Static Correction Level on the Receiver Collar to Level 2. • Put a separate non-metallic collar on your pet’s neck ABOVE the Receiver Collar and attach a leash. -
Page 15: Days 9 Thru 14 - Unleashed Supervision
You may initially need to convince your pet to leave the Pet Area with a food treat and lots of praise. Note: You may also carry your pet out of the Pet Area. Congratulations! You have now successfully completed the training program. www.petsafe.net... -
Page 16: Wireless - To - Go
To purchase additional accessories for your PetSafe Wireless Pet Containment System , contact the Customer ® ® Care Center at 1-800-732-2677 or visit our website at www.petsafe.net to locate a retailer near you. Component Part Number Battery - two pack RFA-67D-11... - Page 17 If I have a question about my Wireless • C ontact the Customer Care Center at 1-800-732-2677 or visit our System or need replacement parts, web site at www.petsafe.net. where can I get answers or service? Can I use the Wireless System on an • W e do not recommend using any electronic training devices on...
-
Page 18: Troubleshooting
Troubleshooting The Receiver Collar is not beeping • T he tone may be difficult to hear in a noisy environment. when setting up the Boundary Zone. • U se Test Light as explained in the “Test Light Instructions” section, and use it to determine the location of Boundary Zone. • C heck that the Transmitter is set up according to directions and install a new battery while standing within 5-10 feet of the Transmitter. - Page 19 Receiver Collar battery to leak onto your pet’s neck. Please review and follow the important safety information on page 2, and the instructions in Step 5 under the heading “Fit the Receiver Collar” on page 11. www.petsafe.net...
-
Page 20: Re-Synchronize The System
Re-synchronize the System 1. Remove the Receiver Collar from your pet. 2. Remove the battery from the Receiver Collar. Discharge all power by holding the correction level button down until the LED is no longer illuminated. 3. At the transmitter, move the Boundary Switch from the low to the high position. 4. -
Page 21: Compliance
Monday - Friday 10:30 AM - 7 PM This product has the benefit of a limited manufacturer’s warranty. Details of the warranty applicable to this product and its terms can be found at www.petsafe.net and/or are available by sending a stamped addressed envelope to PetSafe Ltd. - Page 22 1-800-732-2677...
- Page 23 www.petsafe.net...
-
Page 24: Mounting Template
Radio Systems Corporation ® 10427 PetSafe Way Knoxville, TN 37932 1-800-732-2677 www.petsafe.net Protected by US Patents 6,879,300; 6,921,089; 7,142,167 and D515,027. 400-1422 ©2006 Radio Systems Corporation...
Need help?
Do you have a question about the PIF-300-2 and is the answer not in the manual?
Questions and answers