
Related Manuals for Petsafe PIF-150


Summary of Contents for Petsafe PIF-150
- Page 1 Product Manual PIF-150 RFA-554A Free to Roam Wireless Fence ™ Please read this entire manual before beginning.
- Page 2 If you have any questions, please don’t hesitate to contact us. Hereinafter Radio Systems Corporation, Radio Systems PetSafe Europe Ltd., Radio Systems Australia Pty Ltd. and any other affiliate or brand of Radio Systems Corporation may be referred to collectively as “We” or “Us.”...
- Page 3 • Do not place anything on the top of the transmitter or cover any ventilation holes. This may overheat the transmitter and cause early transmit failure. • Do not place transmitter in a closet or any other confined, unventilated area. • Do not place transmitter on or near a metal surface. petsafe.com...
-
Page 4: Table Of Contents
What’s Covered Components ........................................5 You May Also Need .....................................5 How the System Works ....................................6 Key Definitions.........................................6 Operating Guide ....................................7 Step 1: Set Up the Transmitter ................................7 Step 2: Prepare the Receiver Collar ..............................8 Step 3: Adjust the Pet Area to Desired Size ............................. 10 Step 4: Place the Boundary Flags ..............................11 Step 5: Fit the Receiver Collar ................................ -
Page 5: Components
Adaptor Long Contact Point Contact Points Wrench Boundary Flags - 50 You May Also Need • Scissors • Lighter • Screwdriver • Drill • Tape measure • Non-metallic collar and leash or lead Set up and training help: petsafe.com petsafe.com... -
Page 6: How The System Works
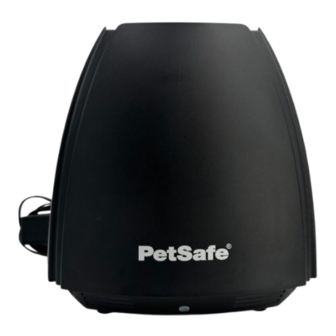
How the System Works The PetSafe Free to Roam Wireless Fence system has been proven safe, comfortable, and effective for pets over 5 lb. The system works by ® ™ transmitting a radio signal up to 105 feet in all directions. You temporarily define the pet area with boundary flags for a visual aid in training your pet. -
Page 7: Operating Guide
2. Unplug transmitter power adaptor from the power jack located on the bottom of the transmitter, indicating power is intentionally being suspended. When your power is restored, be sure to reconnect the power adaptor into the power jack of your transmitter. petsafe.com... -
Page 8: Step 2: Prepare The Receiver Collar
(RFA-67) can be found at many retailers. Contact the Customer Care ® Center or visit our web site at petsafe.com to locate a retailer near you. Turn the Receiver Collar ON Press and hold the mode button continuously for 5 seconds (2D) The green or red receiver indicator light will turn ON for 5 seconds (2E) to indicate battery status, followed by the red receiver indicator light flashing the static correction level settings. - Page 9 While the system locks out further static correction, the green light will remain on for 10 seconds. In the unlikely event that your pet leaves the pet area, he will not receive a static correction upon return to the pet area. petsafe.com...
-
Page 10: Step 3: Adjust The Pet Area To Desired Size
Step 3: Adjust the Pet Area to Desired Size Make sure the entire pet area lies within your property boundaries (3A). Always start determining the boundary zone at the shortest distance from transmitter. Place the boundary switch on “–” if the boundary zone will be less than 45 feet from the transmitter. Note: If your next-door neighbor has a containment system, see Troubleshooting section page 16. -
Page 11: Step 4: Place The Boundary Flags
5. Repeat this process around the boundary zone until it is marked with boundary flags every 10 feet. The boundary flags may be in different parts of the boundary zone and may not be in a line. The boundary zone is 2 to 3 feet wide. petsafe.com... -
Page 12: Step 5: Fit The Receiver Collar
Step 5: Fit the Receiver Collar Important: The proper fit and placement of your receiver collar is important for effective training. The contact points must have direct contact with your pet’s skin on the underside of his neck. Please read and follow the instructions in this manual. Proper fit of the collar is important. A collar worn for too long or made too tight on the pet’s neck may cause skin damage ranging from redness to pressure ulcers;... -
Page 13: Training
• While your pet is still learning the boundary, contain him by another means, such as with a pen or a leash. • Put a separate non-metallic collar on your pet’s neck and attach a leash. • Be sure to place the collar on your dog’s neck with the PetSafe logo facing up. -
Page 14: Day 1
Day 1 For the first day, start with the collar set to level 1, tone-only. With your pet on a leash and with his favorite treats on hand, allow him to explore the pet area (6A). Allow your pet to cross the boundary (6B) and hear the tone from the collar, then ask him to come back into the pet area (6C) and praise and reward him. -
Page 15: Taking Your Pet Out Of The Pet Area
Congratulations! You have now completed the training program. You are both ready to enjoy more freedom. Just make sure to continue to check the tightness of the receiver collar and remove it when it is not in use. Wireless–to–Go Your PetSafe Free to Roam Wireless Fence system is completely portable. Follow the set-up procedures wherever you wish to have ®... -
Page 16: Troubleshooting
Troubleshooting The receiver collar tone is not sounding • The tone may be difficult to hear in a noisy environment. when setting up the boundary zone. • Use test light as explained in the “test light instructions” section, and use it to determine the location of boundary zone. - Page 17 This sealing makes it virtually impossible, without misuse or abuse, for your receiver collar battery to leak onto your pet’s neck. Please review and follow the important safety information on page 2, and the instructions in Step 5 under the heading “Fit the Receiver Collar” on page 12. petsafe.com...
-
Page 18: Terms Of Use And Limitation Of Liability
Customer Care Center to receive instructions on proper disposal of the unit. Please do not dispose of the unit in household or municipal waste. For a listing of Customer Care Center telephone numbers in your area, visit our website at www.petsafe.com. 1-800-732-2677... -
Page 19: Important Recycling Advice
This Product has the benefit of a limited manufacturer’s warranty. Complete details of the warranty applicable to this Product and its terms can be found at petsafe.com and/or are available by contacting your local Customer Care Center. United States and Canada—Radio Systems Corporation, 10427 PetSafe Way, Knoxville, TN 37932 USA Australia/New Zealand—In compliance with the Australian Consumer Law, Warranties Against Defects, effective January 1, 2012,... - Page 20 Radio Systems Corporation 10427 PetSafe Way Knoxville, TN 37932 +1 (800) 732-2677 petsafe.com For a list of patents protecting this product, please visit radiosystemscorporation.com/patents L400-2434 2019 Radio Systems Corporation ©...
- Page 21 Packaging Documentation and Approval Form DOCUMENT INFORMATION Part Number / Revision: Revision Description: 400-2434 SIOC changeover Created by: Category Contact: Greg White Jill Weinstein Initial Release to Production ECO Number: RSC18419 PRINTING SPECIFICATIONS Material: 100g wood free paper Printing/Ink Colors: ...
Need help?
Do you have a question about the PIF-150 and is the answer not in the manual?
Questions and answers